
by California Casualty | Educators, Helpful Tips |
Imagine turning your classroom into a hub of creativity and efficiency with just a few clever tweaks. These classroom hacks aren’t just about organizing supplies; they’re about saving time, reducing stress, and making learning more fun for everyone. Ready to unlock the secrets to a smarter, more effective classroom? Let’s dive in!
General hacks
- Painter’s tape: Put painter’s tape on the wall, desks or bulletin boards before attaching Velcro or even using hot glue. It makes it so easy to remove everything when you’re done.
- Shrink-it and laminate: Reduce your schedule and your class list(s) down to a tiny size. Laminate and wear them behind your badge for easy access.
- YouTube edit: Add a dash after the “T” in the YouTube link and you’ll get access to the ad-free version of your videos.
- Rubber band: Fasten a rubber band under the hand sanitizer pump (or any other pump) to limit the amount that comes out. You can adjust the placement as needed.
Organization and storage
- Backpack hooks: Get those backpacks off the floor with hooks that fasten right on the back of students’ chairs. The extra wall space and maneuverability will make your classroom seem larger.
- Magazine racks: Organize papers in magazine racks or file boxes. Label them so you know which is which. This way, they’re also easy for students to access as needed.
- Hanging shoe rack: These are perfect to store supplies, from multiples (like headphones) to basics (scissors, tape and more). Get one with clear pockets so you can easily see what’s inside. Pro-tip: Keep one slot for errant marker tops that could then be used for markers suddenly missing tops.
- Shower curtain rod: Once you set up this rod, you can use hangers with clothespins to hold plastic packets with papers.
Classroom management
- Coloring tablecloths or murals: Allow students to color when they finish work early or while awaiting transitions.
- Tap lights: Place the lights next to the descriptions of classroom noise levels (e.g. playground voice, table talk, whisper, and no voice). Then tap the light corresponding to the appropriate level. For a fun alternative, try this website to alert students when they’re too loud.
- Mystery rewards: Write down a series of rewards, such as extended recess or no homework. Then cover those rewards with Post-it notes. Write a desired behavior on the Post-it, such as lining up quietly. When students do it successfully, remove the Post-it to reveal the reward.
- Mirror: Hang a full-length mirror horizontally and at an angle above the white board, smart board, or blackboard in your classroom. This works as a rear-view mirror so you can see student behavior while you’re facing away. Pro tip: One teacher uses extra-large binder clips to attach to mirror corners, then runs a cord through the black part between the clip and mirror for a no-tools way to secure the mirror.
- Quiet spray: Fill a spray bottle with water. Colorfully and clearly label it “quiet spray.” When you need the class to settle down, spray the mist in the air. You will automatically grab student attention and generate lots of smiles.
Arts and crafts
- Soap dispensers: Store paint in old, clean soap dispensers so students can pump to get the paint.
- Salt shakers: Fill salt shakers with glitter for an easy way to dispense. Pepper shakers will work too but they have fewer holes.
- Laundry drying rack: These racks are perfect for drying student artwork overnight, without taking up that coveted counter space.
- Duct tape marker caps: Take a box of new markers and duct tape the caps together in a set. That way, students can pull out the markers, use them and replace them in the set. It’s an easy way to make sure none are missing.
Small groups
- Stadium seating: These seats have backs, which make sitting on the floor comfortable. Students love them and they are perfect for small group work when you don’t have an extra table and chairs.
- Rolling carts: Long the domain of traveling teachers, rolling carts are wonderful self-contained storage units. Use them to store the essential supplies, from books to manipulatives, for small group work.
- Dry-erase clipboards: These eliminate the need for a desk and can be used again and again. For a tip on storage and erasers for these markers, see the next section. Pro Tip: Not enough white boards to go around? Use a plastic plate. You’d be surprised at how well it works.
- Number assignments: If you have a Chromebook cart, assign each student a laptop number for the year. Make sure there’s a corresponding number on the cart. That way, you can easily track that the Chromebooks are returned and plugged in to charge.
Independent work
- Socks and pom-poms: Use old socks to store dry erase markers. The socks also make great erasers. Alternatively, glue pom poms at the end of dry erase markers for automatic erasers.
- Dry erase pockets: Place worksheets in dry erase pockets so students can work on problems again and again.
- Silverware tray: Get an inexpensive silverware tray and use it to organize writing utensils in your writing center.
- Highlighter basket: Place a basket of highlighters by the place where students turn in work. Have them highlight their name before they place their paper in the bin. This helps reduce no-name papers.
Check out our blog on Design Tips for more ideas of how to organize your classroom. Our Welcome Back to School blog offers tips on the first 10 days of prep and plans.
Do you have a classroom hack that’s not on the list? Share it with your fellow educators in the comments.
This article is furnished by California Casualty, providing auto and home insurance to educators, law enforcement officers, firefighters, and nurses. Get a quote at 1.866.704.8614 or www.calcas.com.
by California Casualty | Helpful Tips, Pets |
Who says fetch is the only game in town? From puzzles to hide-and-seek treats, brain games turn playtime with your dog into a mental workout, keeping your pup entertained with tail-wagging fun! Games help focus high-energy pups, reduce anxiety and bored behaviors, and build confidence. These fun activities also strengthen your bond with your dog.
Best of all, with just a few supplies, you can make your own brain games. In honor of the Dog Days of Summer, we’ve put together some of our favorites for you to try. Make sure you supervise your pup while playing so they don’t eat something they shouldn’t. Remember to give your dog plenty of praise and positive reinforcement when they solve the puzzles.
Muffin Tin Puzzle
Supplies: muffin tin, tennis balls, treats or kibble
Instructions:
- Turn the muffin tin upside down. Place treats or kibble between the cups. Let your dog eat them.
- For a slightly harder version, place tennis balls in the indentations between the cups and above the treats.
- Increase the level of difficulty by turning the muffin tin right side up. Place treats in the cups and cover them with tennis balls.
- For the hardest level of difficulty, fill only some of the cups with treats or kibble. Cover them all with tennis balls.
Egg Carton Puzzle
Supplies: empty egg carton, treats or kibble
Instructions:
- Open the egg carton and place treats or kibble in some of the cups.
- Don’t close the carton completely. Challenge your dog to try to open it and get the treats.
- Once your dog can open it, try it when the carton is closed completely. Your dog will likely bounce it around in the process.
- Help your pup out as needed to learn the skill.
Treat Dispenser Puzzle
Supplies: Plastic container with lid (empty yogurt or sour cream containers, empty water bottle), cutting tool, treats or kibble
Instructions:
- Cut some holes in the lid that are big enough for treats or kibble to pass through. Make sure the holes are not so big that too many will fall out.
- Put some treats or kibble inside and close the top. Give it to your dog and watch him or her roll it around to dispense the snack.
- You can increase the difficulty by using a container with a smaller opening, such as a plastic water bottle with the cap off.
The Shell Game
Supplies: 3 identical plastic cups, treat or kibble, small ball (optional)
Instructions:
- Place your dog in the sit position.
- Put the 3 plastic cups upside down on the floor in front of him/her.
- Place a treat underneath one cup. Slide the cups around to mix up the order.
- Ask your dog to identify the cup with the treat. When he finds it, and topples the cup, he can eat it. Or he can touch it with his nose, and you can lift the cup.
- For a variation of this game, use a ball instead of a treat.
Destruction Toy
Supplies: empty cereal box or paper towel or toilet paper tube, tape, treats or kibble
Instructions:
- Remove the plastic bag from the cereal box.
- Place a handful of treats inside.
- Tape it up and watch your dog tear it apart.
- Alternatively, use a toilet paper tube or paper towel tube. Put the treats inside. Fold and tape the ends.
- For an easier game, skip the tape.
Mystery Box
Supplies: paper, shoebox, treats or kibble
Instructions:
- Place a treat or two in the middle of the paper and then crunch it into a ball.
- Place the paper balls with treats in a shoebox.
- Add some decoy paper balls without treats.
- Have your dog find the treats.
- For an easier variation of the game, make a treat-paper ball and throw it for your dog to retrieve.
Doggy Ball Pit
Supplies: kiddie pool, balls, treats or kibble
Instructions:
- Fill the kiddie pool with balls.
- Sprinkle treats on top of the balls.
- Have your dog go into the pool to find the treats.
- The treats will shift as your pup walks around.
- To make this easier, start with a few balls and increase as your dog’s comfort level builds.
Snuffle Mat
Supplies: plastic mat with a grid of holes (like a sink mat), fleece strips, scissors as needed
Instructions:
- Cut or tear the fleece strips so they are 6-8 inches long.
- Push them through the holes in the mat. You may need a scissor to open the holes.
- Tie the fleece strips as needed to create a carpet.
- When the mat is filled with fleece, toss in a few treats and let your pup snuffle through to get them.
Hot and Cold Game
Supplies: Kibble or treats
Instructions:
- Hide a treat in a room while your pup is not there.
- Bring your dog into the room.
- Using your voice, give your dog clues as to where the treat is location.
- Calm quiet tones signal that your dog is walking away from the treat.
- Excited higher pitch tones indicate they are heading toward the treat.
- This will take practice, but once you are successful, it is an easy game to play anywhere, anytime.
- A simpler version is to toss the treats in the air and have your dog retrieve them.
Finally, don’t forget to protect your fur baby with pet insurance for added peace of mind, and to save on your vet bill. Remember, you can easily add pet insurance from Pet’s Best to your California Casualty auto or home policy. Find out more about what pet insurance can cover by talking with a California Casualty customer service representative today.
This article is furnished by California Casualty, providing auto and home insurance to educators, law enforcement officers, firefighters, and nurses. Get a quote at 1.866.704.8614 or www.calcas.com.
by California Casualty | Finances, Helpful Tips |
Back-to-school shopping can be stressful and expensive. But it doesn’t have to be. Discover how to turn this annual ritual into a stress-free, budget-friendly adventure, ensuring your kids are well prepared without breaking the bank.
#1: Do an inventory at home.
Before you buy anything, “shop” at home. See if there are leftovers from last year. You might already have a supply of #2 pencils or unused notebooks. Check closets and last year’s backpacks. Make it a fun treasure hunt where the kids get involved.
#2: Spread out the shopping.
Give yourself plenty of time to find the best prices on the items on your list. Start early so you won’t feel pressured to buy everything in one trip. Also, remember that you don’t have to get it all by the start of school. Email the teacher to ask which items are most important, and which can wait. For clothing, start with the necessities: one pair of everyday shoes, one pair of sneakers, and a couple of new outfits. Wait until the fall holidays to shop the clothing sales.
#3. Check giveaway groups.
There are communities of recyclers who give away things for free. You can find many of them online. Check with your our local Buy Nothing Project group on Facebook or the Buy Nothing app. Look for your area’s Freecycle Network. Join these groups and ask your neighbors for what you need. You might be surprised at what you find, and it could inspire you to do your own decluttering.
#4. Shop without the kids.
It will be less stressful to shop without the kids and easier to stick to your budget. Plus, if you’re not doing a dedicated shopping trip for school supplies, it’s easier to pick up things as you’re out. However, if you are going to bring your kids, get them involved. Set expectations about what they will be getting so they are not disappointed. Start with a short list of items and a budget. Pro Tip: If they can spend under that amount, give them the extra to spend on something they’d like.
#5. Go with a plan.
Estimate how much items will cost and set your budget. Keep that list with you so you can check it periodically as you’re out. Importantly, stick to the list. Remember you don’t have to get everything in one trip or at one location. Watch weekly ads from local stores. Download apps to get notices of sales. Be strategic about how and where you shop.
#6. Compare prices before you buy.
How do you know you’re getting the best price? Try online tools like Google Shopping, which will compare prices. Coupon browsers like Honey, Capital One Shopping and CouponCabin also can help. Some stores match competitors’ advertised deals but there are limitations. (For example, Walmart will match a price on one item per day and only if it’s on Walmart.com for a lower price.) Shop with a credit card that gives cash back for extra savings.
#7. Check dollar stores and thrift stores.
Dollar stores offer great deals on essential supplies, such as glue, highlighters, pencil pouches, notebooks, and more. However, as our teacher friends often mention, it’s worth purchasing the name brands, Crayola and Ticonderoga, for crayons and pencils which may not be found at the dollar store. Thrift stores are also a great source to gear up for back to school. Look for gently used items from clothing to backpacks. Just make sure to check back regularly for new finds.
#8. Use discounted gift cards.
This clever hack allows you to buy a gift card for less than its face value. Then you can spend it at full value. That’s an automatic discount if you use it for school supplies. Check out sites like GiftCardGranny, Raise, MyGiftCardsPlus, and CardCash. Just make sure to carefully read the requirements. Do you have an unused gift card that you won’t use? You can sell it for extra cash too.
#9. Buy in bulk.
If you have membership to a warehouse store, check out school supplies that you can buy in bulk. You can split them among your children or share them – and the cost – with friends and family.
#10. Watch for sales after you’re done.
Keep your receipts. If the price drops on your item within two weeks, you may be able to get some of your money back. Policies vary per store so check with yours when you make the purchase.
Finally, prepare for the school year by brushing up on back-to-school safety and carpooling tips. Teach your kids how to be safe around cars. For added peace of mind, make sure you and your precious cargo are fully protected with the right vehicle policy. Wishing you a happy and healthy back-to-school season!
This article is furnished by California Casualty, providing auto and home insurance to educators, law enforcement officers, firefighters, and nurses. Get a quote at 1.866.704.8614 or www.calcas.com.
by California Casualty | Auto Insurance Info, Helpful Tips, Safety, Travel |
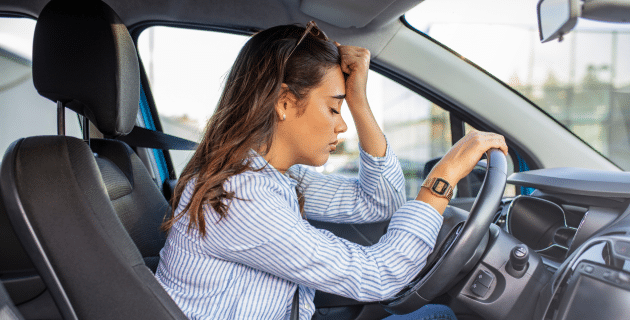
From traffic jams to reckless drivers, it can be stressful on the road. When you’re also juggling life’s daily demands, the stresses can leave you frazzled behind the wheel. Stressed driving not only affects your personal wellbeing, but it poses risks to road safety. Here’s how to bring back a sense of calm and control — and crush your daily commute.
How Stress Affects the Brain
Stress is the body’s reaction to potential threats. It affects your frontal lobe, where you set goals, make plans, and keep your emotions in control. It also impacts the hippocampus, which stores your memories. Importantly, stress causes a chemical reaction known as “fight or flight.” When you’re stuck in traffic or upset about being cut off, there’s often nowhere to go. That’s when your emotions can turn to road rage.
Driving While Stressed
Stress can cause mental and physical symptoms that affect not only how you feel but how you drive. Recognizing these symptoms can help you take steps to manage your stress.
Physical Signs of Stress
You may notice your heart beating faster or your palms getting sweaty. Those are common symptoms of stress. You also may feel muscle tension in your neck, shoulders and back. Biting nails, tapping fingers, and other repetitive motions also are indicators of stress. You may even get tension headaches or feel unusually tired after a short drive.
Distracted Driving
Stress often leaves you distracted. When you’re worrying about traffic, other drivers, or being late, you’re not focusing your attention fully on the road. Your concentration is reduced. You could have difficulty with decision-making and slower reaction times as a result. If you’re sitting in traffic and you pick up your cell phone to complain about the stress, that adds another level of distraction.
Irritability
When you are stressed, you may feel easily annoyed or angered by minor inconveniences. You start to engage in aggressive driving behaviors such as tailgating, speeding or frequent lane changes. This can escalate to emotions that are hard to control.
Tips to Reduce Your Stress While Driving
Stress may be unavoidable, but you can take steps that help you manage it. Follow these tips to reduce your stress behind the wheel.
- Plan ahead. Know the route you’re taking and plan your journey in advance. Be aware of alternate routes should you encounter traffic or road closures. Bringing the kids along? Pack books, snacks, and games to keep them entertained so that they do not add stress to your trip.
- Leave early. Allowing extra time for your journey can help you better handle the unexpected, such as traffic, weather, or detours. When you leave early, you are less likely to worry about being late.
- Set your playlist. Research shows that listening to music can enhance immune system function and lower levels of the stress hormone cortisol. Create a mindful playlist and avoid news or any content that might stress you out. Sing along to your favorite tunes for a mood boost.
- Adjust your posture. Improving your posture can increase oxygen flow, decrease tension in the neck and shoulders, and reduce physical discomfort. Adjust your seat and mirrors to maintain a comfortable and relaxed driving position.
- Breathe. Inhaling through your nose and into your belly is a proven way to reduce stress. Deep breathing sends a calming message to your brain, helping you relax. If you’re feeling stressed, try this breathing exercise: breathe in for a count of 8, contract one muscle group (like your neck and shoulders), then exhale and relax. Repeat for muscle groups in your neck, shoulders, and back as needed.
- Change your perspective. Managing your thoughts can help control your emotions. Instead of getting angry at a driver who cuts you off, think, “I’m glad no one got hurt.” Don’t let a stranger’s actions affect your mood.
- Pull over if needed. If stress becomes overwhelming while driving, don’t risk it. Find a safe location to pull over and take a break until you feel calmer.
- Stay fueled. Keep your car filled with gas to avoid the added stress of running low. When planning your trip, make sure you know when you plan to fuel up.
- Maintain and insure your vehicle. Make sure your vehicle is well maintained so it is less likely to break down and leave you stranded. In addition, protect your vehicle with the right insurance coverage. This will give you peace of mind for your journeys ahead. Safe travels.
This article is furnished by California Casualty, providing auto and home insurance to education professionals, law enforcement officers, firefighters, and nurses. Get a quote at 1.866.704.8614 or www.calcas.com.
by California Casualty | Helpful Tips, Safety, Travel |
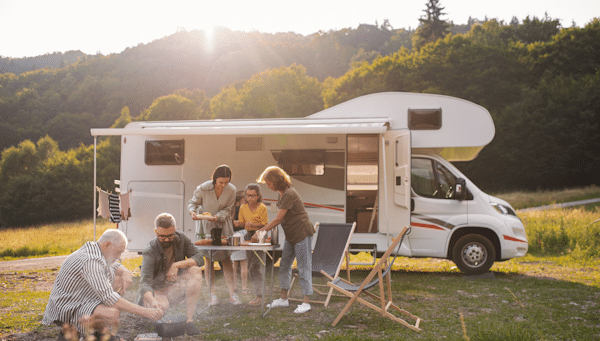
You’re ready to hit the road in your RV. Whether you’re an experienced RVer or a newcomer to the lifestyle, protecting your vehicle from fire hazards can mean the difference between a dream vacation and a disaster.
As your home on wheels, your RV presents greater fire dangers than a standard vehicle. With features like kitchens and curtains, there are more opportunities for things to go up in flames. There also are electrical and mechanical components that can present a fire risk if not properly maintained. Here’s what you need to know to keep your family safe.
Electrical Systems
RVs use both AC (alternating current) and DC (direct current) power. AC operates your appliances and outlets while DC powers your engine and battery. Solar panels also are gaining popularity and can be configured to provide either AC or DC power.
- Bumps and vibrations can loosen connections. Check your electrical systems regularly to make sure connections are secure.
- Check for frayed wires and damaged outlets. Never use wires or outlets that are compromised. Replace as needed.
- If the circuit breaker shuts off power to a certain circuit, it’s probably overloaded. Other signs include lights that flicker or buzzing noises from outlets and switches. Consult a professional to ensure that you don’t have an overloaded circuit.
- While power strips are generally safe for small wattage appliances (charging cell phones or table lamps), they may not do well with high wattage. They also cannot handle continuous loads required by space heaters. Power strips can overheat and ignite combustible material in the walls.
- Don’t cover electric cords with rugs or carpets.
- Only use extension cords rated for outdoor use. If left out overnight, cords can get wet.
- If you have an electrically charged fire, don’t use water to extinguish it. Use a fire extinguisher approved for type C fires.
Propane Appliances
Propane commonly powers stoves, refrigerators and water heaters in your RV. It’s an efficient fuel that also can be dangerous if mishandled. Propane leaks can cause fires and explosions.
- Regularly inspect your propane tanks and lines for leaks or any issues. Do not use tanks and lines that have been damaged.
- Always store propane tanks in an upright position in a well-ventilated area away from a heat source.
- Turn off propane-powered appliances when not in use.
- Make sure propane-powered appliances are off when you are in motion. Gasoline vapor and an open flame are not a good combination. Also, many propane appliances need to be level and roads are not.
- Get your RV LP-certified. A licensed liquid propane technician can inspect and test your propane system.
- Consider switching to an induction cooktop and electric fridge to reduce the use of propane.
Cooking Accidents
The small space and low ceilings in most RVs make it more dangerous to cook there than at home. Most RVs use propane stove tops, which can be an added risk.
- Properly vent fuel-burning appliances. Never operate them in an enclosed space such as a bathroom, bedroom or storage area. Turn on the exhaust fan, open a window, or cook outside.
- Keep flammable materials away from the cooking area.
- Never leave cooking appliances unattended while preparing meals.
- Turn off appliances before leaving the RV.
- Check and maintain your appliances regularly. Keep them clean; make sure there are no loose or chewed wires.
- Do not use cooking appliances to heat your RV. That could create a dangerous situation where there’s insufficient oxygen in a small space.
Pro Tip: For curtains, choose natural fabrics (cotton, hemp) which are less flammable than polyester.
Engine & Mechanical
Your RV is not just a home; it’s also a vehicle. That means it’s equally important to keep the engine and mechanical systems well maintained.
- Check brakes and bearings. Improperly adjusted trailer brakes can overheat. Wheel bearings also can overheat if not properly greased.
- Make sure there are no leaks. Place a piece of cardboard under the RVs engine for a few nights to see if you have a leak. Repair any engine or transmission leak as soon as possible. Transmission fluid is highly flammable.
- Check the battery. Most RVs use lead acid batteries which must be ventilated, or they can give off dangerous gasses. Make sure the battery is open to the outside by vent or hose.
- Trailer chains that are too long can drag on the road and create sparks. Adjust them as needed. Just one spark can cause a fire.
- Improperly inflated tires can overheat and cause a fire. It also can cause the tire to fail.
- Exhaust systems can become very hot. If they have contact with flammable dry grass, it could ignite.
Safety Gear
Outfit your RV with the right safety gear so you’re alerted to any potential emergency, and you can act quickly.
- Place smoke alarms and carbon monoxide detectors in every sleeping area.
- Check the alarms and detectors, and switch batteries every spring and fall.
- Fire extinguishers should be in easy to reach areas, for example near the door. Get one that is rated type A (for wood, plastics, cloth) and type B (for liquid fuel like grease, oil, stove and motor fuel) and type C (for electric fires).
- Test your emergency exits including windows that can be used as an escape route. Make sure you have at least two ways out and nothing is blocking those paths.
If you smell gas:
- Extinguish all open flames pilot lights, lamps.
- Shut off the gas supply.
- Do not turn on an electrical switch as that can create a spark that causes an explosion.
- Remember to evacuate first. Call the fire department, and then try to put out the fire.
If you’re renting an RV:
Remember to do your due diligence to make sure your RV is safe.
- Choose a newer model. Older models of RVs have fewer and less advanced safety measures. Older engines and equipment also are more likely to fail.
- Ask the last time it was inspected.
- Look at the fire extinguisher expiration date.
- Look at the indication lights on the propane system and carbon monoxide system to see that they’re working properly.
- Check smoke alarms and carbon monoxide detectors.
- If you suspect an issue, address it before you sign the paperwork.
Finally, if you’re driving your own RV, make sure it is fully protected by insurance for your own peace of mind. Safe travels!
This article is furnished by California Casualty, providing auto and home insurance to educators, law enforcement officers, firefighters, and nurses. Get a quote at 1.866.704.8614 or www.calcas.com.
