by California Casualty | Auto Insurance Info, Helpful Tips |
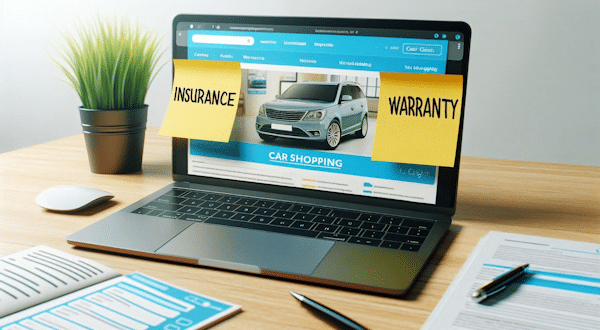
When it comes to protecting your vehicle, car insurance and vehicle warranties both play a big role. Knowing the difference between the two can help you make informed decisions about the coverage you need.
Vehicle Warranty
New car warranties
When you buy a new car, you get a factory warranty from the vehicle manufacturer at no additional cost to you. It is a guarantee that the car you bought is in good working order. A vehicle warranty covers replacements or repairs in case a component breaks or fails for a specified period. Typically, there is no deductible with a new car warranty. It covers both the new part and the labor.
A new car warranty generally comes in two parts:
- Bumper to bumper coverage: This covers repairs to most parts including electronics and air conditioning (for typically 3 years or 36,000 miles).
- Power train coverage: This covers the engine and transmission (for typically 5 years or 60,000 miles).
Sometimes a manufacturer’s warranty includes a limited corrosion warranty, emissions warranty, tire warranty, hybrid and electric car battery warranty, and roadside assistance. When your warranties expire, you often have the option to purchase an extended warranty.
Used car warranties
You can get warranties for used cars. A limited warranty comes with a certified pre-owned (CPO) vehicle. The cost is rolled into the higher price you will pay for a CPO vehicle. You also may purchase an extended warranty from your car’s manufacturer or a third party for most used cars. The cost of that extended warranty usually depends upon vehicle age, mileage, make and model, coverage level, your deductible, and the warranty provider.
What warranties cover and what they don’t
Warranties protect you against defects in your car’s parts from power windows and the infotainment system to your engine and transmission. They help cover repairs for those parts if they break or fail during the warranty period. Most car warranties are similar in their broad coverages but may differ in the details so check your policy for what is covered.
Warranties do not cover everything. They do not cover routine maintenance like oil changes or tire rotations. They do not cover wear-and-tear parts like brake pads or wiper blades. They do not cover damage from collisions, damage caused by the owner, severe weather, fire, or theft. For the latter, you need vehicle insurance.
Vehicle Insurance
Car insurance is required by law in most states for any car – new or used – that is on the road. This type of insurance pays for damage from a collision, or another covered adverse event such as fire or theft. Auto insurance does more than fix your car. It can help with medical bills for you, your passengers and the people you hit in a collision. It can help pay if the other driver is not insured. It even covers damages when another driver is at the wheel of your car and has an accident because insurance follows the car, not the driver.
What vehicle insurance covers and what it doesn’t
Car insurance policies are made up of different coverages. You choose the types you need from a range of options. Your premium is determined in part by the coverages that you choose.
- Liability: If you are at fault in an accident, and others are involved, it’s good to have liability coverage. Liability coverage is required by law in most states. It covers you for bodily injury and property damage you cause to others. However, it does not cover any damage to your own vehicle; that’s covered by collision. It also does not cover injury to you and your family; it only covers the people in the other car.
- Collision: This coverage is if your car is damaged in a collision with another car or an object, such as a fence. Your collision coverage will pay for repairs minus the deductible. Collision coverage is not required unless you’re leasing a car or paying off a loan on a vehicle. However, it may be good to have, especially in the event of an accident.
- Comprehensive: Comprehensive coverage is for natural disasters, fires, vandalism, theft and animals that damage your vehicle. Think of it as “bad luck coverage.” Comprehensive coverage is not usually required unless you’re leasing a vehicle or paying a car loan. However, it’s valuable to protect your car.
- Medical expenses: If you or others are hurt in an accident, you will want medical expenses covered. You will either be able to get medical payments coverage or personal injury protection (PIP). These coverages apply to everyone in your car whether or not you are at fault in the accident. This type of coverage is good to have, as your health insurance may not cover auto accidents and does not normally protect your passengers. PIP is only available in some states and may be mandatory if your state offers it.
- Uninsured or underinsured motorist: You may encounter drivers who are not insured or who are underinsured. If so, you will need insurance to cover your car and the people in your car if hit by an at-fault driver in that situation. Uninsured/Underinsured Motorist Property Damage (UMPD) helps pay for repairs to your vehicle. Uninsured/Underinsured Bodily Injury coverage pays for medical treatment, lost wages, pain and suffering for you and your passengers. These are optional coverages in most states. In some states, you are not allowed to carry collision and UMPD at the same time. Also, sometimes UMPD has a policy maximum, or cap on the amount it will pay.
Talk to your insurance agent to see what is covered under your policy. That way you’ll be fully prepared should anything happen. Safe travels.
This article is furnished by California Casualty, providing auto and home insurance to educators, law enforcement officers, firefighters, and nurses. Get a quote at 1.866.704.8614 or www.calcas.com.

by California Casualty | Auto Insurance Info, Helpful Tips |
It never feels good to fall victim to a scam or pay more for a product because of it. That’s what it is like with car insurance fraud.
Car insurance fraud happens when someone lies to get a better rate or a larger payout. It could be intentional or accidental, but either way it can cost you money in premiums. The FBI estimates that car insurance fraud costs the average family an additional $400 to $700 every year. In addition, nearly 7 in 10 consumers are tricked into illegal schemes, according to the Coalition Against Insurance Fraud. Here’s what you need to know about car insurance fraud, including some clever scams that could catch you unaware.
What are the types of fraud?
Staged Accidents
In staged accidents, dishonest people intentionally cause a collision with an unsuspecting driver. Then they misrepresent the situation, putting the other driver at fault—and thus get a payout that they don’t deserve. Common scenarios for staged accidents include:
-
-
-
-
- Two vehicles trap your car and force you into a rear end collision.
- Someone waves you on that it is safe to pull out, and then another car collides with you.
- You are tricked into turning early and the oncoming driver moves forward and collides with you.
- Another car purposefully sideswipes your vehicle in a dual left turn intersection.
- A car deliberately and abruptly brakes in front of you.
Injury Fraud
Dishonest people can file claims for unnecessary medical treatments or for treatments that they did not receive. Injury fraud also includes claims where people exaggerate the extent of their injury to get a bigger payout.
Exaggerated Claims
Sometimes after an accident, a dishonest person can cause additional damage to their vehicle to receive a bigger payout. That’s why taking photos of the damage is so important to do at the scene of the accident. Another exaggerated claim could be to file multiple claims for the same accident. Finally, disreputable shops can charge for repairs that weren’t made or for substandard work.
Counterfeit Airbags
If you have your airbag replaced by a dishonest shop, you might be charged for the original equipment manufacturer (OEM) bag but get a counterfeit one installed. In a worst-case scenario, a disreputable shop could install a garbage bag stuffed with rags. Counterfeit bags are dangerous and may not protect you in the event of an accident. The good news is that it’s easy to check. With an airbag, the light on your dashboard will flash when you start the car. You can also ask an authorized dealer to check that you have a quality airbag.
Windshield Replacement Scams
There are a variety of different scams associated with windshield replacement. Here are some of the most popular.
-
-
-
-
- A stranger approaches you in a parking lot and offers a free windshield replacement. They point out nonexistent damage that can be fixed. They take your insurance information and file an exaggerated or false claim.
- Windshield scam artists also could go door-to-door or call you with a “special” for customers in your area. Then they follow a similar process of filing a false claim.
- If you live in one of the states that has no deductible for windshield replacement, con artists can file a claim for your windshield and charge you for the deductible.
Tow Truck Scams
Tow trucks that appear right after your accident could be “bandits” who will only tow your vehicle to their shop and charge you hundreds to repair and release it. Calling your own tow truck will help you to avoid this scam.
False Reports of Stolen Vehicles
Reporting a vehicle that hasn’t really been stolen as stolen is illegal. So is misrepresenting the value of a stolen vehicle.
False Documentation
Intentionally providing a false address for your policy to get a better rate is a form of fraud. Understating the annual mileage, misrepresenting the use of a commercial vehicle, and failing to add a new driver also is fraud.
What are the consequences of fraud?
It depends on the seriousness of the fraud. For minor infractions, your claim can simply be denied. For more serious offenses, your policy may be canceled, you could be fined or even serve jail time. A misdemeanor for auto insurance fraud can come with a fine and probation. A felony conviction can result in significant fines and prison time.
How can you fight against fraud?
- Carefully check your insurance application forms for mistakes.
- If you’re in an accident, take good notes of all those involved. Take pictures at the scene. Don’t sign any documents or agree to any terms at the scene of the accident.
- Don’t accept fault for an accident if you believe you are not at fault.
- Be wary of individuals offering services that you didn’t request. Avoid sharing details about your auto policy with those who may be disreputable.
- Don’t tailgate. This gives criminals a chance to take advantage.
- If your car needs repairs or maintenance, go to a trusted professional.
- Don’t accept a windshield replacement offer.
- Choose OEM parts for vehicle repairs to avoid counterfeits. Before buying a used car, have a certified mechanic check that there are authentic air bags.
- Avoid rushed decisions. If someone is pressuring you into something, that could be a red flag.
If you suspect fraud, report it to your insurer as well as to the National Insurance Crime Bureau at 800-835-6422 https://www.nicb.org/.
This article is furnished by California Casualty, providing auto and home insurance to educators, law enforcement officers, firefighters, and nurses. Get a quote at 1.866.704.8614 or www.calcas.com.

by California Casualty | Auto Insurance Info, Helpful Tips |
The moment you drive a new car off the lot, it begins to lose its value. This can come as quite a shock to new car owners. After all, you just spent your hard-earned money on a vehicle. Yet car depreciation is a reality. Understanding it will help anyone looking to buy, sell, or trade in a vehicle.
What exactly is car depreciation?
It’s the difference between the price you paid for your car and how much it is worth if you were to sell it.
How much do cars depreciate?
It depends a bit on the make and model of car. In general, cars lose 20% of their value in the first year, and 60% over the first five years, according to Kelley Blue Book. You can check out their 5-Year Cost to Own for details on different makes and models. You can also find a car calculator online to get an idea of depreciation for your specific vehicle.
What causes depreciation?
Most things that we buy lose value over time due to wear and tear. That’s the same with cars and trucks. Depreciation is caused by the age of the vehicle and the mileage for starters. In addition, as new models come out with redesigns and new technology, there is less demand for older vehicles. Finally, the condition of the car matters. If your car has been in an accident, or has lots of dents or rusting paint, that impacts the resell value.
Can you slow down depreciation?
While depreciation is inevitable, the good news is that you can take steps to help your car keep its value a little longer.
- Maintain your car. Since wear and tear can increase depreciation, taking care of your car helps it stay working its best. Follow the owner’s guide for recommended maintenance.
- Take care of your car’s appearance. Dents and scratches can reduce your vehicle’s value. Wash your car, repair scratches and dents, and keep it clean.
- Drive carefully. Accidents and damage – even when repaired – will impact a car’s value.
- Avoid custom modifications. While these can be fun, they may make it harder to sell your car down the line.
Here’s how to make depreciation work in your favor.
- Do you use your car for business? You can deduct your car’s depreciation on your taxes.
- Are you buying a car? You can purchase a one-year-old car that is as good as new, but you pay only about 80% of the price. Or you could choose a three-year-old vehicle where the bulk of the depreciation has occurred. Make sure to look for one with low mileage for the greatest value.
- Choose a make and model that will resell well. Some vehicles hold their value better than others. It depends on the brand’s reputation plus overall customer demand for certain models. Among the top resellers for 2024 are the Ford Bronco, the Toyota Tacoma, and the Mercedes Benz G-Class.
Other factors that will influence car depreciation include supply and demand. If there are supply chain disruptions that reduce inventory, used versions of those models could be valued at a higher rate. In addition, rising gas prices can put more fuel-efficient cars in demand. Keeping tabs on the market can help you to make informed decisions.
Insurance can also help with depreciation.
Since car loans can last five years, your new car could lose 50% of its value before you pay it off. The loan doesn’t go away even if your car is totaled or stolen. In the event of a total loss, insurance pays the current market value of your vehicle. That’s where a new car replacement policy or gap insurance could help.
New car replacement insurance gives you the money for a new vehicle of the same make and model, minus your deductible. This is typically an add-on coverage that is paired with either collision or comprehensive coverage.
Gap insurance stands for Guaranteed Asset Protection. It is also called loan/lease coverage. Gap is an optional coverage that is paired with either collision or comprehensive coverage. In a covered claim, collision or comprehensive help pay for the totaled or stolen vehicle up to its actual cash value. Gap covers the rest of the loan or lease.
Your car is one of your greatest investments. Keep it protected for added peace of mind.
This article is furnished by California Casualty, providing auto and home insurance to educators, law enforcement officers, firefighters, and nurses. Get a quote at 1.866.704.8614 or www.calcas.com.

by California Casualty | Auto Insurance Info, Helpful Tips |
Imagine this: you’ve just bought a brand-new car and barely had time to savor that new car smell before disaster strikes. Whether it’s a major accident or theft, your car is now a total loss. Here’s the kicker: your insurance settlement isn’t enough to cover what you still owe on your car loan or lease.
That’s where gap insurance comes in. It covers the difference (“the gap”) between what your insurance pays and what you still owe, sparing you from being stuck with a hefty bill for a car you no longer have.
What is gap insurance?
Gap insurance stands for Guaranteed Asset Protection. It is also called loan/lease coverage. Gap is an optional coverage that is paired with either collision or comprehensive coverage. In a covered claim, collision or comprehensive help pay for the totaled or stolen vehicle up to its actual cash value. Gap covers the rest of the loan or lease.
Why is gap coverage necessary?
When you buy or lease a new car, it starts to depreciate as soon as you drive it off the lot. Most new vehicles lose up to 20 percent of their value in the first year, according to Kelley Blue Book. That means that the actual cash value of your new vehicle could be lower than your loan or lease amount.
In the event of a total loss, insurance pays the current market value of your vehicle. The loan doesn’t go away even if your car is totaled or stolen. If there is an additional amount still owed to repay the loan, your Gap insurance covers it. Otherwise, you will have to pay that amount out-of-pocket.
What doesn’t gap insurance cover?
Gap insurance does not pay if your car is only damaged and not declared a total loss. It does not cover mechanical failures and will not pay if your engine dies. Gap does not cover your deductible for collision or comprehensive. It does not pay overdue payments or late fees on your car loan. It only covers the gap, or difference, between your car’s actual value and the amount of your loan.
When should you consider gap insurance?
New car owners generally find value from gap insurance if their car is less than 3 years old. Consider gap insurance if:
- You made a down payment that was less than 20 percent of your car’s value.
- You financed the vehicle for 60 months or longer.
- You leased the vehicle. (Gap insurance is generally required if leasing a car.)
- You moved negative equity from an old car loan into a new one.
- Your vehicle depreciates faster than average.
Calculate whether gap insurance offers a good value for you.
Here’s an easy way to determine if the amount of gap insurance works with your situation.
- Use the Kelley Blue Book to estimate your car’s current value.
- Calculate the difference between the value of your car and your loan amount. Are you able to cover this cost out-of-pocket?
- Get a cost quote for gap coverage.
- Determine how long you will need gap coverage. At some point, the value of your car and the amount of your loan will be close. Mark on your calendar when to drop gap coverage from your policy.
Where should you get gap coverage?
Your car dealer will offer to sell you gap insurance, but if you buy it there, it will be rolled into your car loan. That means you’ll be paying interest on it. You’ll also lose the flexibility to cancel it when you no longer need it. In addition, car dealers often charge a higher fee for gap coverage. Check with your auto insurer. You should be able to add gap coverage to an existing auto policy.
Gap insurance is one of those coverages that we hope we never need, but it’s so helpful if we do. Enjoy your new car, and safe travels.
This article is furnished by California Casualty, providing auto and home insurance to educators, law enforcement officers, firefighters, and nurses. Get a quote at 1.866.704.8614 or www.calcas.com.

by California Casualty | Auto Insurance Info, Helpful Tips, Safety |
You gave your teen the keys to the car, and now they’re off. How do you know they’ll be safe on the road? The latest technologies can help. We’ve done a deep dive into some of the most popular driving monitoring apps that can help your teen establish safe driving habits. Here’s what you need to know.
What can apps measure?
- Speed limits: With limited driving experience, your teen may not realize the dangers of driving fast. They may not know how much time it takes to slow down a car. There are apps that set a speed limit and notify you if the driver exceeds that limit.
- Distractions: Distracted driving is an issue for us all but new drivers are especially vulnerable. They may not realize how much can happen if they take their eyes off the road for even a few seconds. Even responding to a phone call or changing playlists can lead to an accident. Some apps set a Do Not Disturb mode when the car reaches a certain speed. If your teen disables the setting, you will be notified.
- Locations: GPS tracking can let you know your teen is where they are supposed to be. Some systems also have a silent alarm so that your teen can signal an SOS if they feel unsafe.
Before you install a driver monitoring app, it’s important to have a conversation with your teen. Make sure you include any other family rules such as the curfew for the car being home, and how you wish your teen to check in with you. Discuss distracted driving and how they should handle calls and texts. In doing so, you are setting up your teen for a lifetime of safe driving.
The Apps
Auto Coach (free)
This app is designed to help parents teach teens how to drive safely. It was developed by the Shepherd Center Hospital in conjunction with the Georgia Governor’s Office of Highway Safety. It includes interactive lessons for teens with cognitive and physical disabilities. The app tracks driving hours and keeps parents involved in the process.
Bouncie (monthly subscription plus one-time device charge)
This offers real-time detailed insights and driving reports on speed, location, idle time, and hard braking. Bouncie also can monitor gas mileage and fuel economy, battery level, oil level and vital alerts. Information is accessible on your smartphone or computer. Bouncie requires a device that plugs into your vehicle. It works for most vehicles made after 1996.
FamiSafe (monthly subscription)
This app goes well beyond safe driving. It also tracks screen time and inappropriate content on kids’ devices. From a driving perspective, the app reports on speed limit, total distance traveled, and real-time physical location. It instantly notifies you if your teen speeds or brakes suddenly. Weekly driving reports help to analyze patterns. You manage all devices from a FamiSafe Dashboard on your smartphone or computer.
Family360 (monthly fee)
This app synchronizes your family into a private “circle.” It tracks everyone’s locations in real time through mobile phones. You can be notified when someone in your circle leaves or enters the places you go to most frequently.
Life360 (free and paid options)
This app offers real-time location monitoring and detailed driving reports. It tracks speeding, hard braking, and in the paid version signals crash detection and sends roadside assistance. It does more than tracking driving, however. The app includes digital monitoring, stolen phone protection, medical assistance, travel support, and disaster response.
On My Way (free)
This app pays you for safe driving. Users get 5 cents for every mile they drive without texting. While they cannot withdraw real cash, your teen can use it toward food, gas, events, travel, and gift cards.
Road Ready (free)
Part of the Parent’s Supervised Driving Program, this app logs the state’s required drive time for learners and tracks driving experiences. It also provides tips for safe driving.
Teen Time: Parental Control (free and paid options)
This is a location app that also monitors screen time and how kids are using their phones. It allows parents to limit use of games and apps. You can use it to track use of devices while your teen is driving.
TrueMotion Family Safe Driving (free)
This app tells you where your family members are and how they got there, with details on exactly how they drove. It records phone use, texting, aggressive driving, speeding, and more.
Finally, make sure that your car is well maintained and fully insured with your teen listed on the policy. Talk to your insurance agent about ways that you can save with a teen driver.
This article is furnished by California Casualty, providing auto and home insurance to educators, law enforcement officers, firefighters, and nurses. Get a quote at 1.866.704.8614 or www.calcas.com.

by California Casualty | Auto Insurance Info, Helpful Tips, Safety |
The hunt for the perfect set of wheels is a rite of passage for teen drivers. While they may want style and speed, you know it’s better to choose safety and value. How do you find the perfect car that will win them over and fulfill your wish list? Here’s what you need to look for when determining the best cars for teens in 2024. (Scroll down for a list of recommended vehicles by price.)
There are certain safety features that are helpful for new, young drivers. When you look for cars for your teen driver, look for these:
- Blind spot monitoring to alert drivers of nearby vehicles
- Automatic emergency braking systems to avoid collisions
- Lane-keeping assist and lane departure warning systems to keep the car in its lane
- Pedestrian detection systems
- Speed warnings and audio muting while driving
Several automakers help parents monitor teen driving habits with technology that can set limitations, like maximum speed. Ford has MyKey and Chevy has General Motors’ Teen Driver Technology.
Some vehicles could be dangerous for teen drivers. Knowing what to avoid is also important.
- Sports cars have excessive horsepower which might encourage teens to drive recklessly. These cars also are more expensive to insure.
- Compact cars weighing less than 2,750 pounds may lack adequate crumple zones—important in a collision.
- Large vehicles have prolonged braking distances. They are also harder to maneuver and park.
- Vehicles that seat numerous passengers could raise the risk of distractions.
New Cars vs. Used Cars
New cars will automatically come with many safety features. However, they will also come with a higher price tag. Used cars are a better value. If you can’t get every safety feature, at minimum, you will want the following: anti-lock brakes, traction control, and stability control. Also, most cars from model year 2017 and later have rearview cameras.
Recommended Vehicles
The following vehicles offer top safety ratings from the IIHS and NHTSA. IIHS is the Insurance Institute for Highway Safety. NHTSA is the National Highway Traffic Safety Administration. The ones we’ve selected also consider reliability and fuel economy and are recommended by the Kelley Blue Book. Prices listed are based on the Kelly Blue Book Fair Purchase Price national average and could vary due to purchase location, mileage, condition, and trim package.
Cars under $30,000
| 2023 Toyota Prius |
$27,450 |
| 2024 Honda Civic |
$23,950 |
| 2024 Toyota Corolla |
$21,900 |
| 2024 Kia Seltos |
$24,390 |
| 2024 Subaru Crosstrek |
$24,995 |
| 2023 Hyundai Kona |
$22,140 |
| 2024 Chevrolet Trailblazer |
$23,100 |
| 2024 Nissan Sentra |
$20,630 |
Cars under $20,000
| 2017 Toyota RAV4 |
$16,665 |
| 2018 Mazda CX-5 |
$15,176 |
| 2017 Honda CR-V |
$18,272 |
| 2020 Toyota Corolla |
$15,872 |
| 2019 Mazda3 |
$13,983 |
| 2017 Honda Accord |
$16,021 |
| 2017 Toyota Prius |
$17,157 |
| 2018 Kia Sportage |
$12,989 |
| 2018 Honda Civic |
$16,049 |
| 2019 Chevrolet Equinox |
$13,594 |
Cars under $15,000
| 2018 Kia Soul |
$10,807 |
| 2017 Toyota Corolla |
$11,959 |
| 2018 Mazda3 |
$12,299 |
| 2015 Honda CR-V |
$14,141 |
| 2016 Mazda CX-5 |
$11,969 |
| 2015 Toyota Prius |
$12,442 |
Cars under $10,000
| 2013 Honda Accord |
$9,626 |
| 2013 Toyota Camry |
$9,344 |
| 2014 Mazda3 |
$7,773 |
| 2013 Toyota Corolla |
$8,441 |
| 2015 Honda Civic |
$9,463 |
| 2009 Toyota RAV4 |
$7,926 |
| 2010 Honda Element |
$9,760 |
| 2011 Toyota Avalon |
$9,873 |
Final Thoughts
There are ways to save when adding a teen driver to your auto policy. Check with your insurer to find out more.
Safe travels to you and your new driver.
This article is furnished by California Casualty, providing auto and home insurance to educators, law enforcement officers, firefighters, and nurses. Get a quote at 1.866.704.8614 or www.calcas.com.
