
by California Casualty | Auto Insurance Info, Helpful Tips, Safety |
We all know the basics: stop at red lights, obey the speed limit. What about laws about passing cars on the right, or restraining pets in your vehicle? We put together a list of the lesser-known traffic laws that potentially could land you in trouble if you break them. Not knowing about them – unfortunately – isn’t a defense if you get stopped.
Use your turn signal.
Most states require that you signal when you turn right or left and when you change lanes. In fact, you are supposed to signal 100 feet before you turn or move to a new lane. You could get flagged for a non-criminal moving violation if you fail to do this.
Don’t change lanes in the middle of an intersection.
In some states, it is illegal to change lanes in the middle of the intersection. You’re expected to stay in your lane as you cross through it. Even when it is legal, it might be unsafe, and you can be pulled over for that, too.
Come to a complete stop at a stop sign.
You may be tempted to pause rather than stop at a stop sign. The law clearly states that you must come to a complete stop. That means no forward momentum with the speedometer at 0. If you don’t come to a complete stop, you can be cited for running a stop sign. We suggest stopping for three seconds, which will be long enough for an observing police officer to see you have stopped. It’s also long enough for you to check for oncoming traffic, pedestrians, or road hazards.
Follow the rules at a four-way stop.
With a four-way intersection, every driver has a stop sign. That means each vehicle should come to a complete stop. The first vehicle to arrive has the right of way. If two cars arrive at the same time, the car to the right goes first. Bicycles must follow the same rules as cars at a four-way stop and yield to the vehicle who arrived first, or the one on the right. Pedestrians, however, have the right of way, and can cross before any vehicles proceed.
Know about improper passing.
In New Jersey, you cannot pass a car on the right except in special circumstances. The car must be turning left or there must be at least two lanes of traffic traveling in the same direction. In Massachusetts, Pennsylvania, New Jersey, and Illinois, it’s illegal not to move to the right if a car is trying to pass you. In some states, the far left lane is only for passing.
Restrain your pets.
We want to keep our pets safe, and there are several states that have laws on the books to make sure we do. New Jersey has a law requiring you to secure your pet in a carrier or with a seatbelt. In Hawaii, you can be fined for having your pet on your lap or rolling down the windows without restraining your pet. Maine, Connecticut, and Arizona classify pets under distracted driving.
Know when to yield.
It may be obvious that you need to yield at a yield sign. But did you also know that in many states, you must yield to pedestrians in a crosswalk? You also must yield to those who are blind and using a white cane or seeing eye dog. In a “T” intersection, where a road dead ends into another road, the car at the dead end must yield to the continuing road. Finally, if you’re making a turn onto a road, you must yield to traffic on that road.
Move over and slow down for emergency vehicles.
When you see flashing lights, it’s time to slow down and move to the side of the road. This allows for the safe passage of emergency vehicles. Every state has a Move Over law except for Washington, DC. If you don’t move over or slow down, you could be subject to a fine, license suspension, or even jail time.
Put headlights on when it’s raining.
Visibility is down when it’s raining. That’s why several states require headlights to be on anytime your wipers are in use, even in daylight. Some states only require headlights in dense fog, low visibility, and at night. In these situations, your headlights can help other drivers see you better.
Don’t tailgate.
Tailgating is considered a traffic violation. While states aren’t consistent with how they define tailgating, often such tickets are issued after a rear-end collision. If you’re alert and focused on the road, it takes you about 2 seconds to react to a roadway hazard. That means a safe following distance is at least 3 seconds or more. Use the 3-second rule as a starting point. You can measure the distance in seconds this way: Find a landmark such as a mile marker or telephone pole. Start counting once the car in front of you passes that landmark. Count slowly until your car reaches the same landmark. That is the number of seconds that you are traveling behind the vehicle in front of you.
Wear your seat belt.
Most of the country has laws for seat belts. Some states require you to wear both front and back seat belts. Others just focus on front seat belts. If you’re caught without your seatbelt, you could be subject to fines.
Know your state’s cell phone laws.
Most states require cell phone use to be hands-free, and consider texting while driving as distracted driving. However, some states go further and penalize drivers for accessing, viewing, or reading non-navigation content on phones.
Keep the minimum insurance.
Most states require drivers to carry auto insurance. The state sets the minimum amount and type. Generally, this includes bodily injury liability and property damage liability. If you have a leased car, your lender will require you to have more extensive coverage.
This article is furnished by California Casualty, providing auto and home insurance to educators, law enforcement officers, firefighters, and nurses. Get a quote at 1.866.704.8614 or www.calcas.com.

by California Casualty | Helpful Tips |
Picture this: you’re on the brink of capturing the perfect moment. Then it hits you like a digital disappointment – “not enough storage.” The fear of missing out is real. Here’s how to free up space on your phone for perfect picture taking anytime.
Don’t “double save” your photos.
If you use HDR mode or if you take photos on Instagram, you could be saving your photos twice, and that takes up twice the space.
HDR, or high dynamic range, makes your photos look better. If the setting is on for your smartphone, it creates a regular image and an HDR one every time you take a photo. Here’s how to turn it off.
For an iPhone:
- Go to Settings.
- Select Camera.
- Scroll down until you see Smart HDR.
- Toggle the button to turn off Smart HDR.
- Then the next time you take a photo, look for a switch in the upper right corner. Tap the HDR icon to turn it on or off.
For an Android:
- Go to Settings.
- Click on your Camera. The location varies from phone to phone and might be under photos.
- Look for the gear in the upper left corner. It opens camera settings.
- Look for the toggle to turn Auto HDR off.
Eliminate duplicates on Instagram.
Instagram automatically saves a copy of your edited photo in your camera roll. That could easily eat up extra storage space. Here’s how to turn that feature off.
For an iPhone:
- Login to the Instagram app on your phone.
- Tap the three lines in the top right corner.
- Choose Settings.
- Click on Account.
- Select Original Photos.
- Use the toggle in the box to turn this feature off.
- This will stop Instagram from saving photos and videos to your camera roll.
For an Android:
- Login to the Instagram app on your phone.
- Tap the profile button in the lower right corner.
- Tap the three lines in the top right corner.
- Choose Settings.
- Click on Account.
- Select Original Posts.
- Use the toggle in the box to turn off 3 different features: Original Posts, Posted Photos, and Posted Videos.
- This will stop Instagram from saving photos and videos to your camera roll.
Delete photos and videos.
Your photos and videos can take up a lot of room. Periodically deleting them from your phone can help free up space.
With iPhones, if you delete an image from your photo album, you’ll also delete it from the Cloud. There are a few workarounds such as turning off iCloud photo sharing and Sync this iPhone. However, you probably want to keep that connectivity.
To delete photos/videos on an iPhone:
- Open Photos.
- From the Library tab, select All Photos.
- Choose the photo or video that you want to delete.
- Tap the trash button, then delete photo.
- Then find the Recently Deleted album and select delete all to permanently remove them.
To delete photos/videos on an Android:
- Open the Google Photos app.
- Sign into Google.
- Tap or hold a photo that you want to remove. You may select multiple ones.
- At the top, choose Delete.
Can’t bear to permanently lose your photos? You can always transfer your photos to CDs or an external hard drive or store them online in a service like Dropbox or Flickr.
Clean up your data.
Your phone stores lots of data, from text message conversations to temporary files. Removing these items can help clear up some space.
For an iPhone, clear your message history:
- Go to Settings.
- Choose Messages.
- Select Message History.
- The default option is forever. Change it to one year or less.
For an iPhone, clear your cache:
- Go to Settings.
- Choose Safari.
- Select Clear History and Website Data.
For an Android, clear your cache.
- Open your Chrome app.
- Tap more at the top right.
- Choose History.
- Clear browsing data.
- Choose a time range at the top. “All time” will delete everything.
- Check the boxes next to “Cookies and site data” and “Cached images and files.”
- Select Clear Data.
Manage your storage.
You can get a good idea of what is taking up space on your phone by looking at your storage.
For an iPhone:
- Go to Settings.
- Choose General.
- Select Storage & iCloud Usage.
- Then tap Manage Storage. This is the list of how much space is taken up by apps.
- Click Optimize iPhone Storage.
For an Android:
- Go to Settings.
- Select Storage.
- Choose “Free up space” button.
- This will take you the Google Files app.
- You may follow the Cleaning Suggestions from the Files app.
- You also may click the three parallel lines in the top left corner. Select Settings and look for the Smart Storage setting. Toggle it to turn it on.
Organize your apps.
There are apps that you use every day and others that you rarely use. Take this opportunity to delete the latter.
For an iPhone:
- Touch and hold the app on the home screen.
- Choose Remove App to take it off the home screen.
- Or choose Delete to remove it from your phone.
For an Android:
- Open the Google Play Store app.
- Tap your profile at the top right.
- Choose Manage Apps and Devices.
- Click Manage, then select the name of the app you would like to delete.
- Select Uninstall.
Note that the Google Play Store has an Uninstall Manager that tells you which apps are ones that you don’t use.
Pro Tip: You can also delete the data for the apps you use. Just uninstall and reinstall them.
Try an app.
There are apps that you can download for Android phones that help you clean it. Some popular names include 1-Tap Cleaner, CCleaner, AVG Cleaner, and others. Apple has its own version called iPhone Cleaner: Clean Storage +. These apps sometimes cost money, and so you can determine if they are necessary.
Expand your phone’s memory.
Finally, if you have an Android phone, you may be able to expand its memory with a micro-SD card. iPhones unfortunately have the amount of storage that is set at the factory.
This article is furnished by California Casualty, providing auto and home insurance to educators, law enforcement officers, firefighters, and nurses. Get a quote at 1.866.704.8614 or www.calcas.com.

by California Casualty | Auto Insurance Info |
You’re looking forward to your family get-together, but you could do without the drama. How do you keep harmony in the house, including talking to loved ones who have drastically different viewpoints than yours?
Follow these tips to create a more harmonious and enjoyable gathering for all.
The bigger the gathering, the greater potential for friction.
Chances are your family or friends will venture into discussions about politics, religion, marriage, dating, and other potentially controversial topics. This can be stressful. Remember that you are not obligated to talk about them. Follow these strategies to stay away from conversational landmines. (If you do want to engage, there’s advice later in this blog.)
- If someone brings up the topic, gently remind them that there are 11 other months in the year to have the conversation. Today is for celebrating family and the holidays.
- Change the subject. Brief a few family members beforehand so that they can do that as well.
- Set up a quiet corner or room for those who need to withdraw from the larger gatherings. Use it to relax and recharge.
- Children’s quarrels can sometimes set off adults. Make sure there is a teenage cousin to help keep kids safe and entertained or hire a babysitter.
Fun is a great buffer.
It’s hard to get into controversial topics when you’re singing, playing games, or exchanging gifts. Put fun on the agenda and everyone is sure to have a great time.
- Sing carols. Put on a talent show. Watch a movie. Enjoy family holiday traditions.
- Play games but keep them noncompetitive so everyone can enjoy them.
- Host a Secret Santa or White Elephant gift exchange for fun and funny moments.
- Supply everyone with funny hats or themed props. Take plenty of photos.
- Put on some music and dance.
Set the stage for thoughtful conversation.
Interactions with family and friends are opportunities to stretch your perspective. When you’re ready to discuss one of those controversial topics, do it out of the way of the main gathering. Importantly, you don’t want to create tension or start an argument. Before you discuss something controversial, set up a friendly environment.
- Start with topics that reinforce your relationship. Talk about how good it is to see each other. Compliment the food.
- Remember that most people’s opinions are shaped by their past experiences, their culture, and their religious beliefs. These shape a person’s opinion more than actual knowledge of the topic.
- Before you engage in controversial conversation, tell the person that you care about them. Tell them you appreciate their perspective.
Engage in next-level listening.
If you’ve ever felt misunderstood, you know the importance of really listening to someone. Active listening is an art. So, when you’re ready to engage in a potentially controversial topic, ask, “What do you think of…x, y, z?” Then, don’t say a thing. Simply listen.
- Be conscious of your body language. Don’t cross your arms, which can convey a sense of disagreement. Keep your body open, relaxed, and attentive. If sitting, lean forward.
- Keep regular eye contact. Do not stare, however; keep it natural.
- Use simple gestures to encourage the other person to talk. Use an occasional head nod or “mm-hmm.”
- Offer the other person uninterrupted time to talk for a few minutes.
- Then, reflect. Summarize what you heard. If you’re off target, it gives the other person a chance to correct you.
Be curious. Ask questions.
You just listened to the other person’s point of view. After you summarize what you’ve heard, ask the questions that popped up in your mind.
- Ask open-ended questions rather than ones that require a yes or no.
- Stay neutral in your tone and content.
- Avoid judgment, opinion, and sarcasm.
- Don’t call them names or curse at them.
- Don’t be condescending.
- Put yourself in the shoes of the other person. Try to understand why they see the world that way.
- Assume the other person has good intentions. Make a point of saying that their intentions come from a good place.
Share thoughts with compassion and kindness.
Don’t think of the conversation as a win or lose. Leave your ego at the door and avoid putting down the other person’s beliefs as you discuss yours.
- Use “I” statements to share your beliefs.
- Avoid citing facts and trying to change the other person’s mind.
- Personal stories are often more powerful than facts.
- Find the places where you agree. For example, “I really think my friend should be able to have healthcare.” You don’t have to get into how that could happen.
- Know when it’s time to call it quits. If the conversation can’t get beyond a certain point, that’s a good time to agree to disagree.
- Thank them for their time and attention. Offer to revisit the topic in the future.
Make sure the conversation doesn’t take up the bulk of the party. Get back to the fun and make some memories.
Happy holidays from our family to yours.
This article is furnished by California Casualty, providing auto and home insurance to educators, law enforcement officers, firefighters, and nurses. Get a quote at 1.866.704.8614 or www.calcas.com.

by California Casualty | Educators, Firefighters, Nurses, Peace Officers |
It’s time to stop and reflect on the good that is around us. Starting each day with an inspiring message of gratitude not only sets the tone for positivity, it also benefits you in numerous ways. Being thankful increases feelings of happiness and optimism. Gratitude fosters positive self-esteem and improves relationships. It helps to reduce stress.
Embrace the power of gratitude with these inspiring quotes.
- “There are always flowers for those who want to see them.” – Henri Matisse
- “If you want to find happiness, find gratitude.” – Steve Maraboli
- “Enjoy the little things for one day you may look back and realize they were the big things.” – Robert Brault
- “Some people are always grumbling because roses have thorns; I am thankful that thorns have roses.” – Alphonse Karr
- “Gratitude can transform common days into thanksgivings, turn routine jobs into joy, and change ordinary opportunities into blessings.” – William Arthur Ward
- “Let us be grateful to people who make us happy; they are the charming gardeners who make our souls blossom.” – Marcel Proust
- “Gratitude turns what we have into enough.” – Aesop
- “The more grateful I am, the more beauty I see.” – Special Olympics CEO Mary Davis
- “An attitude of gratitude brings great things.” – Yogi Bhajan
- “The single greatest thing you can do to change your life today would be to start being grateful for what you have right now.” – Oprah Winfrey
- “Remember that what you now have was once among the things that you had hoped for.” – Epicurus
- “Sometimes we should express our gratitude for the small and simple things like the scent of the rain, the taste of your favorite food, or the sound of a loved one’s voice.” – Joseph B. Wirthlin
- “This is a wonderful day. I have never seen this one before.” – Maya Angelou
- “We must find time to stop and thank the people who make a difference in our lives.” – John F. Kennedy
- “We often take for granted the very things that most deserve our gratitude.” – Cynthia Ozick
- “Learn to be thankful for what you already have, while you pursue all that you want.” – Jim Rohn
- “Gratitude sweetens even the smallest moments.” – Anonymous
- “All that we behold is full of blessings.” – William Wordsworth
- “Among the things you can give and still keep are your word, a smile, and a grateful heart.” – Zig Ziglar
- “The more you are thankful, the more you attract things to be thankful for.” – Walt Whitman
This article is furnished by California Casualty, providing auto and home insurance to educators, law enforcement officers, firefighters, and nurses. Get a quote at 1.866.704.8614 or www.calcas.com.
by California Casualty | Auto Insurance Info, Safety |
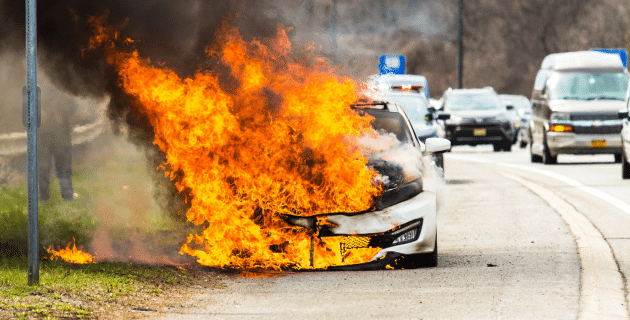
Are you more likely to encounter a vehicle fire in an electric vehicle or a gas-powered one? The answer may surprise you. We’re breaking down the risks of each, and sharing important tips to help keep you safe from a car fire no matter which type of vehicle you drive.
Fires happen in all types of vehicles.
Despite articles circulating on the Internet, there is no government agency tracking fires by the type of vehicle. So, we don’t have a clear idea of which type of vehicle is more prone to fires: gas, electric or hybrid. You’re more likely to see a fire in a gasoline-powered engine than an EV or hybrid, simply because there are more of those vehicles on the road.
We do know that less than half of one percent (or 0.04) vehicles catch fire in any given year. Even though that seems like a low percentage, consider that there were more than 200,000 vehicle fires in the U.S. in 2018, as reported by the National Fire Protection Association (NFPA).
What causes vehicle fires?
Engines produce heat, and when heat connects with a spark or a flammable liquid, a fire can start. Here’s a quick overview of how fires typically happen in gas versus electric vehicles.
Gas-powered combustion vehicles
- Fuel system leaks are the most common causes of fires in gas-powered vehicles. Gasoline is highly flammable and can catch fire from a single spark. Gasoline at a high enough temperature can ignite by itself.
- Electrical system failures are the second most common cause of gas-powered car fires. The electric current produced by a standard lead-acid battery, along with faulty or loose wiring, can produce sparks. Those sparks can ignite a fluid leak or hydrogen gas buildup.
- Flammable fluids can cause fires if their lines, hoses, or containers are damaged. These fluids circulate through your gas-powered engine, and include oil, transmission fluid, power steering fluid, brake fluid, engine coolant and gasoline or diesel. An overheated engine can sometimes cause these fluids to seep out of their designated areas. The anti-lock brake system also can leak brake fluid that can cause an electric short, which can lead to a fire.
- Exhaust-related fires can come from catalytic converters. These parts can be so hot that they can ignite grass under your vehicle. Catalytic converter fires usually occur if your car’s engine doesn’t burn fuel properly, and extra stuff winds up in the exhaust. That causes your catalytic converter to work too hard to burn off those extra pollutants.
- Crashes can cause fires, even though most vehicles are designed with crumple zones that protect the engine, battery, and gas tank. Even so, a crash can cause fluid to leak, and create heat and smoke, which are the ideal conditions for a fire.
Electric vehicles
- Batteries can cause fires in electric and hybrid vehicles. This can happen if the battery is overcharged, damaged, or has a faulty design. The battery is short-circuited, causing a chemical reaction that results in flammable, poisonous gases. This can even happen when a car is not being driven.
- Crashes can damage the battery. If the coolant surrounding the battery leaks out, it can quickly heat up and cause a fire. A crash can also compromise the battery so that it short circuits and heats up. Manufacturers have included safety features such as automatic shutoffs for batteries during a crash, and coatings that help fire from spreading.
EV Car Fires: Much Tougher to Control
Lithium-ion batteries provide their own fuel source, and as a result, can burn for hours on end. They are sometimes hotter than gasoline-powered fires, and therefore harder to cool down. If you call 9-1-1 for a car fire involving an electric or hybrid vehicle, make sure you mention that fact. There are specialized fire extinguishers and firefighting techniques for electrical fires.
Signs Your Car May be in Danger of Catching Fire
Older vehicles may have wiring or other issues that can lead to a fire. However, any car could be at risk. If your vehicle exhibits any of the following signs, take it to your mechanic immediately.
- Quick drops in fuel levels or oil levels
- Wide ranges and changes in your engine’s temperature
- Fuses that repeatedly that pop
- A smoky or burning smell
- Smoke or sparks
- Fluid leaking under your car
What to Do if Your Car Catches Fire
Here’s what to do if your car catches fire.
- Pull over safely as soon as you can.
- Turn the engine off.
- Get everyone out of the car and at least 100 feet away.
- Call 9-1-1.
- Don’t go back into the vehicle for any reason.
- Don’t open the hood. A burning car can explode at any moment.
Your car is one of your greatest investments. Keep your car well maintained and protect it with the right insurance. Safe travels.
This article is furnished by California Casualty, providing auto and home insurance to educators, law enforcement officers, firefighters, and nurses. Get a quote at 1.866.704.8614 or www.calcas.com.
