
by California Casualty | Firefighters, Health, Helpful Tips, Peace Officers, Safety |
When temperatures soar, staying cool isn’t just a comfort—it’s a matter of safety. For law enforcement officers and first responders, the summer heat adds another layer of challenge to already demanding duties. Whether directing traffic under the blazing sun or responding to emergencies in heavy gear, heat stress can sneak up fast. Here are some smart, practical strategies to help you keep your cool.
Suit Up for the Season
Your uniform is your armor, but under the summer sun, it can turn into a sauna. Choosing the right gear can make a huge difference in staying cool.
- Go Light and Breathable: If your department permits, opt for summer uniforms made from lightweight, moisture-wicking materials like mesh, rayon, cotton, or lightweight polyester. These fabrics help sweat evaporate quickly, keeping your body temperature in check.
- Add Cool Extras: Cooling vests, neck wraps, and other personal cooling gear can provide extra relief on scorching days—just make sure they’re approved by your department.
- Bike & Traffic Patrol Tips: Tactical shorts and ANSI-certified high-visibility polos keep you mobile, visible, and comfortable.
- Head-to-Toe Comfort: Swap out heavy hats for breathable, UV-protective caps—department approved of course. Choose moisture-wicking socks—many of which include anti-odor features—to keep your feet dry and blister-free.
Pro Tip: Wear your ballistic vest on the outside. In summer, it’s better to skip layering over it. Outer vest carriers offer protection and breathability—without sacrificing your uniformed look.
Hydrate for the Long Haul
When you’re in the sun for hours, even mild dehydration can take a toll. Drink early and often.
- Water Is #1: Drink before, during, and after your shift. Don’t wait until you’re thirsty.
- Try Coconut Water: It’s a great natural source of potassium and electrolytes.
- Skip These: Caffeinated drinks, sodas, energy drinks, and alcohol all dehydrate you. Caffeine constricts blood vessels and acts as a diuretic, while alcohol sets you up for a rough shift the next day.
Eat to Beat the Heat
It takes a lot of energy for our bodies to digest a steak dinner. When our body breaks down protein, it creates heat. Don’t let heavy meals weigh you down. Aim for lighter, heat-friendly meals and snacks leading up to and during your shift.
- Choose Hydrating Snacks: Watermelon, peaches, apricots, and radishes are great choices.
- Select Leafy Greens: They’re loaded with water and easy on your system.
- Enjoy Smart Fuel: Choose lean proteins and whole grains to keep energy up without overheating your body’s digestive system.
Don’t Forget Sunscreen, Bug Spray & Other Essentials
It’s not just the heat. Make sure you protect your skin from damaging rays and uncomfortable, itchy bites.
- Slather the Sunscreen: Apply broad-spectrum SPF 30+ generously and reapply every two hours, especially if you’re sweating.
- Bring the Bug Spray: This is essential if your beat includes grassy or wooded areas. Mosquito bites are more than just an annoyance.
- Take Towels in the Cruiser: Keep a stash of clean towels to wipe off sweat and help you cool down quickly. Try a cooling towel; it will absorb your sweat and create a cooling effect.
Know When to Rest
Recovery is just as important as readiness. Smart breaks can keep you from overheating and reduce the risk of heat-related illness.
- Take Breaks: When possible, rest in the shade or an air-conditioned vehicle. Short pauses throughout your shift can help regulate body temperature and maintain focus.
- Watch for Warning Signs: Learn to recognize early symptoms of heat stress—like dizziness, nausea, or confusion—and act quickly if they appear.
- Use the Buddy System: Keep an eye on your partner—and yourself—for signs of heat exhaustion.
- Have a Heat Emergency Plan: Know what to do if you or a colleague begins to show symptoms. This goes for K-9 partners, too!
Know the Warning Signs
Heat illness can escalate quickly—from cramps to exhaustion to life-threatening heat stroke. Be alert for these symptoms:
Signs of Heat Stroke:
- Body temperature above 103°F
- Dizziness or disorientation
- Nausea or vomiting
- Headache
- Hot, red, dry skin
- Rapid heartbeat
- Confusion
If you or a partner exhibit any of these, take immediate action:
- Get to a cool area
- Remove excess gear
- Apply cold compresses or ice packs to the forearms, neck, or groin
- Seek medical help immediately
As law enforcement officers and first responders, you face challenges every day—especially when the heat is on. That’s why we’re proud to protect the heroes who protect all of us. From custom insurance coverage to exceptional service tailored to law enforcement professionals, we’ve got your back—on duty and off.
This article is furnished by California Casualty, providing auto and home insurance to educators, law enforcement officers, firefighters, and nurses. Get a quote at 1.866.704.8614 or www.calcas.com.
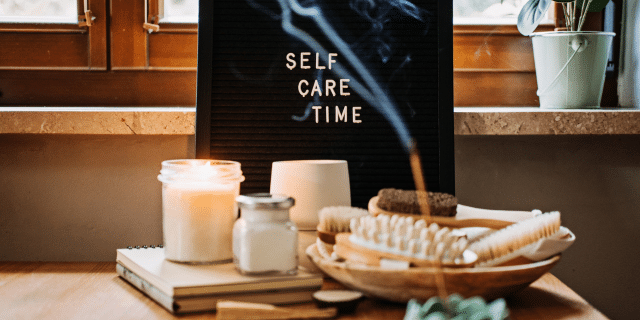
by California Casualty | Educators, Health, Helpful Tips |
You made it! After months of lesson planning, parent emails, grading marathons, and cafeteria duty, summer has finally arrived—and it’s your turn to recharge. Whether you’re craving quiet mornings with coffee and a good book, long walks in the sun, or finally catching up on that podcast everyone’s talking about, this is your season to rest, reflect, and reset.
We’ve compiled your summer self-care toolkit—packed with wellness ideas, downtime inspiration, and refreshingly practical tips to help you feel your best. Let’s dive in—because the best version of you starts with a well-deserved break.
Reconnect with Your People
You didn’t have time for coffee meetups or lunches during the school year. Now’s your chance to catch up. Whether it’s brunch with friends, a backyard barbecue with family, or a spontaneous coffee run, nurturing your relationships will help refill your emotional cup.
Turn Up the Music
Music has a magical way of shifting your mood. Make a summer playlist, explore a new artist, or revisit your favorite throwback tracks. Bonus points if it turns into an impromptu dance party in your kitchen.
Lose Yourself in a Good Book
Take a screen break and curl up with a page-turner. Whether it’s a juicy novel, an inspiring memoir, or a professional read that fuels your passion for teaching, books are a powerful (and portable) form of escape.
Plug Into a Podcast
Whether you’re lounging by the pool, folding laundry, or on a morning walk, podcasts are a great way to unwind, learn something new, or just be entertained. Choose from feel-good shows, culture and entertainment, true crime mysteries, or mindfulness meditations—whatever suits your mood. The best part? You can hit play and let someone else do the talking.
Pamper Like a Pro
Say yes to self-care Sundays—or any day, really. Run a bubble bath, try out a face or hair mask, paint your nails, or indulge in your favorite skincare ritual. When you feel good in your own skin, it shows.
Reignite Your Joy
Have a hobby you’ve put on hold? Now’s the time to dive back in. Whether it’s painting, gardening, baking, or learning something new, doing what you love brings balance and sparks joy.
Get Outside
Sunshine is healing. Whether you’re hiking through the woods, strolling on the beach, kayaking, birdwatching, or simply soaking in rays from your porch, nature has a way of restoring us—body and mind. And yes, your vitamin D levels will thank you.
Move Your Body (Your Way)
Exercise doesn’t have to mean a grueling gym session. A brisk walk, gentle yoga, tai chi in the park, or a dance class can do wonders for your mood and energy levels. Move in ways that make you feel alive—not drained.
Reclaim Your Rest
Now’s the time to reset your sleep schedule. Quality rest supports mood, memory, and immune function. Create a relaxing nighttime routine—think herbal tea, a calming playlist, or screen-free wind-down time—and aim for consistent sleep and wake times. Your future self will thank you come September.
Tidy Just a Little
Pick one small area—your catch-all drawer, your sock collection, your desktop—and give it a refresh. Organizing even a tiny corner of your life can provide a satisfying sense of control. (Pro tip: Leave the school supply bin for August.)
Laugh Often
They say laughter is the best medicine—and it’s true. Watch a favorite comedy, scroll through silly dog videos, or swap corny jokes with a friend. Surround yourself with joy and let the laughter roll.
Be Kind to Yourself
Practice self-compassion. That means speaking to yourself the way you would a close friend—with encouragement, not criticism. Notice negative self-talk and gently swap it for something more supportive. You deserve it.
Practice Gratitude
Before bed, jot down three things you’re grateful for. It could be your morning coffee, a meaningful text, or the way the sunset lit up the sky. Gratitude gently shifts your mindset from stress to satisfaction, helping you feel more grounded and connected.
You give so much of yourself all year long. This summer, give yourself permission to slow down, savor the moment, and take care of you. You’ve earned it. It could be inspiration to continue the self-care journey as you head back to school.
This article is furnished by California Casualty, providing auto and home insurance to educators, law enforcement officers, firefighters, and nurses. Get a quote at 1.866.704.8614 or www.calcas.com.

by California Casualty | Firefighters, Health, Helpful Tips |
When the alarm sounds, you spring into action—no time to think about snacks or sugar crashes. That’s why what happens in the kitchen is just as important as what happens on a call. At the firehouse, mealtime is more than fuel—it’s tradition, teamwork, and a chance to swap out greasy comfort food for healthy hero meals that keep the crew strong, sharp, and ready for anything.
We focused on meals that can handle the unpredictability of a shift. They are easy to prep in bulk, hold up well if interrupted mid-cook, and reheat like a champ. Here are some simple, satisfying ways to level up your firehouse fare.
Big Batch Chili
https://lovinghomeschool.com/big-batch-homemade-chili/
A firehouse favorite, this yields about 10½ quarts. It’s also easy to freeze. Cooking the meat ahead of time makes this easy to assemble.
Ingredients
- 2 pounds ground beef cooked in onion* (for a healthier version, use ground turkey or chicken)
- 1 cup green peppers, chopped
- 3 16-ounce cans kidney beans
- 3 15-ounce cans of great northern beans
- 2 28-ounce cans of diced tomatoes
- 2 2-ounce cans of tomato sauce
- 4 Tablespoons chili powder
- 2 tsp. pepper
- 4 tsp. salt
- 2 tsp. garlic powder
*Sprinkle about 2 Tbsp. dried minced onion over each pound of meat when you put it in the pan. Alternately, you can add ½ cup of raw, chopped onion.
Instructions
- Cook and drain ground beef.
- Rinse and drain beans.
- Add all ingredients to large pot.
- Stir together and bring to boil.
- Reduce heat and simmer gently 60 minutes or more.
- Serve with rice and shredded cheddar cheese.
Protein Pancakes
https://www.womenshealthmag.com/food/a64595865/high-protein-pancake-recipe/
Made with oat flour and protein powder rather than the traditional white flour, this recipe keeps you fuller longer. Size it up for your crew.
Ingredients
- 1/3 cup oat flour
- 1/4 cup unflavored whey protein powder
- 1 baking powder
- 1/4 ground cinnamon
- Kosher salt
- 1 small ripe banana
- 1/2 cup low-fat cottage cheese
- 1 large egg
- 1/2 pure vanilla extract
- Maple syrup and fresh berries, for serving
Instructions
- In medium bowl, whisk oat flour, protein powder, baking powder, cinnamon, and a pinch of salt.
- In another medium bowl, mash banana with a fork. Whisk in cottage cheese, egg, and vanilla to combine. Gradually add wet ingredients to dry ingredients, whisking just until combined. Let batter rest 5 minutes.
- Heat large nonstick skillet on medium. Add four scant 1/4-cupfuls of batter and flatten into 3½ to 4-inch rounds using side or bottom of measuring cup. Cook until edges are set and bottom is golden brown, 2 to 3 minutes. Flip and cook until golden brown and cooked through, 1 to 2 minutes more. Transfer to plate.
- Reduce heat to medium-low. Repeat with remaining batter adjusting heat as necessary. Serve pancakes with maple syrup and berries if desired.
Rice with Black Beans and Sausage
https://foodhero.org/recipes/rice-black-beans-and-sausage
This comforting and flavorful dish is quick and easy to prepare. Size it up for your crew.
Ingredients
- 2 tsp. vegetable oil
- 8 ounces low-fat polish kielbasa sausage, cut into small pieces
- 1 large onion, chopped
- 1 clove garlic, minced or ¼ teaspoon garlic powder
- 1 red bell pepper, chopped
- 1 tsp. ground cumin
- 1 cup uncooked white rice (try brown rice for a nutritional boost)
- 1 can (15 ounces) black beans, drained and rinsed
- 2 cups water
Directions
- Rinse or scrub fresh vegetables under running water before preparing.
- Heat oil over medium-high heat (350 degrees F in an electric skillet); cook sausage and onion until onion is clear.
- Add remaining ingredients.
- Bring to boil over high heat, then reduce heat to low. Cover the skillet and simmer for 20 minutes. (Adjust cooking time for brown rice as needed.)
- Refrigerate leftovers within 2 hours.
Six-Can Chicken Tortilla Soup
https://www.allrecipes.com/recipe/19766/six-can-chicken-tortilla-soup/
This could be the easiest soup ever. Just open cans and combine. The following recipe makes 12 portions, so size it up as needed for your crew.
Ingredients
- 4 14.5-ounce cans chicken broth
- 2 15-ounce can whole kernel corn, drained
- 2 15-ounce can black beans
- 2 10-ounce can chunk chicken
- 2 10-ounce can diced tomatoes with green Chile peppers, drained
- crushed tortilla chips (optional)
- shredded Cheddar cheese (optional)
Instructions
- Pour chicken broth, corn, black beans, chunk chicken, and diced tomatoes with green chilies into a large saucepan or stockpot over medium heat.
- Simmer, stirring occasionally, until chicken is heated through, about 15 minutes.
- Serve hot, topped with tortilla chips and grated cheese.
Slow-Cooker BBQ Pulled Chicken
https://cooking.nytimes.com/recipes/1025356-slow-cooker-bbq-pulled-chicken?register=google&auth=register-google
Enjoy the fragrant smells of cooking all day long in anticipation of this delicious dish. This recipe makes 8 servings. Size it up as needed for your crew and your crockpot.
Ingredients
- 1½ cups tomato-based barbecue sauce (homemade or store-bought)
- 1 to 2 chipotle chiles in adobo (depending on heat tolerance), plus 2 tablespoons adobo sauce
- 2 tablespoons Worcestershire or soy sauce
- 1½ teaspoons onion powder
- 1½ to 2 pounds boneless, skinless chicken thighs
- 1½ to 2 pounds boneless, skinless chicken breasts
- Salt and black pepper
Instructions
- In a 5- to 8-quart slow cooker, stir together 1 cup barbecue sauce, chipotle chiles, adobo sauce, Worcestershire sauce and onion powder. Add the chicken, season with salt and pepper, and toss to coat. Cover and cook on low until the chicken shreds easily when pulled with a fork, 3 to 5 hours.
- Working right in the slow cooker, use two forks to shred the meat into large, bite-size pieces. Stir in the remaining ½ cup barbecue sauce and season to taste with salt and pepper.
At California Casualty, we’re proud to serve firefighters—the everyday heroes who put others first. We know that what’s on the plate can make a big difference at the station. Do you have a go-to firehouse recipe or a healthy twist on a classic? Share it in the comments—we’d love to hear what’s fueling your crew!
This article is furnished by California Casualty, providing auto and home insurance to educators, law enforcement officers, firefighters, and nurses. Get a quote at 1.866.704.8614 or www.calcas.com.
by California Casualty | Health, Nurses |
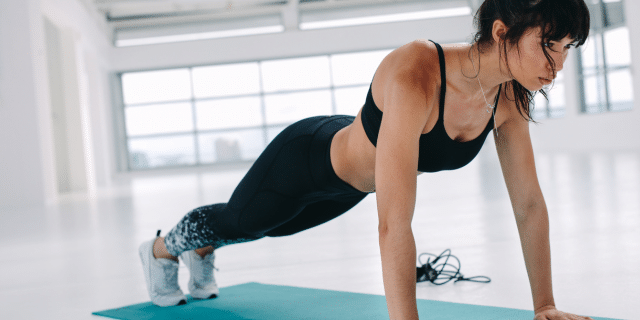
You spend your days caring for others—rushing from room to room, charting notes, and squeezing in quick sips of coffee between patient calls. As a nurse, your schedule is anything but predictable and finding time for fitness can feel like one more thing on an already overflowing to-do list. But here’s the good news: staying active doesn’t require hours at the gym. With a little creativity (and maybe a pair of sneakers in your work bag), you can sneak in movement that boosts your energy, strengthens your body, and helps you keep doing what you do best—taking care of everyone else.
Why Fitness Matters—Especially for Nurses
Let’s be honest: nursing is physically and emotionally demanding. Long hours on your feet, unpredictable shifts, and high-stress situations take their toll. Incorporating fitness into your routine is about:
- Reducing stress and anxiety: Exercise releases endorphins that boost mood and ease tension.
- Preventing injuries: Stronger muscles and better flexibility help you lift, bend, and move with less risk.
- Boosting energy: Moving more often can increase your stamina for those marathon shifts.
- Improving sleep: Regular physical activity can help you unwind and sleep more soundly—critical for anyone working nights or variable hours.
- Supporting overall health: Exercise strengthens your immune system, helps manage weight, and lowers your risk for chronic conditions.
You don’t need to overhaul your life to start seeing benefits. A few minutes of targeted movement each day can make a real difference.
The 5-Minute On-the-Go Workout
Got a quick break or a quiet moment? Keep your blood flowing and muscles engaged with these fast, equipment-free exercises:
- Seated neck stretches – Gently tilt your head to each side to loosen up tension (30 seconds each side).
- Seated spinal twists – Sit tall and twist your torso from side to side (1 minute total).
- Standing calf raises – Stand tall and lift your heels off the ground to work your calves (1 minute).
- Wall sit – Slide your back down a wall and hold a seated position to engage quads and glutes (1 minute).
- Glute bridges – Lie on your back, bend knees, and lift hips toward the ceiling (1 minute).
- Push-ups against a wall – Great for upper body strength without needing to get on the floor.
- Side leg lifts – Stand tall and lift one leg to the side, then switch (30 seconds per side).
- Squats – Classic and effective (1 minute).
- Jump rope simulation – Mimic the motion without the rope—it’s fun and gets your heart rate up (1 minute).
These are perfect for breaks, pre-shift warmups, or even winding down after work.
The 10-Minute Power Routine
If you have a full 10 minutes, you can fit in a quick circuit that strengthens your core, tones your muscles, and gets your heart pumping:
- Bicycle crunches – Work your core with 30–60 seconds of alternating elbow-to-knee movement.
- Plank – Hold a forearm plank for 30–60 seconds to strengthen your core and shoulders.
- Mountain climbers – Start in push-up position and alternate knees to chest for 30–60 seconds.
- Penguin crunches – Lie on your back and reach side to side for your heels to target obliques.
- Jumping jacks – Get your heart rate up with this classic move (30–60 seconds).
- Tricep dips – Use a chair or sturdy surface to strengthen arms (30–60 seconds).
Repeat if you have time or mix in your favorite bodyweight moves.
Short on Time? Try HIIT or Tabata
High-Intensity Interval Training (HIIT) is a smart strategy for nurses. It alternates quick bursts of effort with short recovery periods to get maximum benefit in minimal time.
One of the most efficient formats is Tabata:
- 20 seconds of intense exercise
- 10 seconds of rest
- Repeat for 8 rounds (about 4 minutes total)
Try it with:
- Squats
- Push-ups
- Burpees
- Jumping jacks
- Kettlebell swings (if you have one handy!)
Not only does HIIT burn calories and boost endurance, it also revs up your metabolism—great for shift workers who may have unpredictable eating and sleeping patterns.
Easy Ways to Add More Movement to Your Day
Sometimes the best fitness “plan” is simply to move more often:
- Walk during your break – Do a few laps around the building or in the parking lot.
- Take the stairs – It adds up over the course of a shift!
- Stretch at the nurse’s station – A quick spinal twist or shoulder roll can ease tension.
- Park farther away – It’s an easy way to squeeze in a few extra steps.
- Do leg lifts or calf raises while you chart – This is multitasking at its finest.
Little actions can help keep you limber, mobile, and energized during even the most grueling days.
Let Technology Be Your Trainer
Don’t want to think about your next move? Let an app do the heavy lifting. These free or low-cost fitness apps offer guided routines, timers, and tracking tools to help you stay consistent:
Set a daily reminder and treat your workout like a meeting you can’t skip—you deserve that time.
Bottom Line: Take Care of You
You give 100% to your patients. Just don’t forget to take care of yourself, too. Fitness isn’t about being perfect—it’s about making movement a regular part of your life in a way that feels good and fits your schedule. So, grab your sneakers, press play on your favorite workout app or simply stretch and breathe for a few minutes. You’ve earned it.
This article is furnished by California Casualty, providing auto and home insurance to educators, law enforcement officers, firefighters, and nurses. Get a quote at 1.866.704.8614 or www.calcas.com.

by California Casualty | Firefighters, Health, Peace Officers |
You run toward danger, answer the call in the toughest moments, and shoulder the weight of other people’s emergencies. But who looks out for you? For first responders, the toll of constant stress, trauma, and long shifts can quietly accumulate—until it erupts as burnout, anxiety, or worse. That’s why taking a mental health day isn’t a luxury—it’s a necessity.
In this article, we’ll explore why stepping back is just as vital as stepping in, what a true mental health day looks like, and how to spot the warning signs that it’s time to take one. Don’t miss the quick self-check quiz to gauge your current stress level—it could be the first step in reclaiming your well-being.
Why Take a Mental Health Day?
Mental health days give your mind and body time to rest and recover from prolonged stress experienced by first responders:
- Emotional overload from repeated exposure to trauma
- Physical exhaustion from long shifts and irregular hours
- Compassion fatigue from constantly caring for others
- Feeling constantly on edge, even outside of work
Ignoring these signs can lead to chronic burnout, strained relationships, stress that affects daily living, and serious mental health conditions like depression or PTSD. A mental health day gives you the space to breathe, reset, and care for an important member of the team—you.
What Should You Do on a Mental Health Day?
A mental health day should be intentional and restorative. While it might be tempting to sleep in, stay in your pajamas, binge your favorite show, or scroll endlessly through social media, that’s not likely to leave you feeling truly refreshed. Instead, try making a simple plan to help you get the most out of your time away from work. Start by thinking about what brings you joy. Jot down a few possibilities—or if that feels overwhelming, just choose one thing. Here are some ideas to get you started.
Disconnect to Reconnect: Put your phone on Do Not Disturb. Avoid the news, emails, and social media. Give your mind a chance to unwind. Be fully present in the moment. Even a short break from screens can lower anxiety and help you feel more grounded.
Get Outside: Nature has powerful healing properties. A walk in the park, time at the beach, or even sitting in the sun can reduce stress hormones and boost mood. If the weather is warm enough, take off your shoes and walk on the soft grass. Let the sights, sounds, and scents of nature engage your senses.
Move Your Body: Stretching, yoga, or a bike ride can ease tension and improve your mental clarity. Movement can also release endorphins and help shift your mindset.
Be Creative: Engage your creative side. Draw or paint, write, experiment with a new recipe. Focus on the process of creation rather than the outcome. In other words, don’t judge your work. Enjoy the playfulness of creativity.
Do What Fills Your Cup: Read a book. Listen to music. Cook a favorite meal. Watch a show that makes you laugh. Reconnect with hobbies that bring you joy. Give yourself permission to slow down and indulge in what makes you feel most like yourself.
Practice Mindfulness: Quiet your mind. Try deep breathing, journaling or simply sitting in stillness to tune into your inner voice. Reflect on where you have been and where you are going. Evaluate goals and affirm your direction—or write down ideas of future explorations.
Burnout Self-Check Quiz for First Responders
How are you really doing? Take this quick quiz to find out. For each statement, choose the option that best reflects how you’ve felt over the past two weeks.
- I feel emotionally drained at the end of my shift.
A. Rarely
B. Sometimes
C. Often
D. Almost always
- I’ve been feeling more irritable, anxious, or disconnected than usual.
A. Not at all
B. Occasionally
C. More days than not
D. Nearly every day
- I struggle to get quality sleep or feel rested, even on days off.
A. Never
B. A few times
C. Most of the time
D. Every night
- I’ve lost interest in activities I used to enjoy (hobbies, time with family, etc.).
A. Not at all
B. A little
C. A lot
D. Completely
- I often feel like I must push through the day with little motivation or energy.
A. Rarely
B. Occasionally
C. Frequently
D. Constantly
Results
Mostly A’s – You’re in a good place. You may feel tired now and then, but you’re managing stress well. Keep practicing regular self-care to stay on track.
Mostly B’s – Take note. You’re starting to feel the weight. A mental health day could help you reset before stress takes a bigger toll.
Mostly C’s – Time to pause. Burnout may be setting in. Prioritize a mental health day, seek support, and consider checking in with a professional.
Mostly D’s – You need support now. Your tank is running on empty. Take a break immediately and talk to a trusted mental health provider. You don’t have to carry this alone.
You spend every day helping others. It’s okay—essential, even—to take a day to help yourself. Mental health days aren’t a sign that you’re falling short. They’re proof that you value your health, your career, and your ability to continue serving others with strength and compassion. Make space for rest. You’ve earned it.
This article is furnished by California Casualty, providing auto and home insurance to educators, law enforcement officers, firefighters, and nurses. Get a quote at 1.866.704.8614 or www.calcas.com.

by California Casualty | Health, Nurses |
Flu season can feel like a marathon for nurses, with every shift presenting new challenges to stay healthy. As the frontline defense against the virus, you know how crucial it is to protect yourself while supporting your patients. From bolstering your immune system to managing stress during long hours, these flu season survival tips will help you stay strong, focused, and ready to tackle whatever comes your way. Because when you’re at your best, so is your care.
Stock Up on Essentials
Preparation is key. Ensure you have an ample supply of personal protective equipment (PPE), such as masks, gloves, and gowns, and always ensure they are properly fitted and changed between patients. Keep sanitizers, disinfectants, hand creams, and lozenges on hand. Stock your home with over-the-counter medications, thermometers, and electrolyte solutions in case you or a loved one falls ill. Having these supplies ready allows you to focus on care without unnecessary stress.
Practice Exceptional Hand Hygiene
Hand hygiene is one of the most effective ways to prevent the spread of infection. Follow strict sanitation practices, washing your hands with soap and water for at least 20 seconds after each patient interaction and after touching shared surfaces. Remember, some viruses like norovirus are resistant to hand sanitizers, so soap and water are crucial. Avoid touching your face—especially your eyes, nose, and mouth—with unwashed hands. This simple habit can dramatically reduce your exposure to harmful pathogens.
Clean and Disinfect Workspaces
Shared spaces can harbor countless germs, making regular cleaning a must. Wipe down frequently touched surfaces such as desks, telephones, computer keyboards, and breakroom appliances daily. In common areas, pay attention to high-touch points like water fountain handles and microwave door handles. Keeping these areas clean helps minimize the risk of cross-contamination.
Stay Up to Date on Vaccinations
Vaccination remains one of the most effective tools in preventing the flu. Make sure your immunizations are current, including your annual flu shot, and encourage coworkers and patients to do the same. Vaccines not only protect you but also help reduce the spread of illness within your workplace and the broader community.
Boost Your Immune System
Your immune system is your strongest ally during flu season. Fuel your body with a nutritionally balanced diet rich in fruits, vegetables, whole grains, lean proteins, and healthy fats. Stay hydrated by drinking about 2 liters of water daily and carrying a water bottle to sip throughout your shift. Prioritize healthy sleep habits, aiming for 7-9 hours per night to allow your body to recharge. Incorporate stress-reducing activities like deep breathing exercises, meditation, or yoga into your routine. Regular physical activity can also boost your immunity. Find a workout you enjoy to help you stay motivated.
Manage Your Workload Effectively
A well-organized workload can reduce stress and improve efficiency. Start by prioritizing patient care based on urgency and complexity, focusing on high-risk patients first. Bundle similar tasks together to save time and energy. For example, group medication rounds or paperwork sessions to streamline your day. Delegate non-critical tasks to coworkers when appropriate, allowing you to concentrate on providing the best possible care.
Address Stress and Fatigue
Prolonged stress and fatigue can weaken your immune system, leaving you more vulnerable to illness. Incorporate short self-care breaks into your day to recharge. Use these moments to practice deep breathing, stretch, or enjoy a brief moment of mindfulness. Make restful sleep a priority, even if it means adjusting your schedule. Create a calming bedtime routine to signal to your body that it’s time to rest.
Collaborate with Your Healthcare Team
Effective communication with your team is vital during flu season. Maintain open lines of communication with fellow nurses, physicians, and caregivers to ensure efficient workflows and minimize gaps in care. Share updates on patient conditions, supply needs, and any changes in protocol. A united team effort can make a significant difference in managing the demands of flu season.
If You’re Sick, Stay Home
As a nurse, it’s natural to want to push through illness, but it’s essential to prioritize your health and the safety of those around you. If you feel unwell, take the time to recover. Stay hydrated, treat aches and fever with over-the-counter medications, and rest as much as possible. Cover your mouth and nose when coughing or sneezing and run a humidifier to ease congestion. Remember to replace your toothbrush after recovering from an illness to avoid reinfection.
Flu Season Preparedness at Home
Don’t forget to prepare your household for flu season as well. Encourage family members to practice good hygiene and stay up to date on their vaccinations. Designate a sick room for anyone who becomes ill and establish a cleaning routine to keep the rest of your home germ-free. By creating a safe and clean environment at home, you’ll minimize the risk of spreading illness within your family.
Stay Positive
Flu season can be challenging, but maintaining a positive mindset can make a big difference. Focus on the small wins, like successfully preventing an illness or seeing a patient recover. Celebrate your hard work and dedication, knowing that your efforts are making a meaningful impact in the lives of your patients and community.
This article is furnished by California Casualty, providing auto and home insurance to educators, law enforcement officers, firefighters, and nurses. Get a quote at 1.866.704.8614 or www.calcas.com.
