
It can happen in an instant. A child falls into the pool. A friend collapses in the heat. Someone chokes on a piece of food. If you know CPR, you can help.
CPR is short for cardiopulmonary resuscitation. It is a lifesaving technique used in situations when someone’s heart stops or they stop breathing. CPR helps supply blood and oxygen to vital organs. It increases your chances of survival. It can be used for both humans and pets.
Follow this guide to know what to do if you have to administer CPR in an emergency.
Before beginning CPR
- Check for responsiveness. Shout, “are you okay?” Or tap the individual gently and see if he/she moves or makes a sound. If there is no movement, no pulse, no breathing, or the person is unconsciousness, it’s time to start CPR.
- If you’re alone, and performing CPR on a child, start immediately. You’ll call 9-1-1 after 2 minutes of CPR and rescue breaths.
- If you’re alone, and performing CPR on an adult or teen, call 9-1-1 before you start CPR. Put your phone on speaker.
- If you’re with others, point to one person. Tell him or her to call 9-1-1 and then begin CPR. If you don’t specify the person, there’s a chance that no one will make the call. If there might be an automated external defibrillator (AED) nearby, send someone to get it as well.
- For pets, an emergency vet is the equivalent of 9-1-1. See the last section for steps to take in performing CPR.
CPR for Adults
CPR for adults also applies teens. The general rule is that if the person has entered puberty, this technique may be used.
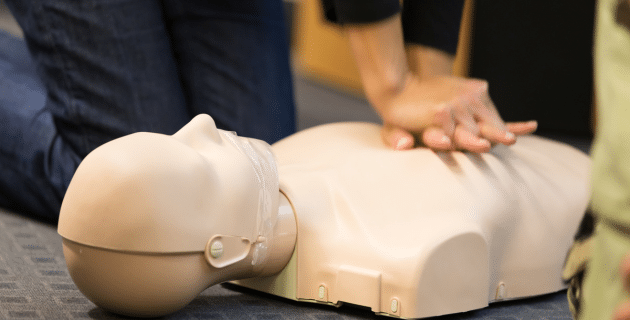
Step #1: Put the person on their back on a flat firm surface. Kneel beside them.
Step #2: Do 30 chest compressions to get the blood flowing.
- Place your two hands centered on the person’s chest.
- Make sure your shoulders are directly above your hands. Lock your elbows.
- Push down at least 2 inches hard and fast, about 100-120 compressions per minute.
- Let the chest return to normal between compressions.
Step #3: Look, listen and feel for breathing.
- Look to see if their chest is rising and falling.
- Listen for breathing sounds.
- Feel their breath against your cheek.
Step #4: Give 2 rescue breaths to deliver oxygen to the organs.
- Tilt the head and lift the chin to open the airway.
- Make sure there is nothing in the mouth obstructing the airway. If there is, sweep it out with your fingers.
- Pinch the nose shut, while you take a normal breath.
- Put your mouth over the person’s mouth and make a complete seal.
- Blow the breath into their mouth for one second. Watch the chest rise. If the chest does not rise, try repeating the head tilt and breath. If the chest still doesn’t rise, there may be something blocking the airway.
- Repeat the process of blowing for a second breath.
Step #5: There may be an AED if you are in a public place. This machine delivers an electric shock to the heart. It can help restore a heart’s rhythm. After five cycles of CPR, turn on the AED and follow the voice prompts.
CPR for Children (1-12 years)
A child’s airway is more delicate than an adult’s airway. If you approach CPR on a child as you would an adult, you could do harm. You will need to be more careful with the head tilt and the compression strength and depth.
Step #1: Place the child on his/her back on a flat surface. Kneel next to the child.
Step #2: Do 30 chest compressions.
- Put heel of one hand on the breastbone, just under the nipples. Make sure your hand is not on the end of the breastbone.
- Push down about one-third of the child’s chest, about 1.5 to 2 inches. Aim for 100-120 compressions per minute.
- Let the chest return to normal between compressions.
Step #3: Look, listen and feel for breathing.
- Look to see if their chest is rising and falling.
- Listen for breathing sounds.
- Feel their breath against your cheek.
Step #4: Give 2 rescue breaths for every 30 compressions.
- Lift the chin to tilt the head back. Be careful not to tilt the head too far.
- Make sure there is nothing in the mouth that is blocking the airway.
- Pinch the nose shut, while you take a normal breath.
- Put your mouth over the child’s mouth and make a complete seal.
- Blow the breath into their mouth for one second. Watch the chest rise. If the chest does not rise, try repeating the head tilt and breath. If the chest still doesn’t rise, there may be something blocking the airway.
- Repeat the process of blowing for a second breath.
Step #5: If an AED with pediatric pads is available, use it after five cycles of CPR. Pediatric pads adjust the energy level used. You can use adult pads for children ages 8 and older.
CPR for Babies (under a year)
Babies have flexible bones and are still developing. You must take care with the force of your compressions and breaths.
Step #1: Place the child on his/her back on a flat surface such as a table or floor.
Step #2: Do 30 chest compressions.
- Use only 2 fingers to provide compressions in the center of the baby’s chest.
- Place your fingers in the center of the chest just below an imaginary line between the nipples. Compression depth should be about an inch and a half.
- Do 30 gentle chest compressions. Aim for 100 compressions per minute.
Step #3: Look, listen and feel for breathing.
- Look to see if their chest is rising and falling.
- Listen for breathing sounds.
- Feel their breath against your cheek.
Step #4: Give 2 rescue breaths for every 30 compressions.
- Gently tilt back the baby’s head and lift its chin to open the airway.
- With your breaths, do not use the full force of your lungs. Use your cheeks to puff air into the mouth and nose.
- Give one gentle puff of air for the duration of a second. Wait one second and give a second puff.
- Watch to see if the baby’s chest rises. If it doesn’t rise, repeat the head tilt, and give another breath.
Step #5: If available, use the AED only with pediatric pads, after five cycles of CPR.
CPR for Pets
You also may perform CPR on a pet. Make sure to only do it for unconscious animals, as even a beloved family pet can bite from pain or fear. The following guidelines are geared toward our fur babies.
Step #1: Place the pet on a flat surface such as a table or floor. Kneel or stand behind the pet.
- For large dogs, put the dog on its back and compress its chest as you would a human.
- For small dogs and cats, lie them on their side and compress the side of the rib cage or position the animal on its back and press on both sides of the rib cage.
Step #2: Do 30 chest compressions.
- Compress at least a third the depth of the chest, but not more than a half the depth.
- For small dogs and cats, do compressions with one hand to avoid pushing too hard.
- For dogs over 60 lbs.: do 60 compressions per minute.
- For animals 11 to 60 lbs.: do 80-100 compressions per minute.
- For animals 10 lbs. or less: do 120 compressions per minute.
Step #3: Give 2 rescue breaths.
- Make sure the pet’s windpipe is as straight as possible. The head should be flat on the table or floor with tip of nose aligned with the spine.
- Open the animal’s mouth, and make sure the air passage is clear. Remove any objects.
- Open your mouth. Put it over both nostrils of your pet. For large dogs, close the pet’s jaw tightly and breathe into the nose. For small dogs and cats, cover the animal’s nose and mouth with your mouth as you breathe.
- Blow hard and quickly and make sure you see the chest rise.
Step #4: Alternate breaths with compressions. There should be 30 compressions to 2 breaths.
Step #5: Since 9-1-1 is not an option for pets, get someone to help you get your pet to an emergency vet. Continue CPR on the drive over.
CPR training is available for adults, children, babies, and pets. Contact your local Red Cross for information on human CPR and ask your veterinarian about animal CPR. Keeping your pet fully insured also will help should an emergency arise.
This article is furnished by California Casualty, providing auto and home insurance to educators, law enforcement officers, firefighters, and nurses. Get a quote at 1.866.704.8614 or www.calcas.com.

- California Casualty Earns Financial Stability Rating® of A, Exceptional, From Demotech, Inc. - April 28, 2025
- Music & Arts Grant Recipients – 2024 - December 13, 2024
- Understanding Auto and Home Insurance Rate Changes - December 3, 2024