
by California Casualty | Helpful Tips, Homeowners Insurance Info |
Ready to roll up your sleeves and boost your home’s value without breaking the bank? Whether you’re prepping to sell or just want to make your space shine, the right DIY projects can deliver big returns—and serious satisfaction. From weekend upgrades to clever curb appeal tricks, we’re diving into easy, affordable ways to make your home more appealing to buyers and more enjoyable for you. Let’s get started—toolbox optional, enthusiasm required!
Freshen Up with Paint and Wallpaper
Paint is one of the most cost-effective ways to transform your home. And it doesn’t stop at the walls! Try painting your kitchen island a bold color or adding contrast by painting trim, molding, or millwork. Pair soft white walls with a neutral island and colorful trim to let the details shine.
Give your front door a splash of color to boost curb appeal instantly. Or refresh dated kitchen cabinets with a coat of paint or stain. Peel-and-stick wallpaper is a great way to add personality with minimal effort—try it on an accent wall or even as a unique backsplash.
Upgrade Fixtures for a Stylish Finish
Swapping out outdated fixtures can give your home a modern edge—and lighting especially can make a difference. Start with the bathroom: replace an old faucet and old vanity lighting with something more stylish.
In the kitchen, replace your faucet. Convert recessed lights to pendant lights for an instant design upgrade—hardware store kits make it easy. Throughout your home, switch out builder-grade light fixtures for ones that reflect your personal style, and don’t overlook the details: new metal switch plates can add a surprising dose of polish.
Add Charm with Décor Details
Sometimes it’s the little touches that make the biggest impact. Display beautiful cookware on brass racks to elevate your kitchen’s look and free up cabinet space. Swap out cabinet hardware for on-trend pulls—just be sure to match existing holes for easy installation (tip: bring an old one with you when you shop!).
Hang curtains using tension rods and clip-on rings for a no-drill window treatment. Brighten glass-front cabinets with colorful self-adhesive shelf liners. Mirrors placed strategically can make rooms feel larger and filled with natural light.
Refresh Furnishings and Layouts
Furniture can work double-duty when it’s thoughtfully chosen. Consider recovering worn chairs or swapping out bar stools for a more modern look. Create a cozy breakfast nook with a slim table, a few chairs, and a bench—bonus points if it includes hidden storage.
Speaking of storage, look for pieces that offer built-in compartments or shelves to reduce clutter. Want to add buyer appeal? Carve out a home office space. Even a walk-in closet or pantry can be transformed into a compact yet functional workspace.
Enhance Floors Underfoot
Flooring can make or break a first impression. If you have hardwood, refinishing it can dramatically boost your home’s value. Want a simpler update? Add a carpet runner in the entryway or kitchen to define the space and add comfort where you stand most.
Bathroom flooring is a great place to try a DIY upgrade—it’s typically a smaller area and a neutral finish goes a long way in appealing to future buyers.
First impressions matter, and your home’s exterior sets the tone. A good power wash can do wonders—and if that’s not enough, consider painting the siding, trim, or shutters for a clean, fresh look. Don’t forget the gutters—cleaning them is a small job that makes a big difference.
Tidy up your landscaping by trimming overgrowth and patching bald spots in the lawn. Add perennials along walkways or in front of the house for low-maintenance greenery that returns year after year. If you have pets, make sure it’s pet-friendly. Repair and refresh your deck to keep it looking its best. Declutter your garage and consider some easy garage updates.
Want a quick style boost? Update your mailbox or address numbers for a simple but noticeable refresh.
Considering bigger home renovations? See our blogs on DIY versus going pro and how to avoid contractor scams.
Your home is likely one of your greatest investments—protect it and help it shine with projects that add value and personality. And don’t forget, the right insurance coverage is just as important.
This article is furnished by California Casualty, providing auto and home insurance to educators, law enforcement officers, firefighters, and nurses. Get a quote at 1.866.704.8614 or www.calcas.com.

by California Casualty | Auto Insurance Info |
Ever dreamed of snapping a selfie in front of Dunder Mifflin in Scranton or standing where Walter White once stood in Albuquerque? With a little imagination (and a full tank of gas), a road trip inspired by your favorite TV show can feel like stepping straight into the screen. It’s more than sightseeing — it’s a journey that connects you to the stories, characters, and places that have captured your heart. Suddenly, you’re not just a fan… you’re part of the world.
So fuel up, check out our long-distance driving tips, and get ready for a memorable ride. Here are some ideas to get you started.
Breaking Bad
Albuquerque, New Mexico
Walk in the footsteps of Walter White with a trip to the heart of the Southwest. From the famous car wash to Jesse’s house and more, Albuquerque is filled with filming locations that bring Breaking Bad to life. While Walter’s house has an iron privacy fence now (from too many enthusiastic fans throwing pizzas), there are places you can visit. Drive by the Crossroads Motel, aka The Crystal Palace, or Tuco’s headquarters (now Java Joe’s). Grab a burger or burrito at Los Pollos Hermanos (actually Twisters on Isleta Blvd.) which features memorabilia from the show. Maybe pick up some blue rock candy as a souvenir from the Candy Lady in Old Town Albuquerque.
Gilmore Girls
Litchfield County, Connecticut
A drive through Litchfield County reveals quaint downtowns, cozy diners, and scenery that feels straight out of the show. Start in Washington Depot, the town that inspired Stars Hollow. Sip coffee in a café like Marty’s Cafe that might just remind you of Luke’s. For a Doose’s Market experience, stop at the Washington Food Market. Head to the Mayflower Inn & Spa which was inspiration for the Dragonfly Inn. Schedule a tour at Yale University and imagine Rory’s student life. For the iconic gazebo photo op, don’t miss a trip to New Milford.
Grey’s Anatomy
Seattle, Washington
Even if most of Grey’s Anatomy was filmed in Los Angeles, the show’s soul belongs to Seattle. The real-life Seattle Grace Hospital is actually the KOMO Plaza building, and fans will recognize the famous Seattle skyline and the Space Needle. Ride a ferry across Puget Sound for your own “Meredith and Derek” moment. Stop by the intern house in Queen Anne Hill. (It’s a private residence so enjoy it from a respectful distance.) While you’re there, explore the cool and quirky shops and cafes in the area.
The Marvelous Mrs. Maisel
New York City, New York
Step into the 1950s and ’60s with a tour of the New York City landmarks featured in The Marvelous Mrs. Maisel. From Greenwich Village to the B. Altman department store on Fifth Avenue, fans can stroll through Midge’s world while soaking up iconic city sights, vintage charm, and world-class bagels. Visit the Gaslight Café (actually The Up & Up), where Midge first took the stage. Grab a bite at La Bonbonniere—standing in for The City Spoon in the show—where she dined after her post-jail appearances (just remember, it’s cash only!). See the Strathmore on Riverside Drive, which served as the exterior for Midge’s apartment building, and swing by Columbia University, where her father Abe taught.
The Office
Scranton, Pennsylvania
Make your way to Scranton for a dose of workplace comedy nostalgia. You’ll find the “Welcome to Scranton” sign from the opening credits at the Steamtown Mall. Grab lunch at Poor Richard’s Pub, a real bar frequented by the Dunder Mifflin crew. Bonus points if you wear a “World’s Best Boss” hat. Or try the “good” pizza at Alfredo’s Pizza Café. Don’t miss the mural, The Office: The Story of Us, in downtown Scranton, and the World’s Largest Dundie Award outside Scranton City Hall. While you won’t find the Dunder Mifflin office, you can visit the Pennsylvania Paper & Supply company tower featured in the opening credits.
Stranger Things
Hawkins, Georgia
Head to the Peach State for a glimpse into Hawkins—aka various Georgia filming locations. The kids’ houses were located on Piney Wood Lane in East Point. Jackson, Georgia stood in for downtown Hawkins, and Lucy Lu’s Coffee Café has a special Stranger Things menu. The Butts County Probate Court was the exterior for Hawkins Public Library. You can find the creepy Hawkins Lab at Emory University’s Briarcliff Campus. Fans of the Upside Down will enjoy the mix of small-town Americana and eerie science fiction vibes.
Yellowstone
Montana
For fans of the Dutton family saga, the wide-open landscapes of Montana are calling. Many scenes from Yellowstone are filmed at the real Chief Joseph Ranch in Darby, Montana, which doubles as the Dutton Ranch. Visit Ruby’s Café in Missoula, the location of a memorable shootout. Take a scenic drive through the Bitterroot Valley. Head to Hamilton to tour the Daly Mansion, which was the governor’s residence. Drive the roads – Meridien and Bear Creek – where Kayce’s car chase was filmed. This is a road trip rich with ranch country, mountain views, and that rugged Western spirit.
These are just a few ideas to spark your imagination—there’s a whole world of TV-inspired road trips waiting to be explored. Whether you’re chasing nostalgia, adventure, or just a great selfie spot, the open road is full of possibilities. Have a favorite show or road trip destination of your own? We’d love to hear it!
Ready to hit the road? See our blogs on childproofing your car and road trip preparation.
Finally, make sure your car is covered—so you can enjoy the ride with peace of mind. Safe travels.
This article is furnished by California Casualty, providing auto and home insurance to educators, law enforcement officers, firefighters, and nurses. Get a quote at 1.866.704.8614 or www.calcas.com.

by California Casualty | Health, Nurses |
You spend your days caring for others—rushing from room to room, charting notes, and squeezing in quick sips of coffee between patient calls. As a nurse, your schedule is anything but predictable and finding time for fitness can feel like one more thing on an already overflowing to-do list. But here’s the good news: staying active doesn’t require hours at the gym. With a little creativity (and maybe a pair of sneakers in your work bag), you can sneak in movement that boosts your energy, strengthens your body, and helps you keep doing what you do best—taking care of everyone else.
Why Fitness Matters—Especially for Nurses
Let’s be honest: nursing is physically and emotionally demanding. Long hours on your feet, unpredictable shifts, and high-stress situations take their toll. Incorporating fitness into your routine is about:
- Reducing stress and anxiety: Exercise releases endorphins that boost mood and ease tension.
- Preventing injuries: Stronger muscles and better flexibility help you lift, bend, and move with less risk.
- Boosting energy: Moving more often can increase your stamina for those marathon shifts.
- Improving sleep: Regular physical activity can help you unwind and sleep more soundly—critical for anyone working nights or variable hours.
- Supporting overall health: Exercise strengthens your immune system, helps manage weight, and lowers your risk for chronic conditions.
You don’t need to overhaul your life to start seeing benefits. A few minutes of targeted movement each day can make a real difference.
The 5-Minute On-the-Go Workout
Got a quick break or a quiet moment? Keep your blood flowing and muscles engaged with these fast, equipment-free exercises:
- Seated neck stretches – Gently tilt your head to each side to loosen up tension (30 seconds each side).
- Seated spinal twists – Sit tall and twist your torso from side to side (1 minute total).
- Standing calf raises – Stand tall and lift your heels off the ground to work your calves (1 minute).
- Wall sit – Slide your back down a wall and hold a seated position to engage quads and glutes (1 minute).
- Glute bridges – Lie on your back, bend knees, and lift hips toward the ceiling (1 minute).
- Push-ups against a wall – Great for upper body strength without needing to get on the floor.
- Side leg lifts – Stand tall and lift one leg to the side, then switch (30 seconds per side).
- Squats – Classic and effective (1 minute).
- Jump rope simulation – Mimic the motion without the rope—it’s fun and gets your heart rate up (1 minute).
These are perfect for breaks, pre-shift warmups, or even winding down after work.
The 10-Minute Power Routine
If you have a full 10 minutes, you can fit in a quick circuit that strengthens your core, tones your muscles, and gets your heart pumping:
- Bicycle crunches – Work your core with 30–60 seconds of alternating elbow-to-knee movement.
- Plank – Hold a forearm plank for 30–60 seconds to strengthen your core and shoulders.
- Mountain climbers – Start in push-up position and alternate knees to chest for 30–60 seconds.
- Penguin crunches – Lie on your back and reach side to side for your heels to target obliques.
- Jumping jacks – Get your heart rate up with this classic move (30–60 seconds).
- Tricep dips – Use a chair or sturdy surface to strengthen arms (30–60 seconds).
Repeat if you have time or mix in your favorite bodyweight moves.
Short on Time? Try HIIT or Tabata
High-Intensity Interval Training (HIIT) is a smart strategy for nurses. It alternates quick bursts of effort with short recovery periods to get maximum benefit in minimal time.
One of the most efficient formats is Tabata:
- 20 seconds of intense exercise
- 10 seconds of rest
- Repeat for 8 rounds (about 4 minutes total)
Try it with:
- Squats
- Push-ups
- Burpees
- Jumping jacks
- Kettlebell swings (if you have one handy!)
Not only does HIIT burn calories and boost endurance, it also revs up your metabolism—great for shift workers who may have unpredictable eating and sleeping patterns.
Easy Ways to Add More Movement to Your Day
Sometimes the best fitness “plan” is simply to move more often:
- Walk during your break – Do a few laps around the building or in the parking lot.
- Take the stairs – It adds up over the course of a shift!
- Stretch at the nurse’s station – A quick spinal twist or shoulder roll can ease tension.
- Park farther away – It’s an easy way to squeeze in a few extra steps.
- Do leg lifts or calf raises while you chart – This is multitasking at its finest.
Little actions can help keep you limber, mobile, and energized during even the most grueling days.
Let Technology Be Your Trainer
Don’t want to think about your next move? Let an app do the heavy lifting. These free or low-cost fitness apps offer guided routines, timers, and tracking tools to help you stay consistent:
Set a daily reminder and treat your workout like a meeting you can’t skip—you deserve that time.
Bottom Line: Take Care of You
You give 100% to your patients. Just don’t forget to take care of yourself, too. Fitness isn’t about being perfect—it’s about making movement a regular part of your life in a way that feels good and fits your schedule. So, grab your sneakers, press play on your favorite workout app or simply stretch and breathe for a few minutes. You’ve earned it.
This article is furnished by California Casualty, providing auto and home insurance to educators, law enforcement officers, firefighters, and nurses. Get a quote at 1.866.704.8614 or www.calcas.com.

by California Casualty | Educators, In Your Community, News |
California Casualty has delivered $1,000 Thomas R. Brown Athletic Grants to educators at 10 public middle and high schools across five states to help support their school sports program(s). Since its inception in 2010, the Thomas R. Brown Athletics Grant Program has helped fund burdened athletic programs in 773 public schools across the nation.
Named in honor of Tom Brown, an ardent sports enthusiast and California Casualty Chairman Emeritus, the Thomas R. Brown Athletic Grant reflects his conviction that the values cultivated on the field—such as teamwork, trust, communication, and confidence—extend far beyond sports, enriching academic and personal development. Athletic programs play a pivotal role in shaping students’ character, fostering well-rounded individuals who excel both in the classroom and in life.
California Casualty recognizes the vital role of youth sports in promoting children’s physical and mental well-being. We are delighted to announce that the 2024/2025 Athletic Grants will support the following initiatives:
-
- Diablo High School – Concord, California – Girls Volleyball
- Natomas High School – Sacramento, California – Swim Team
- Paramount High School – Paramount, California – Girls Flag Football
- San Benancio Middle School – Salinas, California – Wrestling and Soccer
- Tahquitz High School – Hemet, California – Cross Country
- Aurora Frontier P-8 – Aurora, Colorado – Boys & Girls Basketball
- Carmody Middle School – Lakewood, Colorado – Carmody Bike Club
- Post Falls High School – Post Falls, Idaho – Track and Field
- Lebanon High School – Lebanon, Oregon – Unified Basketball
- Laramie Middle School – Laramie, Wyoming – Middle School Athletic Programs
Congratulations to all of our 2024/2025 grant recipients!
Mt. Diablo High School, Concord, CA
Applicant: Taylor Thompson
Athletic Program: Girls Volleyball
Photo L-R: Principal, Dr. Markell McCain, Recipient, Taylor Thompson, Mt Diablo EA President, Linda Ortega, and Angie Rajczyk
Natomas High School, Sacramento, CA
Applicant: Amanda Connelly
Athletic Program: Swim Team
Photo L-R: Swim Coaches, Eliana & Danielle, Amanda Keidel, Recipient, Amanda Connelly
Paramount High School, Paramount, CA
Applicant: Monique Reed
Athletic Program: Girls Flag Football
Photo L-R: TAP president, (DeeDee) Ardelia Aldridge, PE Coach, Frank Bignami, Flag Football Coach, Monique Reed and school principal, Jill Hammond.
San Benancio Middle School, Salinas, CA
Applicant: Phillip Snell
Athletic Program: Wrestling and Soccer
Photo L-R: Principal, Joe Carnazzo, Recipient, Phillip Snell
School: Tahquitz High School, Hemet, CA
Applicant: Shelly Hannah
Athletic Program: Cross Country
Photo: Recipient, Shelly Hannah
Aurora Frontier P-8, Aurora, CO
Applicant: Leila Malsam
Athletic Program: Boys & Girls Basketball
Photo L-R: Jolie Spence, Recipient, Leila Malsam and AEA President, Linnea Reed-Ellis
Carmody Middle School, Lakewood, CO
Applicant: Rob Wright
Athletic Program: Carmody Bike Club
Photo L-R: CEA Executive Committee and JCEA Secretary, Ang Anderson, Recipient, Rob Wright, and Jolie Spence
Post Falls High School, Post Falls, ID
Applicant: Brian Etchison
Athletic Program: Track and Field
Photo L-R: Assistant Principal, Mike Mclean and Recipient, Brian Etchison
Lebanon High School, Lebanon, OR
Applicant: Sheridan Echternach
Athletic Program: Unified Basketball
Photo L-R: Dee Dee Templeton, Recipient, Sheridan Echternach and Lebanon EA President, Bonita Randklev
Laramie Middle School, Laramie, WY
Applicant: Jamie Simmons
Athletic Program: Middle School Athletic Programs
Photo L-R: Jolie Spence, Jamie Simmons and Greg Herold (Uniserv Director)
by California Casualty | Helpful Tips, Homeowners Insurance Info |
There’s nothing like sipping a cold drink on your backyard deck, soaking up the sunshine or hosting a summer barbecue with friends. But before you roll out the grill and string up the lights, it’s time to show your deck a little love. Whether it’s blazing sun, pouring rain, heavy snow, or constant foot traffic, your deck weathers it all—and proper maintenance is the key to keeping it safe, sturdy, and looking its best. Ready to give your deck the TLC it deserves? Let’s dive in!
Know Your Type of Deck
Before you start, it’s important to know what kind of deck you have. Different materials require different levels of care.
- Wood Decks: These are traditional and beautiful but need the most maintenance. Hardwoods like cedar, redwood, and teak are more durable than softwoods like pine and fir.
- Composite Decks: Made from wood fibers and plastic, these are lower-maintenance and usually come with UV protection built in. However, they still require periodic cleaning and inspection.
Summer Deck Maintenance
Now is the perfect time to inspect, clean, and reseal your deck as part of summer home maintenance. Here’s your seasonal to-do list:
1. Inspect and Repair
Your first step should be a thorough inspection:
- Check for damage such as cracked, warped, or splintering boards.
- Look for discoloration, rot, and peeling. Soft, spongy areas or visible decay could mean the wood is rotting.
- Inspect fasteners. Tighten loose screws and replace any that are rusty.
- Examine the flashing—the water barrier where your deck attaches to the house. Damaged or missing flashing can lead to major water issues.
- Ensure that stairs and handrails are stable and secure.
Warning signs your deck may need replacing:
- Severe rot or decay
- Multiple loose or broken boards
- Deep discoloration or widespread splintering
- Rusty or failing hardware
Make minor repairs now to prevent costly fixes later.
2. Clean Your Deck the Right Way
Before you clean, protect nearby plants by covering them with a breathable tarp. Many deck cleaning products contain chemicals that can harm vegetation.
- Remove all furniture, plants, and décor.
- Sweep off leaves, dirt, and debris.
- Spray down the deck with a garden hose using a strong stream.
- Apply a wood-safe cleaner or a composite-safe cleaner according to the product instructions. You can also use warm soapy water.
- Scrub using a stiff-bristled brush.
- Rinse thoroughly and let dry completely before applying any sealant or stain.
Pro Tip: Avoid using chlorine bleach—it can damage wood and composite decks. For stubborn stains on a wood deck, make a paste of baking soda and water, apply it to the stain, let it sit, then scrub and rinse. For composite decks, try a composite-safe cleaner.
Power washing caution: You can power wash occasionally, but not every year. Used incorrectly, a pressure washer can gouge wood and composite decks, and cause more harm than good. When in doubt, a hose with a hard spray setting often does the trick.
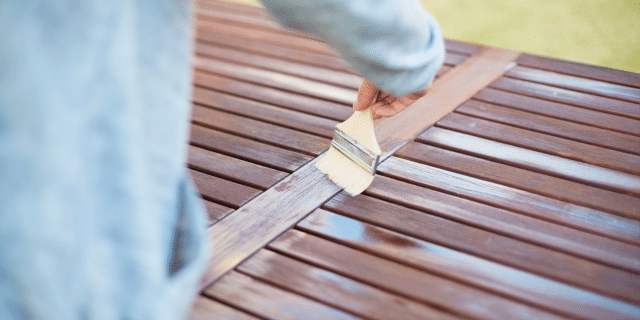
3. Seal and Stain (for Wood Decks)
Sealing and staining are critical to protect your wood deck from sun, moisture, and wear. (Composite decks do not need to be stained or sealed.)
- Frequency: Seal every 1–2 years, depending on the product and your climate.
- Timing: Make sure your deck is clean and completely dry. Sand any splintered or rough areas before you begin.
- Product selection:
- Choose a UV-protective stain that complements your home’s exterior.
- Use a clear or semi-transparent sealant with strong water resistance.
- Avoid paint—while it may look good initially, it tends to crack, peel, and deteriorate quickly on deck surfaces.
- Application tips:
- Follow the wood grain to prevent streaks.
- Use a brush, roller, or sprayer to apply an even coat.
- Apply in the early morning or late afternoon to avoid direct sun, which can cause uneven drying.
4. Deck-Safe Furnishings and Accessories
Your furniture and décor choices can impact your deck’s longevity.
- Skip natural fiber rugs (like jute or bamboo). These absorb moisture and promote mildew. Opt for synthetic, quick-drying outdoor rugs instead.
- Protect your deck from grill heat. Place grills on a nonflammable grill pad or mat to prevent grease stains and fire risks. Practice grill safety.
- Use furniture with rubber or plastic feet to prevent scratching or gouging the surface.
Year-Round Deck Care Tips
While summer is deck maintenance season, a few habits year-round can help preserve your investment:
- Sweep regularly to prevent leaves and debris buildup, which can cause staining and mildew.
- Shovel snow carefully in winter using a plastic shovel and always with the grain of the boards.
- Trim nearby trees and bushes to reduce moisture buildup and leaf litter.
Your deck is an extension of your home—and like any living space, it deserves care and attention. By inspecting it annually, cleaning it regularly, and sealing it as needed, you can enjoy a beautiful, safe, and functional outdoor retreat for years to come.
This article is furnished by California Casualty, providing auto and home insurance to educators, law enforcement officers, firefighters, and nurses. Get a quote at 1.866.704.8614 or www.calcas.com.


