
by California Casualty | Helpful Tips |
Embrace your inner artist and let your imagination run wild. Whether you prefer glue and glitter or pottery and paint, it’s fun to get creative. In honor of March, National Craft Month, we compiled some of our favorite crafts for home and the classroom. So, whether you’re looking to unwind after a long day or searching for a fun activity to share with your students, join us in celebrating National Craft Month.
Benefits of Crafting
Crafting is good for our brains and our spirits. Working with our hands and exercising our creative skills helps with hand-eye coordination, concentration, critical thinking, and problem solving. Crafting teaches us patience and resilience, and how to fix things when they don’t exactly go our way. The process of creation can also reduce stress and anxiety, improve our mood and self-confidence. When we create with others, we also build community and a sense of shared accomplishment.
Here are some ideas to get you started. Feel free to improvise; after all, creativity is what it’s all about!
Colored Mason Jars
https://modpodgerocksblog.com/colored-mason-jars/
These decorative mason jars make great gifts. Personalize them with your favorite stencils.
Supplies: Clear mason jars, Mod Podge, food coloring or acrylic paint, foam brush, adhesive stencils, glitter, scissors, wax paper (Use food coloring if you want the final result to be clearer, and acrylic paint if you want more color.)
Process: Wash and dry the mason jars to ensure the best result. Add some Mod Podge to a bowl with a few drops of food coloring or paint. Put about two tablespoons into the mason jar and roll it around to coat it. Add more as needed, one tablespoon at a time. Shake it over the garbage can to get rid of excess Mod Podge. Place the jars face down on wax paper and allow to dry for 24 hours. Affix your stencil on the outside of the jar. Cover the stencil area with Mod Podge. Peel off the stencil and apply glitter right away. You can tie the jar with baker’s twine for a festive touch.
DIY Sharpie Mug
https://feelingnifty.com/sharpie-mugs-diy-tutorial/
This personalized mug makes a great gift and it’s so easy to create.
Supplies: a plain and inexpensive ceramic mug, oil-based Sharpie marker (regular Sharpies will wash away)
Process: You can draw any design on the mug or write a meaningful quote. Try affixing a large alphabet sticker and using your Sharpie to make colorful dots around it. Then peel off the sticker and you’ll have a monogrammed mug. Once the marker paint is dry, put the mug in a cold oven. Turn it to 250 degrees and bake your Sharpie mug for 2 hours. Turn the oven off and let it cool completely. Note that color changes can happen while baking. If you are concerned, you can skip the baking and simply coat the mug with Mod Podge.
Flower Pens
https://parents.highlights.com/how-to-make-flowers-out-pens
Create a beautiful bouquet of pens with just a few supplies. Make it extra special by choosing favorite flowers or colors.
Supplies: Pens, silk or plastic flowers with stems, floral tape
Process: Place the flower stem against the bottom of the pen. Wrap floral tape around the stem and pen to attach it. Continue wrapping the tape all the way to the top, then bring it back down again. Cut off the excess once the pen is fully wrapped. The floral tape will self-adhere with some pressure.
Glitter Sensory Bottles
https://onelittleproject.com/sensory-bottles/
These bottles are easy to make, and kids love them. Use them as a sensory tool in class or as a free time reward once work is done.
Supplies: Clear, empty water bottles, baby oil, glitter, pony beads, buttons
Process: Fill the bottles three-quarters of the way with baby oil. Add glitter; start with a small amount. The glitter will sink to the bottom. Add other items such as beads or buttons. Put the cap on. Turn the bottle upside down and right side up a few times. Watch the glitter fall. Add more as necessary. When it’s finished, fill the bottle to the top with baby oil.
Paper Plate Dream Catchers
https://onelittleproject.com/how-to-make-a-dreamcatcher/
These dream catchers are easily customizable. Tie them into a social studies curriculum on Native American crafts.
Supplies: Paper plates, yarn, feathers, pony beads, hole puncher, markers, glue
Process: Cut out the inner circle of the paper plate. Punch 8 evenly space holes around the inside cutout circle. Decorate the plate with markers. Cut a 55-inch length of yard. Tie it to one of the inner holes and knot it in place. Thread the yarn through the other inner holes in any pattern that you like. Punch one hole at the top and tie a piece of yard to hang the dream catcher. Punch three holes at the bottom where you will hand yarn with beads and feathers. Cut three pieces of yarn, 12 inches long. Tie the feathers to the end of the yarn. Add some glue to keep them in place. Slide beads down over the yarn above the feathers. Tie the feathered and beaded yarn on the bottom. You are now ready to hang your dreamcatcher!
Salt Painting
https://www.thebestideasforkids.com/salt-painting/
Experiment with color and texture as you create a beautiful piece of art.
Supplies: Glue, table salt, watercolors or food coloring, paintbrush, pencil, cardstock
Process: Draw the image on the cardstock. Trace the lines using glue. Keep glue lines thin. Sprinkle salt over the glue. Use a lot so it coats every part. Shake off the excess salt. Dip your paintbrush in the watercolor and gently tap the salt. Watch the color spread. Let your painting dry. Spray with a sealer.
Tissue Paper Painting
https://thelittleredhen.typepad.com/my_weblog/2011/05/painting-with-tissue-paper.html
Create a masterpiece of color with this easy technique. Make sure to buy tissue paper that is not shiny. The cheaper tissue paper found at Dollar Stores will not “bleed” easily.
Supplies: Watercolor paper or cardstock, tissue paper, a spray bottle, water
Process: Tear up the tissue paper into small pieces. Arrange it on your paper in a design. Make sure to overlap some colors. Spray the tissue with water until it is wet. Then, let it dry. Once the project is completely dry, remove the tissue paper and see the colorful results. It is very important that everything is completely dry. Removing the tissue too soon will damage the paper underneath.
Yarn Pumpkins
https://onelittleproject.com/yarn-pumpkins/
These yarn pumpkins can also be yarn apples or decorative balls. They make beautiful centerpieces and are so easy to make.
Supplies: Balloon, yard, white glue (one full 2-ounce bottle per pumpkin – Tacky glue works best), pipe cleaners, tape measure, scissors, plastic fork
Process: Blow up the balloon about half full. Pour glue into a bowl. Tie one piece of yarn to the end of the balloon and use it to hang the balloon from a kitchen cabinet or other location so that it’s easier to manage. Dip a piece of yard in the bowl of glue and swirl it around with the fork. Then holding the end of the yarn with your fingers, run it through the fork tines to remove extra glue. Press it against the balloon, winding it around. Repeat until much of the balloon is covered. Allow it to dry for 24 hours. When you’re ready to pop the balloon, press your fingers down under the yarn all around to detach the balloon. Make a very small hole near the balloon knot to let the air leak out slowly. Pull the deflated balloon out. Add pipe cleaner stems and vines. Create spirals by wrapping the pipe cleaners around your finger.
Do you have a favorite craft that’s not listed here? Share it with us in the comments.
This article is furnished by California Casualty, providing auto and home insurance to educators, law enforcement officers, firefighters, and nurses. Get a quote at 1.866.704.8614 or www.calcas.com.

by California Casualty | Auto Insurance Info, Helpful Tips |
You’re ready for a new set of wheels. Time to head to the dealership, test drive some models, and negotiate like a pro. Or you could boot up your laptop and start clicking from the comfort of your couch.
Online car shopping is a game-changer. You can shop anytime, anywhere, with access to a multitude of vehicles without the sales pressure. But is it right for you?
What it Means to Buy a Car Online
Many of us shop online for everything from clothes to groceries. A car, of course, is a larger purchase. It costs much more and so there is more at stake. You might be comfortable researching a car online, and even calculating loan payments. But there’s a comfort level to continuing the car buying process in the dealer showroom. However, more and more people are taking the plunge into online car shopping. They’re buying online from start to finish.
Pros & Cons
It’s ultra-convenient to shop for a car online.
- You don’t have to go to a dealership during business hours. You can shop on your schedule from any place.
- There is likely more inventory available online than at your local dealership.
- You can get pre-approved for a loan before you even start shopping.
- There is less sales pressure and no haggling. Prices are clearly posted, and what you pay ultimately depends on the base price, any trade-in, and your credit rating.
- You can fill out paperwork online at your leisure.
- Many online marketplaces have a short return window, so if the car wasn’t what you expected, you can return it.
- You can get the car delivered to your driveway.
Of course, there are some downsides.
- You can’t physically see the car or test drive it before you buy it. (Some services are offering test drives, however, and you can always test drive at a dealership before buying online.)
- You can’t negotiate the price.
- Online purchases often come with extra fees. It can cost $1,000 or more to deliver a car.
- Your financing choices may be limited. The seller may restrict you to a single lender.
- You cannot get your car the same day, as you would at a dealer.
- You can potentially get more incentives onsite at a dealer, such as lease specials or cash rebates.
Online Sellers
There are a variety of online vehicle sellers. Some new car dealers offer the full online experience, including car delivery. There are also services that sell used vehicles in online marketplaces. Still others connect buyers with private sellers. Each site has different terms and warranties, so make sure you understand them before you buy. Here are some of the most popular:
- Carvana offers used cars, auto loan prequalification, and a 7-day return window. Car delivery is not available everywhere and may include a shipping fee.
- CarMax also sells used cars. They can deliver a car for test driving (fees may apply). CarMax offers financing and has a 7-day return window.
- Vroom sells used cars with a 7-day or 250-mile return window. Vroom also offers access to online financing.
You may buy from private sellers on sites such as these:
- eBay Motors connects you with private sellers. The site offers free vehicle purchase protection that can cover you if there are problems with the sale.
- CarGurus also connects you with private sellers and offers support for paperwork including title transfers. They offer financing through their partner, Auto Pay.
Red flags
- Be careful with sellers that are not vetted by a third party. While you can find cars on Craigslist and Facebook Marketplace, it is more difficult to know if it’s a scam.
- Avoid bait-and-switch scenarios, where the car you want is suddenly not available, but another similar more expensive model is. If a seller does that, chances are there will be problems later with other items such as warranties.
- Beware of fraudulent websites. Make sure the site and the seller are legitimate. If the price is too good to be true, it probably is.
- Do not make a deal without a written agreement. Remember to read the fine print.
Ready to buy?
- Know what you can afford for a monthly payment, and then work backwards to determine how much you can finance.
- Know your credit score. Your credit rating is used to determine your interest rate.
- Pre-qualify for a loan. You can get a loan from a bank or credit union, or from the dealership or online marketplace where you will get your vehicle.
- Determine the type of car that fits your needs. Do you need a large SUV for off-roading and camping with the family? Perhaps you need the right car for your teen driver? Browse the online inventory to find the car that meets your budget and needs.
- Comparison shop across at least three websites to determine the best options. Consult Consumer Reports, Edmunds, and Kelley Blue Book to ensure that your car is priced at current market value.
- If you’re able to arrange a test drive, do so. You want to make sure that you can fit comfortably in the car, and you like how it handles. If all checks out, then go ahead with the purchase.
A car is one of your greatest investments. For added peace of mind, protect it with the right insurance.
This article is furnished by California Casualty, providing auto and home insurance to educators, law enforcement officers, firefighters, and nurses. Get a quote at 1.866.704.8614 or www.calcas.com.

by California Casualty | Auto Insurance Info, Helpful Tips |
Your car is more than just a mode of transportation; it’s a companion on life’s journey. But like any good friend, it needs a little care to keep it going strong. Whether you’re a road trip enthusiast or someone who relies on their wheels for daily commutes, extending the life of your vehicle makes sense. So, buckle up as we explore some simple yet effective ways to make your car last longer.
Ditch the heavy keychain.
When you put the key into the ignition, a heavy keychain can drag it down. That puts pressure on the tumblers inside the ignition. Over time, that can cause the ignition switch to fail. If your car keys share space with lots of other keys, consider a car-only keychain.
Watch for this warning sign: your key sticking in the ignition when you turn on the car. Get the ignition replaced before it leaves you stranded.
Use your parking brake.
The parking brake has an important job: to keep your car from rolling when parked. However, you don’t just need a parking brake on an incline; you need it whenever and wherever you park. Parking brakes help take the stress off the transmission. In addition, if not used, your parking brake can corrode over time. This can lead to expensive repairs. So, engage that parking brake whenever you park.
Don’t idle in the driveway.
It’s not a good idea to idle your car for long periods of time. Not only does it waste gas, but it can also do some damage. During idling, the oil pressure may not send oil to every part of the engine. The engine also won’t operate at its peak temperature. That means there could be incomplete fuel combustion, soot deposits on cylinder walls, contaminated oil, and damaged components.
Be mindful of moisture.
Moisture can do a lot of damage to your vehicle. Water that seeps into your car’s body panels can cause rust. Extreme heat and humidity can reduce your car’s battery life. Moisture inside your car can also lead to mold and mildew. Finally, salt water can damage your car’s paint. Don’t drive through water, which can expose your undercarriage to unnecessary moisture. Clean corroded battery terminals if you live in humid areas. Make sure to keep your car dry and as cool as possible during the hot, humid months to avoid expensive future repairs.
Change the oil and the air filter.
If your oil is dirty, it can affect the components in your engine. Without proper oil changes, your engine could seize up, which will cost you more than nearly any other car repair. Most manufacturers suggest changing the oil every 5,000-7,500 miles. Newer vehicles will alert you when you need an oil change. You also need to change the air filter, although not as often as the oil. The air filter removes dirt and debris, which also can harm your engine. Change your air filter every 15,000 to 20,000 miles.
Help your tires wear evenly.
Tires naturally wear down over time. Keep them working well by inflating them at the recommended pressure. That will help prevent blowouts. Tires also wear unevenly; that’s why it’s important to rotate them every 6 months or 6,000-8,000 miles. Otherwise, your tires will wear out faster and have to be replaced.
Wash your car.
Cars get dirty, and that dirt buildup is more than cosmetic. It can slowly destroy your paint, which can lead to rust. That’s why washing your car is important. How often depends on the weather, whether you park outside, and if your car is exposed to pollen, bugs, sap from trees, salt on winter roads and more. Wash biweekly or as needed and wax every month or so.
Prevent pests.
If you leave food and wrappers in your car, you could attract mice and bugs. They in turn can do damage that requires repairs. Clean up all food items, wrappers, and containers. Block broken seals or holes where they can get in. If you suspect pests, have your upholstery professionally cleaned.
Protect the interior.
Leather can become dry and brittle after years of exposure to the sun. Apply a conditioning solution routinely to help prevent cracks and keep seats in good condition. Use a windshield shade to help slow upholstery fading.
Don’t fill your tank if you see the tanker.
Gasoline tankers can stir up sediment as they refuel the tanks at gas stations. That could cause you to get dirty gasoline, which can clog your fuel filter or fuel injector. Avoid filling up at a station when it is being filled by a tanker. You’ll avoid a potential expensive repair.
Avoid bad driving habits.
Certain driving habits can reduce the lifespan of your car. Don’t brake hard all the time, it can lead to deterioration of your brake pads. Don’t turn at high speeds; that’s hard on your tires. Don’t strongly accelerate when the engine is cold. Don’t rev your engine when your car isn’t properly warmed up. Avoid potholes and running over curbs which can harm your tires. Good driving habits can help reduce the need for expensive repairs.
Pay attention to maintenance lights.
Don’t skip routine maintenance. It may cost you now but save you money in the long run.
If you have a newer car, it will let you know when it needs service. When the maintenance light is on, schedule your appointment. However, you can look out for things, too. If you hear an unusual noise, take your car in. Watch for puddles under your car. It’s better to get ahead of potential problems than to pay for them as they become big issues.
Keep your car protected.
You may do everything right but accidents still happen, including some that could total your car. Your car is one of your greatest investments. Protect it with the right auto insurance for added peace of mind.
Check out our blog on Pro Tips to Keeping Your New Car Ageless for more tips.
This article is furnished by California Casualty, providing auto and home insurance to educators, law enforcement officers, firefighters, and nurses. Get a quote at 1.866.704.8614 or www.calcas.com.
by California Casualty | Health, Helpful Tips |
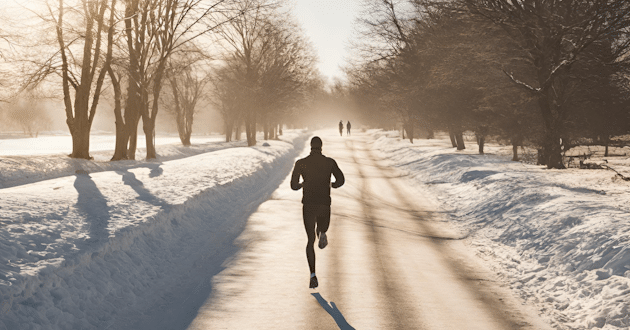
It’s easy to exercise in the spring and fall when the weather beckons you to come outside. It may take a bit more inspiration in the winter, but it’s worth it.
Getting outside in cold weather connects you with nature, lifts your mood, and gives you a beneficial dose of sunlight/vitamin D. It also boosts your immunity during cold and flu season. With no heat and humidity, you might even be inspired to work out longer.
However, there is a way to do it safely. Follow these winter fitness tips for the basics of exercising in cold weather.
Choose the right fabrics.
When you’re wet, you lose body heat and that makes you feel cold. The colder you are, the less likely you’ll want to work out. In addition, cold can put you at risk for frostbite or hypothermia. Avoid active wear made from cotton, which holds in moisture from sweat and rain/snow. Instead choose synthetic fibers like polyester, nylon, and polypropylene. They dry quickly and wick away moisture.
Layer your clothes.
Use layers to trap warm air next to your body. Start with a thin base layer of synthetic fabric, which will keep sweat away from your skin. Then add a middle layer such as a fleece. Your outer layer should be either a lightweight nylon windbreaker or if it’s cold, a heavyweight waterproof jacket. As you exercise and get warmer, remove a layer, and tie it around your waist. That will help you from getting hot and sweaty which can lead to feeling damp and cold.
Pro Tip: Wear bright colors. Visibility is more limited in winter from rain, snow, fog, or dark skies. Be seen by the people and vehicles in your immediate area.
Protect your hands and feet.
In cold weather, blood is circulated to the core of your body, leaving less heat funneled to your extremities – your fingers, ears, nose, and toes. That means these areas are less warm. To counter that effect, wear a hat or headband, gloves or mittens, and thick socks. Choose materials like wool or synthetic as cotton could get wet. If your toes get cold, consider your shoes. Running shoes are designed to let heat escape. You can buy shoe covers at skiing and hiking stores. There also are specialty running sneakers designed for winter.
Protect your skin.
Winter isn’t just cold; it’s dry, and that can affect your skin. Apply moisturizer or lotion regularly. When you’re going to be outdoors, also apply sunscreen. SPF rays can damage your skin even when it’s cloudy. Snow reflects up to 80 percent of UV rays, so you get doubly exposed. UV rays also increase with elevation. Every 1,000 meters (3,281 ft.) in altitude, UV radiation increases by 10 percent.
Make sure you have traction.
When you’re exercising on icy surfaces, it’s easy to slip. That can lead to injury. Make sure that you have footwear with good traction and stay on plowed surfaces or salted ones. Take care to remove ice from your own property. If you will be primarily on the ice and snow, consider adding snow or ice spikes to your footwear. Just note that while those spikes help on icy surfaces, they can affect your balance on dry ones.
Take the time to warm up.
It’s especially important to warm up for an exercise routine in cold weather. You want to
Increase your blood flow and temperature so you’re not at risk for sprains and strains. A good analogy is what happens when you stretch a cold rubber band. It can snap more easily than a warm one. That’s what could happen to your muscles. For your warm-up, choose low intensity moves that are like those in your workout. Lunges, squats, and arm swings, for example, are good for runners.
Pro Tip: Head into the wind at the beginning of your workout. When you’re on your way back and feeling sweaty, you won’t have to fight the wind chill as much. That will help keep you warmer.
Pay attention to your breathing.
Cold weather causes your airway passages to narrow. That’s why it can hurt to breathe when you’re exercising in cold weather. Breathing through your nose can help but isn’t always possible when you’re moving intensely. Try wrapping a scarf or some thin fabric around your mouth. It will help keep in the humidity.
Hydrate.
You may not feel as thirsty during cold weather workouts. However, you’re still losing fluids. Dehydration carries risks, including headaches and a drop in energy. Sip water while you’re exercising. If you’re going to be exercising for more than 90 minutes, choose a sports drink like Gatorade.
Cool down. Change clothes.
You can get chilled fast after a workout. Take the time to cool down, which helps reduce later muscle soreness. It also helps your heart transition from an exercise pace to a normal rhythm. Then get out of your damp clothes. Take a warm shower and change into clean, dry clothes.
Avoid severe weather.
While cold weather workouts are beneficial, there’s a limit to when you should exercise outside. Avoid the extreme cold. Don’t exercise outdoors during winter storms. Prolonged exposure to the cold can cause frostbite and hypothermia. The cold also can put a strain on your heart. If you have a chronic health condition such as asthma or a heart problem, talk to your doctor about whether cold weather exercise is right for you.
Know the signs of hypothermia.
Finally, be aware of the signs of hypothermia. That’s when your body temperature drops too low and affects other systems in your body. If you experience any of these signs, get medical help right away.
- Shivering
- Lack of coordination
- Slow reactions
- Slurred speech
- Mental confusion
- Exhaustion or sleepiness
This article is furnished by California Casualty, providing auto and home insurance to educators, law enforcement officers, firefighters, and nurses. Get a quote at 1.866.704.8614 or www.calcas.com.
by California Casualty | Helpful Tips |
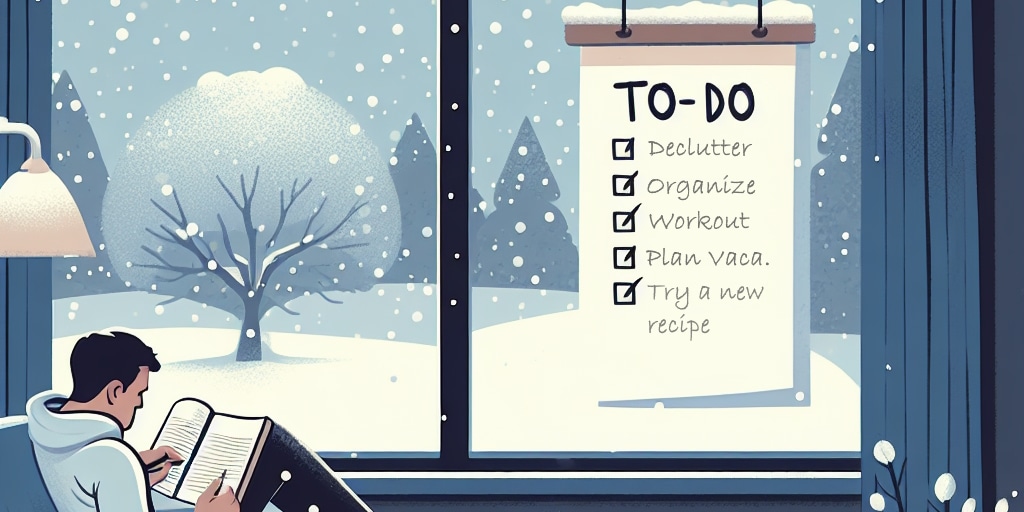
It may be tempting to hide under the covers on the next cold winter day and binge movies. But it’s also a great time to get things done at home. In fact, it’s easier to be productive when you don’t want to be outside. Plus, checking off your “to do” list feels great. Follow this guide for some ideas of productive things that you can do at home on cold winter days.
- Declutter
It’s time to pick your favorite waffle iron and set the rest free. Go through your home and collect items to donate. Include gently used bedding, warm clothing, shoes, books, and even canned goods for the food bank. Clean up and give back at the same time. Check out our guide on Easy Ways to Declutter Your Home for more tips.
- Throw things out.
It goes without saying but you probably have single socks that you’re hoping will eventually find a mate. Now is the time to part with them, too. Go ahead and throw out your extra socks, your worn-out underwear, half-used candles, orphaned Tupperware (bottoms without lids or vice versa), expired food, and half-empty, fully expired beauty products.
- Organize
When is the last time you took a good look at your closet? Or your kitchen cabinets? Now is a great time to go through them. Start with one space. Pull out everything and assess whether you use these items or not. For your closet, put together outfits for various occasions to determine what you will wear and what you probably won’t. For closets, cabinets, and other storage areas, it’s always helpful to put similar things together so that they’re easy to find for future use.
- Listen to a book.
You can curl up on the couch and read the latest bestseller—or you can listen to the audio version while you’re cleaning, organizing, and decluttering. Not only will it provide the perfect soundtrack, but it will also engage your brain and you will feel extra productive.
- Workout
Getting up and moving is just what you need on a cold winter’s day. Luckily you can do that right inside. Find an inspirational YouTube workout video or turn on your favorite tunes and have a private dance party. If you have a jump rope or hula hoop, channel your inner child and have some fun!
- Try a new recipe.
Cold winter days are perfect times to bake cookies, make soup, make pet treats, and enjoy the time you might not otherwise have to try out new recipes. You can also take some time to cook and freeze meals so you’re ready for the week ahead. Tools like Recipe Radar help you find recipes based on ingredients that you already have on hand.
- Do a craft project.
Indulge your creative side with an arts and crafts project. It’s a great way to relax. Choose something practical, like making birthday cards or holiday cards to have in stock for the future. Or try something whimsical such as a sock bunny. The Internet has lots of ideas; do a search based on your interests and the supplies at hand.
- Explore a hobby; learn a skill.
Maybe you’ve always wanted to learn a second language or brush up on your knife skills in the kitchen. There’s so much free content online that it’s easy to find videos about your areas of interest. Take a makeup tutorial. Try meditation. Not sure where to start? Sites like Skillshare offer a free month of classes on a variety of topics.
- Enjoy a spa day.
You don’t get a chance to pamper yourself nearly enough. Make time for a long, hot bath. Do a beauty treatment. Give yourself a manicure and pedicure. Don’t forget to hydrate. Make yourself a glass of cucumber water for that extra spa touch.
- Organize your photos.
If you’re like most people, you have albums of photos – on your phone, in print, or both. You just don’t always have the time to cull through them. Organizing your photos is the perfect indoor activity for a cold winter’s day. Sort your digital photos into albums so you can more easily find them. Save them to the cloud to free up space on your phone. Delete any photos that you don’t want anymore. For printed photos, follow a similar process. Decide which ones you will keep and in what format (e.g. scan to digital, place in a photo album). Consider giving away or throwing out photos to keep your collection manageable.
- Catch up with friends or family.
If you haven’t had a chance to chat with friends or family in a while, give them a call. Chances are that they’re stuck inside too and would love to hear from you. Not only can you catch up, but you can also plan your next get together. Don’t feel like talking? Write a letter. Everyone loves a handwritten note.
- Plan your summer vacation.
What better time than a cold winter’s day to dream about summer? Do some research and plan your next vacation. You can often find a better selection of vacation rentals by planning so far in advance. You may find money-saving deals on flights, accommodations, rental cars, and activities. Plus, you’ll be able to set a budget with ample time to save up for your trip.
This article is furnished by California Casualty, providing auto and home insurance to educators, law enforcement officers, firefighters, and nurses. Get a quote at 1.866.704.8614 or www.calcas.com.
