by California Casualty | Auto Insurance Info, Helpful Tips, Safety, Travel |
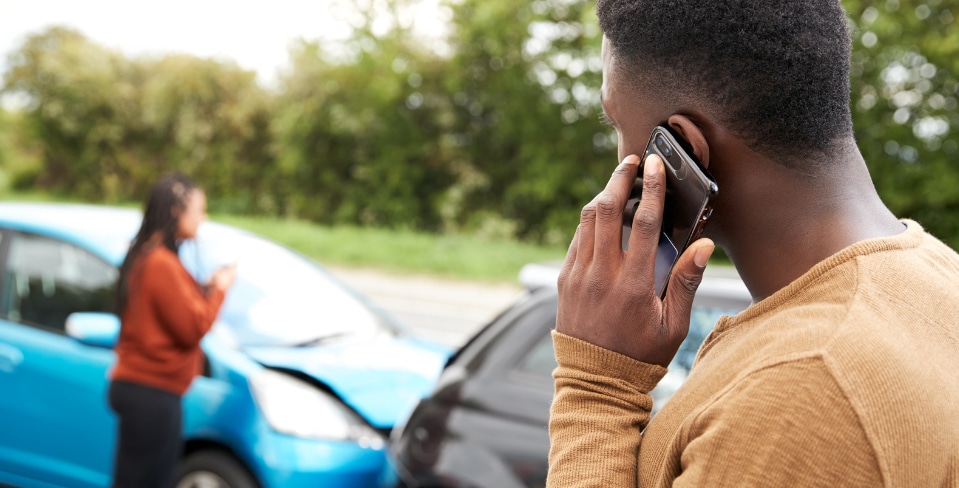
The car ahead suddenly collides with another vehicle, forcing you to brake hard to avoid the crash. Your heart races, adrenaline kicks in, and as the dust settles, you realize you’re not just a passerby—you’re a witness. But what happens next? Knowing your role in that critical moment can make all the difference.
While it’s not a legal requirement to stop at the scene of an accident, many people do. As a witness, you’re often the first to arrive and can play a crucial role in calling for help. You may also provide key information that helps clarify what happened and determine liability. If you witness an accident, here are the steps to follow.
Find a place on the side of the road near the accident that is about 100 feet away. Stay
away from broken glass, leaked fuel, downed power lines, and other hazards. You don’t want to put yourself or your car in danger. Once you’ve parked, shut off your car and put on your flashers.
2. Call 9-1-1.
Don’t assume someone else is doing it—unless you see and hear them doing it. Notify the police about the accident, which can be more serious than it looks. Be prepared to give your location. Look for the nearest cross street, a mile marker, or nearest off ramp. The operator will ask how many people need help, and if they are conscious, breathing, or bleeding. Now is the time to step out of your car to check.
3. Exit safely if you can.
Only leave your vehicle if it is safe to do so. Be careful of cars whizzing by and of debris on the road, including broken glass and twisted metal. Be aware of smoke, odd smells or fluids that could signal a potential fire danger. Your safety is your priority.
4. Offer comfort and, if needed, first aid.
Approach the vehicles with the accident victims. Ask if they are okay. Let them know that first responders are on their way. Importantly, do not move an injured individual unless there is an immediate danger of fire. You can bind wounds and stanch bleeding; ask the 9-1-1 operator for direction if you’re unsure.
5. Stabilize the scene.
Make sure all vehicles are in park and turned off. If cars are still on, and fuel is leaking, that could cause a fire. If you need to, and if you can, move the damaged car off the road. Otherwise, set up warning flares (only if there are no fuel leaks) or traffic triangles. You can keep these in your trunk for just this purpose.
6. Document the accident.
The victims may not be able to take photos of the crash. Go ahead and do so and add notes so you will remember what happened. Get contact information so you can get the pictures to the people involved in the accident. Pay special attention if it was a hit and run. Any details you remember could help police track down that car.
7. Talk to the police.
When the police arrive on the scene, they will want to talk with you. Simply share the facts. Don’t speculate on fault if you are unsure who caused the accident. Do not feel pressured to answer every question and do not guess at the answers. “I’m not sure” and “I don’t know” are valid responses. It’s possible that you may be called to testify in a court of law. Don’t ignore a subpoena if you get one. That is against the law, and you could be fined or go to jail.
Some final thoughts…
- Witnessing any kind of accident is upsetting. Seeing a fatal accident can be traumatic. Make sure to talk to your pastor, doctor or a therapist to help process the experience.
- Did you see the accident occur or did you come by after it happened? If you didn’t see it, then you’re not a witness. You can still stop and help but let the police know that you do not have any information on the crash.
- Finally, make sure your own vehicle is protected with the right insurance. This will help add peace of mind if you should get in an accident.
This article is furnished by California Casualty, providing auto and home insurance to educators, law enforcement officers, firefighters, and nurses. Get a quote at 1.866.704.8614 or www.calcas.com.
by California Casualty | Auto Insurance Info, Helpful Tips, Safety, Travel |
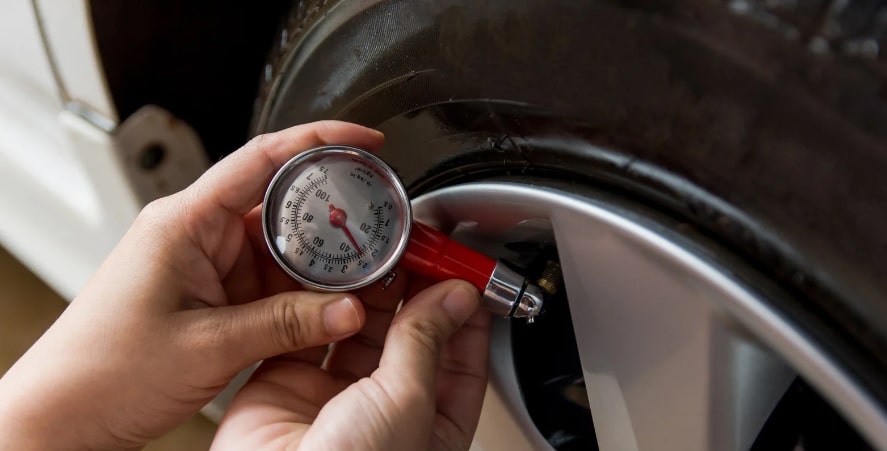
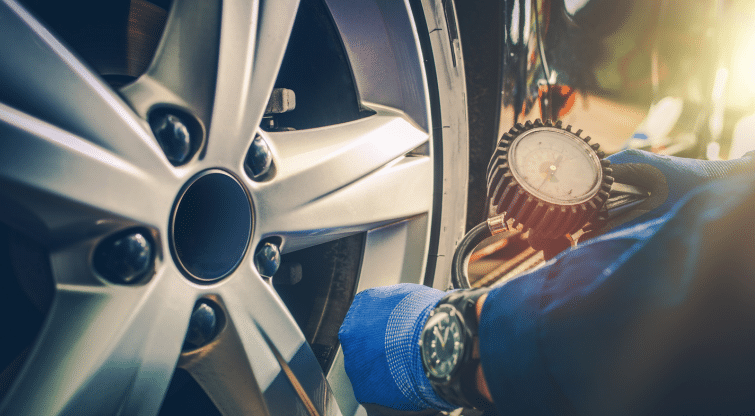
There are four things standing between you and the pavement when you drive—your tires. Keeping them in good shape is key to staying safe on the road. Whether you’re gearing up for a long drive or just your daily commute, knowing how to check your tire pressure is a small step that can make a big difference.
That’s because the right tire pressure can have some far-reaching impacts:
- A smoother ride and better handling
- Better fuel efficiency
- Improved stopping distance
- A longer lifespan for your tires
What’s the right pressure?
If you drive a passenger car, your tire pressure is likely between 32 to 35 pounds per square inch (psi). SUVs and trucks require a higher psi. Here’s how to find the exact number:
- Open your driver’s side door.
- Look along the doorjamb for a sticker. It should display the pressure (including whether you need specific pressures for front and rear tires and your spare).
- You can also find the recommended pressure in your owner’s manual.
- Importantly, do not go by the number that is on the sidewall of your tires. That is the maximum pressure allowed.
Dangers of Overinflating or Underinflating Tires
You want the right amount of pressure in your tires, not too much and not too little.
- Overinflating causes the center of the tire’s tread to wear faster. It also decreases traction and your tire’s ability to absorb impacts.
- Underinflating causes the outer edges to wear faster. Your car may pull or drift to the side.
- Both overinflation and underinflation cause uneven wear, which reduces your tires’ lifespan. At the very least, it will require you to purchase a new set sooner than normal; at the worst, it could cause a
Start with the Right Tools
Now that you know the basics about tire pressure, you’ll want to gather the right tools. You need a tire pressure gauge to start. While you could use one built into an air machine at a gas station, those aren’t always the most accurate. It’s always good to have your own, which you can use at home and anywhere. You can purchase a gauge at an auto supply or hardware store. You will likely have a choice of three kinds:
- Stick gauge: Usually the most inexpensive option, this type of gauge resembles a pen. It has a small bar that pushes out to show the reading.
- Dial gauge: This type of gauge has a round dial that looks like a clock face or compass. The needle will stop at the number to show the reading.
- Digital gauge: This gauge has an LCD display showing the pressure in numbers. However, it needs batteries to operate and when they run out, you will need to replace them.
Optional but handy:
You can buy a portable air compressor to allow you to fill your tires anywhere and not just at a gas station’s air compressor kiosk. These vary from manual hand-operated or foot pumps to those you can plug into your car’s battery or a 12V power port. You will pay more for one with a built-in gauge, which can be helpful. If you are considering a purchase, look for one where you can put in the proper pressure and the unit will shut off when it reaches that number.
How to Check Pressure
You should check your tires’ pressure monthly or whenever there are changes in weather that could affect them.
- Start with a “cold” tire which is when a vehicle has been parked for 3 hours or more, or one that has been driven less than a mile at moderate speed. Tires heat up when they’re driven and that will increase the air pressure, and you won’t get an accurate reading.
- Remove the screw-off cap on your tire’s air valve. Put it someplace safe where you will not lose it.
- Place your tire gauge over the valve and push it into the stem. If you hear air escaping, continue to press it in until that stops.
- Check the reading on your tire gauge. Note that some gauges need to be in the tire’s valve for the reading; others may be removed.
- If the reading matches the recommended pressure, screw the cap back on. If not, take the next steps to add air or take it out.
- Repeat for each tire.
- If you can access your spare, do it for that one as well. It will be helpful to have a spare ready to go should you need to change a tire.
How to Add Air
You can find air compressors at most gas stations, and they are often free or a minimal charge.
- Park so the tire in need is closest to the machine so the cord will reach.
- Read the directions on the compressor before paying (if there is a cost). Once you pay, you should hear the machine turn on.
- Remove the screw-on cap on the tire valve. Put it somewhere safe.
- Press the hose nozzle on the stem of the valve. You should see the tire inflating and the numbers on the air machine going up.
- If you hear a hissing noise, you’re letting air out. Push the nozzle in to attach it properly.
- Check the pressure with your gauge.
- Repeat until you have the right number. Replace the cap.
If you had to drive a few miles to get to a gas station with air, your tires will be hotter than normal. Remember your base “cold tire” reading and calculate the difference between that and the ideal pressure. Add that amount. (For example, your tires needed to be 33 psi but were only at 31 psi in your driveway, you will want to add 2 psi.) Then, check again later after the tires have been sitting for 3 hours to make sure it’s the right amount.
How to Remove Air
You don’t need an air machine to let air out. You just need a flathead screwdriver.
- Take the cap off the valve.
- Press the end of the screwdriver into the center of the valve stem.
- Hold it for a few seconds. Listen for air escaping.
- Check the pressure and repeat as necessary.
Pressure Changes by Season
As the weather changes, you will notice corresponding changes in your tire pressure. That’s because air expands as it gets hotter, which raises the pressure. It contracts as it gets colder, which lowers it. In cold weather, tire pressure can decrease about 1 psi for every 10-degree drop in temperature. That’s why it’s important to check your tire pressure when the weather changes, in extreme heat and cold, and adjust as needed.
Note that your car’s tire pressure light activates when there’s a temperature change as well as a small leak. The light goes on when the pressure is about 25% below the recommended level.
A Word About Air vs. Nitrogen
When it comes to keeping your tires inflated, you have a choice: air or nitrogen. If you have nitrogen in your tires, you will need to revisit a nitrogen provider to fill your tires. You will not be able to fill them at air kiosks at a gas station.
Keeping the right tire pressure will help extend the life of your tires. Keeping your vehicle well maintained will help extend its life. Finally, protect it with the right insurance coverage. This will give you peace of mind for your journeys ahead. Safe travels.
This article is furnished by California Casualty, providing auto and home insurance to educators, law enforcement officers, firefighters, and nurses. Get a quote at 1.866.704.8614 or www.calcas.com.
by California Casualty | Auto Insurance Info, Helpful Tips, Safety, Travel |
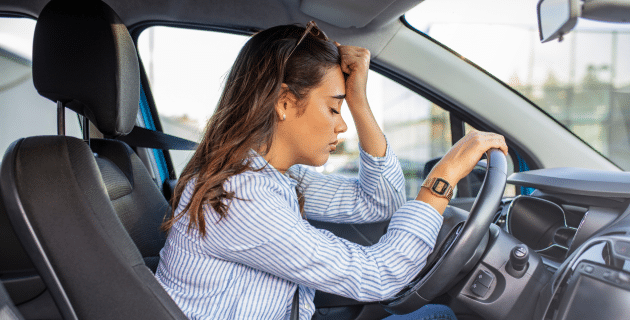
From traffic jams to reckless drivers, it can be stressful on the road. When you’re also juggling life’s daily demands, the stresses can leave you frazzled behind the wheel. Stressed driving not only affects your personal wellbeing, but it poses risks to road safety. Here’s how to bring back a sense of calm and control — and crush your daily commute.
How Stress Affects the Brain
Stress is the body’s reaction to potential threats. It affects your frontal lobe, where you set goals, make plans, and keep your emotions in control. It also impacts the hippocampus, which stores your memories. Importantly, stress causes a chemical reaction known as “fight or flight.” When you’re stuck in traffic or upset about being cut off, there’s often nowhere to go. That’s when your emotions can turn to road rage.
Driving While Stressed
Stress can cause mental and physical symptoms that affect not only how you feel but how you drive. Recognizing these symptoms can help you take steps to manage your stress.
Physical Signs of Stress
You may notice your heart beating faster or your palms getting sweaty. Those are common symptoms of stress. You also may feel muscle tension in your neck, shoulders and back. Biting nails, tapping fingers, and other repetitive motions also are indicators of stress. You may even get tension headaches or feel unusually tired after a short drive.
Distracted Driving
Stress often leaves you distracted. When you’re worrying about traffic, other drivers, or being late, you’re not focusing your attention fully on the road. Your concentration is reduced. You could have difficulty with decision-making and slower reaction times as a result. If you’re sitting in traffic and you pick up your cell phone to complain about the stress, that adds another level of distraction.
Irritability
When you are stressed, you may feel easily annoyed or angered by minor inconveniences. You start to engage in aggressive driving behaviors such as tailgating, speeding or frequent lane changes. This can escalate to emotions that are hard to control.
Tips to Reduce Your Stress While Driving
Stress may be unavoidable, but you can take steps that help you manage it. Follow these tips to reduce your stress behind the wheel.
- Plan ahead. Know the route you’re taking and plan your journey in advance. Be aware of alternate routes should you encounter traffic or road closures. Bringing the kids along? Pack books, snacks, and games to keep them entertained so that they do not add stress to your trip.
- Leave early. Allowing extra time for your journey can help you better handle the unexpected, such as traffic, weather, or detours. When you leave early, you are less likely to worry about being late.
- Set your playlist. Research shows that listening to music can enhance immune system function and lower levels of the stress hormone cortisol. Create a mindful playlist and avoid news or any content that might stress you out. Sing along to your favorite tunes for a mood boost.
- Adjust your posture. Improving your posture can increase oxygen flow, decrease tension in the neck and shoulders, and reduce physical discomfort. Adjust your seat and mirrors to maintain a comfortable and relaxed driving position.
- Breathe. Inhaling through your nose and into your belly is a proven way to reduce stress. Deep breathing sends a calming message to your brain, helping you relax. If you’re feeling stressed, try this breathing exercise: breathe in for a count of 8, contract one muscle group (like your neck and shoulders), then exhale and relax. Repeat for muscle groups in your neck, shoulders, and back as needed.
- Change your perspective. Managing your thoughts can help control your emotions. Instead of getting angry at a driver who cuts you off, think, “I’m glad no one got hurt.” Don’t let a stranger’s actions affect your mood.
- Pull over if needed. If stress becomes overwhelming while driving, don’t risk it. Find a safe location to pull over and take a break until you feel calmer.
- Stay fueled. Keep your car filled with gas to avoid the added stress of running low. When planning your trip, make sure you know when you plan to fuel up.
- Maintain and insure your vehicle. Make sure your vehicle is well maintained so it is less likely to break down and leave you stranded. In addition, protect your vehicle with the right insurance coverage. This will give you peace of mind for your journeys ahead. Safe travels.
This article is furnished by California Casualty, providing auto and home insurance to education professionals, law enforcement officers, firefighters, and nurses. Get a quote at 1.866.704.8614 or www.calcas.com.
by California Casualty | Helpful Tips, Safety, Travel |
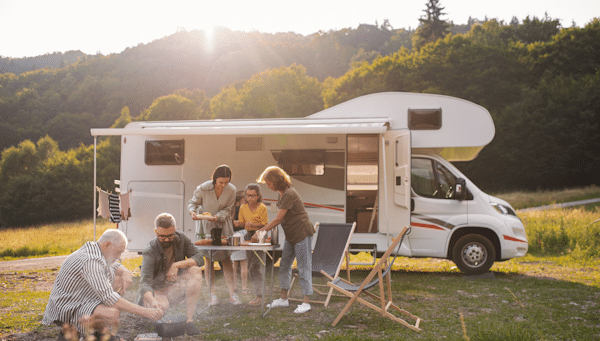
You’re ready to hit the road in your RV. Whether you’re an experienced RVer or a newcomer to the lifestyle, protecting your vehicle from fire hazards can mean the difference between a dream vacation and a disaster.
As your home on wheels, your RV presents greater fire dangers than a standard vehicle. With features like kitchens and curtains, there are more opportunities for things to go up in flames. There also are electrical and mechanical components that can present a fire risk if not properly maintained. Here’s what you need to know to keep your family safe.
Electrical Systems
RVs use both AC (alternating current) and DC (direct current) power. AC operates your appliances and outlets while DC powers your engine and battery. Solar panels also are gaining popularity and can be configured to provide either AC or DC power.
- Bumps and vibrations can loosen connections. Check your electrical systems regularly to make sure connections are secure.
- Check for frayed wires and damaged outlets. Never use wires or outlets that are compromised. Replace as needed.
- If the circuit breaker shuts off power to a certain circuit, it’s probably overloaded. Other signs include lights that flicker or buzzing noises from outlets and switches. Consult a professional to ensure that you don’t have an overloaded circuit.
- While power strips are generally safe for small wattage appliances (charging cell phones or table lamps), they may not do well with high wattage. They also cannot handle continuous loads required by space heaters. Power strips can overheat and ignite combustible material in the walls.
- Don’t cover electric cords with rugs or carpets.
- Only use extension cords rated for outdoor use. If left out overnight, cords can get wet.
- If you have an electrically charged fire, don’t use water to extinguish it. Use a fire extinguisher approved for type C fires.
Propane Appliances
Propane commonly powers stoves, refrigerators and water heaters in your RV. It’s an efficient fuel that also can be dangerous if mishandled. Propane leaks can cause fires and explosions.
- Regularly inspect your propane tanks and lines for leaks or any issues. Do not use tanks and lines that have been damaged.
- Always store propane tanks in an upright position in a well-ventilated area away from a heat source.
- Turn off propane-powered appliances when not in use.
- Make sure propane-powered appliances are off when you are in motion. Gasoline vapor and an open flame are not a good combination. Also, many propane appliances need to be level and roads are not.
- Get your RV LP-certified. A licensed liquid propane technician can inspect and test your propane system.
- Consider switching to an induction cooktop and electric fridge to reduce the use of propane.
Cooking Accidents
The small space and low ceilings in most RVs make it more dangerous to cook there than at home. Most RVs use propane stove tops, which can be an added risk.
- Properly vent fuel-burning appliances. Never operate them in an enclosed space such as a bathroom, bedroom or storage area. Turn on the exhaust fan, open a window, or cook outside.
- Keep flammable materials away from the cooking area.
- Never leave cooking appliances unattended while preparing meals.
- Turn off appliances before leaving the RV.
- Check and maintain your appliances regularly. Keep them clean; make sure there are no loose or chewed wires.
- Do not use cooking appliances to heat your RV. That could create a dangerous situation where there’s insufficient oxygen in a small space.
Pro Tip: For curtains, choose natural fabrics (cotton, hemp) which are less flammable than polyester.
Engine & Mechanical
Your RV is not just a home; it’s also a vehicle. That means it’s equally important to keep the engine and mechanical systems well maintained.
- Check brakes and bearings. Improperly adjusted trailer brakes can overheat. Wheel bearings also can overheat if not properly greased.
- Make sure there are no leaks. Place a piece of cardboard under the RVs engine for a few nights to see if you have a leak. Repair any engine or transmission leak as soon as possible. Transmission fluid is highly flammable.
- Check the battery. Most RVs use lead acid batteries which must be ventilated, or they can give off dangerous gasses. Make sure the battery is open to the outside by vent or hose.
- Trailer chains that are too long can drag on the road and create sparks. Adjust them as needed. Just one spark can cause a fire.
- Improperly inflated tires can overheat and cause a fire. It also can cause the tire to fail.
- Exhaust systems can become very hot. If they have contact with flammable dry grass, it could ignite.
Safety Gear
Outfit your RV with the right safety gear so you’re alerted to any potential emergency, and you can act quickly.
- Place smoke alarms and carbon monoxide detectors in every sleeping area.
- Check the alarms and detectors, and switch batteries every spring and fall.
- Fire extinguishers should be in easy to reach areas, for example near the door. Get one that is rated type A (for wood, plastics, cloth) and type B (for liquid fuel like grease, oil, stove and motor fuel) and type C (for electric fires).
- Test your emergency exits including windows that can be used as an escape route. Make sure you have at least two ways out and nothing is blocking those paths.
If you smell gas:
- Extinguish all open flames pilot lights, lamps.
- Shut off the gas supply.
- Do not turn on an electrical switch as that can create a spark that causes an explosion.
- Remember to evacuate first. Call the fire department, and then try to put out the fire.
If you’re renting an RV:
Remember to do your due diligence to make sure your RV is safe.
- Choose a newer model. Older models of RVs have fewer and less advanced safety measures. Older engines and equipment also are more likely to fail.
- Ask the last time it was inspected.
- Look at the fire extinguisher expiration date.
- Look at the indication lights on the propane system and carbon monoxide system to see that they’re working properly.
- Check smoke alarms and carbon monoxide detectors.
- If you suspect an issue, address it before you sign the paperwork.
Finally, if you’re driving your own RV, make sure it is fully protected by insurance for your own peace of mind. Safe travels!
This article is furnished by California Casualty, providing auto and home insurance to educators, law enforcement officers, firefighters, and nurses. Get a quote at 1.866.704.8614 or www.calcas.com.

by California Casualty | Helpful Tips, Safety, Travel |
It’s time for a ride in the C-A-R. Cue the excited barking and tail wagging. Whether you’re planning a cross-country road trip or just a quick spin around the block, we have some paw-some tips to turn your car into the ultimate canine-friendly cruiser!
Floor Mats
Face it. Our fur babies can be messy. Dogs can track mud, sand, and debris onto your car’s floor. Protect it with rubber floor mats that are waterproof and easy to clean. They cover your car’s carpet and shield it from dirt. You can get floor mats that are custom fit to your car, ones you can trim to fit, or universal mats. Avoid mats made with harsh chemicals such as lead, cadmium, latex, and PVC, as they will have unpleasant odors.
Seat Covers
As any dog owner knows, fur floats everywhere. It can easily get into crevices and stick to seats. Plus, if car rides stress your dog, he will shed even more. Seat covers will help keep your seats fur-free and mess-free. Cover the seats where your dog will be. Choose tightly knit fabrics that also will be scratch proof. Some covers are padded for shock absorption; some have nonslip designs with a rubber base. Still others have pockets for storage. Look for ones that are washable so you can periodically clean them.
Pro-Tip: A felt blanket is a simple alternative to a seat cover. It attracts fur and it’s easy to remove and wash. Just make sure to tuck it in the crevices of your seat.
Cargo Liners & Hammocks
If you put your back seats down for your dog, consider a cargo liner or hammock that extends from the back of the front seats. These are larger than traditional seat covers, and they give your dog a chance to spread out and lay comfortably. Look for one that is non-porous, water resistant, tear resistant, and easy to clean. Make sure it is comfortable for your fur baby.
Window Protection
Nose prints on windows are just a fact of life, right? They don’t have to be. Try a magnetic window shade, which also protects against UV rays. Alternatively, you can buy shatter resistant window film to add another layer of protection to your glass. In a pinch, clear plastic wrap works too.
Scratch Protection
Paint and surfaces can be easily scratched. You can help to prevent scratches with some paint protection film on doors and trunk sills where your dog usually enters your vehicle. If your dog will wear them, nail caps can work too.
Barriers
While our dogs may want to ride in the front seat, it’s not a good idea. In the event of an accident, your front seat airbag could deploy. Safety is important, and you want to keep them from jumping into your lap when you’re driving. That’s where barriers come in. They keep your fur baby safely in the back. Barriers come in various materials, from breathable mesh to heavy duty fabric to plastic or metal.
Safety Belts
Just as we wear seat belts, it’s a good idea to secure your dog. Some safety belts hook right into your car seat belts. Others attached to your seats. Choose a harness that goes around your fur baby’s body. Never secure them by their collar as the leash can pull unnecessarily on their necks.
Carriers
You can also travel with your fur baby in a crate or pet carrier. They come in a range of styles. Some are soft mesh and others are hard. Some come with wheels for easy transport. Make sure the crate is large enough so that your dog can stand, turn around, and lie down in it.
Tips for Traveling with Your Pet
Follow these additional tips for traveling with your pet.
- Start with short trips to get your dog used to the car before driving long distances.
- Feed your dog 3 hours before you leave.
- If you need to feed your dog on the road, stop the car to do it.
- Stop regularly along the way so dogs can stretch their legs and go to the bathroom.
- Give your dog access to clean water. Riding in the car can be stressful for dogs and if they pant, they can lose water.
- Don’t let your dog hang their head out the window.
- Never leave your dog alone in the car. Hot cars are dangerous, but even in cool weather, a well-meaning passerby may try to release your dog.
- Pack an emergency kit for messes. Include gloves and cleaning supplies. (A moistened rubber glove is great for picking up pet fur.)
- Don’t forget your dog’s favorite treats.
Finally, protect your fur baby with pet insurance. You can easily add coverage from Pet’s Best to your California Casualty auto or home policy. Find out more about what pet insurance can cover by talking with a California Casualty customer service representative today.
This article is furnished by California Casualty, providing auto and home insurance to educators, law enforcement officers, firefighters, and nurses. Get a quote at 1.866.704.8614 or www.calcas.com.
by California Casualty | Auto Insurance Info, Helpful Tips, Safety, Travel |
When it comes to keeping your tires inflated, you have a choice. You can fill up with air, like people have done for decades, or you can use nitrogen. What are the pros and cons of each? Let’s take a closer look.
Nitrogen
Remember when you studied molecules in science class? Molecules are the smallest amount of a substance that still carries its properties. Nitrogen molecules are larger and slower than the molecules in air. As a gas, nitrogen also is drier. These properties give nitrogen some advantages.
PROS
-
- Nitrogen won’t seep out of your tires as quickly as air because of its larger, slower molecules. That will help you to maintain your tire pressure longer.
- The moisture naturally found in air can cause changes in temperature. With nitrogen, there is no moisture and therefore it is less susceptible to temperature changes that affect tire pressure.
- Nitrogen is especially good for locations with very high or low temperatures. It is often used in race cars, heavy vehicles, and aircraft because it is nonflammable and able to more easily maintain its temperature.
- Nitrogen will not react to rubber, steel, or any of the tire’s components. There is no oxidation which can damage tires. That should help preserve your tire over time.
CONS
-
- You most likely will pay to inflate your tires with nitrogen. The initial charge to remove the air and fill them with nitrogen can cost about $30 per tire. Then, it will be about $7-10 per tire for topping it off as you need more nitrogen.
- Nitrogen may not be significantly better than air at maintaining tire pressure. Consumer Reports found only a 1.3 psi difference between air and nitrogen over the timeframe of a year.
- There is no scientific evidence that nitrogen helps with fuel economy.
- It is harder to find places to fill up with nitrogen. You will have to search for locations that offer nitrogen, even for a fee.
Note: If your tire is low and there is no place to get nitrogen, you can top your tire off with air. It won’t harm your tires, but it will reduce the effectiveness of the nitrogen alone.
Air
You may be surprised to learn that air is composed of mostly nitrogen. In fact, the mix is 78% nitrogen, 21% oxygen, and about 1% of other gases. Air, which has been used to inflate tires for over a century, also has its advantages.
PROS
-
- Air is often free. If it costs, it is minimal such as a dollar or two.
- Air is readily available. You can find it at gas stations, convenience stores, wholesale clubs, tire shops, and more.
- While air loses pressure over time, its rate is close to that of nitrogen. Plus, with air, drivers are more likely to check in often versus relying on nitrogen to stay pressurized.
CONS
-
- You will experience more pressure changes with air. Air is affected by temperature changes due to water vapor in its mix. However, it is worth noting that most tire shops have moisture separators that limit the amount of water vapor.
- The oxygen in air can cause oxidation, which can make rubber brittle over time.
- You will have to fill your tires more often when you have air versus nitrogen.
Tire Pressure is Key
When you fill up with nitrogen, you get a green cap on your tire valve. When you fill up with air, your cap will be black. However, whether you use nitrogen or air, you still will fill your tires to the same recommended pressure. Check the inside of your door or your driver’s manual to find the right psi.
Maintaining the correct pressure helps your tires last longer, your car handle better, and could even help with fuel economy. Under or over inflated tires increase your risk of a blowout and increase wear and tear. No matter whether you use nitrogen or air, regularly checking the pressure of your tires is part of responsible vehicle maintenance.
Your car is one of your greatest investments. Protect it with the right insurance for added peace of mind.
Safe travels from all of us at California Casualty.
This article is furnished by California Casualty, providing auto and home insurance to educators, law enforcement officers, firefighters, and nurses. Get a quote at 1.866.704.8614 or www.calcas.com.
