by California Casualty | Homeowners Insurance Info |
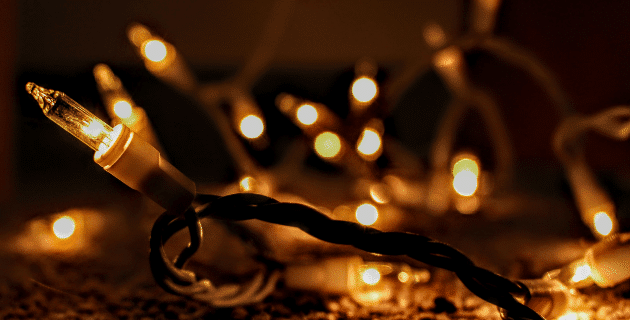
It’s the holidays and if you’re like most Americans, you’re pulling out the extension cords. Whether you’re planning a fantastic holiday light display or you simply need to power an extra item or two, remember that safety is key.
Extension cords are responsible for about 3,300 home fires annually, including holiday fires, killing 50 and injuring 270 people each year, according to the Electrical Safety Foundation International. That’s why it’s important to know how to choose and use these cords safely.
Follow these tips for extension cord safety this holiday season.
When buying extension cords, consider these important factors.
-
- Select a cord that is approved by an independent testing lab such as Underwriters Laboratories (UL), Intertek (ETL), or CSA-International (CSA).
- Choose a cord with a 3-prong plug and if possible, a polarized one. Polarized plugs can only be inserted into an outlet one direction, because the blade on one side is wider than the other.
- If you’ll be using the cord outside, choose one marked for outdoor use. Outdoor extension cords have more insulation, which protects them from varying temperatures, sunlight, and unintentional scrapes.
- Select a cord that is long enough for your needs. Never plug an extension cord into another extension cord to extend it. That’s not safe.
- Know what you are powering and choose a cord that can provide the right load amount. If you buy one with insufficient power for your needs, you could overheat it and cause an electrical short or a fire.
- The thickness of the cord will be a clue to its power. Small appliances and electronics can use thin or flat cords. Larger ones need thick, round, low-gauge cords able to handle a higher amperage/watt flow. The amperage is the measure of electrical current flow. The wattage is the amount of electrical power of an appliance or lamp.
- Look at the label on the cord and match it to your electrical needs. If you’re unsure, ask for help from the retailer.
- Length makes a difference. The longer the cord, the more chance for voltage to drop. If you’re running a 50-foot cord, select a higher rating to account for that loss.
When using extension cords, remember these do’s and don’ts.
Don’t…
… power multiple appliances with one cord.
… remove the third prong from your plug to fit in a 2-prong outlet. That could open the way for a nasty electrical shock.
… run cords under rugs or furniture. If the heat has nowhere to escape, it could cause a fire
… tape cords to floors or attach them with staples or nails, which could compromise the wiring.
… bend or coil extension cords that are in use.
… put cords across highly trafficked areas. They can be a tripping hazard.
… plug extension cords into power strips that are then plugged into outlets. This presents a similar danger to plugging extension cords into other extension cords—and heightens the risk of a fire.
… don’t use extension cords with heaters or fans. The risk of overheating is too great.
… don’t use extension cords that feel hot to the touch.
Do…
… check for frays, loose wires, and other damage. If you see any, throw out the cord and use another.
… insert prongs fully so no part of the metal is exposed while the extension cord is in use.
… cover unused cord receptacles with childproof covers.
… keep pets away from extension cords. Spray the cord with Bitter Apple to discourage chewing.
… pull the plug – and not the cord — when disconnecting from the socket. Pulling the cord could damage the wire and also present a shock hazard.
… store cords indoors and throw away damaged cords.
Remember that extension cords are designed to be temporary. If you’re using them on a permanent basis, it may be time to update your home’s electrical system.
Finally…a word about power strips
Power strips add extra outlets when you need them. That doesn’t mean you should use every outlet in the strip. Just like extension cords, power strips have electrical load limits. Check the rating, and make sure your power strip includes a built-in surge protector. These protect from a spike in electric current that can damage your electronics or appliances.
The personal property coverage in your homeowner’s insurance may cover damages from a power surge or electrical fire. Check with your insurer.
This article is furnished by California Casualty, providing auto and home insurance to educators, law enforcement officers, firefighters, and nurses. Get a quote at 1.866.704.8614 or www.calcas.com.

by California Casualty | Homeowners Insurance Info, Pets |
You came home to a rug that’s been chewed to shreds and a mess on the carpet—again. Now your house is smelling (and looking) a bit like a kennel… You love your dog, so you’re thinking it may be time to scrap the carpet altogether.
But think twice before you make any rash decisions. Carpets have so many advantages for your home! They muffle noise. Dogs won’t slip and slide on them like they can on hard surfaces. You also don’t have to worry about their claws scratching your hardwood floor. Plus, carpets are a soft place for your feet and for their paws.
The good news is that dogs and carpets can actually coexist nicely. Here’s what you need to know.
Choose the right carpet.
Not all carpets are the same when it comes to protecting against pet stains and messes. Look for carpets made of nylon, wool, or a material known as olefin. The most popular option, nylon is durable and easy to clean. It also has built-in stain resistance. Wool, the more expensive option, has some natural stain resistance but cannot be treated with a stain-resistant coating. Olefin was originally used in outdoor carpets but has been engineered to have more of the feel of wool. It’s made from plastic fibers, is easy to clean, and repels moisture.
Take care of new messes right away.
Cleaning up after your pet is part of being a responsible pet owner. The best way to keep your carpet from staining is to address your pet’s accidents right away. If you use a store-bought cleaner, choose one with a neutral pH to help remove the acidity of your pet’s urine. You can also make your own cleaning solution from vinegar, baking soda, and water. Here are two natural methods for cleaning up pet urine on carpet.
Method #1
-
- Place a thick layer of paper towels over the wet spot.
- Cover the towels with layers of newspaper.
- Stand on the newspaper for a few minutes for it to absorb the urine.
- Remove the paper and paper towels and dispose of them.
- Rinse the area with cool water.
- Blot up the water with towels. If you have a wet vac, you can use that instead.
- Once most of the liquid is blotted, spread baking soda over it. Use ¼ cup or less. (Note that large amounts of baking soda are toxic to dogs so keep your fur baby away.)
- Let the mixture sit overnight and then vacuum the spot thoroughly the next morning. The area should feel clean to the touch.
Method #2
-
- In a clear spray bottle, mix one cup of distilled white vinegar with one cup of water and 2 teaspoons of baking soda. Shake it up.
- Spray the mixture on the stain.
- Let it sit for a few minutes and then blot it with a towel until clean.
You can use these methods for other pet messes such as vomit or poop. Remove the vomit or feces before treating the carpet, being careful not to embed it in the carpet fibers. Act quickly; the acid in vomit can quickly discolor your carpet.
Take care of old stains, too.
Old urine stains can cause a lingering odor in your home. You can take care of these stains in several ways. One way is to use an enzymatic cleanser that breaks down the stain at the molecular level. You can find these cleansers at pet stores. Another way is to rinse the area thoroughly with water, then use a wet-dry vacuum to clean it up. Importantly, do not use a steam cleaner. The heat can set the odor and stain permanently.
Not sure where the stains are? A blacklight can help you find them. The wavelengths of blacklight cause the proteins in urine to glow.
Add a carpet runner to high-traffic areas.
Consider a carpet runner or area rug over your wall-to-wall carpeting for an extra barrier. Place it in high-traffic areas or where your dog commonly goes. Carpet runners and area rugs may be picked up and cleaned, and more easily replaced, if needed.
Clean their paws and clean your carpet.
There’s a lot of preventive care that you can take to keep your carpets clean. Start by wiping and drying your dog’s paws when your fur baby comes in from outside—especially on rainy, snowy, or muddy days. Then, take care of your carpet by vacuuming regularly and shampooing your carpet every 12 months to remove dirt, grime, and allergens. You can schedule a professional carpet cleaning or do it yourself.
Train your pet.
When you adopted your pet, you made the commitment to stick with them through the good and the bad. Oftentimes bad behavior like going to the bathroom on the carpet can be un-trained. You can do this by kennel training when you are gone or using a reward method when they go outside. If you need help, talk to your pet’s veterinarian for ways you can teach your pet to unlearn these behaviors or find a local trainer! You may think you are doing them a favor by not disciplining them when they make a mess or start chewing on furniture, but really you are getting in the way of the great pet they have the potential of becoming- by not letting them learn that these behaviors are ‘bad’.
Keep in mind the age of your pet plays a factor. A puppy or an older dog may need extra attention and may have more accidents than a dog in its prime.
Does homeowner’s insurance cover damage from your pets?
Unfortunately, homeowner’s and renter’s insurance both do not cover the damage your pet does to your carpet—or to any of your personal property. Take note that even your carpet warranty probably does not cover pet damage. If your pet, however, gets loose and damages property at your neighbor’s, the liability coverage in your homeowner’s policy may kick in and cover some of the costs.
This article is furnished by California Casualty, providing auto and home insurance to educators, law enforcement officers, firefighters, and nurses. Get a quote at 1.866.704.8614 or www.calcas.com.

by California Casualty | Consider This, Homeowners Insurance Info |
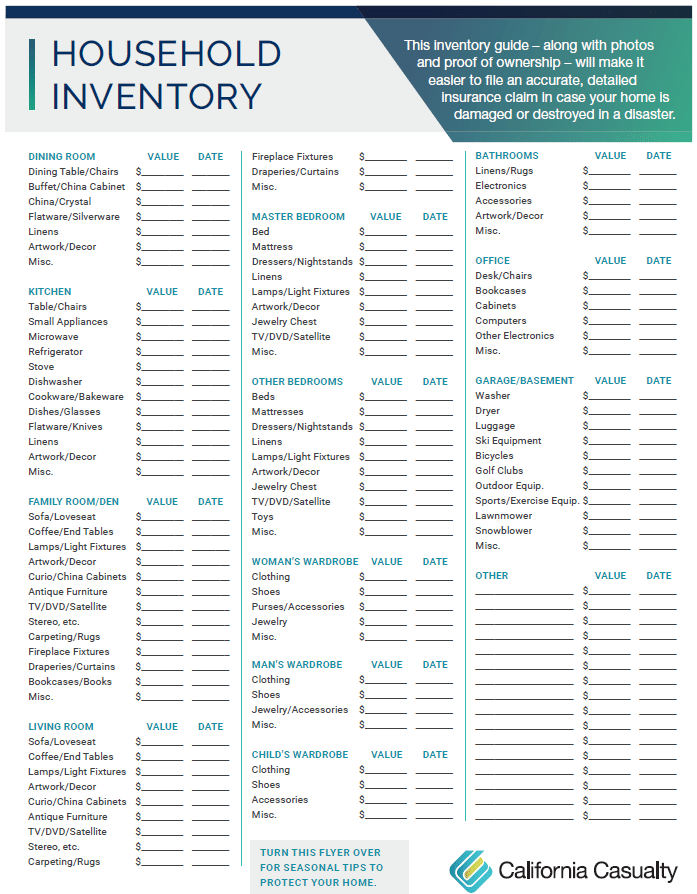
It’s almost time to find room for all of the new gifts that you received over the holidays. The easiest way to keep track of all of your possessions is by creating- and continually updating- a Home Inventory.
A Home Inventory is a list of the valuable objects that you have inside of your home.
It may sound like a waste of time, but this list will be your saving grace if there is a fire, destructive storm, or if someone breaks in and steals your belongings. Without one, many people have a difficult time pinpointing or recalling everything that might have been destroyed or taken, and unfortunately, that can delay homeowner claims or keep you from getting your full compensation.
So, when the New Year rolls around make the time to take inventory of your home and all of your new treasures. It’s easy! Just go room by room and document:
- Electronics
- Personal Care Items
- Jewelry
- Art
- Kitchen items and appliances
- Furniture
- Carpeting
- Beds and linens
- Clothing
- Sports equipment
- Tools
Don’t forget to take pictures of the exterior of your home as well -photos are best from all angles- including the landscaping and any decks or porches- and also take note of everything in the garage, attic, or basement, like holiday ornaments, lawn and yard equipment, tools, etc.
You can choose to write everything down, but we suggest to use photo/video documentation of your belongings. To make the whole process easier on you we’ve created a Household Inventory Checklist that walks you through each possession you may have, so you don’t forget anything- you can even document the value. Just attach your photos to the document or put them in a folder on your phone and you are good to go! Click here for the checklist.
Trying to tally up what needs to be replaced is not something you want to do in the event of a claim, so taking the time to complete an inventory will be more than worth it. You can even use the time to get rid of the old and make room for all of the new!
Related Articles:
Too Late is Too Late: Why You Need a Home Inventory
5 Things Not Covered By Most Home Insurance Policies
Protect Your Home and Family- Know It. Do It.
by California Casualty | Homeowners Insurance Info |
You want to take good care of your house. Not only does it provide shelter and a cozy environment for you and your family, it’s also your largest investment and you want to make sure it to holds up over time.
That’s why it’s important to avoid these unfortunately common and costly mistakes made by homeowners. Doing these things to your house could cost you big time now – or in the future, if you decide to sell.
Home Improvements
You should never…
Remove architectural features.
You may be tempted to remodel but make sure in doing so, you don’t destroy the charm of your home. That quaint tin ceiling, the chair rail molding along the wall and that detailed millwork are selling features to future buyers. Architectural details offer curb appeal and help distinguish your home.
Get rid of a bedroom or a bathtub.
Bedrooms sell homes, and similarly, so do bathtubs. Families are looking for both when buying a new house. That’s why you should never remove a bathtub in favor of a new shower. You’ll discourage families with kids and pets who need the tub. Similarly, taking down a wall to merge two bedrooms into one large one may be good for you, but it will detract from your home’s future sale price.
Cover wallpaper with water-based paint.
Water-based paint reacts with wallpaper glue, causing it to peel. So, if you paint over wallpaper with water-based paint, you’ll have a peeling mess on your hands. Instead, use oil-based primer to provide a protective barrier. Let it dry fully and then apply latex paint.
Leave cabinet doors on when you’re painting.
Painting your cabinets is an easy way to give your kitchen a facelift without spending tons of money. Just make sure that when you do, you remove the cabinet doors. That way, you won’t paint over hinges and hardware. It will turn out to be a much more professional job. Remember to keep track of which doors go in which spots. Label them with numbers under the hinge locations or back where it won’t be visible.
Do your own plumbing or electrical.
You may know a bit about plumbing or electrical. That doesn’t mean that you should add a bathroom or rewire your house. DIY projects are great when they match your experience. Hire a professional for jobs that are beyond your skill level to avoid costly mistakes.
Daily Living
You should never…
Flush flushable wipes.
They may say flushable, but they really aren’t if you want to keep water flowing through your pipes. Flushable wipes are made from synthetic materials that don’t break down. As a result, they can get stuck in your pipes or make their way to the sewer system and clog it up. The best choice always for toilets is toilet paper.
Let ceiling fans run.
You may think ceiling fans cool down your home. In reality, they move air around which helps your sweat evaporate more quickly. That’s what makes you feel cooler. It makes sense to run a ceiling fan in the room where you are; however, running it in every room when people are not present just doesn’t make sense. It just increases your energy bill.
Leave a brick in the toilet.
It used to be common for people to put a brick in their toilets to displace the amount of water used. That would ultimately save them money. But water causes bricks to crumble over time and those pieces can really damage or clog your pipes. Instead, try filling a half-gallon milk carton with sand and put it in the tank. That will save you a half-gallon of water for each flush. Or you could replace your toilet with a new model that uses less water.
Put starchy food down the disposal.
Starchy foods clump up when they come in contact with water. That’s great for cooking but terrible for garbage disposals, which can get easily clogged. Instead, put the potatoes, rice and oatmeal in the trash or compost pile.
Pour bleach or drain cleaner down the drain.
Diluted bleach is great for cleaning surfaces but not so great for pipes. That’s because this harsh chemical can damage them. Bleach also kills the good bacteria that break down waste. In that way, bleach can actually cause clogs. Drain cleaner also is hard on pipes. If you’re trying to clear a drain, use a pipe snake instead.
Outdoors
You should never…
Plant trees too close to your house.
Trees enhance our property and provide beauty and shade. But having trees too close to our homes can be dangerous. Branches can break off during storms, and in heavy winds, and limbs or trees can fall on your house. In addition, their large root systems can grow into your foundation, weakening it. Always take care to plant trees far enough away from your house: at least 30 to 50 feet away for medium and large trees and 10 feet away for smaller trees (less than 30 feet tall when full grown).
Plant invasive species.
You may love the Rose of Sharon, but if you plant it in your garden, you could find more than you bargained for. This pretty plant is an invasive species, meaning that it will easily take over your garden and your lawn. It’s tough to get rid of invasive species, so do yourself a favor. Don’t plant them in the first place and remove them as soon as possible.
Skip the last mow of the season.
Long grass provides a place for critters to hide. It also means that they will have a safe path to get into your home during the winter months. Keep your lawn short and you’ll be less likely to have these unwanted guests, plus your grass will be healthier.
Leave your hoses connected in winter.
Leaving your hoses attached can trap water which can freeze your pipes and damage them. Don’t make that mistake. Disconnect your hoses when you put away your lawnmower for the winter.
Park your car on your lawn.
It seems like common sense to park in the driveway or on the street and not on your lawn. After all, you could ruin your grass that way. But there’s another important reason. You could create a fire hazard from a hot engine on dry grass. You also may leak harmful chemicals onto your lawn. For these reasons, many local ordinances make it illegal to park on the lawn.
Luckily, home insurance covers repairs from most mistakes like these. An annual review of your homeowner’s policy will ensure you are fully covered. Talk to your insurance agent to see what’s covered under your current policy.
This article is furnished by California Casualty, providing auto and home insurance to educators, law enforcement officers, firefighters, and nurses. Get a quote at 1.866.704.8614 or www.calcas.com.
by California Casualty | Homeowners Insurance Info |
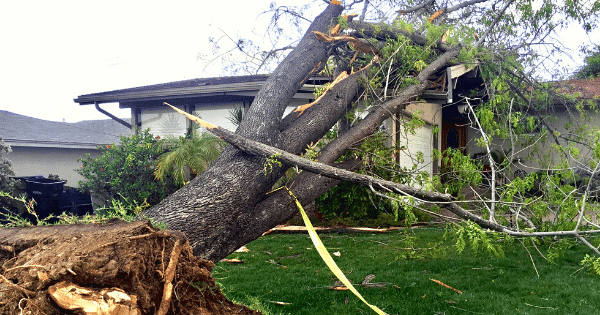
When storms and high winds take down trees, it can be frightening. If you’re not covered for the damage- the bill can be pretty scary, too.
If a tree fell on your home tomorrow, would you be covered by your insurance policy? Whether or not a fallen tree is covered depends on what caused the tree to fall and where it fell. Here’s everything that you need to know.
If a healthy tree falls on your home…
Strong winds can cause even healthy trees to fall. When a tree hits your house, your garage, your deck, your shed, or your fence, your homeowner’s policy usually covers the costs of repair. That also includes the cost of tree removal. Of course, you have to first pay your deductible. Check your property contract to see what is covered. There may be a cap – a maximum paid per tree. Finally, an annual policy review is a good time to review your coverages, before anything happens.
If an unhealthy tree falls on your home…
It’s a little different with diseased or dying trees. They’re more likely to fall—with or without a storm. As a homeowner, your responsibility is to check the trees on your property, trim the branches, and make sure the trees are healthy. If a diseased or dying tree falls on your home as a result of a severe storm or high winds, your policy most likely will not cover it.
If a tree falls but does not hit your home…
If a tree falls and doesn’t damage anything, that’s great (and lucky) news! However, a downed tree is considered a hazard and you are still responsible for removing it from your property. Unfortunately, in this case, your homeowner’s insurance does not cover that tree removal. The only exception is if the fallen tree is blocking a driveway or a ramp for someone who is handicapped. But proceed with caution – before you remove the tree, check with your local regulations. There are laws that govern tree removal in some states, and you may need a permit.
If your neighbor’s tree falls on your home…
It’s not uncommon for a tree in your next-door neighbor’s yard to fall on your home. If it’s a healthy tree that got knocked over in a storm, your policy will likely pay for damages just as if the tree fell from your own property. However, in this case, your insurer may go through your neighbor’s insurance provider for payment, and if that’s what happens, you will be reimbursed for your deductible. One word of warning: If a tree falls because your neighbor cut it down incorrectly, that’s on him to pay for damage and tree removal. Insurance does not cover that.
If a tree falls on your car…
It makes sense if you think about it. Homeowners’ policies do not cover trees that fall on cars. Car insurance policies do—but only those policies with comprehensive coverage. Check to make sure that you have comprehensive coverage so that you will be covered in the event of a fallen tree.
What To Do If A Tree Falls
-
- Assess the damage. Be careful and watch for fallen power lines as you do so.
- Determine who may be liable for the damage.
- Contact your insurance company if you believe you have a claim or if you are unsure.
- If you have a claim, make sure not to move anything until you have spoken with your agent. Take and submit photos or videos of the damage from all angles. Your insurer will guide you through the process.
- If you do not have a claim, you may still be responsible for removing a tree. Before contracting with a tree removal service, ask for proof of insurance. The company will then be responsible for any further damage they may cause.
Avoid a Disaster By Keeping Your Trees Healthy
-
- Water your trees regularly but don’t overwater. Consult a garden reference to determine how much water your species needs.
- Add mulch around the base of your trees. This will help protect the roots from weather conditions. It also will keep your mowers from bumping into the roots or the trunk.
- Visually inspect your trees for signs of disease. Look for discoloration and stunted growth or signs of pests. Mushrooms growing at your tree’s roots also can indicate decay.
- Remove any dead branches or large limbs that look like a liability. Prune your trees during the winter months.
- If you are removing a tree- be careful where you dig, as root systems of large trees can extend two to three times farther than the branches.
This article is furnished by California Casualty, providing auto and home insurance to educators, law enforcement officers, firefighters, and nurses. Get a quote at 1.866.704.8614 or www.calcas.com.
by California Casualty | Consider This, Homeowners Insurance Info |
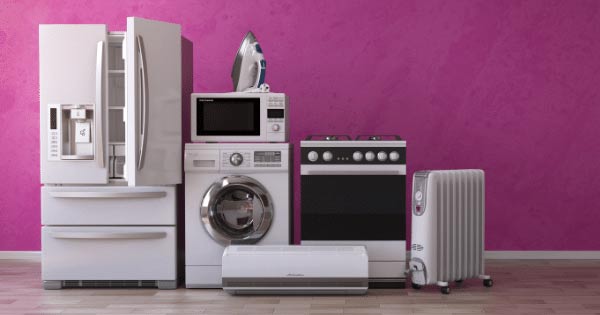
Is there anything more frustrating than your washing machine breaking down in the middle of a cycle or your refrigerator dying in the middle of the night? Appliance repairs are not only inconvenient – and seem to only happen at the most inconvenient time – they can also be expensive. Fortunately, regular maintenance can help keep your appliances in good working order for years to come.
No one wants to deal with a broken device in the dead of winter… that’s why fall is the perfect time to do a quick check on all your appliances. Don’t worry, you don’t have to be a master mechanic; most of these maintenance tasks are easy to do on your own.

Laundry Room
Dryers need proper airflow in order to function. When the filter or exhaust is blocked, the heat buildup can cause a fire. Nearly 17,000 clothes fires are reported each year, according to the National Fire Protection Association. Keep your dryer from becoming a fire hazard by following these steps.
-
- Unplug your dryer if it’s an electric model. If it’s a gas model, turn off the gas.
- Pull the dryer away from the wall and detach the dryer duct, the flexible tube connected to the back of the dryer.
- Vacuum inside the duct and in the vent.
- Go outside your home and locate the exterior dryer vent. Remove the cover and vacuum in there as well.
- If your dryer vent is a long one, and the vacuum doesn’t quite get at the lint, you can buy a dryer vent kit that has brushes and tools to get inside.
- Inspect your duct for cracks or tears. If you see any, repair them with aluminum tape. (Do not use duct tape. Despite the name, duct tape does not work well with the heat of the dryer.)
- Reattach the duct.
- Remove the lint screen and vacuum in and around it. If it’s clogged, you can scrub it with warm, soapy water and then dry it with a towel before placing it back.
- Find the moisture sensor. It’s usually a thin metal bar below the dryer door. Clean it with a cotton ball and rubbing alcohol.
Washers benefit from regular maintenance. Not only will this help avoid breakdowns, but also leaks which can cause major water damage to your home. Regular care also will keep your machine clean and your clothes smelling fresh.
-
- Look for cracks, bulges, or leaks in your water hoses. That means you will need to replace them. Your owner’s manual also may recommend a timeframe for replacing hoses even if there is no damage.
- Make sure your washer is at least four inches from the wall to prevent hoses from twisting.
- Clean the lint collector, which is usually found near the center agitator tube or near the top of the machine.
- If you have a front loader, wipe down the door and rubber gasket area.
- Clean the soap scum buildup from your washing machine. Architectural Digest recommends this process using vinegar and baking soda.

Kitchen
Dishwashers can build up debris over time which can cause odors. Doing a deep clean periodically can help keep things fresh.
-
- Remove your racks and inspect them for chips or exposed metal. If you see any, you can buy special touch-up paint to help prevent rust.
- Check and clean your dishwasher drain.
- Remove and wash the filter.
- Run a wash cycle with a dishwasher-safe cup filled with vinegar on the top rack. Use the hottest water setting available.
- Sprinkle a cup of baking soda on the bottom of the dishwasher and run a short cycle.
Refrigerators can work harder than they have to, if not properly maintained. Plus, a clean refrigerator helps keep your food safe from germs.
-
- Your refrigerator’s coils could be clogged with dust, dirt, and pet hair. Use a handheld vacuum to remove this debris. You’ll find the coils either at the back of your fridge or underneath the front.
- Check the seals on your refrigerator’s doors. Make sure the door gaskets are “gunk-free.” This could affect the seal.
- Check the temperature to make sure that the fridge is at or below 40 degrees Fahrenheit and the freezer is at 0 degrees. You can buy a refrigerator thermometer if you have an older fridge without a temperature gauge.
- Your ice maker and water dispenser usually have filters that need changing. Check your manufacturer’s guide for instructions.
- Listen to your fridge. If it makes a loud sound, it may require some maintenance. (Fridges should have low-level hums that are barely noticeable.)
Stoves and ovens are well used during the fall and winter months, especially for holiday meals. Make sure yours are all in good working order.
-
- As you cook on your stove, the range hood draws the cooking steam upward and traps grease particles in its filter. This food-flavored grease attracts pests, so you’ll want to make sure it’s cleaned regularly. Home Depot offers the following steps to clean your range hood.
- Clean stovetop drip pans underneath your burners.
- Make sure the oven has a tight seal; otherwise, it could be losing heat. That will cause food to take longer to cook or cook unevenly. Feel along the seal that lines the door. If you find any broken, torn, or deformed areas, replace the seal, also known as a gasket.
Garbage disposals can host harmful bacteria or grow mold. This Old House suggests this approach: Pour a half cup of baking soda into the disposal. Wait 30 minutes, then pour in one cup of white vinegar. Let the mixture foam for 3 minutes, then rinse with hot water. Finally, grind up two cups of ice and a cup of salt while running cold water. You also can grind lemon peels at the end for a fresh scent.

Heating
Furnaces have a lifespan of 20-30 years when properly maintained. Fall is the best time to check to see that your furnace is working properly before the cold weather descends.
-
- If your furnace is the kind that pulls air from outside, make sure that nothing is blocking the outdoor vent.
- Check that the ducts and vents are free of debris and dust, and securely fastened.
- Check the filter(s) and replace as needed.
- Know the signs that indicate you may need a new furnace. These include frequent breakdowns, a rise in energy consumption, and inconsistent heat where one room is cold and another hot.
Call a professional if you are unsure about maintaining your appliances. If you need to replace an appliance, it’s always good to get at least 3 bids. Make sure the bid includes the removal and disposal of the old appliance.
Your appliances aren’t the only devices that need to be checked in the fall. Help keep your HVAC running smoothly and your pipes thawed all winter by checking out our blog on fall maintenance for your home systems.
This article is furnished by California Casualty, providing auto and home insurance to educators, law enforcement officers, firefighters, and nurses. Get a quote at 1.866.704.8614 or www.calcas.com.
