
by California Casualty | Homeowners Insurance Info |
You’re ready to upgrade your kitchen or build that deck. Remodeling is a great way to add value to your home. If you’re planning a renovation project, there’s something you’ll want to do first. Review your homeowner’s policy. That way you can make any changes to ensure you’ll be fully covered.
There are several ways insurance can factor into home renovations, but you’ll want to check the specifics. Then you’ll know what is covered and what is not:
- If your home is damaged during remodeling
- If someone gets hurt during remodeling
- If your home is not up to code
- If the remodel increases the value of your home/property
If your home is damaged during remodeling…
You may hire a contractor for your home renovation. Make sure they carry the right insurance. This includes workers’ compensation, property damage, and personal liability. Ask to see a copy of your contractor’s insurance policies. Look for a commercial business/general liability policy and for a workers’ comp policy. Take a photo of the documents for your records. If your contractor is not insured, he or she or their staff could sue you if injured.
If someone gets hurt during remodeling…
If you are doing a DIY remodel with the help of family or friends, you’re responsible for their safety. Make sure your liability coverage is enough. Consider increasing liability limits in case someone gets injured. Personal Liability protects you if a claim is made or a suit brought against you for bodily injury or property damage and you are found to be legally liable. Liability covers you at your place or anywhere in the world. If you are found liable, the policy will pay up to its limit of liability for damages for which an insured is legally liable. This can include medical expenses, lost wages, pain and suffering, and permanent scarring. The policy also provides a defense in court, if needed, for the policyholder. This is at the insurance company’s own expense.
If your home is not up to code…
Insurance only pays if there is a covered loss, not for renovating or remodeling. However, if you are rebuilding your house due to a covered loss, and you need to bring your home up to code, insurance can help. Add an endorsement for Ordinance or Law coverage to bring your home up to current building codes for repairs and/or rebuilding. Again, this endorsement only provides coverage if there is a covered loss and you are required to bring it up to code. The contract automatically includes 10% of your coverage A but the endorsement can be added to increase that percentage.
If the remodel increases the value of your home…
Your homeowner’s insurance is designed to repair and/or replace your home should it be damaged by a covered loss. When you renovate your home, your improvements have increased its value. Don’t make the mistake of thinking your original insurance will cover it. Make sure you are fully covered for the new value of your home if you must replace or rebuild it in the future.
Your insurer may require you to notify them within 30 days of completion of any improvements, alterations or additions to the building insured under Coverage A which will increase the replacement cost of your home by 5% or more.
Dwelling Coverage
Talk to the service department at your insurer about increasing your dwelling coverage. Dwelling refers to the structure of your home and includes the roof, walls, floorboards, cabinets, and bath fixtures. The easiest way to think about it is that if you could tip your house upside down, the dwelling is everything that remains attached.
Attractive Nuisance
Does your renovation include an attractive nuisance? Attractive nuisance is a term used to describe anything that might attract children and present a potential danger to them. Examples include trampolines, swimming pools, and playground equipment. If you added any of these during your renovation, be sure that you are (a) secured against access to them with a fence and locked gate and (b) covered for them under your policy.
Personal Property Coverage
You may need to increase coverage for personal possessions if you purchased items as part of the renovation or since your last policy update. Personal property coverage protects your possessions, such as furniture, clothes, sports equipment, and other personal items. Again, if you could tip your home upside down, everything that would fall out is considered personal property. This coverage protects these items whether they are in your house or off premises.
Speak with your insurer’s service department to see if you need to change your coverage limits.
Your insurer has a built-in tool that helps them estimate the replacement cost of your home. They update the information into the system, which provides the new rebuild cost. While a renovation can increase your premium, certain improvements can help to reduce payments. These include security systems, or a new roof. Ask about discounts, too. California Casualty offers discounts to nurses, educators, and first responders.
This article is furnished by California Casualty, providing auto and home insurance to educators, law enforcement officers, firefighters, and nurses. Get a quote at 1.866.704.8614 or www.calcas.com.

by California Casualty | Auto Insurance Info, Safety |
You’re driving along and, suddenly, you notice a puff of smoke. The needle on your dashboard starts inching into the red. There goes your engine warning light. Your car is overheating.
Don’t panic. While overheating can cause permanent damage to your car, your quick action can make a difference. Here’s a guide on why engines overheat, steps to take to prevent it, and what to do if your vehicle overheats this summer.
Why do engines overheat?
An engine naturally generates heat when it runs. The cooling system helps it from getting too hot. Sometimes, however, the system fails. Here are some common reasons an engine overheats.
- Low oil or coolant levels
- Leak or blockage in the cooling system
- Faulty thermostat
- Clogged or worn-out hoses or belts
- Defective water pump
- Radiator failure, damaged radiator cap
- Damaged or blown head gaskets, warped cylinder heads
Watch for these signs.
You may not even be aware your engine is getting too hot until it’s too late. That’s why it is important to look for the signs of overheating.
Early signs
- Ticking noises in your engine that could be related to a loss of lubrication
- Thumping noises from cold coolant mixing with boiling coolant (due to a failed sensor in your thermostat)
- An engine that gets hot after short trips
- A puddle of coolant on the ground after you’ve parked
Emergency signs
- Steam (that looks like smoke) coming from the vehicle’s hood
- Spike in your temperature gauge or check engine warning light
- Strange smells or odors from the front of your car (Oil produces a burnt smell, coolant smells sweet, and you may also notice the smells of hot metal or burning rubber.)
- Reduced engine power
What to do if your car overheats…
Overheating can lead to serious and expensive damage if it’s not addressed quickly. Follow these steps if your car overheats.
- Turn on the heater.
It may seem counterintuitive but turning on the heat will draw heat away from your engine. Sometimes that’s enough to move the gauge back into the safe area. Importantly, do not run your air conditioning. That will only make the car heat up more.
- Stay calm and pull over safely.
Put on your hazard lights and make your way to the side of the road. If you’re on a highway or busy street, do so as soon and safely as possible. Pull over in a place where you can wait it out for a while, and where emergency service vehicles can easily access your vehicle.
- Shut off the engine and wait.
It will take at least 15 to 30 minutes for the engine to cool down. There is nothing you can do at this time. Call for assistance if you think you will need it. Importantly, do not try to open the hood. Your car is dangerously hot, and you could be sprayed with boiling water or steam.
- Check the pressure of the radiator hose.
Wait until the hood is cool to the touch to open it. Then put on gloves and grab a towel. Locate the radiator hose in the upper side of your engine. Use the towel to squeeze it. If it’s stiff, there’s pressure in the system. Do not remove the radiator cap until the pressure has decreased.
- Add coolant.
Locate the radiator cap (see owner’s manual). Cover the cap with a towel and slowly push down to loosen it a quarter of a turn. That will release some of the pressure. Then fully open the cap. Refill the coolant if needed. Also add coolant to the small clear plastic overflow reservoir on the side of the radiator. Replace the cap.
- Turn on the engine.
If the gauge is normal or the warning light is off, proceed with caution. Adding coolant doesn’t fix the problem. It just allows you to get somewhere safely to address it. Note that if your car is overheating because of a hose or radiator issue, then coolant will not work.
- Drive or get towed to a service station.
If your car has overheated, it needs to be seen by a mechanic. Don’t ignore it. It may be inconvenient to get it fixed, but driving an overheated car will ruin your engine.
Prevent your car from overheating.
Overheating is common in the hot summer weather. There are steps to take to safeguard your car if it is at risk.
- Check and maintain your fluid levels. This includes coolant and oil.
- Get a coolant flush. This will remove old coolant and chemical buildups.
- Perform routine car maintenance. Do regular radiator checkups.
- Check under your vehicle for signs of coolant or oil leaks. Get them addressed right away.
- Avoid traveling in extreme heat.
Your car is one of your greatest investments. Keep it fully insured for added peace of mind. Safe travels.
This article is furnished by California Casualty, providing auto and home insurance to educators, law enforcement officers, firefighters, and nurses. Get a quote at 1.866.704.8614 or www.calcas.com.

by California Casualty | Auto Insurance Info, Finances, Homeowners Insurance Info |
Maybe you got married—or divorced. Perhaps a nanny moved in, or your son or daughter moved out. When major life changes like this happen, it’s time to look at your insurance policy. If you need to add or remove someone, here’s what you need to know.
Who must be listed on your policy?
Car Insurance
For car insurance, you must list all people in your household. Your list will include family members but also a roommate, relative or nanny who lives with you. They are added because they live with you, not because they drive your car. It varies from state to state but you may be able to exclude those individuals who won’t drive your car.
- Excluded from rating: If a person meets underwriting guidelines and has coverage elsewhere, they will be listed on the policy but excluded from a rating. That means no premium will be charged for them.
- Excluded from coverage: If the person has an unacceptable driving record, they will not meet underwriting guidelines and will be excluded from coverage. A signed document is usually required.
Some states do not allow you to exclude any drivers, and others will not allow exclusions of drivers who are acceptable. Still other states will not allow the exclusion of a family member or spouse. For details on excluding someone from your policy, see the section on removing someone from your policy.
Homeowner’s Insurance
For homeowner’s insurance, the policy must be in the name of the person who owns the home. That person’s name is listed on the title. If another person, spouse or not, has their name on the deed/title and they live in the home, they will be added as a named insured.
Adding someone to a car insurance policy
You can either call your insurance company or log into your account online to add a person to your policy. You will need their:
- Name and date of birth
- Driver’s license or permit
- VIN for the vehicle(s) that they are driving
- Number of years that they have been driving
- Driving record, including any accidents or violations
Your insurer will then give you a cost quote for the additional driver. Ask your insurer for ways to save money while bundling or with other discounts.
Removing someone from a car insurance policy
If someone on your policy no longer lives with you and/or no longer drives your car, that’s a good time to remove them.
- You will need to provide proof that the individual no longer lives with you.
- If your loved one has passed away, you will need to provide the death certificate.
- If the person still lives with you, your insurer may require you to keep them on the policy or show proof of their own insurance.
Special situation: child away at school
If your child is away at school, and you are expecting that child to return for breaks, this is not the time to remove him/her. If your child has a car that will be kept at home and not driven while he/she is at school, ask your insurance company whether you qualify for a discounted rate. If your child is over 100 miles away without a car, you may receive a discount.
Children away at school are automatically covered by your policy, so you are not able to remove them. However, as your children age and move out, that will change. When should you remove your child from your policy? It really depends upon your unique situation and needs. While there is technically no age limit for children on a policy, many insurance companies require children get their own policy once they are no longer a dependent, even if they are still living with the insured.
Excluding a driver vs. removing a driver:
Some insurance carriers allow you to exclude a driver, even if they live with you. Excluding a driver means that they will not be covered while driving any vehicles. You may be able to exclude a driver for an unacceptable driving record, and therefore reduce your premium. Note that there will be no coverage of that person driving your car even in an emergency, and if that person is discovered to be driving your car, your insurer may decide to increase your premiums or decline to renew your policy. It’s important to note that if the excluded driver does drive and has an accident, you, the insured, will be responsible for paying for all the damages/injuries out-of-pocket. That includes any damages/injuries that occur if they are driving someone else’s car too.
Adding someone to a homeowner’s policy
The homeowner’s policy is held by the person or people whose names are on the title/deed of the home.
- You may add your spouse as a named insured on your policy if they are on the title/deed. Depending upon your spouse’s claim history, note that this could raise your rate.
- If you’re not married but living together, and the non-married partner’s name is on the deed/title, you may add them as a named insured.
- You may want to adjust personal property coverage if your new spouse has items that increase the value above what is currently on your policy.
- You must be named on the policy to file a claim.
Removing someone from a homeowner’s policy
If you are the primary homeowner listed on the policy, you may remove someone from your policy. Traditionally, this happens during a separation or divorce. A homeowner’s policy can be maintained during a separation, but should be changed as soon as the divorce is finalized. At California Casualty, we typically wait until the divorce is final and/or the policy renewal date to move property policies from one account to another.
- Only a named insured on the policy is authorized to make changes. Ideally, the changes should follow the separation agreement.
- The effective date the change takes place depends upon your policy.
- The spouse who moves out, but is still on the deed, should be named as an additional insured.
- Your homeowner’s policy should be listed under whomever keeps the house.
Adding or removing someone to a renter’s policy
You’re often able to add coverage for a partner or roommate to your renter’s policy if they move in. There are three main ways to do this.
- You can add coverage for a roommate for an additional cost. You can do this on a homeowner’s and renter’s endorsement called “Other Member of Your Household.” Some states do not charge a premium for this. You can remove this person at any time, with no notice given to them.
- Unless you are married, you cannot add a significant other as a named insured.
- You can ask the person to get their own policy. Separate policies mean each of you has the full amount of liability coverage if you cause a loss.
Having the right coverage gives you peace of mind. Make sure you are protecting your greatest investments.
This article is furnished by California Casualty, providing auto and home insurance to educators, law enforcement officers, firefighters, and nurses. Get a quote at 1.866.704.8614 or www.calcas.com.
by California Casualty | Auto Insurance Info, Safety |
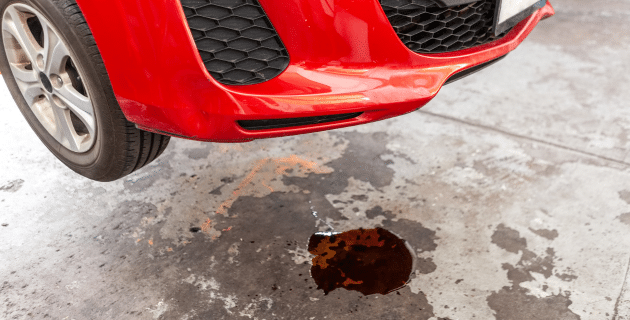
There’s a puddle underneath your car. Don’t panic. If it’s summer and you’ve just run the air conditioning, you probably don’t need to worry. But there are times when you should be concerned.
We’ve put together a guide to why puddles form under cars, what to look for, and when you need to act.
What is an air conditioning puddle?
Water puddles are common on hot, humid days after we run our car’s air conditioner. That’s because the process of air conditioning produces condensation. There’s a drain tube built into the system that allows that moisture to pass through the floorboard and exit the car. You’ll usually see that puddle under the car on the front passenger side.
Note: A puddle under the car is normal. A puddle inside the car is not.
Check to see if the puddle is water.
Chances are, if it’s a hot day and you just ran the air conditioning, that puddle is water. However, you can easily check that.
- Dip a clean rag in the puddle. Do the sniff test. If there’s an odor, it’s not water.
- Visually inspect the fluid on the rag. If there’s a color, it’s not water.
- Slide some white cardboard under the car to tell what is leaking and where.
What if it’s not water?
If it’s not water, here are some common fluids that could be leaking from your car. Should you see any of these leaks, get them fixed as soon as possible.
- Coolant (antifreeze) – Coolant comes in many colors, including green, orange, yellow, blue, greenish blue, pink or red. It may appear clear with a hint of color. It also will have an odor. If your radiator loses too much coolant, your engine can overheat. Leaks also are dangerous to pets. The sweet smell of coolant can attract them and it’s poisonous if consumed.
- Gas – A fuel leak may look like water, but it will smell like fuel. It’s also highly flammable so be cautious when handling it. Fuel leaks usually happen due to a crack in the fuel tank.
- Oil – If it’s light brown or black, and greasy, it’s probably engine oil. You’ll find this type of leak at the front end of your vehicle. If you suspect an oil leak, check your car’s dipstick. If it’s low, that confirms there is an oil leak.
- Brake fluid – This type of fluid ranges from clear to yellow brow in color. You’ll find the leak near the wheels. It’s not safe to drive if you have a brake fluid leak. It may cause the brakes to fail.
- Automatic transmission fluid – This fluid is pink to dark brown. It is a lubricant and a coolant. If you have this type of leak, driving your car could cause further damage.
- Power steering fluid – Usually yellow or reddish brown in color, a power steering fluid leak will have a slightly sweet, burnt smell. Driving on low levels of steering fluid can cause lasting damage.
- Windshield washer fluid – This comes in colors such as blue, purple, green, or orange. You’ll likely find the leak in the reservoir near the windshield. While a windshield washer fluid link won’t affect the car’s operation, it will impact your ability to drive in the rain.
Refrigerant Leaks
There’s also a possibility that the refrigerant from your air conditioning system is leaking. Refrigerant is colorless and can look like water. If refrigerant is leaking, it puts a strain on the compressor and reduces the air conditioner’s ability to cool down air.
Leaks can happen for a variety of reasons. These include a blockage in the drainpipe, the drain not being attached properly, air filters that are dirty or blocked or a broken drain pan.
Here’s how to diagnose a refrigerant leak:
- Listen for a clicking sound. With less refrigerant, the compressor shortens its cycle. This creates a clicking sound, which is an early warning sign.
- Look for a dashboard When refrigerant levels are low, there may be an early warning light.
- The air conditioning stops working. If it’s blowing hot air, the refrigerant level is too low.
Air conditioning leaks inside the car
If your air conditioning drain tube becomes blocked, you may notice a buildup of water on the front carpets and mats of your car. That may mean you need to clean out the tube and remove any debris. This will allow condensation to flow freely. If the tube is deteriorating or damaged, or if the heater core is leaking, it requires a more extensive repair. If you suspect a clogged drain tube, try driving without the air conditioning. See if the dampness continues. If it does not, then you’ll want to get your drain tube checked out.
Your car is one of your greatest investments. Keep it well maintained and fully insured for added peace of mind. Safe travels.
This article is furnished by California Casualty, providing auto and home insurance to educators, law enforcement officers, firefighters, and nurses. Get a quote at 1.866.704.8614 or www.calcas.com.
by California Casualty | Health, Pets, Safety |
It can happen in an instant. A child falls into the pool. A friend collapses in the heat. Someone chokes on a piece of food. If you know CPR, you can help.
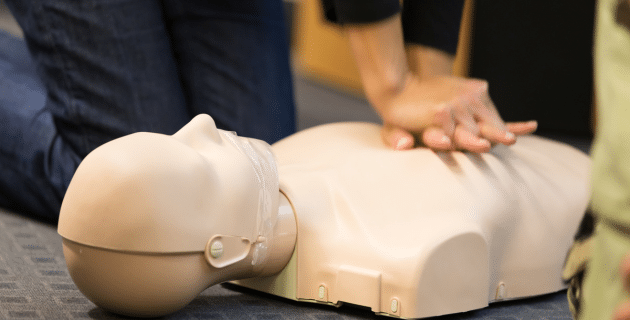
CPR is short for cardiopulmonary resuscitation. It is a lifesaving technique used in situations when someone’s heart stops or they stop breathing. CPR helps supply blood and oxygen to vital organs. It increases your chances of survival. It can be used for both humans and pets.
Follow this guide to know what to do if you have to administer CPR in an emergency.
Before beginning CPR
- Check for responsiveness. Shout, “are you okay?” Or tap the individual gently and see if he/she moves or makes a sound. If there is no movement, no pulse, no breathing, or the person is unconsciousness, it’s time to start CPR.
- If you’re alone, and performing CPR on a child, start immediately. You’ll call 9-1-1 after 2 minutes of CPR and rescue breaths.
- If you’re alone, and performing CPR on an adult or teen, call 9-1-1 before you start CPR. Put your phone on speaker.
- If you’re with others, point to one person. Tell him or her to call 9-1-1 and then begin CPR. If you don’t specify the person, there’s a chance that no one will make the call. If there might be an automated external defibrillator (AED) nearby, send someone to get it as well.
- For pets, an emergency vet is the equivalent of 9-1-1. See the last section for steps to take in performing CPR.
CPR for Adults
CPR for adults also applies teens. The general rule is that if the person has entered puberty, this technique may be used.
Step #1: Put the person on their back on a flat firm surface. Kneel beside them.
Step #2: Do 30 chest compressions to get the blood flowing.
- Place your two hands centered on the person’s chest.
- Make sure your shoulders are directly above your hands. Lock your elbows.
- Push down at least 2 inches hard and fast, about 100-120 compressions per minute.
- Let the chest return to normal between compressions.
Step #3: Look, listen and feel for breathing.
- Look to see if their chest is rising and falling.
- Listen for breathing sounds.
- Feel their breath against your cheek.
Step #4: Give 2 rescue breaths to deliver oxygen to the organs.
- Tilt the head and lift the chin to open the airway.
- Make sure there is nothing in the mouth obstructing the airway. If there is, sweep it out with your fingers.
- Pinch the nose shut, while you take a normal breath.
- Put your mouth over the person’s mouth and make a complete seal.
- Blow the breath into their mouth for one second. Watch the chest rise. If the chest does not rise, try repeating the head tilt and breath. If the chest still doesn’t rise, there may be something blocking the airway.
- Repeat the process of blowing for a second breath.
Step #5: There may be an AED if you are in a public place. This machine delivers an electric shock to the heart. It can help restore a heart’s rhythm. After five cycles of CPR, turn on the AED and follow the voice prompts.
CPR for Children (1-12 years)
A child’s airway is more delicate than an adult’s airway. If you approach CPR on a child as you would an adult, you could do harm. You will need to be more careful with the head tilt and the compression strength and depth.
Step #1: Place the child on his/her back on a flat surface. Kneel next to the child.
Step #2: Do 30 chest compressions.
- Put heel of one hand on the breastbone, just under the nipples. Make sure your hand is not on the end of the breastbone.
- Push down about one-third of the child’s chest, about 1.5 to 2 inches. Aim for 100-120 compressions per minute.
- Let the chest return to normal between compressions.
Step #3: Look, listen and feel for breathing.
- Look to see if their chest is rising and falling.
- Listen for breathing sounds.
- Feel their breath against your cheek.
Step #4: Give 2 rescue breaths for every 30 compressions.
- Lift the chin to tilt the head back. Be careful not to tilt the head too far.
- Make sure there is nothing in the mouth that is blocking the airway.
- Pinch the nose shut, while you take a normal breath.
- Put your mouth over the child’s mouth and make a complete seal.
- Blow the breath into their mouth for one second. Watch the chest rise. If the chest does not rise, try repeating the head tilt and breath. If the chest still doesn’t rise, there may be something blocking the airway.
- Repeat the process of blowing for a second breath.
Step #5: If an AED with pediatric pads is available, use it after five cycles of CPR. Pediatric pads adjust the energy level used. You can use adult pads for children ages 8 and older.
CPR for Babies (under a year)
Babies have flexible bones and are still developing. You must take care with the force of your compressions and breaths.
Step #1: Place the child on his/her back on a flat surface such as a table or floor.
Step #2: Do 30 chest compressions.
- Use only 2 fingers to provide compressions in the center of the baby’s chest.
- Place your fingers in the center of the chest just below an imaginary line between the nipples. Compression depth should be about an inch and a half.
- Do 30 gentle chest compressions. Aim for 100 compressions per minute.
Step #3: Look, listen and feel for breathing.
- Look to see if their chest is rising and falling.
- Listen for breathing sounds.
- Feel their breath against your cheek.
Step #4: Give 2 rescue breaths for every 30 compressions.
- Gently tilt back the baby’s head and lift its chin to open the airway.
- With your breaths, do not use the full force of your lungs. Use your cheeks to puff air into the mouth and nose.
- Give one gentle puff of air for the duration of a second. Wait one second and give a second puff.
- Watch to see if the baby’s chest rises. If it doesn’t rise, repeat the head tilt, and give another breath.
Step #5: If available, use the AED only with pediatric pads, after five cycles of CPR.
CPR for Pets
You also may perform CPR on a pet. Make sure to only do it for unconscious animals, as even a beloved family pet can bite from pain or fear. The following guidelines are geared toward our fur babies.
Step #1: Place the pet on a flat surface such as a table or floor. Kneel or stand behind the pet.
- For large dogs, put the dog on its back and compress its chest as you would a human.
- For small dogs and cats, lie them on their side and compress the side of the rib cage or position the animal on its back and press on both sides of the rib cage.
Step #2: Do 30 chest compressions.
- Compress at least a third the depth of the chest, but not more than a half the depth.
- For small dogs and cats, do compressions with one hand to avoid pushing too hard.
- For dogs over 60 lbs.: do 60 compressions per minute.
- For animals 11 to 60 lbs.: do 80-100 compressions per minute.
- For animals 10 lbs. or less: do 120 compressions per minute.
Step #3: Give 2 rescue breaths.
- Make sure the pet’s windpipe is as straight as possible. The head should be flat on the table or floor with tip of nose aligned with the spine.
- Open the animal’s mouth, and make sure the air passage is clear. Remove any objects.
- Open your mouth. Put it over both nostrils of your pet. For large dogs, close the pet’s jaw tightly and breathe into the nose. For small dogs and cats, cover the animal’s nose and mouth with your mouth as you breathe.
- Blow hard and quickly and make sure you see the chest rise.
Step #4: Alternate breaths with compressions. There should be 30 compressions to 2 breaths.
Step #5: Since 9-1-1 is not an option for pets, get someone to help you get your pet to an emergency vet. Continue CPR on the drive over.
CPR training is available for adults, children, babies, and pets. Contact your local Red Cross for information on human CPR and ask your veterinarian about animal CPR. Keeping your pet fully insured also will help should an emergency arise.
This article is furnished by California Casualty, providing auto and home insurance to educators, law enforcement officers, firefighters, and nurses. Get a quote at 1.866.704.8614 or www.calcas.com.
