by California Casualty | Helpful Tips, Homeowners Insurance Info |
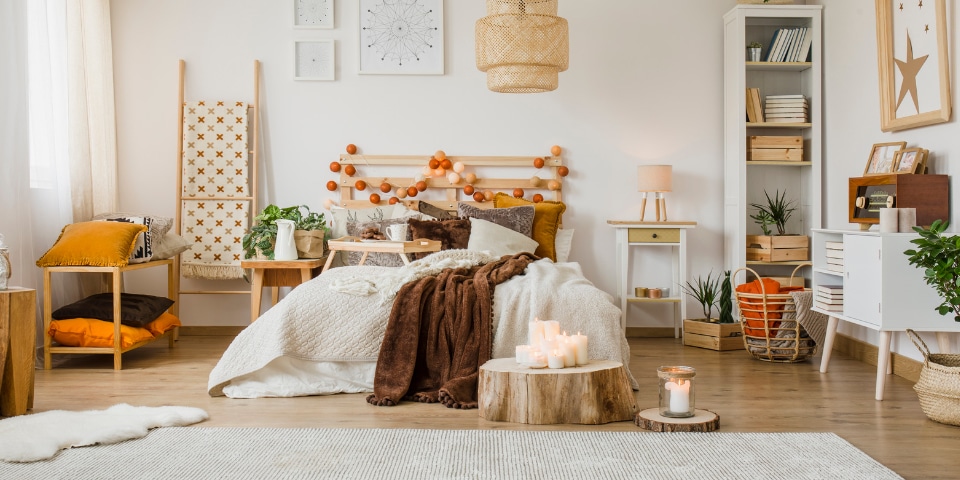
Picture a living room where soft throws, flickering candles, and calming neutral tones create a haven of warmth and relaxation. That’s the idea behind Hygge, the Danish art of coziness. Whether you’re unwinding with a cup of tea or enjoying a quiet moment, a hygge-inspired space wraps you in comfort and serenity. Ready to embrace the cozy life? Let’s explore how to turn your living room into the ultimate snug retreat.
What exactly is Hygge?
Hygge (pronounced hoo-ga) is a Norwegian word that means coziness. It’s a Danish concept characterized by simplicity that embodies a feeling of comfort and contentment. At its core, hygge is about slowing down and savoring moments that bring joy and relaxation, helping to create a sense of well-being and balance in everyday life.
Elements of Hygge Design
Hygge design is all about simplicity and functionality. Here are some easy ways to incorporate hygge elements into your living room.
Space
Hygge spaces are uncluttered, light and airy spaces with distinct areas.
- Clutter is stressful. The first step is to declutter your room. This gives you the blank canvas to thoughtfully consider what belongs here.
- If you’re ready for a painting project, paint your walls in a light earth tone such as white, off-white or cream.
- Add sheer drapes or window coverings in shades of those same colors.
- Plan out cozy places within the room to gather, such as a reading corner and conversation nook.
Furnishings
When considering your furniture, look for modern, minimalistic designs.
- Draw inspiration from Scandinavian furniture with clean lines, rounded edges and tapered legs.
- Avoid stiff furnishings. Instead choose a chair with overstuffed arms or super soft upholstery.
- Blend old and new. You can incorporate vintage furniture next to modern.
- Arrange seating for conversation and interaction, rather than around the television.
- Less is more but make sure you have ample seating for everyone.
Calming Neutrals
The neutral color palette used in hygge design draws inspiration from nature.
- Choose calming tones such as creams, grays and browns. Think of the colors that you find in natural shades of wood.
- Select patterns with similar colors that will not disrupt the harmony.
- Avoid bright pops of color. Instead, go deeper with earth tones.
- Everything you add should create a peaceful atmosphere.
Tactile Textiles
A neutral palette allows the textures to really stand out.
- Choose materials that invite you to touch them, such as fluffy pillows, thick knits, boucle blankets, and items made of linen, cashmere, and fuzzy mohair.
- Add a deep pile area rug that invites your toes to sink in.
- Layer your textures. Group together throws and cushions of different textures.
- Pile blankets high in a wicker basket within easy reach of your seating area.
Soft Lighting
Lighting creates the right ambiance for relaxation.
- Just as you layer fabrics, you can layer lighting. Choose an overall dimmer switch for full room lighting that can be adjusted to fit your mood. Then add pockets of lighting in areas within your space.
- Use a floor lap or table lamp in your reading nook. Choose light bulbs with a warm color temperature. Lamps with frosted shades offer beautiful, filtered light.
- Candles provide a flickering glow. Choose flameless varieties that are safe around kids and pets, for increased fire safety.
- Twinkling lights give off a softer light than your overhead light. Choose tiny white or clear lights that work with hygge décor.
Natural Elements
Hygge is inspired by a connection to nature. Bring those natural elements inside.
- Add potted plants, fresh or dried flowers, for some natural inspiration.
- Incorporate organic materials like wood and stone in furniture and décor.
- Consider wood floors, wooden bookcases and shiplap paneling on walls.
- Display artwork depicting scenes in nature or using natural items or themes.
Décor
Hygge is about minimalism. You’ll want to keep your décor simple and meaningful.
- Display your treasures—the things that are meaningful to you. That includes children’s artwork, DIY crafts and family photos.
- Avoid overcrowding shelves and tables with knickknacks.
- Less is more when it comes to décor. Start with a blank slate and add one or two pieces to create that cozy, welcoming feel.
Your home is one of your greatest investments. Make sure to protect it – and your valuables – with the right insurance.
This article is furnished by California Casualty, providing auto and home insurance to educators, law enforcement officers, firefighters, and nurses. Get a quote at 1.866.704.8614 or www.calcas.com.

by California Casualty | Educators, Helpful Tips |
In the classroom, every second is an opportunity to learn. That’s where sponge activities come in—quick, engaging learning tasks that soak up spare moments like a sponge, turning downtime into teaching time. Whether it’s a fun brain teaser, a vocabulary challenge, or a quick math drill, these activities keep students engaged and learning, making the most of every moment.
What exactly are sponge activities?
The term was coined by educator Madeline Hunter. She envisioned activities that reviewed previously learned material and provided ways to practice and engage with the content. The best sponge activities are fun and engaging, and don’t seem too academic.
Sponge activities are often confused with brain breaks. Brain breaks offer a break from learning to energize or relax students so they can refocus. Sponge activities are learning activities.
When should you use sponge activities?
- When the lesson finishes earlier than expected
- When the lesson doesn’t pan out and you need to switch gears
- When the Wi-Fi goes out and you don’t have access to your planned lesson
- When you have a few minutes left in class before dismissal or the next activity
- When you want to add a fun element to learning
- When you want to engage students to prevent behavioral management issues during downtime
Engaging & Effective Sponge Activities
Sponge activities do not just happen. They are pre-planned just as any of your lessons. However, once you establish your list of “go to” sponge activities, you can incorporate them at a moment’s notice. Here are some of our favorites.
Language Arts
- Storytelling: Write a story collaboratively with the whole class. Use a ball to toss around. The person with the ball must add one sentence to the story. Record the story so students can later illustrate it.
- Word scramble: Ask students to write down spelling words so that the letters are scrambled. Then, have them switch papers with a classmate and challenge students to unscramble the words. Alternatively, write a multisyllabic word on the board and have students find as many words as possible using a selection of letters from the word.
- Spelling chain: Give the students a word to spell. The challenge is that each student spells just one letter and they must do it in order. The first student says the first letter, the second the second letter, and so on. Any student who gives a wrong letter sits down.
- Advice column: Ask students to write a letter to a character in the book the class is reading. Students could offer advice at a pivotal moment, share their support, or ask questions. This really helps students to engage with the text.
- Vocabulary guess: A volunteer stands at the front of the room with their back to the board. You write a vocabulary word on the board. The student then calls on the class to provide clues so they can guess the word.
- Wordle for kids: Spellie consists of three daily puzzles ranging in difficulty. The easiest level has four letter words that are good for kindergarten to grade 2. The medium and hard versions use five letter words but keep to words that are common to a fourth-grade vocabulary.
Math
- Countdown: Sit students in a circle and ask them to count by 2s, 5s, etc. Make it more difficult by counting backwards or skipping prime numbers.
- Wordy math: Give students an equation and ask them to write a word problem for it.
- Around the world: You will need flashcards with simple math equations. Start with two students and see which one solves it first. The winner plays the next student using a new flash card, and so on, until it travels around the classroom, and everyone gets to play. You can also do this in small groups.
- Problem-solving box: Keep a small box and blank cards available for students. When they have free time, they can write a problem and place it in the box. For your sponge activity, draw a card from the box and challenge the class to solve it.
- Mental math: How fast can students calculate an answer in their head? Can they beat a calculator? Start with easy computations to build confidence and gradually increase difficulty.
- Race the teacher: Challenge your students to complete a math page more quickly than you can. You can even have students create the questions.
Social Studies
- History charades: Have students act out people, situations, and events that occurred during the period you are studying.
- 20 questions: Write down a name, event, or other content from your current unit. Students choose a card and then the class asks them yes/no questions to discover the answer. If the class cannot guess it within 20 questions, the student has successfully stumped them.
- Historic careers: What careers would students have chosen if they grew up in the historic era the class is studying? Ask the students to write down requirements for that job and to create a daily schedule.
- The list of lists: How many states can students name in a minute? 5 minutes? Choose any content that can be shared as a list and challenge students to compile it within a timeframe.
- Advocacy: Ask students to take a stand about a local or state issue. Present both sides of the issue. Have them write an email to their local or state official about their view.
- Four corners: Present students with a statement related to the unit the class is studying. Have students assemble in one of the four classroom corners: strongly agree, agree, disagree or strongly disagree. Then have each group discuss why they felt that way.
Science
- Student teacher: Ask for a volunteer to be the teacher. That student will quiz the class about the lesson. Model first what you are looking for and prepare a rubric with types of questions the student can ask.
- 20 questions: Write down a scientific element, animal/species, or content from the unit the class is studying. Students choose a card and then the class asks them yes/no questions to discover the answer.
- The list of lists: How many elements on the periodic table can students name in a minute? Choose a category and challenge students to list items within that category.
- Brilliant scientist: Ask students to design an experiment that will prove a concept that the class is studying. (For younger students, give them the steps of an experiment and have them put the steps in the right order.)
- Science fiction: Take a scientific concept and have students create a story around it.
- Breakthrough news: Ask students to write a news article on a past scientific discovery (e.g. discovery of gravity).
General
- Last one standing: Have students write down items in a category related to your content area. Then, ask all students to stand. One by one, have students read one item on their list. If that item appears on anyone else’s lists, it must be crossed off. When all items on a student’s list are crossed out, they must sit down. The winner is the last one standing.
- Epic tech: Use Padlet to help students process the lesson. What 3 things did they learn? What 2 questions would they put on a quiz? Or try these other tech tips and tricks from a third-grade teacher.
- Blackboard races: Divide the class into teams. Pose the question and then students race each other to the blackboard to write the answer. Points are awarded for speed and accuracy.
- Music to my ears: Have students free write or draw to different types of music, with prompts based on your content area.
- Study habits: Have students create mnemonics using their own silly sentences to remember a series of terms. They can even create a chant or cheer that the class can practice.
- Homework help: Model the use of AI and how it can help with homework questions. Then, ask the class some questions to ask AI. Discuss when it is appropriate to use, and when it is not.
Do you have a sponge activity that’s not on the list? Share it with your colleagues in the comments below.
This article is furnished by California Casualty, providing auto and home insurance to educators, law enforcement officers, firefighters, and nurses. Get a quote at 1.866.704.8614 or www.calcas.com.

by California Casualty | Helpful Tips |
Planning a night out or a fun day without the kids? Make sure your babysitter is ready for more than just snacks and bedtime stories. Prepare them with the right information to handle any situation—whether it’s a scraped knee, a tantrum, or a power outage. When they’re prepared, you can truly relax.
Having a clear, written plan for your babysitter is essential for peace of mind. In unfamiliar or stressful situations, even the most experienced sitter might forget key details. A written guide provides them with easy access to the important information they need to stay calm and handle things efficiently.
Family Information
Your sitter may know you well or may be meeting you for the first time. Either way, it’s good to provide the basics in case they need to reference the information, whether it’s for a pizza delivery or a 9-1-1 call.
- Home address (and nearby cross streets or landmarks if needed)
- Full names and ages of each child
- Home phone landline (if there is one)
- Your cell phone number
- Name and number of a neighbor, close friend or relative as a backup
Pro Tip: Get your sitter to program your cell phone number into their phone before you leave.
Emergency Contacts
Emergencies happen, and when help is needed right away, your sitter may have to call 9-1-1. Share examples of when they should do so, such as when someone is injured beyond the first aid they can provide, or if a child has been exposed to a potentially toxic substance. If there’s a fire in the house, they still need to call, but they should leave the home first with your child(ren) and call from outside.
- Poison Control Center (800) 222-1222 (open 24/7)
- Pediatrician’s phone number (which will connect to after-hours care)
- 9-1-1 (police and fire)
In case of fire, share these instructions with the sitter:
- Do not try to put the fire out yourself.
- Bring the children out of the house. Do not go back in for any reason, even to rescue pets.
- Call 9-1-1. Stay on the line until the operator says it is okay to hang up.
- Call the parents after you have called 9-1-1.
- Wait at a safe distance with the children.
In case of severe weather, use this as your basis for instructions to the sitter:
- In a hurricane, tornado or high-wind storm, stay inside your home. Choose a small, interior room without windows, such as a bathroom or closet, on the first level.
- Share the location of flashlights, extra batteries, candles and matches in case the power goes out. (They can also use the flashlight on their phone.)
- Call the parents to let them know. Conserve your phone’s battery so you can stay in communication.
Medical Information
Whether it’s allergies, medications, or any existing health conditions, providing this information ensures the sitter is prepared to act quickly and appropriately.
- Food and medication allergies (if any) listed for each child
- Where medicine is stored, instructions on how and when to administer (and whether they need your permission to receive)
- Location of the first aid kit, band-aids and other medical supplies
- A healthcare authorization form in case you can’t be reached in an emergency and your child needs medical care (You can find these forms online.)
Schedule & Routines
Think through a typical day and write down the routines for your children. Use that as a basis for the schedule you will provide for your sitter.
- Include approximate times, as it may take longer than usual when a person other than you is directing.
- Chores or homework for which the kids are responsible
- Essential supplies (e.g. a lovey and sound machine for bedtime)
- Include options for discipline (e.g. loss of screen time) and rewards (e.g. an extra story) to help encourage children to follow the routine.
Snacks & Meals
Whether or not your sitter will be feeding your child, they will likely have to negotiate requests for snacks.
- Establish the rules on snacks and sweets, and when children can have them.
- Make sure your sitter knows what is safe for a baby or toddler to eat. Don’t give a child under age 4 whole grapes, whole hot dogs, hard candy, popcorn, or other choking hazards.
- Plan to feed your sitter if they are there during mealtime and let them know the options.
Safety Rules
Safety isn’t always commonsense. Make sure your sitter is aware of the following rules.
- Never leave child unattended in a bathtub or on a high surface like a changing table.
- Keep children away from windows.
- Don’t let little ones play near stairs.
- Don’t allow children to play with household appliances or dangerous objects, including plastic bags which can present a suffocation hazard.
- Never leave children alone with a dog, even the family dog. Bites can happen quickly and unexpectedly even with a pup that hasn’t bitten before.
- Never leave the children alone in the house.
- Avoid swimming pools and trampolines when the parent is not around.
House Rules
You will want to share your rules about what is allowed, from screen time to what the sitter is allowed to do when the kids are asleep. Here are some rules to consider.
- How much screentime children are allowed
- Whether the sitter is allowed to post photos of your kids on social media
- What is off-limits in terms of television shows (even when kids are asleep), technology, food and drinks
- Your policy on visitors (e.g. no friends, don’t open the door unless the parent has let you know that a visitor is expected)
- No sleeping on the job
When Your Babysitter Arrives
- Ask your sitter to arrive 15-30 minutes before you plan to head out to allow ample time for instructions. It’s worth the additional peace of mind to pay her for this extra time.
- Give your babysitter a tour of the house if she or he hasn’t been there before. Point out any areas that are off-limits to the sitter and/or the kids. Show him or her two ways out of each room in case of a fire.
- If you have Nanny cams, point them out.
- Go over the written instructions and leave them posted in a visible, easily accessible place, such as stuck to the fridge with a magnet.
- Give your sitter a chance to ask questions.
- Confirm your expected arrival back at the home and let them know how you will update them if you are running late.
- Enjoy your day or night out with the peace of mind that you’ve taken the steps to keep everyone safe.
This article is furnished by California Casualty, providing auto and home insurance to educators, law enforcement officers, firefighters, and nurses. Get a quote at 1.866.704.8614 or www.calcas.com.
by California Casualty | Helpful Tips, Safety |
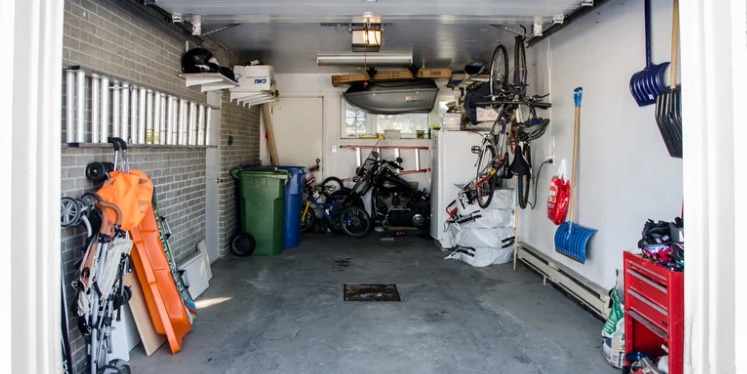
Your garage might be your go-to spot for stashing everything from holiday decorations to that old treadmill, but not everything is garage-friendly. What should you keep there and what should you avoid storing? Here’s a quick guide so you can ensure your belongings and your home stay safe.
Garage-Friendly
Unlike your house, your garage is not climate controlled. Temperatures fluctuate from very hot to very cold, depending on the weather outside. It can also get damp in your garage if humidity is high. Plus, there are critters – from mice to bugs – who can make their home there, even in the most well-kept spaces. That’s why it’s important to store items in your garage that can withstand temperature swings, humidity, and the occasional visits from pests.
Here are some items that work well for garage storage:
- Lawn care equipment: Go ahead and store your lawnmower, your leaf blower, your edger and spreader. Landscaping tools benefit from inside storage, away from the weather.
- Gardening supplies: Bags of soil and fertilizer, rakes, shovels, flowerpots, buckets, and hoses are well suited for the garage.
- Patio furniture and lawn chairs: Store beach chairs and outdoor furnishings during the off-season. It protects them from winter weather damage.
- Bicycles and scooters: Garage storage will help prolong the life of bikes and scooters which can rust. Garages also protect from potential theft of these items. Avoid storing anything with lithium batteries. Not only will the extreme temperatures reduce their lifespan, but these batteries can also pose a fire risk.
- Sports equipment: Store your outdoor and indoor sporting equipment, from skis to kayaks to basketballs. Consider wall-mounted racks to keep them off the ground and away from pests.
- Camping supplies: Your tent, head lamps, and camping chairs also are well suited to garage storage. Clean them before you store them; you don’t want to bring the woods into your garage.
- Pool equipment: Garages are great for swimming pool equipment like floats, skimmers and pool vacuums. However, pool chemicals need a cool, dry, ventilated place so move those elsewhere.
- Holiday decorations: These work for the garage if they are in airtight containers on shelves or pallets, so they’re not affected by moisture damage. But it’s better to store your holiday extension cords inside your home.
- Vehicles: Your garage is made for your car, truck, motorcycle, or ATV to keep it protected. That of course is the ideal use for this space.
Pro Tip: When choosing storage containers for the garage, select airtight plastic bins rather than cardboard boxes. They are less likely to be chewed through or affected if they get wet. For added protection, add moisture absorbers (known as desiccants) in the bin.
Not for the Garage
The general rule is that if you couldn’t bear to see something lost or destroyed, it should not be in the garage. Also, you don’t want to store anything that would be affected by a garage’s fluctuating temperatures and humidity, that potentially could cause a fire.
Here are some items that should be moved out of the garage to a safer storage spot:
- Fuel and chemicals: Avoid storing gasoline, gas cans, propane tanks, and cleaning chemicals in the garage. Not only could these items emit toxic fumes if not properly stored, but they also present a fire risk, and could be set off with a spark, such as from your car’s ignition.
- Paint: Paint needs a cool, dry place. It doesn’t do well in extreme heat and cold or humidity. Improper storage can change a paint’s formula.
- Furniture: Wood is a porous material that expands and contracts with humidity. It can swell and shrink to the point of cracking. Pests and rodents also can nest in upholstery. If the garage is your only option for furniture storage, make sure your items are in a clean, dry spot that is elevated. Also make sure that they are wrapped and covered.
- Sleeping bags and bedding: Humidity can make fabrics moldy. Rodents may nest in it or chew it. It’s tempting to put your sleeping bags with other camping supplies in the garage, but instead, move them inside your home.
- Clothing: Clothing can soak up fumes and dust in a garage and be at the risk of pests. Clothes also attract moths. In addition, fur and leather don’t hold up when in damp conditions. It’s best to store your clothes inside your home.
- Stuffed animals: These favorite toys can attract dust mites, insects, and mice. If you do store them in a garage, make sure they are in an airtight container.
- Rugs and carpets: These make great homes for mice and insects. The fibers also absorb moisture and odor which can stay with them if left for a long enough time.
- Food: Not only will food attract pests, but it will also spoil more quickly in temperature extremes. Even canned food is susceptible. In addition, humidity can cause cans and metal lids to rust. That can potentially trigger a chemical reaction with the food inside.
- Electronics: Moisture can damage hardware and cause electronics to short out. Damaged electronics can pose a risk of electrocution.
- Fragile and Valuable: Heat, cold and moisture can ruin photos, artwork and cause them to curl or fade. Store them in climate-controlled areas in acid-free boxes.
- Vinyl records: Grooves can hold moisture and get mildew damage. Record sleeves made of paper can rot, become moldy or be eaten by pests. Vinyl records can also warp or melt in the heat. CDs and DVDs can warp, too, so it’s best to put your music and movie collection elsewhere.
- Wine: Changing temperatures and humidity can alter the taste and quality of wine.
- Books: Silverfish love to eat the glue that binds books together. They also like paper. They are known to do well in dark, damp environments. The humid environment that’s ideal for pests will also cause pages of your book to curl.
- Firewood: Bringing firewood into the garage invites the pests that like to live in piles of wood outside. The general rule is to keep wood at least 20 feet away from your home, including your garage.
You want your belongings to stay safe. That’s why you protect them with personal property coverage. For more information on personal property coverage, common insurance purchasing mistakes, or setting up the right coverage for your home, contact a California Casualty representative.
This article is furnished by California Casualty, providing auto and home insurance to educators, law enforcement officers, firefighters, and nurses. Get a quote at 1.866.704.8614 or www.calcas.com.

by California Casualty | Helpful Tips |
Want to instantly make your home brighter, safer, and more welcoming? A few simple lighting upgrades can do just that. Whether you’re creating a cozy atmosphere in the living room, brightening up your kitchen workspace, or making sure hallways and staircases are well-lit to prevent accidents, improving your home’s lighting can make all the difference. Not only does good lighting boost mood and productivity, but it also enhances safety and adds value. Ready to see your home in a whole new light? Read on.
Enhance your natural light.
Sunlight is free, and there are ways to maximize how much light is naturally in your home. Make sure your windows are clean as a first step. Then try some of these tips.
- Use sheer curtains on your windows rather than heavy drapes. Try curtains or blinds that can be pulled back or opened wide to let the light in.
- Paint your walls lighter colors and your ceilings white. You’ll be surprised at how much that can lighten up a space.
- Place mirrors in hallways or corners to reflect the natural light coming in your windows. Other glossy surfaces have a similar effect, so consider adding silky fabrics, wallpaper with a sheen, or glass tables and objects.
- Make sure nothing is blocking your windows inside or out. Move furniture. Trim bushes. Clear the way for more sunshine.
Consider the type of lighting.
Not all lighting is the same. Knowing the types will help you determine which works best for each space in your home.
- Ambient describes general lighting. This is usually the main source of light, when you flip the light switch as you enter a room. It is a foundation for the lighting of your rooms. You can then add lighting as you see fit.
- Task lighting illuminates an area for a specific task. These are typically brighter lights for seeing clearly as you are cooking or while you’re in the bathroom. Task lighting could also be the desk lamp that you use for your home office or a table lamp for reading while the rest of the room is lit by ambient light.
- Accent lighting draws attention to pieces of art or an architectural feature of a room. It draws the eye in that direction.
- Decorative lighting offers the finishing touch to your home’s décor. This type of lighting typically includes wall sconces, chandeliers, hanging pendant lights, and floor and table lamps.
Pay attention to the bulbs.
Bulbs range in brightness and in color—and different choices can really change the feel of a room. Energy efficiency is also a factor in light bulb selection, as it can save you money over time. There are a lot of choices on the market so do your research for the right bulbs for your home.
- Warm white light works best for relaxing. Look for bulbs that are 2000 Kelvin (K) to 3000 K.
- Cool bright light looks the most like daylight. Look for bulbs that are 4500 K and above.
- Neutral light or bright white light, ranging from 3100 K – 4500 K, is for areas that require focus: kitchens, home offices, and bathrooms.
- Bulbs are measured by lumens and watts. The more lumens a bulb has, the brighter the light will be. The more watts a bulb has, the more energy it will use.
- Incandescent bulbs used to be the industry standard. They are not as energy efficient as other kinds of bulbs. Halogen light bulbs use less energy. Fluorescents are popular for kitchens and offices. LED bulbs are longer lasting and energy efficient. Smart versions of LED bulbs can be adjusted remotely for brightness and timing.
Pro Tip: Chances are you have three or four different types of light bulbs with different color temperatures throughout your home (and possibly even in the same room). Replace them with one kind for a more cohesive look.
Layer your lighting.
You will benefit from having several types of lighting in each room, so you have multiple options for different moods and tasks.
- Consider the activities that will take place in the room and the need for lighting. Use the ambient light as the base.
- Include brighter lights for tasks, which can be turned off or dimmed when you do not need them.
- Add an accent lamp on the table or floor for softer and more flattering lighting. Try a new lampshade. Light colored shades help diffuse light. Dark colored shades will concentrate it.
Pay attention to placement.
You can use lighting to help define your space by strategically placing it throughout the room, at different levels – on a table, floor, and hanging from the ceiling.
- Consider LED strips under cabinets to illuminate counters.
- For larger rooms, cluster the lighting to break the space into cozier areas.
- To make a room appear wider, place lamps in the corners.
- Point your light fixtures toward walls and ceilings, which can diffuse harsh light and reduce glare.
Install motion sensor lights.
Motion sensor lights enhance home safety by automatically lighting dark areas when movement is detected.
- Install them in hallways and stairwells, which are prime places for slip, trip and fall accidents.
- Use plug-in night lights with motion sensors.
- Battery operated LED light strips are available if you don’t have outlets in these spaces.
- Motion sensor lights are also effective outside your home. A sudden light can alert you to movement on your property and deter intruders.
Use smart lights and dimmers.
Smart lights and dimmers offer customizable, energy-efficient lighting solutions that adapt to your mood, schedule, and lifestyle with just a tap or voice command.
- With smart options, you can set up routines for changing lighting throughout the day and evening.
- You can control your lighting from anywhere via an app, adjusting for color and brightness.
- Dimmers also are available with manual switches. Dimming lights helps you save on your energy bill.
Add exterior fixtures for safety.
Exterior lights provide visibility around entry points, driveways, and walkways outside your home to enhance security.
- Walk your perimeter at night. Identify the dark spaces you want to illuminate.
- Try sconces for a side door or garage door.
- Landscape lighting is effective for a walkway and is available in solar and battery powered options.
- Consider smart lighting solutions for the outside that can be controlled remotely from inside or wherever you happen to be.
Your home is one of your greatest investments. Make sure to protect it with the right insurance.
This article is furnished by California Casualty, providing auto and home insurance to educators, law enforcement officers, firefighters, and nurses. Get a quote at 1.866.704.8614 or www.calcas.com.
