
by California Casualty | Pets |
It’s time to spoil the real VIPs in our lives—our pets and the people who love them! Whether you’re shopping for a cat cuddler, a dog devotee, or the proud parent of a feathered friend, finding the perfect gift can make tails wag, whiskers twitch, and hearts melt. From paw-some gadgets to cozy pet accessories, we’ve got a gift guide that’s sure to delight both two-legged and four-legged family members.
For Pets
Bow Wow Labs Buddy Safety Bully Stick Holder
Our dogs love bully sticks but when they get too short, they can become a choking hazard. This bully stick holder helps keep pups safe while chewing and ensures they enjoy their treats to the fullest without worry.
Drinking Fountain
Cats love to drink from running water, and this fountain provides a fresh, flowing drink that encourages hydration. There are many varieties available at a range of price points.
Hide and Slide Treat Dispensing Toy
Dogs must slide blocks and move flippers in order to access the hidden treats in this puzzle toy. Not only does it provide mental stimulation, but it’s also a great way to redirect your pup’s energy away from less desirable behaviors.
Interactive Laser
Keep your kitty entertained with this automatic laser toy that creates random patterns and movements. With 15 minutes of hands-free play and an automatic shutoff feature, it’s an ideal gift for busy cat parents who want to keep their feline friends active and happy.
Matching Hoodies
Choose a matching hoodie—or PJs or sweaters—for you and your pup to twin in style. This particular gift donates a portion of the sales to rescues so you’re giving while getting!
Matching Collar and Owner Friendship Bracelet
Celebrate the bond with your pet by sporting matching accessories! These stylish sets are available for dogs and cats, allowing you to show off your special friendship in a fun and fashionable way.
Pet Cactus Lick Mat
This cleverly designed lick mat helps soothe cats and dogs during stressful moments like grooming, baths, or nail trims. Its maze-like surface not only entertains pets but also gently removes food particles from their tongues, promoting healthier teeth and gums.
Talking Pet Starter Set
If only your dog or cat could talk…well, with this recordable button set, they just might start. Developed by a speech therapist, this could be a fun activity for you and your best friend.
For Pet Parents
Dog Bingo
Dog lovers will enjoy seeing their favorite breeds on this bingo board. It’s a guaranteed hit at your next game night. Don’t worry, cat lovers, there’s a cat version, too.
Doormat
Proclaim your love for pets with a fun doormat or a personalized one. Choose a washable version to make cleaning up those muddy pawprints a breeze.
Furbo Dog Camera
Watch your pet when you’re not at home with this 360-degree camera. The Furbo camera offers two-way audio and treat-dispensing capabilities, making it a must-have for pet parents who want to stay connected while away from home.
Grounds and Hounds Coffee Club
Coffee lovers and dog enthusiasts alike will appreciate this coffee club. Every purchase helps support rescue organizations, so you can enjoy your morning brew knowing you’re making a difference. Their gift selection includes fun items for both pets and humans too.
Greeting Cards
Not only does this greeting card company feature rescue dogs on their cards, they donate a portion of their proceeds to rescue organizations. Their pet-themed notecards make wonderful gifts.
Novelty Socks
Show your love with socks featuring your pet’s photo. Or find socks that have the right message, such as you can’t get up because the dog is on your lap. You can buy socks that save dogs and cats too.
Pet Backpack
Carry your pet around in style with a backpack that looks like the one Taylor Swift used for her cat in the Netflix documentary, Miss Americana. Chewy also has a list of their best 10 options in a variety of price ranges.
Pet Portrait
Commission a portrait of your fur baby or feathered friend. You can even find a cartoon version or put your pet on your favorite mug or other item. For a DIY take on a pet portrait, order one that the recipient can paint by number.
Finally, don’t forget to protect your fur baby with pet insurance for added peace of mind, and to save on your vet bill. Remember, you can easily add pet insurance from Pet’s Best to your California Casualty auto or home policy. Find out more about what pet insurance can cover by talking with a California Casualty customer service representative today.
This article is furnished by California Casualty, providing auto and home insurance to educators, law enforcement officers, firefighters, and nurses. Get a quote at 1.866.704.8614 or www.calcas.com.

by California Casualty | Auto Insurance Info, Helpful Tips, Safety |
Every day, lives are lost, and families are affected by drunk driving. Yet, these tragedies are entirely preventable. By raising awareness and taking action, we can help ensure safer roads for everyone. Whether it’s through planning a safe ride home or promoting responsible behavior, we all have a role to play in preventing drunk driving and saving lives. Let’s explore how simple choices can make a world of difference.
The Reality of Drunk Driving
The Numbers: Nearly 40 people die each day in drunk driving crashes, according to the National Highway Traffic Safety Administration. That’s about one person every 39 minutes. In fact, almost a third of all deadly crashes in the U.S. involve drunk drivers.
The Legal Consequences: The penalties for drunk driving include fines, license suspension, and even jail time. Consequences vary from state to state, but most use blood alcohol content to measure intoxication. In nearly all states, 0.08% is the threshold for drunk driving. Some states have zero tolerance for drivers under age 21 with any amount of alcohol in their system.
The Emotional and Financial Costs: If you’re convicted of driving under the influence (DUI) or driving while intoxicated (DWI), it’s an expensive proposition. You may have fines to pay. Your insurance rates will increase. You will have to arrange for transportation if you cannot drive while your license is revoked. The emotional toll is significant as well, especially if the crash caused injuries and/or the loss of a loved one.
Why Drunk Driving Happens
Impairment: Alcohol affects your brain, causing you to react more slowly and lose coordination. It can make you drowsy. You may have trouble judging distances and tracking moving targets. If you have enough to drink, you could have difficulty maintaining your lane, braking appropriately, and controlling your vehicle.
Overconfidence: Many people overestimate their ability to function after drinking. They believe they are less impaired than they truly are. They may not realize how even small amounts of alcohol can affect their judgment and reflexes. This false sense of control increases the likelihood of accidents and mistakes.
Social Norms: Social pressure often plays a role in drinking. Friends or colleagues might encourage you to drink more, dismissing concerns about impairment or consequences. This can make it difficult to set personal boundaries or say no, leading individuals to drink more than they intended.
Practical Tips to Prevent Drunk Driving
Drunk driving remains a significant danger on the roads, but it’s one that can be prevented with proactive measures. Here’s how to play your part in keeping yourself and others safe:
Plan Ahead
A little foresight can go a long way in avoiding risky situations:
-
- Be the hero. Volunteer as a designated driver and coordinate with friends to rotate this role for group outings.
- Choose alternative transport. Opt for a rideshare, taxi, or public transportation if you plan to drink. These options are often cheaper than the cost of an accident or a DUI.
- Stay the night. If you’re attending a gathering where you’ll be drinking, ask the host if you can crash on their couch.
Know Your Limits
Understanding your own boundaries can prevent poor decisions:
-
- Be alcohol aware. Alcohol affects everyone differently based on factors like weight, drink strength, and tolerance levels. Know how it impacts you.
- Use tech tools. BAC calculators or personal breathalyzers provide a snapshot of your intoxication level—but don’t rely solely on them to decide if you’re fit to drive.
- Err on the safe side. If you’ve consumed any alcohol, you could be impaired. Make decisions accordingly.
Host Responsibly.
When hosting, you can create an environment that discourages drunk driving:
-
- Offer alternatives. Serve non-alcoholic beverages alongside alcoholic ones to give guests choices.
- Feed your guests. Snacks or meals can slow alcohol absorption, helping guests pace themselves.
- End alcohol service early. Stop serving drinks at least an hour before your event ends.
- Keep an eye out. Pay attention to your guests. If someone appears intoxicated, offer them a ride home or a place to sleep.
Speak Up.
Your intervention could save a life:
-
- Step in when needed. Offer to drive friends home if they’ve been drinking or insist they use alternative transport.
- Take the keys. It’s tough to confront someone, but preventing an impaired friend from driving is worth it.
- Be firm about your safety. Refuse to ride with anyone who’s been drinking.
- Educate teens. Have open conversations about the dangers of drunk driving and ensure they know they can always call you in an emergency.
Drive Defensively.
Even if you’re sober, staying alert can protect you from impaired drivers on the road:
-
- Stay vigilant. Watch for erratic driving behavior like swerving, inconsistent speeds, delayed reactions, or incorrect signaling.
- Maintain distance. If you suspect someone is driving drunk, give them plenty of space to minimize risk.
- Report suspected drunk drivers. Call local law enforcement with details such as the vehicle’s make, model, color, license plate, and location. Never try to stop the driver yourself.
Finally, protect your vehicle with the right insurance. Happy holidays and safe travels from all of us at California Casualty.
This article is furnished by California Casualty, providing auto and home insurance to educators, law enforcement officers, firefighters, and nurses. Get a quote at 1.866.704.8614 or www.calcas.com.

by California Casualty | Auto Insurance Info, Calcas Connection, Finances, Helpful Tips, Homeowners Insurance Info |
We understand that changes to insurance premiums can be concerning, and we want to help you understand the factors that influence your rates. Insurance rates are determined by a combination of external conditions and personal policy coverage selections. Below, we’ll explain some of the most common reasons rates can increase and what changes in your policy could impact your premium.
External Factors That Can Cause Rate Increases
1. Rising Costs of Repairs and Replacements
For auto insurance, advanced technology in vehicles, like sensors and cameras, makes repairs more expensive. In the case of a total loss, rising prices for new and used vehicles drives up the cost of replacement. Similarly, home insurance is impacted by increasing prices for building materials and labor, making it more costly to repair or rebuild homes after a loss.
2. Weather and Natural Disasters
Severe weather events, such as wildfires, floods, and hailstorms, are happening more frequently and with greater intensity. These events lead to higher claim payouts and cause insurance rates to rise, even in areas that haven’t been directly affected.
3. Inflation
General inflation affects nearly every industry, including insurance. The rising cost of goods and services —from everything associated with a minor vehicle repair all the way to restoring extensive home damage, like parts, materials, labor, rental cars, temporary housing, legal and medical expenses —can result in an adjustment of premiums to align with the amount that is paid out on claims.
4. Increased Claim Frequency
More claims being filed—whether due to a rise in car accidents, litigation, or property damage—paired with increased claims costs can lead to paying out more on claims than what is collected in premium. When this happens, a rate increase can occur.
5. Reassessment of Risks
Insurance companies regularly re-evaluate risks in specific areas. If you live in a region that’s seen more accidents, theft, or natural disasters, your premiums may increase to reflect the heightened risk.
How Policy Changes or Adjustments Affect Your Premium
1. Adding or Removing Coverage
Expanding your coverage—such as adding comprehensive auto coverage or increasing your home insurance policy limits—will raise your premium. Conversely, reducing coverage may lower your rate but could leave you underinsured.
2. Adjusting Deductibles
Choosing a higher deductible typically lowers your premium since you agree to pay more out-of-pocket in the event of a claim. However, a lower deductible means your insurer covers more upfront, which increases your premium.
3. Policy Discounts and Loss of Discounts
We offer many discounts including affiliated group membership, bundling auto and home, multi-vehicle, safe driving, home security, non-smoking, good student, mature driver, etc. If you no longer qualify for a discount, your rate may increase.
4. Changes in Your Personal Profile
Life changes such as adding a new driver to your policy, changes to the number or type of covered vehicles, or moving to a different area can impact your premiums.
5. Claims History or Driving Record
Filing a claim can result in higher premiums at renewal. Additionally, if a ticket or accident is charged against your driving record, you may be subject to a surcharge that will likely raise your rates.
How You Can Help Manage Your Premiums
While some factors are out of your control, there are steps you can take to keep your premiums manageable:
- Bundle Policies: Combining your auto and home insurance or having multiple vehicles on one policy can help you save more.
- Review Your Coverage: Call us for a free policy review to make sure you’re not paying for coverage you don’t need.
- Increase Your Deductibles: Opting for a higher deductible can lower your premium but be prepared to cover more out-of-pocket costs in the event of a claim.
- Maintain a Safe Driving Record: Avoid accidents and traffic violations to keep your auto insurance costs down.
- Home Upgrades: A new roof, installing alarms, fire-resistive updates, or upgrading plumbing, electrical or HVAC systems can help you qualify for discounts.
- Ask About Discounts: Let us know if there have been changes, like completing a mature driving course, a child away at school without a vehicle, or reaching a milestone like retirement. We also offer discounts for multi-home, years claim free, good student, safe driving, and driver training for youthful drivers
We’re Here to Help
Whether it’s an auto accident or a home repair after a storm, having insurance helps ensure you’re not left to bear the full financial burden – so maintaining adequate coverage is crucial.
We understand that insurance can feel complex, but we’re here to make it simple and help make sure you have the coverage that’s right for you. Our trusted advisors are available to review your current policies, provide guidance on your coverage options, help explore ways to save, and answer any questions you have.
Thank you for trusting us to protect what matters most to you.
This article is furnished by California Casualty, providing auto and home insurance to educators, law enforcement officers, firefighters, and nurses. Get a quote at 1.866.704.8614 or www.calcas.com.

by California Casualty | Auto Insurance Info, Helpful Tips, Safety |
As temperatures drop and roads become icy, taking steps to winterize your car ensures you stay safe and stress-free. From checking your battery to swapping out wiper blades, preparing for the season is all about protecting yourself and your ride. Ready to keep your car in peak performance through the cold months? Let’s get started!
Take care of your tires.
You depend on your tires to grip the road. Make sure they’re in the best condition to help you maneuver safely.
- Check the tread. Tread gives you traction, and worn tread will take longer to stop on slippery roads with ice and snow. Put a penny into one of the grooves with Lincoln’s head facing you and upside down. If you see all his head, your tread depth is dangerously low. Replace your tires.
- Rotate your tires. Tires don’t wear evenly. The front tires usually have more wear on the outside edges, because they lean when you turn right or left. The front tires also hold the weight of the engine. To help your tires wear evenly, you need to rotate them every 5,000-7,000 miles.
- Align your tires. If you’ve ever taken your hand off the wheel while driving, and notice your car veering toward the side, you need an alignment. You need to align your tires to keep them pointing straight ahead. You can easily knock them out of alignment by going over a pothole. If you don’t align your tires, you can experience steering problems, poor fuel economy, and uneven tire wear.
- Consider snow tires. If you live in a place where snow is heavy, you may wish to switch to snow tires. Their softer rubber remains flexible in cold weather and helps them grip the road. Their wider grooves also are better at repelling water and gaining traction in snow.
- Check your tire pressure. As the weather changes, you will notice corresponding changes in your tire pressure. That’s because air expands as it gets hotter, which raises the pressure. It contracts as it gets colder, which lowers it. In cold weather, tire pressure can decrease about 1 psi for every 10-degree drop in temperature. That’s why it’s important to check your tire pressure when the weather changes, in extreme heat and cold, and adjust as needed.
Take care of your fluids.
Cold weather affects your car’s essential fluids.
- Change your oil. Cold weather thickens engine oil. That makes it harder for parts to turn. It also puts a strain on the starter and the battery. Choose a lighter weight oil for winter. Check your owner’s manual for the proper oil weight.
- Top off coolant (antifreeze) Coolant prevents your engine from overheating or freezing. Check the reservoir tank (not the radiator) and ensure the level is between the “min” and “max” lines. Use the correct coolant specified in your owner’s manual, as using the wrong type can damage the engine. Mix coolant with water in the ratio recommended in your manual.
- Refill windshield fluid. We use our windshield wipers a lot in the snow and rain. Make sure you have enough wiper fluid. Use a formula designed for low temperatures to avoid freezing. Keep an extra gallon in your car for emergencies.
- Change differential fluid if needed. This fluid helps to lubricate the gears and helps the wheels rotate at different speeds. It should be changed every 30,000 to 60,000 miles as the fluid breaks down over time.
Take care of your car’s components.
Cold weather can wear down critical parts of your vehicle. Getting your vehicle checked out with routine maintenance helps you stay on top of things.
- Test your battery. Cold temperatures slow down chemical reactions in the battery, reducing power. Check for corrosion and ensure it holds a charge. Replace old batteries to avoid breakdowns.
- Inspect belts and hoses. Cracks or wear in belts and hoses can lead to failures in cold weather. Address any issues immediately.
- Check your brakes. On slippery winter roadways, your brakes must be in good condition. Check and make sure your pads are not worn down. Otherwise, it will take longer to stop and could cause an accident.
- Check your spark plugs. Worn spark plugs can make your car more difficult to start in the winter. Look for signs of wear like carbon buildup, a damaged ceramic insulator, or oil deposits. Check your owner’s manual for recommended replacement intervals.
- Change your wiper blades. Snow, salt and slush builds up on your windshield. Your wipers need to work well. If your wipers look dry and feel brittle, if they make noise, or if they leave streaks, you will want to replace them. You can also get winter wipers which have a rubber edge and are heavier than regular wipers. A heavier weight makes the wiper motor work harder so make sure to remove them come spring.
- Change the cabin air filter if needed. A dirty filter can cause your HVAC system to perform poorly. It can slow down defogging of your windows, and not screen airborne contaminants. Change the filter at recommended intervals.
Equip your car with emergency essentials.
Winter driving can be unpredictable, so pack for the unexpected.
- Stay warm. Include hand warmers, blankets, and a winter emergency kit.
- Be ready for snow and ice. Make sure you have an ice scraper and snow brush.
- Bring along cat litter. Keep a bag of cat litter to sprinkle if you get stuck in the snow or on a slick patch. The extra weight will also increase your tire’s grip on the road.
- Stay fueled. Fill up your gas tank every time it hits the halfway mark. That way if you’re stranded, you’ll have gas to run the heat and keep you warm until help comes.
- Stock up. Keep bottled water and snacks handy. In case of a breakdown, that will help.
Finally, protect your vehicle with the right insurance for added peace of mind. Safe travels this season.
This article is furnished by California Casualty, providing auto and home insurance to educators, law enforcement officers, firefighters, and nurses. Get a quote at 1.866.704.8614 or www.calcas.com.
by California Casualty | Helpful Tips, Homeowners Insurance Info |
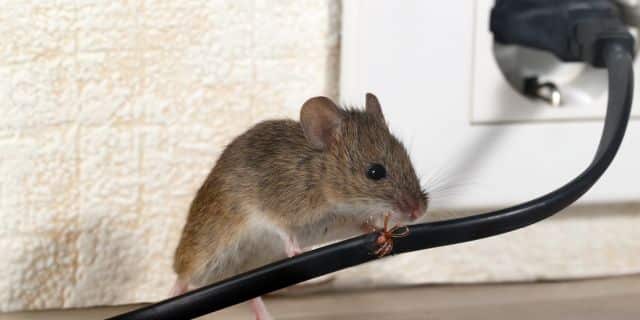
As the temperature drops, uninvited guests may view your home as the perfect winter retreat. Small critters like mice, squirrels, bats, and raccoons are experts at finding cozy nooks to ride out the chill. But don’t worry—keeping your home critter-free this winter is easier than you think. With a few simple steps, you can secure your space against these furry invaders and avoid the damage and mess they can bring.
Ready to critter-proof your home? Let’s get started!
Steps to Take Outside
Animals live outside and you would expect them to be there. However, you don’t want them nesting so close to your home that they may be tempted to venture inside.
- Trim landscaping. Keep shrubs close to the house well-trimmed so there are not places for them to build a home. Trim your trees so squirrels won’t be able to easily jump from there to your roof. Avoid using wood chips as mulch, as these make wonderful nesting material.
- Store firewood safely. Firewood can be a cozy hideout. Place logs at least 20 feet away from your house. Not only will that keep critters farther away, but the distance will also help protect against a fire risk. Keep the wood at least 18 inches off the ground to reduce the chance of rodents seeking shelter there.
- Remove food sources. Food is a major draw for animals. Place bird feeders away from your home and use squirrel guards to keep unwanted visitors out. Store food in sealed containers, and ensure garbage cans are securely closed and inaccessible.
- Secure decks and porches. The spaces beneath decks and porches are prime nesting spots. Look for signs of activity like gnawed wood, droppings, or burrow holes. Animals prefer dark, quiet areas, so deter them with a combination of radios, flashing lights, and apple cider vinegar-soaked rags. Once the critters leave, block openings with decorative lattice, burying the bottom edge to prevent reentry.
A note: Groundhogs who burrow under concrete slab, deck, porch are hibernators. You do not need to worry about them in the winter. They will not bother anything. However, during the springtime, you can use some of the above actions to get them to leave. Mylar windmills that move with the wind also will frighten them away.
Steps to Take in the Garage
Your garage is the midpoint between the outside and your house. Due to its proximity to your home, and the amount of stuff you probably store there, it could be inviting for critters.
- Seal openings. Garages offer shelter that is relatively warm, dry and protected from the elements. It’s no wonder critters want to be there. They don’t need a lot of space to get inside. Mice can enter in a ¼ inch gap. Check your garage for any openings. Caulk and fill in any cracks. Install a garage weather seal to close the gaps at the bottom of the doors.
- Clear the clutter. Critters do not like being out in the open. They are seeking cozy spaces where they can hide. This includes behind boxes, under shelves, beneath insulation, inside old tires, and so on. Remove any unnecessary boxes. Use plastic bins with tight lids so they can’t get inside. Raise items off the floor as a further deterrent.
- Eliminate food sources. Don’t keep trash or store food in your garage. Animals can smell a food source. If you must keep food in your garage, seal it in a container that will help prevent the scent from being detected.
- Insulate cavity walls. If your garage has cavity walls, you may find them make great homes for smaller animals such as mice. Consider filling them with a spray foam insulation. Not only will it help prevent critters from nesting there, but it will keep your garage warmer. Pro Tip: Choose a foam that includes rodent repellent.
Steps to Take in the Attic and Chimney
Both attics and chimneys are popular places for critters to nest. They are often easily accessible to the outside, and like garages, they offer protection from the outside elements. They also are generally dark and quiet, something critters enjoy.
- Check for signs of critters. Listen for noises. Look for droppings or urine stains and for damage such as chewed wood or ripped ventilation ducts. If you suspect that there are animals, take steps to remove them safely. Your local wildlife organization or a professional exterminator are good resources.
- Seal entry points. Animals enter your attic through small openings. The easiest way to check is to look during daylight, and see the places where light is coming in. Common spots are by attic vents, and openings in your roof soffits or eaves. Take steps to seal those openings. For attic vents, put a screen to cover the entire vent using ½ inch mesh. Use gutter guards on your roof to keep critters from settling there.
- Install chimney covers. These mesh screens allow airflow while blocking access to birds, squirrels, bats and other animals. In addition, make sure your chimney damper is properly closed when you’re not using your fireplace.
Steps to Take Inside
Your home is a warm, comfortable sanctuary for you, but it can also be an inviting retreat for unwelcome critters. With countless hiding spots, from behind your walls to under your cabinets, pests can easily find cozy nooks. The key to keeping them out is vigilance and preparation.
- Inspect every room. Conduct a room-by-room inspection to identify potential entry points. Focus on areas where gaps might exist along your floors, under cabinets, or around doors. Pay close attention to places where wires, pipes, or vents penetrate walls; even a tiny ¼-inch gap is enough for a mouse to slip through. Use caulk or sealant to close these gaps and consider plugging larger holes with steel wool, as rodents find it difficult to chew through.
- Secure doors and windows. Install or upgrade weather stripping around your doors and windows to seal off any openings. For exterior doors, consider adding a sweep or brush strip to block even the smallest gaps at the bottom. These simple steps help keep pests—and drafts—out.
- Examine vents and exhausts. Check your dryer vent, stove exhaust vent, and other external openings. Birds and small animals often see these as perfect nesting spots. Install vent covers or screens to prevent intrusions while maintaining proper airflow.
- Store food properly. Avoid leaving food out in the open, including pet food. Store all pantry items in sealed, airtight containers. This not only deters pests but also keeps your food fresher for longer.
- Try natural deterrents. Use the power of scent to repel pests naturally. Peppermint oil, for instance, is a proven deterrent for mice. Soak cotton balls in essential oil and place them near suspected entry points or in areas prone to critter activity. Replace them regularly to maintain their potency.
Your home is your greatest investment. Keep up with winter home maintenance and protect your home with the right insurance for added peace of mind.
This article is furnished by California Casualty, providing auto and home insurance to educators, law enforcement officers, firefighters, and nurses. Get a quote at 1.866.704.8614 or www.calcas.com.
