by California Casualty | Auto Insurance Info, Helpful Tips, Safety, Travel |
Your tires do a lot more than roll you from point A to point B. They keep you safe, improve fuel efficiency, and make every drive smoother and quieter. Yet terms like rotation, alignment, and balancing often sound like auto shop jargon best left to the pros. In this Tires 101 guide, we break down what these services really mean, why they matter, and how a little tire care can go a long way toward protecting your vehicle — and your wallet.
Tire Rotation
What is tire rotation?
Tire rotation is the practice of moving your tires to different positions on your vehicle — front to back, side to side, or diagonally — so they wear more evenly over time. Because each tire position experiences different forces, rotation helps distribute that wear instead of allowing one tire to do all the hard work.
Why tire rotation matters
Even tread wear means longer-lasting tires, better traction, and a smoother ride. Rotating your tires also helps maintain predictable handling and braking, especially in wet or slippery conditions. As a bonus, evenly worn tires roll more efficiently, which can help improve fuel economy.
What happens when you skip rotation
When tires are not rotated, they wear unevenly and wear out faster — sometimes thousands of miles sooner than expected. Front tires, in particular, tend to wear more quickly on most vehicles because they handle the bulk of steering, braking, and acceleration. Over time, uneven wear can lead to noise, vibration, and reduced grip on the road.
How often rotation is needed
Most vehicles benefit from tire rotation every 5,000 to 8,000 miles, or as recommended by your vehicle’s manufacturer. Many drivers pair tire rotation with routine oil changes, making it easy to remember and stay consistent.
How rotation is done
The rotation pattern depends on several factors: your vehicle’s drive system (front-, rear-, or all-wheel drive), whether your tires are directional, and whether the front and rear tires are the same size.
- Front-Wheel Drive (FWD): Front tires move straight back; rear tires move to the front and switch sides.
- Rear-Wheel or All-Wheel Drive (RWD/AWD): Rear tires move straight forward; front tires move to the back and switch sides.
- Directional Tires: Designed to roll in one direction only, these tires can move front to back but must stay on the same side.
- Staggered or high-performance setups: If front and rear tires are different sizes, they are typically rotated side to side only.
Pro Tip: If you have a full-size spare that matches your other tires, ask whether it can be included in the rotation to keep it in good condition and ready for use.
Tire Alignment
What is tire alignment?
Tire alignment — also called wheel alignment — ensures your wheels are perpendicular to the ground and parallel to each other. Alignment involves adjusting the angles of the wheels, so they point straight ahead and make optimal contact with the road.
Why tire alignment matters
Proper alignment helps your vehicle drive straight, handle predictably, and wear tires evenly. When your wheels are aligned correctly, your steering feels more responsive, your ride is smoother, and your tires last longer.
What happens when alignment is off
Misaligned wheels can cause tires to wear unevenly or prematurely. You may notice your vehicle pulling to one side, your steering wheel sitting off-center, or increased rolling resistance that forces your engine to work harder. Over time, poor alignment can reduce fuel efficiency, increase stopping distances in emergencies, and even cause steering wheel vibration.
How often alignment is needed
A good rule of thumb is to have your alignment checked once a year or every 10,000 to 15,000 miles. You may also need an alignment after hitting potholes, curbs, or other road hazards — or anytime your vehicle doesn’t feel quite right.
How alignment is done
Alignment adjustments are made to your vehicle’s suspension system, not the tires themselves. Technicians fine-tune three key angles:
- Toe: The degree to which tires point inward or outward when viewed from above.
- Camber: The inward or outward tilt of the tire when viewed from the front of the vehicle.
- Caster: The forward or backward tilt of the steering axis when viewed from the side.
Together, these adjustments ensure your wheels work in harmony rather than fighting against one another.
Tire Balancing
What is tire balancing?
Tire balancing ensures that the weight of each tire and wheel assembly is evenly distributed around the entire circumference. Proper balance allows your wheels to spin smoothly without vibration.
Why tire balancing matters
Balanced tires improve ride comfort, reduce vibration, and help your tires wear evenly. They also minimize stress on your suspension and steering components, contributing to better overall vehicle performance.
What happens when tires are unbalanced
When a tire has a heavy spot, it can wobble as it spins, causing noticeable vibrations, especially at highway speeds. Unbalanced tires may lose consistent contact with the road, leading to uneven tread wear and shortened tire life. Over time, this imbalance can also strain suspension and steering parts.
How often balancing is needed
Tires should be balanced every 6,000 to 8,000 miles, typically at the same time they are rotated. Balancing is also recommended whenever you install new tires or notice unusual vibrations.
How balancing is done
A technician mounts the tire and wheel assembly on a computerized balancing machine that detects weight imbalances. Based on the machine’s readings, small lead, zinc, or steel weights — either clip-on or adhesive — are placed on the wheel rim. The tire is then re-spun to confirm that the weight is evenly distributed.
General Tire Care
Keeping your tires in good shape goes beyond rotation, alignment, and balancing. Regular inspections and proper inflation play a critical role in tire safety and longevity.
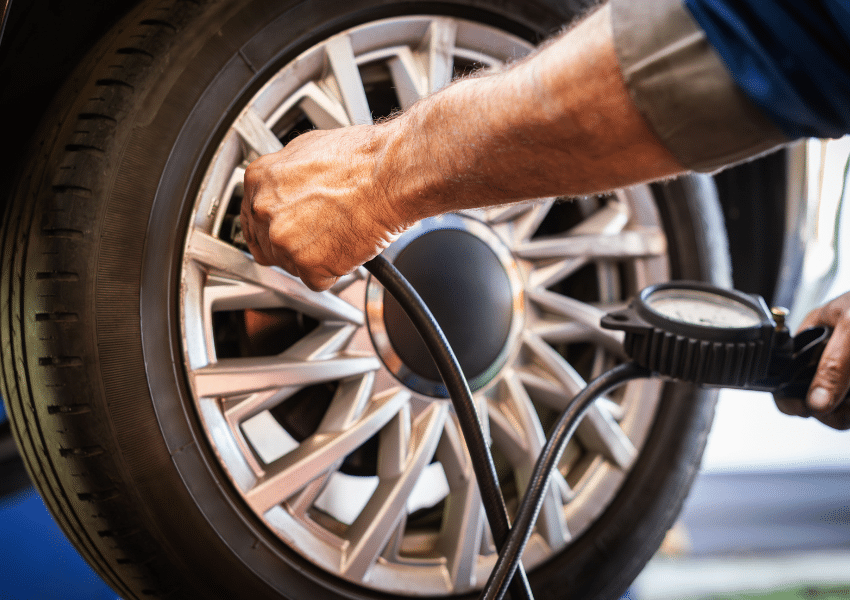
Check tire pressure regularly using a gauge, ideally when tires are cold — meaning they haven’t been driven for at least three hours. The correct pressure can be found in your owner’s manual or on the sticker inside the driver’s side door.
- Underinflated tires generate excess heat and stress, leading to irregular wear and increased risk of failure.
- Overinflated tires are more susceptible to punctures and road damage.
It’s also wise to visually inspect your tires for cuts, cracks, bulges, or embedded objects so small issues can be addressed before they become major problems.
Finally, make sure your vehicle is fully insured for added peace of mind.
Safe travels from all of us at California Casualty.
This article is furnished by California Casualty, providing auto and home insurance to educators, law enforcement officers, firefighters, and nurses. Get a quote at 1.866.704.8614 or www.calcas.com.
by California Casualty | Auto Insurance Info, Helpful Tips, Travel |
The fall and winter holidays are here, and that means one thing — road trip season! Whether you’re packing up the car for a cozy weekend with family or planning a winter getaway, a little prep now can make the miles ahead smooth and stress-free. So before you hit the highway, let’s make sure both your car and your crew are road trip ready.
1. Give Your Car a Quick Checkup
Take some time to make sure your vehicle is in good shape. A simple once-over now can prevent big headaches later.
- Tires: Start from the ground up. Check tread depth using the penny test — if you can see the top of Lincoln’s head, it’s time for new tires. Adjust the air pressure to the manufacturer’s recommendation (listed on the inside of your driver’s door), and make sure your spare tire is in good shape and properly inflated.
- Battery: Car batteries tend to struggle in extreme temperatures. If your battery is more than three years old, have it tested before your trip. A weak battery can leave you stranded in a rest area or gas station parking lot — never fun with a trunk full of luggage and kids in the back seat.
- Lights: Do a quick walk-around to check your headlights, taillights, brake lights, and turn signals. Replacing a bulb takes only a few minutes and improves both visibility and safety.
- Oil & Fluids: If you’re due (or close to due) for an oil change, take care of it before your trip. Clean oil helps your engine run more efficiently on long drives. Don’t forget to top off brake fluid, power steering fluid, windshield washer fluid, and coolant (anti-freeze) — especially if you’re heading into colder weather.
- Belts & Hoses: Pop the hood and look for cracks, fraying, or leaks. Worn-out belts and hoses are a common cause of breakdowns on long drives.
- Recalls: Before you leave, take a minute to look up your VIN at gov/recalls. It’s an easy way to see if your car has any unaddressed safety issues.
2. Stock Up and Plan for Emergencies
Even with the best prep, life can throw a curveball. A well-stocked emergency kit ensures you’re ready for whatever comes your way. Pack these essentials:
- Jumper cables
- First aid kit
- Flashlight with extra batteries
- Blankets or emergency thermal wraps
- Reflective triangles or road flares
- Tire pressure gauge
- Tire sealant for small punctures
- Multipurpose tool or pocketknife
You’ll also want to keep a portable phone charger or power bank handy, especially if your car doesn’t have USB ports. Toss in personal medications, a small stash of cash (for tolls or emergencies), and some bottled water and nonperishable snacks in case you get delayed. For comfort, include pillows, cozy blankets, and a travel cooler filled with snacks and drinks. A happy car equals happy passengers — and fewer unscheduled pit stops!
3. Keep It Clean and Comfortable
Nothing ruins a road trip faster than clutter and chaos. Before you go, clean out the interior and start with a fresh, organized space. Make sure to bring along:
- A small trash bag or reusable bin for wrappers and napkins
- Hand sanitizer and disinfecting wipes for quick cleanups
- A travel-size tissue pack or paper towels
If you’re traveling with kids, you may want to childproof your car and stock up on car-friendly activities — audio books, travel games, or coloring pads. For adults, download your favorite playlists or podcasts before leaving areas with spotty reception. Little touches like seat cushions, neck pillows, or a cozy throw blanket can turn long stretches of highway into something a bit more comfortable.
4. Don’t Forget the Paperwork
Make sure your essential documents are where they belong. Keep your driver’s license in your wallet and your vehicle registration and insurance card together in your glove compartment for easy access. It’s also a good idea to store digital copies of key documents in your phone’s secure folder or email for backup.
Bringing your pet along? Don’t forget their vaccination records, ID tags, and pet insurance information. Pack food, a collapsible water bowl, leash, and waste bags. Remember to plan regular stops for bathroom breaks and walks — both for safety and comfort.
A well-kept home sends the message that someone’s still around, discouraging would-be burglars and helping you relax on your trip. A few simple precautions can make it look like you never left.
- Let a trusted neighbor know your plans and how to reach you.
- Avoid posting your trip on social media until you’re back.
- Mow your lawn and tidy up the yard before you leave.
- Stop your mail and newspaper deliveries or ask a neighbor to collect them.
- Leave a car parked in your driveway or ask a friend to park there occasionally.
- Set indoor lights on timers to turn on and off automatically.
- Consider installing a home security system or video doorbell for extra reassurance.
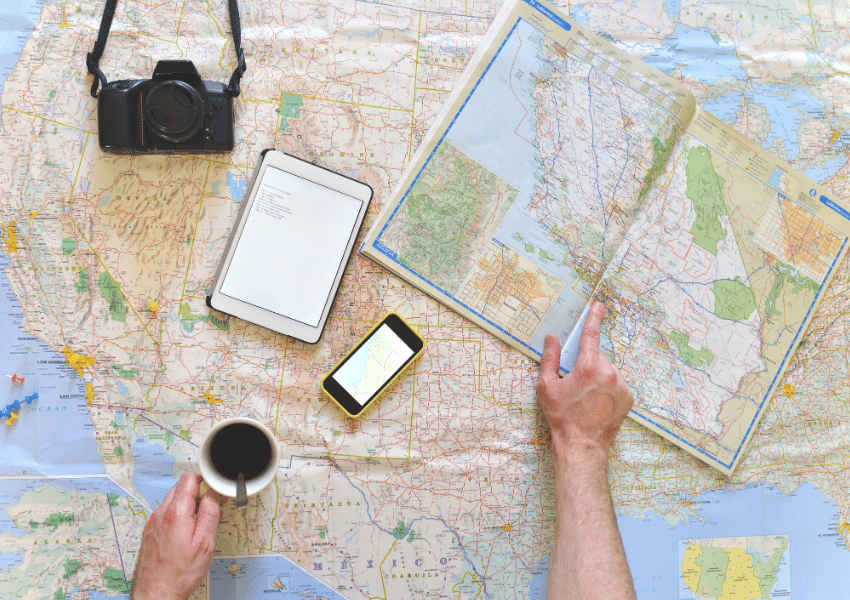
6. Check the Forecast and Plan Your Route
Before you head out, check the weather — not just for your destination but for every major stop along your route. Knowing about snow, heavy rain, or construction zones can help you reroute or adjust your travel times. If the forecast calls for snow or ice, pack an ice scraper, small shovel, and sand or kitty litter for traction. You might not need them, but you’ll be glad to have them if you do.
Download a reliable navigation app like Google Maps or Waze and save offline maps in case of poor service. If you’ll be driving through rural or mountainous areas, keep a printed map as a backup — sometimes, old-school really is best.
7. Enjoy the Ride
Once your checklist is complete, it’s time to focus on the best part — making memories on the open road. Cue up a fun playlist, plan a few scenic stops, and don’t rush. Whether you’re watching the leaves change or catching a winter sunrise, the journey itself can be just as rewarding as the destination.
This article is furnished by California Casualty, providing auto and home insurance to educators, law enforcement officers, firefighters, and nurses. Get a quote at 1.866.704.8614 or www.calcas.com.
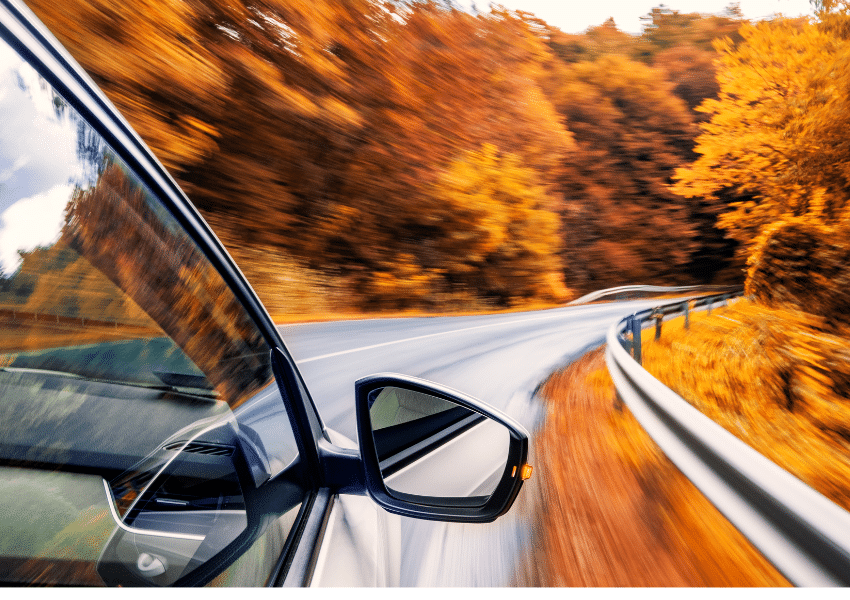
by California Casualty | Auto Insurance Info, Helpful Tips, Safety, Travel |
As the temperature drops and the leaves begin to fall, road conditions change in ways that can catch even experienced drivers off guard. Deer are more active, wet leaves can be as slick as ice, and shorter days mean more time driving in the dark. Here’s what to watch for this season—and how to steer clear of danger.
Watch for Deer on the Move
You’ll often see deer during dawn and dusk at the side of the road during the fall months. That’s when they’re foraging for food. Keep a sharp eye out near wooded areas and where deer crossing signs are posted. If you must stop, use your hazard lights to alert other drivers. A few tips to remember:
- Deer travel in groups; if you see one, more are likely close behind.
- Avoid swerving. Swerving can confuse the animal and cause them to run in the wrong direction. It also can put you in the path of oncoming traffic. Instead, slow down in a controlled manner and let the deer pass.
- Know your insurance coverage. Damage from hitting a deer is typically covered by comprehensive insurance—not liability. Check to see if your policy includes it.
Beware of Leaf Trouble
Fallen leaves may look pretty, but they can cause more problems than you might think. Here are just some of the hazards.
Wet Leaves
When wet, leaves can be as slick as ice. They can also block roadside drains, creating puddles and hidden hydroplaning risks. make sure your tires are properly inflated to help maintain grip. If you drive over wet leaves and your tires lose traction:
- Don’t slam the brakes. Ease off the gas. If you need to brake, use a light pumping motion.
- Steer gently in the direction you want to go.
- When you feel the tires connect with the road, you can proceed as normal.
Dry Leaves
Dry leaves and hot car parts don’t mix. Avoid parking over leaf piles. Your exhaust or catalytic converter can ignite them, even if the engine’s off. Also, keep leaves away from garages and undercarriages so there’s no chance that they can cause trouble.
Around Your Car
Leaves can clog air filters, radiators, and windshield gullies. Remove them regularly to prevent foul-smelling moisture buildup and potential damage to your car’s paint or electronics.
Hidden Potholes and Road Hazards
A thick carpet of leaves — or later, snow — can hide potholes, curbs, and lane markings. Drive cautiously and maintain extra distance from the car ahead. Slow down near leaf piles; kids sometimes play in them. And remember, some drivers are more focused on the foliage than the road, so stay alert.
Adjust to Early Darkness
When daylight savings time ends, you may find yourself driving home in the dark more often. Make sure your headlights and brake lights are working properly. Darkness also affects depth perception, so give yourself more space and time to react.
- Drive at a speed where you can stop within your headlight range.
- Use high beams when safe and dim them for oncoming cars.
- Watch for pedestrians and pets, especially during dusk and dawn when visibility is lowest.
Reduce Sun Glare
The sun sits lower in the sky during fall, which means more blinding glare during morning and evening commutes. Keep sunglasses handy, use your visor, and clean your windshield inside and out — streaks and dust scatter light and make it harder to see. Replace your windshield wipers as needed. If glare is intense, slow down and increase your following distance.
Handle Fog and Frost the Right Way
Foggy and frosty fall mornings reduce visibility fast. They can sneak up on your car’s windows as temperatures fluctuate. Don’t drive with foggy or icy glass. Use your defroster and a scraper or try a DIY de-icer (three parts vinegar to one part water).
- If it’s foggy, engage your fog lights to increase visibility. Don’t use your high beams; they have the opposite effect — reflecting off the fog and temporarily blinding you.
- Turn on your defroster or crack a window to balance temperatures and prevent your windshield from fogging.
- Remember: frost on your windshield means it could also be on bridges and overpasses, which freeze first. Proceed with caution.
Keep an Eye on Tire Pressure
Cooler weather means lower tire pressure. For every 10-degree drop in temperature, tires can lose about one PSI. Low pressure affects traction, braking, and fuel efficiency, so check often and inflate your tires as needed.
Share the Road with School Buses
Fall also means back-to-school season. Be aware of how that impacts traffic safety and know the rules about school buses:
- Yellow flashing lights: The bus is preparing to stop.
- Red lights and extended stop arm: The bus has stopped for children.
- Always stop — never pass. Watch for kids crossing the street or walking near the bus and remember that visibility is lower in early morning and late afternoon light.
Don’t Forget Your Insurance
Even the most cautious drivers can’t prevent every accident. Make sure your auto insurance is up to date so that you have peace of mind when the unexpected happens.
Safe travels this season!
This article is furnished by California Casualty, providing auto and home insurance to educators, law enforcement officers, firefighters, and nurses. Get a quote at 1.866.704.8614 or www.calcas.com.

by California Casualty | Pets, Travel |
Whether your pet is a seasoned jetsetter or a first-time flyer, navigating air travel with a four-legged friend takes planning, patience, and know-how. From booking the right seat to ensuring a smooth security check, here’s how to make flying with your pet a paws-itively stress-free adventure!
Cabin or Cargo? Choosing the Best Travel Option
Your pet’s size will determine whether they can fly in the cabin with you or if they must go in cargo. Cargo is not for every pet, and if you must consider it, make sure to check with your vet that it is safe for your pet’s breed, age and health.
Carry-On Pets:
- Pets in the plane’s cabin are limited to cats and small dogs meeting size requirements.
- Your pet must remain in a carrier under the seat in front of you for the flight.
- Some airlines allow you to purchase an extra seat for your pet carrier. You still will need to keep your pet in the carrier, and you also will need to place the carrier under the seat during takeoff and landing.
- Choose a window or aisle seat which will have the most room to stow your pet’s carrier under the seat. Avoid emergency exit rows and bulkhead seats.
- A pet fee applies. Check with the airline for the exact amount.
Cargo Travel:
- Larger dogs must fly in cargo, which is the space at the bottom of the plane where luggage is stored.
- While cargo is ventilated, it is not temperature controlled, and airflow is not the same as in the cabin. Pets may not be allowed in cargo during extreme heat or cold.
- Short-nosed breeds like bulldogs, pugs, and Persian cats are at higher risk for breathing issues and should never fly in cargo.
- Pets must be placed in cargo-approved kennels. Check your airline for specifications.
- While most pets travel safely in cargo, poor ventilation or mishandling can pose risks.
- Most airlines are required to report on companion animal safety. Check your airline’s safety record before booking your pet in cargo.
- A pet fee also applies.
Service Dogs:
- Service dogs are an exception to the pet traveling policies. They are allowed to be out of a carrier but must not block the aisle. Generally, they are not allowed on seats.
- To qualify as a service dog, they must be fully trained and certified to assist a person with a disability.
- Emotional support animals are considered pets and not service dogs. They must follow standard pet travel guidelines.
- Service dogs will usually fly free of charge.
Booking Your Flight
- Research quarantine, vaccine, and other restrictions for your destination so you will have the right paperwork.
- Always communicate with the airline in advance. You don’t want any surprises.
- Book direct flights. There is less chance of handoffs going wrong.
- For cargo, if traveling in the summer, pick early morning or evening flights to avoid the hottest parts of the day. In winter, book midday flights to avoid the cold.
Prepping Your Pet for Takeoff
Before your trip, make sure your pet is in tip-top shape for travel. Here’s how:
- Vet Visit: Schedule a checkup to ensure your pet is healthy enough to fly. Some destinations require a health certificate issued within 10 days of travel.
- Skip Sedatives: Tranquilizers can affect breathing. Ask your vet for guidance on whether you should use them. You also can consider pet calming chews with melatonin or chamomile. For nervous cats, try pheromone sprays to help ease anxiety.
- Microchip & ID: Make sure your pet’s microchip info is up to date and their collar includes both your home address and temporary travel address.
Helping Your Pet Adjust to Air Travel
Crate Training: Get your pet comfortable with their travel carrier well in advance. Reward them with treats and praise.
- Crowd Exposure: Airports are busy and noisy! Take your dog to a crowded, dog-friendly area to get them used to similar sights and sounds.
- Practice Security Checks: TSA requires pets to go through security outside of their carrier. Practice taking your pet in and out calmly.
Packing List: Don’t Forget These Essentials
Proof of vaccinations and vet contact info
- Microchip number and pet license
- Airline-approved carrier (waterproof & spacious enough for your pet to stand, turn, and lie down)
- Collapsible water bowl
- Small bag of food in case of delays
- Treats and chew toy (helps with pressure changes)
- Poop bags and pet wipes for clean-ups
- Extra collar and leash
- A recent photo of your pet (for ID purposes)
Pro Tip: For pets traveling in cargo, freeze water in the collapsible water bowl. This will help prevent spills. By the time your pet is thirsty, the water will have defrosted. You can also attach a water bottle dispenser.
Airport Tips: Navigating the Terminal with Your Pet
Strange sounds, sights and smells can be challenging even for the most well-trained pet. Changes in diet and water also can affect your pet. Here are some ways to navigate specific issues with traveling.
Skip Breakfast? A light stomach may help prevent nausea—check with your vet.
- Pre-Flight Potty Break: Ensure your pet relieves themselves before heading to check-in.
- Cargo Flyers: Label crates with LIVE ANIMAL in large letters and add arrows to indicate the upright position. Attach a photo of your pet, and line the bottom with towels. This will help absorb any liquids if there are accidents. You will be dropping off your pet at the check-in counter along with your luggage.
- Cabin Flyers: Be prepared to remove your pet from the carrier for TSA screening. Once through security, locate pet relief areas before boarding.
- Alert the Flight Crew: If your pet is traveling in cargo, notify a flight attendant so they’re aware. They should be able to confirm that your pet is safely on board.
- Meet Your Pet: The airline will direct you to a place where you can meet your pet and show them some love following your flight.
Are you flying with small children, too? Check out our blog on Flying with Kids.
Travel with Peace of Mind
Finally, don’t forget to protect your fur baby with pet insurance for added peace of mind, and to save on your vet bill. Remember, you can easily add pet insurance from Pet’s Best to your California Casualty auto or home policy. Find out more about what pet insurance can cover by talking with a California Casualty customer service representative today.
This article is furnished by California Casualty, providing auto and home insurance to educators, law enforcement officers, firefighters, and nurses. Get a quote at 1.866.704.8614 or www.calcas.com.

by California Casualty | Auto Insurance Info, Travel |
Spring break is right around the corner, and for many travelers, renting a car is part of the adventure. Whether you’re heading to the beach, exploring a national park, or visiting family, a rental car provides the freedom to go wherever your journey takes you. But with rental costs fluctuating and unexpected fees lurking, how can you save money while still enjoying a stress-free ride? Read on to learn more.
1. Book early to lock in the best rates.
Rental car prices can skyrocket as demand increases, especially during peak travel seasons. The earlier you book, the better your chances of securing a lower rate. Many rental companies allow free cancellations, so you can reserve now and rebook if prices drop.
Pro Tip: Once you reserve your car, set a weekly calendar reminder to check if the rate has dropped. Then, as long as there are no fees, you can cancel and rebook.
2. Compare prices across multiple platforms.
Don’t settle for the first price you see. Use comparison websites like Expedia, Kayak, or Priceline to check rates across different rental companies. Also, visit rental agency websites directly—sometimes they offer exclusive discounts not available on third-party platforms.
3. Shop coupons and specials.
Many rental companies offer online coupons. Try sites like AutoSlash to do a search for those discounts. Also, if you bundle car, hotel and airfare, you can get additional savings. If you’re driving long distances, check out the weekly rate, which often averages out to be cheaper per day. See if there is a cost to returning the car early. Ask if there is a discount if you prepay. Just keep in mind that paying in advance could mean it’s nonrefundable.
Pro Tip: Follow social media accounts for car rental companies or sign up for their newsletters to get a heads up on specials.
4. Leverage membership discounts.
Are you a member of AAA, AARP, or a teacher’s union? Maybe you belong to a warehouse club or are a frequent flyer. These organizations negotiate for better rates on rental cars and provide discounts to their members. Additionally, some credit cards offer rental car benefits, including discounts and insurance coverage, which can help you save even more.
5. Avoid airport pickups.
Picking up your rental car at the airport might be convenient, but it often comes with higher fees. Airports have high demand for vehicles, which can drive up rates. Consider renting from a location a short distance away—many off-airport locations offer lower rates, and the savings could outweigh the cost of a quick rideshare or shuttle ride. Make sure to check that there is accessible transportation there before you book. Also find out if you can return the car to the airport without additional fees.
6. Choose economy cars and fuel-efficient models.
Opting for a smaller, fuel-efficient car not only saves you money on the rental itself but also helps reduce gas costs. Unless you absolutely need an SUV or a luxury model, stick with an economy or compact vehicle to maximize savings. Plus, since economy cars are typically the cheapest and the most likely to be booked, there’s a chance they may not be on the lot, and you’ll be upgraded.
7. Stick to one driver.
Rental car companies usually charge a fee to add a second driver. Some companies waive that fee if you are married or have a domestic partnership. You do need to show driver’s licenses with the same home address. Others will waive the fee for a spouse if you join their membership program. Sometimes, your membership in organizations such as AAA or Costco can get you a free additional driver too.
8. Be smart about insurance.
Rental companies often push expensive insurance coverage at the counter, but you may not need it. Check if your personal auto insurance or credit card offers rental coverage—many policies do. Just be sure to confirm the details in advance to avoid unnecessary charges. This also goes for rental car insurance, which can be an add-on to your travel insurance policy.
9. Skip the extras.
Rental companies love to upsell add-ons like GPS navigation, satellite radio, and roadside assistance. Most of these extras are unnecessary—use your smartphone for navigation, stream music via Bluetooth, and check if your existing auto insurance or credit card includes roadside assistance. If you’re traveling with a small child and need a car seat, bring your own or borrow one from a friend at your destination. That can save you as much as $10 per day.
10. Understand the fuel policy.
The “prepay for fuel” option might sound convenient, but it often leads to overpaying for gas. Instead, opt for the “return with a full tank” policy and fill up at a nearby gas station before dropping off the car. Just be sure to keep your receipt in case there’s a dispute.
11. Watch out for hidden fees.
Read the fine print carefully. Some companies charge extra fees for additional drivers, young drivers, early returns, or late drop-offs. Understanding these fees upfront can help you avoid unexpected costs.
12. Consider alternative car rentals.
Traditional rental companies aren’t the only option. Services like Turo and Getaround let you rent cars from private owners, often at lower rates than corporate agencies. There are also car sharing clubs which require a monthly fee. Just be sure to check the terms, insurance coverage, and reviews before booking.
Remember, whether you’re renting for a weekend getaway or a weeklong road trip, having the right insurance coverage is essential. Before you hit the road, check with your insurance provider to ensure you’re fully protected. Safe travels from all of us here at California Casualty!
This article is furnished by California Casualty, providing auto and home insurance to educators, law enforcement officers, firefighters, and nurses. Get a quote at 1.866.704.8614 or www.calcas.com.

by California Casualty | Auto Insurance Info, Helpful Tips, Travel |
You’re ready to hit the road, but your car has other plans—stuck in a snowbank with tires spinning. Before your frustration gets out of hand, take a deep breath. With the right techniques and a little patience, you can free your vehicle and get back on track. Here’s your step-by-step guide to escape the snow’s icy grip without breaking a sweat—or your car!
1. Stay Safe and Assess the Situation
Before doing anything, ensure you’re safe. Turn on your hazard lights and assess the situation. Are other vehicles nearby? Make sure you’re visible to others and have enough space to work around your car safely.
2. Clear the Exhaust Pipe
Check your car’s tailpipe for snow and ice. A clogged exhaust can cause dangerous carbon monoxide to back up into the vehicle’s cabin. Clearing it is a critical safety step before you start working to free your car.
Use a shovel or any sturdy tool to remove snow around the tires, under the car, and along the path you want to travel. Clearing as much snow as possible will make it easier to gain traction and move forward.
4. Try Melting the Snow
If the snow around your wheels is packed and icy, try sprinkling salt or a de-icing agent. Be cautious, as salt can cause rust on your vehicle, and some chemicals may be harmful to pets and the environment.
5. Add Traction
Improve your grip by spreading dry materials like sand, kitty litter, or even your car’s floor mats under the tires. These items can provide the friction needed to get your car moving.
Pro Tip: Lower your window slightly to listen for spinning wheels as you press on the gas. If you hear them spinning, it’s not working.
6. Choose the Right Driving Technique
Depending on your type of vehicle, you will want to take advantage of its strengths.
-
-
- 4-Wheel Drive: If your vehicle has a 4-wheel drive option, turn it on to deliver power to all wheels. Use a low gear in an automatic to reduce wheel spinning.
- Front-Wheel Drive: Turn your steering wheel left and right repeatedly to find a patch of traction.
- Manual Transmission: Start in second gear to reduce wheel spin and increase grip.
7. Turn Off Traction Control
Your traction control system can prevent your wheels from spinning, which helps in skids but can hinder your efforts when stuck. Temporarily disable it to give your wheels the power they need to move.
8. Rock Your Vehicle
Gently rock your car by shifting between forward and reverse gears. Apply light gas pressure—avoid flooring it—and stop if it’s not working after a few tries to prevent transmission damage.
9. Let Air Out of Your Tires
In extreme cases, slightly deflate your tires to increase surface contact and improve traction. Only do this if you’re near a place to reinflate them, as driving on underinflated tires can be dangerous.
10. Call for Roadside Assistance
If all else fails, it’s time to call for help. Roadside assistance professionals have the tools and expertise to safely free your vehicle.
After You’re Unstuck
Once your car is free, pull over in a safe spot and inspect your tires. Spinning wheels can pack snow and ice into the treads, making steering difficult. Use a snow scraper to clear them and restore proper grip. Don’t forget to turn your traction control back on before resuming your drive. Follow winter driving safety tips to prevent any future issues.
Be Prepared for the Future
Getting stuck in deep snow can damage your car’s transmission, battery, or drivetrain. Get your car checked out if you have been stuck in deep snow.
In addition, prepare for any future incidents. Keep a winter emergency kit in your vehicle, including:
- Ice scraper and snow brush
- First aid kit
- Flashlight and flares
- Blankets
- Tire pressure gauge
- Car jack
- Cell phone charger
- Kitty litter or sand for traction
Finally, make sure your vehicle is protected for winter with the right insurance. This will help add peace of mind. Safe travels.
This article is furnished by California Casualty, providing auto and home insurance to educators, law enforcement officers, firefighters, and nurses. Get a quote at 1.866.704.8614 or www.calcas.com.
