by California Casualty | Auto Insurance Info, Homeowners Insurance Info, Safety |
Thanksgiving is a special time to gather with loved ones. But when your turkey catches fire, your aunt drinks a little too much and falls and breaks her leg, or your fur baby takes a little nip of a guest, it’s time to be thankful for insurance. Fortunately, there’s coverage for most Thanksgiving dinner disasters. Whether you’re home entertaining guests, or traveling to friends or family, we’ve compiled a quick guide.
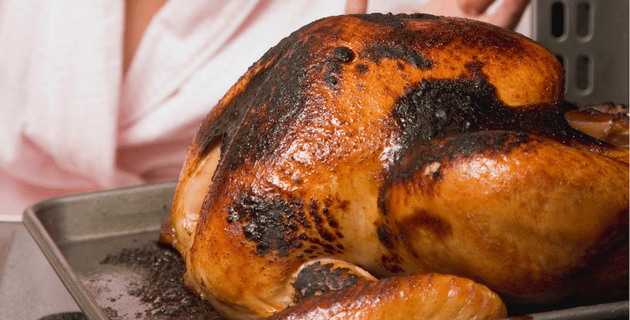
Cooking Fires
It’s easy to lose sight of something on the stove or in the oven when you’re also attending to guests. That’s why you’re more likely to have a holiday cooking fire on Thanksgiving than on any other day of the year, according to the National Fire Protection Association (NFPA). The risk increases if you’re deep-frying a turkey. Deep fryers heat up to such a degree that they have caused severe burns and injuries, and even deaths. (If you must have a deep-fried turkey, consider ordering one from your local grocery store.) When cooking fire accidents happen, your homeowner’s or renter’s insurance policy will cover the damage to your home, your belongings, and any related injuries to your guests. (For the guest injury part, skip to the next section.)
-
- Your homeowner’s policy includes dwelling coverage. This covers the repair or rebuilding of the structure of your home up to your policy limit. So, if the fire damages your kitchen or other areas, you can report the claim to your insurance adjuster. They will advise you on how to proceed. Your insurer will likely send someone out to inspect the damage and write up an estimate. You will get reimbursed by your policy, minus your deductible (which is the amount that you chose to pay out-of-pocket before insurance kicks in).
-
- Personal property coverage is that part of your homeowner’s or renter’s policy that protects your possessions such as kitchen appliances, furnishings, and if the fire spreads beyond the kitchen, your television, clothing, etc. Fire is one of 16 different named “perils” that your policy covers. There are dollar limits for certain items such as money, jewelry, and firearms, so check with your insurer. For personal property coverage on a homeowner’s policy, you typically get 50 or 75% of Coverage A, the total amount of coverage for your home. If you’re renting, you get to choose the amount of personal property coverage when you select your policy.
-
- You can select replacement cost or actual cash value (ACV) for personal property. ACV is the amount the item is worth, minus depreciation for its age. It will cost a little more for a policy that provides replacement cost (and we strongly recommend it).
-
- Depending upon the extent of the fire, your house may not be livable. If that’s the case, you would be covered for any necessary increase in living expenses, such as lodging, food, and gas. Under Coverage D – Loss of Use, called “Additional Living Expense,” your policy will provide a flat percentage toward living costs, usually 30% of the Coverage A amount. Some states have time limits (e.g. 12 months) on when you can use that coverage. Plan to cover those additional expenses out-of-pocket.
Pro Tip: Having a fire extinguisher could earn you a discount on your home insurance policy.
Guest Injuries
Injuries can happen anytime, especially during gatherings where people may drink. Guests could become tipsy and trip, slip, and fall. That could happen even if they’re not drunk, of course. Burns could occur if there is a kitchen fire. Your guests could get food poisoning. Your normally well-behaved fur baby could bite one of your guests. While you can’t anticipate every situation, you can make sure there are no obvious dangers in your home, such as tripping hazards or unsecure handrails. Keep everyone’s safety and comfort in mind, including where your pet may be during the festivities. Then, if a guest does get injured, your insurance can kick in.
-
- You may be covered for guest injuries under your homeowner’s or renter’s liability coverage. If you are found liable, the policy may cover damages to the injured party. This can include medical expenses, lost wages, pain and suffering, and permanent scarring. The policy also provides a defense in court, if needed, for the policyholder. This is at the insurance company’s own expense.
-
- If you are not liable, but your guest was injured through his/her own fault, then Coverage F – Medical Payment to Others may cover your guest’s medical bills.
-
- Liability coverage does not apply to you and your family. Your own injuries or illnesses are not covered under homeowner’s or renter’s policies. You would use your own health insurance policy to cover any injuries that you might have in your home.
-
- If your dog has bitten a guest, make sure that your dog’s breed is not restricted by your insurance policy. Some policies will not cover breeds such as Pit Bulls, Doberman Pinschers, or Rottweilers. California Casualty does not currently have such restrictions.
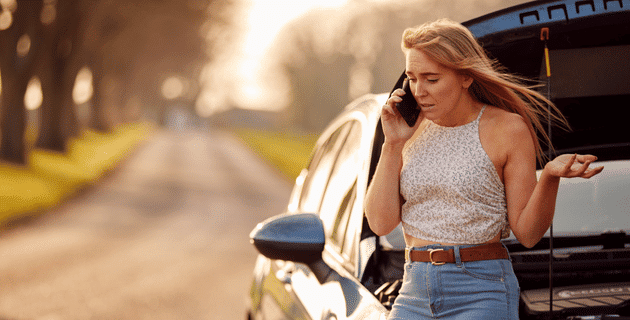
Thanksgiving on the Road
If you’re among the millions who drive to Thanksgiving celebrations, you’ll want to make sure your car is well-maintained, and that your car insurance is up to date. Be ready for the holiday traffic, and drive safely. An accident can put a damper on the holiday. The good news is that you’re covered if you do have one.
-
- If you cause an accident, you are responsible for damages. You would pay with your vehicle’s liability policy. Importantly, auto liability does not cover any damage to your own vehicle; that’s covered by collision. It also does not cover injury to you and your family; it only covers the people in the other car. Liability coverage is required by law in most states.
-
- There are two types of liability coverage:
- If you are found liable for the accident, bodily injury coverage helps pay for medical expenses, lost wages, and pain and suffering for the driver and passengers in the other vehicle. We say “helps pay” because it depends on how much coverage you choose. The costs of an accident can be more than your insurance policy limit.
- Property damage coverage helps pay for repairs for the other vehicle or for repair/replacement of property, such as a fence, damaged or destroyed in the collision.
-
- If you are not at fault for the accident, the other driver is responsible for damages. Your insurance kicks in if the other driver does not have enough insurance. Collision covers your car for any type of damage, regardless of fault or if the person does not carry any/enough insurance. Underinsured motorist (UIM) and uninsured motorist (UM) coverage are for injuries. They cover you and your passengers if you are hit by an at-fault UM or UIM. Uninsured motorist property damage (UMPD) can cover your car if hit by an at-fault uninsured motorist.
-
- Unlike liability insurance, collision coverage is not usually required—unless you’re leasing a car or paying off a loan on a vehicle. However, it may be good to have.
No matter where you enjoy the holiday, we wish you a safe celebration. From our family to yours, Happy Thanksgiving!
This article is furnished by California Casualty, providing auto and home insurance to educators, law enforcement officers, firefighters, and nurses. Get a quote at 1.866.704.8614 or www.calcas.com.
by California Casualty | Auto Insurance Info, Safety |
It’s never a good sign when our cars start to screech, thump, or grind…However, while we may not be excited to hear these sounds, paying attention to them can help us take care of the problem before it gets worse- keeping us safer and maybe even saving us some money.
We compiled a list of common car noises and what they could mean. Read on to find out what your car is trying to tell you.
Banging
A loud bang Like a firecracker could mean that your vehicle’s fuel is burning at the wrong time. It could be that the fuel-to-air ratio has more fuel than it should or there’s an issue with the spark plugs. While this is not an emergency, over time it could damage your exhaust system, so get it checked out.
Clicking
If you hear clicking sounds as you turn the steering wheel, it could be from your CV (Constant Velocity) joint. The CV needs grease or it becomes dry. You may just need to replenish the grease, or you might have to replace the shaft boot if it’s torn and leaking grease. If the damage is extensive, you may have to replace the whole CV joint.
Growling or Grating
A low growl or grating sound when you step on the brakes could mean your brake pads have worn away. Brake pads push against metal rotors or drums. When they’re worn away, they can start to damage other parts and become a costly repair. You’ll want to take care of this as soon as possible.
Hissing
A hissing sound could indicate a fluid leak such as radiator coolant leaking onto the engine. If hissing occurs when you speed up, it could be a vacuum leak from a small hose around the engine’s air intake. You’ll need to replace the hoses or other components that are leaking.
Humming
If you hear a low drone or humming sound that increases in volume when accelerating, check your tires. Their tread could be worn-out or wearing unevenly. The wheel bearing in your tires also may be damaged, which is a serious issue. Your tires also may need an alignment and some air. Have tires and bearings checked and, if needed, replaced as soon as possible.
Knocking or Pinging
A knocking or pinging sound under your hood that increases as you accelerate can occur when fuel in your engine detonates at incorrect times. Sometimes this is the result of using fuel with too low an octane level. Other times, it is more serious. There may be a worn crankshaft bearing or a piston that needs replacing. Address this sooner rather than later.
Rattling
Rattling, vibrating, or squeaking sounds when you drive over a speed bump or pothole could indicate a problem with your suspension. There could be bad bushings, the cushions that help absorb road bumps. Try performing a bounce test. Step outside the car and press down firmly on the front corner. If you hear the sound, you will want to get it checked out. If your car is rattling when the car is idling, it could mean a damaged heat shield in your exhaust system. Check that out, too, to make sure everything stays cool when you’re operating your vehicle.
Roaring
Your car’s muffler is designed to muffle the roaring sound made by your engine. However, if there’s a crack in the exhaust system, the gases that cause the roar can escape before they reach the muffler. Deadly carbon monoxide gas can even leak into the cabin. A missing catalytic converter also can cause this sound. Get this sound addressed right away.
Pro Tip: Catalytic converter theft is a growing problem and they are expensive to replace. Consider getting your VIN number stamped on the catalytic converter or installing an anti-theft device.
Rumbling
A low-pitched engine rumble with vibrations can indicate an exhaust leak in a gasket, flex pipe, resonator or muffler. A dirty fuel injector could cause a rumbling sound. (Try adding a fuel injector cleaner to your gas tank). A dirty air filter could be another cause, so try replacing that part. Your oxygen sensor could be creating the wrong mix of fuel and oxygen. Finally, the sound could be caused by worn spark plugs that fire inconsistently.
Scraping
A rock or other debris stuck in your brake rotor could cause a scraping sound and cause damage over time. Get that removed before it becomes a problem.
Squeaking or Squealing
Squeaking or squealing could be caused by a number of things. If the sound happens when you brake, you may have worn brake pads, improperly cut brake rotors, or glazed brake pads that get too hot. You also may have broken anti-rattle clips or incorrectly installed insulation shims. If you hear loud squealing after you start your car, but then the sound gradually fades, it may be a serpentine belt that is failing. If you hear the squeal when you turn on the air conditioning, it may need a serpentine belt adjustment or replacement. Squeaking or whining when turning the steering wheel could be a power steering issue. There may be air in the fluid and adding more fluid could help. However, if you hear a high-pitch whine when you make a turn, the pump could be damaged. Get these sounds checked out for your safety.
Thumping
When you brake and hear a thumping sound, that means potential damage. A thumping in the rear could be rear brake drums and thumping in the front could be rotor damage. Rotor damage can be caused by a car not being used, and just sitting outside and rusting.
Washing Machine Sound
If your car sounds like a washing machine on the high-spin cycle with loose change inside, pull over as soon as safely possible. This likely means a loose lug nut is inside your hubcap. When that happens, the tire could fall off or you could have a blowout. Pull over as soon as you safely can. Jack up the car and use a lug wrench to tighten the lug nuts. Fill the tire if the pressure is low or swap it out for the spare tire. Call roadside assistance if needed.
Whirring
If your car whirs like a helicopter and gets louder as you travel faster, it’s most likely a worn-out wheel bearing. You can check this while driving. Turn the wheel to the left and then to the right and see if the noise disappears briefly. Wheel bearings should be replaced as soon as possible.
Figuring It Out
If you are able to do so safely, record the sound your car is making using your phone or other device. Then play it for your mechanic. This will help to pinpoint the exact sound you are hearing.
Finally, if your noise isn’t listed here, or you’re not sure about what sound you hear, it’s always a good idea to consult a trusted mechanic. This will help to find any problems and fix them before they become expensive issues.
Paying attention to your car’s dashboard lights and sounds will help you keep it well-maintained. Protect your vehicle with the right insurance and keep up with auto recalls for added peace of mind.
This article is furnished by California Casualty, providing auto and home insurance to educators, law enforcement officers, firefighters, and nurses. Get a quote at 1.866.704.8614 or www.calcas.com.
by California Casualty | Calcas Connection, Safety |
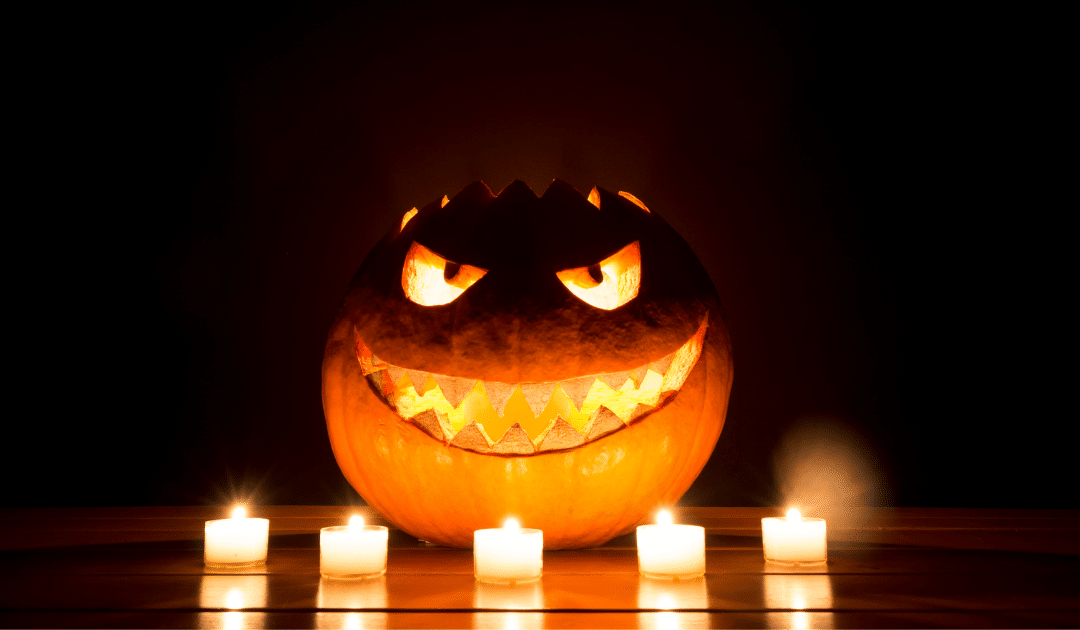
Creating a spooky Halloween mood often relies on great lighting effects in your home and yard. Glowing jack-o-lanterns, flickering luminaries, and strategically placed uplighting are all classic fare.
But they can also pose a fire threat. The National Fire Protection Association estimates that Halloween decorations cause approximately 800 house fires per year, totaling $11 million in property damage. And that’s not counting the injuries sustained when flammable costumes meet heat sources or open flames.
Here are some do’s and don’ts to make your Halloween safer — without giving up on the spookiness!
Decorations
Many decorations are flammable due to materials or the use of candles and other heat elements. In fact, . Make sure yours pass the safety check:
Jack-o-Lanterns – These are the ubiquitous, favorite Halloween decoration of most households.
-
- DON’T use a candle as your lighting feature. The pumpkin can easily be tipped over and catch its surroundings on fire, whether that’s dry brush or a porch outside, or upholstery or carpeting inside.
- DO use an LED light, glow stick, or electric candle instead.
Flammable decorations – These can light up in an instant, igniting from live flames as well as heat sources like heaters and light bulbs.
-
- DON’T use cornstalks, hay bales, dried flowers, or crepe paper. And don’t put flammable decorations in the path of exits, which creates a serious obstruction risk in case your family needs to exit quickly.
- DO use flame-resistant or non-flammable materials wherever possible. Avoid having a wood-burning fire inside if it may become unattended due to holiday commotion or trick or treaters. Outside, have a hose and buckets of water ready for any outdoor emergencies.
Paper bag luminaries – Another holiday mainstay, these decorations give a warm, welcoming lighted pathway up to a house.
-
- DON’T use live candles. Paper bags are extremely flammable and are prone to tip over with just a slight breeze.
- DO use an electric candle instead which, even if tipped over, won’t cause any damage.
Candles – More than a third of Halloween home fires each year are started by a candle. A live flame is never safe – inside, outside or anywhere.
-
- DON’T use candles for any holiday decorations.
- DO use electric candles or LED lights instead. Just doing a Google search on “LED lights Halloween” will bring up a range of options for creative, fun ways to give a spooky lighting effect.
Costumes
Unfortunately, a lot of Halloween costumes pose a fire hazard. Follow these tips to keep you and your family safe.
-
- Only choose flame retardant materials.
- Avoid costumes that are bulky or billowy or have long trailing fabric.
- Teach kids to stay away from open flames, including jack-o-lanterns and luminaries, while they’re trick-or-treating.
- Give them glow sticks or flashlights to light their way on the big night.
- If your child’s costume has a mask, make sure the eye holes are large enough so she/he can easily see out of it.
- Review “Stop! Drop! And Roll!” with your kids, making sure everyone understands and passes a practice round.
Final Reminders
Make sure well ahead of time that all your fire and smoke alarms are working and ready. Also, remember that even if you take fire-safety steps, your neighbors might not – and if their home catches fire, yours could be imperiled. Review these fire safety tips from firefighters, and update your family’s evacuation plan, just to be on the safe side.
By following Halloween fire safety precautions, you can make this scariest night of the year all about the fun kind of scary instead of the bad kind of scary.
This article is furnished by California Casualty, providing auto and home insurance to educators, law enforcement officers, firefighters, and nurses. Get a quote at 1.866.704.8614 or www.calcas.com.
by California Casualty | Auto Insurance Info, Safety |
The open road, the sunshine, and vacation time—it seems that summer is meant for road trips. With so many of your fellow travelers on the road, though, there’s a chance for collisions. That’s especially true if you’re on a long drive, on unfamiliar roads or distracted by confusing signs, or even the passengers in your car.
So, how do you avoid a vacation-spoiling accident? Knowing the most common summer collisions – and their causes – can help you take action to avoid them. Here’s what you need to know.
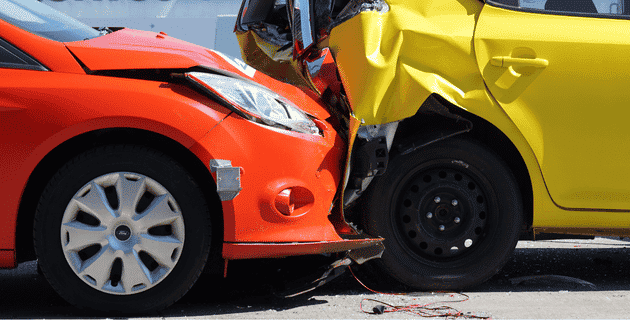
Rear-end Collisions
These common types of collision can be caused by tailgating or distracted driving during stop-and-go traffic. Rear-end collisions also happen when motorists drive too fast or aggressively. To avoid a rear-end collision:
-
- Slow down and watch your speed.
- Increase your following distance between your vehicle and the car in front.
- Avoid stopping suddenly or swerving.
- Make sure your taillights and turn signals are working.
Pro Tip: If your car has one, an automatic braking system or forward collision warning system can help prevent these types of accidents.
Front-end Collisions
When the front end of your vehicle strikes another vehicle, tree, telephone pole, or other object, it’s a front-impact collision. These types of crashes are common during rainy weather. To avoid a front-end collision:
-
- Drive more slowly in the rain. Roads are slippery. Fog can impair your vision. Give yourself time to adjust.
- Increase your following distance in inclement weather. This will help give you more time to react.
- Avoid distractions; even playing with the radio or talking to passengers can divert your attention.
- Lane keeping systems can help. They alert you when you’re drifting out of lane, and can even steer your car back into the lane.
Side-impact Collisions
You know these as T-bone collisions or sideswipes. They often occur at intersections, as a result of confusion about which vehicle has the right of way. However, they also can occur if you run a red light or change lanes without warning. To avoid a side-impact collision:
-
- Look both ways as you approach a stoplight. Slow down when you see yellow; don’t speed up. You could risk running a red light.
- Come to a complete stop at every stop sign. Know where other traffic is before proceeding.
- Check your blind spot before changing lanes.
- When passing cars, be alert for other drivers changing lanes unexpectedly.
Highway Construction Collisions
Construction crews are out on the roadways, often sharing space with vehicles traveling at high speeds. That’s why it’s especially important to watch for signage and adjust your speed as you navigate past a construction site. To avoid a highway construction collision:
-
- Pay attention to construction site speed limits and follow them.
- Watch for signage and personnel directing you where to go.
- Slow down as you are passing workers and be alert.
- Increase your following distance for the car in front of you.
Interstate Collisions
High speeds coupled with distracted, aggressive, or drowsy drivers can cause accidents. When a crash happens on the highway, it can sometimes have a chain reaction effect. Make sure to use due diligence when you’re traveling at high speed around other vehicles. To avoid an interstate collision:
-
- Follow the speed limit and maintain a safe following distance from other drivers.
- Clearly indicate with your turn signal when you wish to change lanes. Check your blind spot before doing so, and make sure cars in other lanes aren’t heading to the same place you are.
- Maintain your distance from cars that are driving aggressively or dangerously.
- Limit distractions. Your priority is to drive safely.
Parking Lot Collisions
We may not think about it, but parking lots can be dangerous. When the lot gets busy, it’s easy to have multiple cars moving in different directions. Inattention or simply a bad decision can cause a collision. To avoid a parking lot collision:
-
- If possible, park in a spot away from other cars.
- Check your surroundings before getting into your car to pull out of your parking space.
- Don’t rely on technology alone (such as rearview cameras). The image can be distorted by sunlight or shadows. Use your mirrors.
- Move slowly and be aware of pedestrians and cars in the immediate area.
- Don’t drive when you’re drowsy. If you’re feeling tired or having a hard time staying awake, pull over in a safe place and take a power nap.
- Don’t use your cell phone when driving except for emergencies.
- Don’t eat or drink anything in spillable containers while you’re driving.
- Don’t drive when you’ve had a few drinks. Use a designated driver or call a ride-share service instead.
- Avoid driving during high traffic times.
- Take your car in for a maintenance checkup before you go on a road trip. This will help avoid equipment-related accidents.
Finally, make sure your car is insured so you are fully covered in case of an accident.
Safe travels!
This article is furnished by California Casualty, providing auto and home insurance to educators, law enforcement officers, firefighters, and nurses. Get a quote at 1.866.704.8614 or www.calcas.com.

by California Casualty | Homeowners Insurance Info, Safety |
You’re a proud pool owner – or a soon-to-be one. You know how important it is to keep your pool clean, safe, and ready to swim.
We’ve compiled a list of 10 common maintenance mistakes that pool owners make, and how you can avoid them. Use this as your guide to ensure that your pool is ready to enjoy all season long.
1. Don’t ignore your pool’s pH level.
The pH is a measure of how acidic or basic your water is. If your pool’s pH is too low, the water is acidic—which is good to keep away algae but which can damage pool equipment like your pump and filter, heater, vinyl liner, and chemical feeder. When the pH is too high, however, it limits the effectiveness of your chlorine, the chemical that kills pathogens—microorganisms and bacteria that could be present in your pool. Pool pH that is too high also can cause skin rashes. That’s why a balanced pH is important.
Do: Test your pH levels at least twice a week. Keep the pH between 7.2 and 7.8.
2. Don’t add chlorine—or try to shock your pool—on a hot day.
It’s less effective to add chlorine to the water on a hot day. When chlorine is exposed to sunlight, it forms ions that convert to a gas that releases into the atmosphere. That requires you to add more chlorine for the right effect. Shocking—or adding a chemical mixture with a high dose of chlorine—has a similar effect. While you may want to do a shock treatment that helps to get rid of chloramines that can irritate eyes and skin, daytime is not the right time to do it.
Do: Add chlorine when temperatures are cooler, such as during the evening. Shock your pool once a week at night.
Pro Tip: Don’t think a strong chlorine smell means your pool has too much chlorine. When some contaminants in your pool oxidize, they can give off the scent of chlorine. If you smell chlorine, test your pool’s chlorine level. If needed, add chlorine until the water gives a reading between 3 and 5 parts per million (ppm).
3. Don’t do a shock treatment through your skimmer or put the shock chemicals directly into your pool without diluting them first.
Combining pool shock and chlorine can create a deadly gas, which can explode. That’s why you never want to add a shock treatment to a filter system with an automatic chlorinator. Putting those chemicals together in a confined space can cause an explosion in your pool’s filter system. Pool owners also have been burned and severely injured by mishandling of these chemicals. In addition, you don’t want to add shock directly into your pool. Shock is a form of concentrated chlorine; it can bleach anything within contact. Always dissolve the chemical into a bucket full of water. That will ensure it’s more evenly dispersed and it will protect your pool walls and floor.
Do: Follow manufacturer instructions when adding shock. Always wear proper safety gear.
Pro Tip: When diluting shock, put water in the bucket first and then add the chemicals. Putting chemicals in first can cause them to splash back on your arms or face.
4. Don’t run the pool filter system less than 8 hours each day.
Your pool’s filter and pump push water in and out of the system, cleaning it of dirt and keeping pool chemicals mixed. While running it less may seem like a cost-saving measure, it’s not. Inadequate pool filtering leads to more expensive treatments to remove algae and critters in your pool. While the size of your pool does matter, for most pools, 8 hours should do the trick.
Do: Keep your pool filter running at least 8 hours a day so it can do its job.
5. Don’t forget to brush.
Regular vacuuming helps to clear your pool of debris. Regular brushing helps to get those problem spots like the waterline, steps, and stairs, and behind ladders, corners and crevices. This helps to keep algae and other unwanted substances under control.
Do: Use an extra wide, heavy-duty aluminum pool brush with curved edges. Brush every week or more often if your pool is often used.
6. Don’t try to fix an algae problem with an automatic pool cleaner.
A robot simply pushes debris and algae around, and up through a mesh bag where it can clog. In other words, if you’re using an automatic pool cleaner, you’re just spreading the problem around. You’re not removing it.
Do: Use a manual vacuum. Make sure you either remove the drain plug or switch your filter to waste.
7. Don’t forget to check your calcium level.
Calcium helps to protect concrete, plaster, fiberglass, and vinyl. However, too much calcium makes the water cloudy. Again, you have to strive for that perfect balance. The recommended range is 175 to 225 parts per million (ppm).
Do: Check your calcium levels and as needed, add some calcium hardness increaser to the water. Note if you’re using calcium hypochlorite shock, you’re already adding calcium when you do the shock treatment.
8. Don’t backwash your pool filter too often.
Debris builds up in your pool’s filter over time. This sediment eventually begins to thicken and after a while prevents water from flowing through the filter. That’s the time to backwash. You’ll know because the pressure will be close to 10 psi. However, you don’t want to backwash too often. It could lead to cloudy or murky water because you’re also washing away the bed of fine sediment that helps your filter clear the water.
Do: Backwash only when your filter’s pressure gauge is 10 PSI. As the sand in your filter ages, and pressure increases regardless of backwashing, it may be time to change the filter media.
9. Don’t neglect your pool’s water level.
If your water level is too high, you’ll get water on the deck and most likely backwash that pushes dirt and debris back into the pool. If it’s too low, your pool’s pump might start filtering air instead of water, which could damage it.
Do: Keep your pool’s water level at the right height for the day’s swimmers and evaporative impact.
10. Don’t forget to prepare the pool for your furry friends—and clean up afterward.
Dog owners love sharing their pool with their furry friends. Yet the average-sized dog can introduce more contaminants to your pool than the average person. This includes pet hair that can clog filters to natural oils and even dirt. All of this can change your pool’s chemical levels. It’s good to know however that chlorine is considered safe for dogs as long as it is the recommended amount.
Do: Brush your dog before swimming to reduce the amount of pet hair. Rinse your dog after swimming to reduce chlorine exposure. Make sure your dog is safe in the summer heat. Vacuum your pool after each pet use. Regularly clean your filter, too.
Finally, don’t forget to protect your pool with the right homeowner’s policy, and take steps to minimize its risk as an attractive nuisance. That will provide peace of mind for you and your family to enjoy your pool and outdoor recreation all season long.
This article is furnished by California Casualty, providing auto and home insurance to educators, law enforcement officers, firefighters, and nurses. Get a quote at 1.866.704.8614 or www.calcas.com.

by California Casualty | Safety |
You’ve got a new addition to your family – or you’re expecting one soon. Congratulations! There is a lot to do to prepare, including getting your home ready for your new baby.
Here’s a checklist to help better prepare your home for your new little bundle of joy.
In the Bedroom
-
- Take strings off of the bottom of sleepers (clothing) so they don’t get wrapped around baby’s toes. Check all clothing for loose buttons that could be swallowed.
- Remove mobiles when the baby can sit on his or her own.
- Adjust the mattress so it’s in the lowest spot when the baby can pull up to a standing position.
- Store creams and smaller objects that your baby could fit in its mouth up high and out of reach.
- Place a protective cover on all unused outlets.
- Wind or wrap electric cords so that babies cannot pull on them, causing lamps or other appliances to fall.
- Wrap or tie up drapery cords so they are out of reach. Use cordless window blinds if possible.
- Make sure all heavy furniture, like drawers and desks, are anchored to the wall to prevent them from falling over.
In the Kitchen
-
- Make sure high chairs are sturdy and tray latches are secure.
- Install cabinet locks so when the baby starts exploring, little fingers won’t get into the contents.
- Install appliance locks so baby can’t pull open an oven or dishwasher door.
- Use a stove guard that attaches to the front and blocks knobs so that curious kids can’t turn them on.
- Store cleaning products out of reach of baby. Store them safely up high or behind a secured cabinet. Similarly, keep any alcohol out of reach.
- Keep all knives, cooking utensils, smaller appliances, and glassware safely stored away in cabinets or drawers.
- Consider a child safety look on pantry doors to keep curious kids away from unopened groceries.
In the Bathroom
-
- Set your water heater to 120 Fahrenheit or below to prevent burns. Or install an anti-scald device on your tub’s faucet.
- Use nonslip mats for the bathtub and any tile floors or hard surfaces.
- Put a rubber spout cover on the tub faucet to protect from bangs or bruises.
- Replace any bathroom trashcans that do not have lids.
- Make sure the toilet seat has a protective lock and that it is never left up for the baby to fall in.
- Store away fragrances, razors, soaps, styling tools, makeup, etc. out of reach.
In the Laundry Room
-
- Get a child safety lock for your washer and dryer doors so that curious toddlers cannot crawl inside. (Some newer models may include safety locks.)
- Store bleach and detergent pods out of reach. While they look good enough to eat, pods can be poisonous.
- Use a lock on the laundry room door to prevent curious crawlers from exploring, especially when machines are in use.
- Never leave hot irons or steamers plugged in.
More Throughout the Home
-
- Mount any heavy furniture to the wall so it doesn’t tip. If you can’t mount your television, secure it in a cabinet.
- Block staircases with a hardware-mounted baby gate to ensure it stays put. Pressure-fit gates may not. Know that safety gates are designed for children ages 6-24 months.
- Install window guards to prevent babies and toddlers from falling out of open windows.
- Add furniture padding to pointy corners on coffee tables, kitchen counters, and other places.
- Remember that toddlers will pull themselves up on furniture so ensure that it is secure.
- Install pinch guards to protect little fingers from getting pinched in doors.
- Cover any open outlets with child-safe covers.
- Keep chargers and any other cords stored away and out of reach.
- Make sure anything breakable, like decorative vases, glass photo frames, or indoor planters are placed safely out of reach.
- Make sure the doors on your fireplace remain closed and that you use a protective gate to keep the baby at a far enough distance away.
As a new parent who cares about safety, you’re going to be great. Enjoy your new arrival!
This article is furnished by California Casualty, providing auto and home insurance to educators, law enforcement officers, firefighters, and nurses. Get a quote at 1.866.704.8614 or www.calcas.com.
