
by California Casualty | Helpful Tips |
Holiday parties are all about good company, great memories — and that one dish everyone can’t stop talking about. If you’re searching for the perfect potluck recipe to wow a crowd, you’re in the right place. We’ve scoured the internet for festive favorites that travel well, taste amazing, and disappear fast.
Appetizers
Hot Crab Pinwheels
These warm, melty bites deliver a burst of creamy crab flavor that disappears from the platter in minutes.
Ingredients:
- 1 package (8 ounces) reduced-fat cream cheese
- 1 can (6 ounces) crabmeat, drained, flaked and cartilage removed
- ¾ cup diced sweet red pepper
- ½ cup shredded reduced-fat cheddar cheese
- 2 green onions, thinly sliced
- 3 tablespoons minced fresh parsley
- ¼ to ½ teaspoon cayenne pepper
- 6 flour tortillas (6 inches)
Directions:
- Beat cream cheese until smooth. Then stir in crab, red pepper, cheese, green onions, parsley and cayenne.
- Spread 1/3 cup filling over each tortilla and roll up tightly.
- Wrap in plastic, twisting ends to seal. Refrigerate for at least 2 hours.
- When ready to bake, preheat the oven to 350 degrees.
- Unwrap rolls, trim ends and cut each into 6 slices.
- Coat cookie sheet with cooking spray. Place rolls on cookie sheet and bake until bubbly, about 10 minutes. Serve warm.
Pro tip: Bring the refrigerated rolls to the party and finish them in the host’s oven.
Muffin Tin Latkes
Crispy on the edges and tender inside, these muffin-pan latkes bring a fun twist to a beloved classic.
Ingredients:
- ¼ cup vegetable oil
- 12 ounces russet potatoes (2-3 potatoes)
- 1 large onion
- ¼ cup all-purpose flour
- 1 ½ teaspoons kosher salt
- 1 ½ teaspoons freshly ground black pepper
- 1 large egg, lightly beaten
- Sour cream, cooked apples, caramelized onions and/or chopped chives for serving
Directions:
- Place oven rack in the top position and preheat oven to 425 degrees. Generously spray a 12-cup muffin pan with nonstick cooking spray. Add 1 tsp. oil to each muffin cup. Put the muffin tin on a rimmed baking sheet and set aside.
- Peel the potatoes. Use a grater or a food processor to shred them. Then shred the onions and add them to the potatoes in a medium bowl.
- Add the flour, salt, pepper and egg and mix.
- Scoop a ¼ cup of the potato mixture into each muffin cup, pressing it into the bottom and against the sides.
- Bake until the latkes are a deep golden brown and the oil is sizzling, about 40-50 minutes.
- To ensure the latkes don’t stick, run a knife around and under each after you take them out of the oven, and move them to a cooling rack. Add your favorite toppings when serving.
Pro Tip: Make these up to 2 days ahead and store them tightly wrapped in the refrigerator. Just reheat on a baking sheet at 350 degrees, about 20 minutes.
Main Dishes
Skillet Cheeseburger Hot Dish
All the flavors of your favorite backyard burger come together in one bubbling, crowd-pleasing skillet.
Ingredients:
- 1 28-oz. bag frozen potato tots
- 1 medium red onion, chopped and divided
- 3 pickle brine, divided, plus 6 pickle chips, chopped
- 1 olive oil
- 1 ½ lb. 90% lean ground beef
- 2 steak seasoning
- 3 tomato paste
- 2 all-purpose flour
- 1 ½ tsp. beef bouillon base mixed with 1 ½ cup warm water
- 6 Cheddar cheese, coarsely grated (1 ½ cup) and divided
- ¼ cup mayonnaise
- 3 ketchup
- 1 yellow mustard
- 4 Campari tomatoes, chopped
Directions:
- Heat oven to 425 degrees.
- Put tater tots on a rimmed baking sheet and bake until crispy, about 25-30 minutes.
- In a small bowl, combine half of the onion with 2 tablespoons of pickle brine. Set aside.
- Heat oil in cast iron skillet. Add remaining onion and cook until tender and golden, 6-7 minutes. Add beef and steak seasoning and cook until the meat is no longer pink.
- Add tomato paste until caramelized and darkened in color. Sprinkle with flour. Gradually add bouillon mixture and simmer. Stir until slightly thickened.
- Sprinkle with 1 cup cheese and top with tots, then the remaining ½ cup cheese. Bake until cheese is melted and mixture is bubbling.
- In a small bowl, whisk together the mayonnaise, ketchup, mustard, and remaining tablespoon pickle brine. Drain pickled onions, then scatter over tots along with tomatoes and pickles. Serve with the special sauce on the side.
Turkey and Stuffing Casserole
This cozy casserole layers all the comfort of a holiday dinner into one hearty, shareable dish.
Ingredients:
Casserole:
- 2 tablespoons EVOO
- 2 tablespoons butter
- 2 pounds ground turkey at room temp and patted dry
- 2 teaspoons Worcestershire sauce
- Salt and freshly ground black pepper
- 2 ribs celery, chopped
- 1 carrot chopped
- 1 onion chopped
- 1 small potato, peeled and chopped
- 2 tablespoons finely chopped fresh thyme
- 2 tablespoons flour
- 2 to 2 ½ cups turkey or chicken stock
- ½ cup frozen peas
Stuffing:
- 6 tablespoons butter cut into pieces
- 3-4 ribs celery with leafy tops, chopped
- 2 small apples, such as Macintosh or Honeycrisp, chopped
- 1 large fresh bay leaf
- 1 onion chopped
- About 1 tablespoon poultry seasoning
- Salt and freshly ground pepper
- 1 bag traditional seasoned stuffing mix or 5 cups cubed stale bread
- About 3 cups of turkey or chicken stock
- Butter for dotting casserole
Directions:
- Preheat the oven to 375 degrees.
- Heat the EVOO in a large, deep skillet over medium high heat. Melt in the butter.
- Add the turkey and cook until browned. Season with the Worcestershire, salt and pepper.
- Add the celery, carrots, onions, potatoes and thyme. Cook 8-10 minutes until vegetables are softened.
- Stir in the flour and cook for a minute, then add the stock and cook to thicken.
- Stir in the peas until warmed through and transfer the mixture to a casserole dish.
- For the stuffing, heat a large skillet and melt the butter on medium heat. Add the celery, apples, bay leaf and onions.
- Add the poultry seasoning and salt and pepper. Cook until tender, 12-15 minutes. Then add the stuffing mix or bread to moisten in the stock.
- Arrange the stuffing on top of the casserole and dot with butter.
- Bake until brown, bubbly and crisp on top, about 15 to 20 minutes.
Pro Tip: If baking later, refrigerate the casserole. On party day, plan to bring the casserole to room temperature and follow baking instructions above at your home or the host’s.
Side Dishes
Sweet Onion Creamed Corn
Sweet, smoky, and irresistibly creamy, this upgraded corn dish steals the show on any potluck table.
Ingredients:
- 5 bacon strips, chopped
- 1 large, sweet onion, chopped
- 1 medium sweet red pepper, chopped
- 5 cups frozen corn (about 24 ounces), thawed
- 2 cups cubed fully cooked ham
- ½ cup half-and-half cream
- 1 tablespoon brown sugar
- 1 tablespoon dried parsley flakes
- 1 teaspoon smoked paprika
- ½ teaspoon salt
- ½ teaspoon pepper
- 1 package (8 ounces) cream cheese, cubed and softened
Directions:
- Cook bacon over medium heat until crisp. Remove with slotted spoon, leaving drippings in the pan.
- Cook and stir onion and sweet red pepper in bacon drippings over medium high heat until tender, about 5-6 minutes.
- Grease a 4-quart slow cooker. Combine corn, ham, cream, brown sugar, parsley, paprika, salt, pepper, bacon and onion mixture. Cook covered on low for 3-4 hours.
- Stir in cream cheese and cook 10 minutes longer. Stir before serving.
Broccoli Rice Casserole
Packed with cheesy goodness and wholesome veggies, this casserole is the kind of side everyone goes back for
Ingredients:
- 4 Tbsp. (½ stick) salted butter
- 1 medium yellow onion, finely diced
- 1 garlic clove, grated
- 4 Tbsp. all-purpose flour
- ½ tsp. dry mustard
- ¼ tsp. cayenne pepper
- 3 cups whole milk
- 4 oz. cream cheese, at room temperature
- ½ cup grated parmesan cheese
- 1 tsp. black pepper
- ½ tsp. kosher salt
- ½ tsp. paprika
- 8 oz. processed cheese (Velveeta), cubed
- 3 cups grated sharp cheddar cheese (about 12 ounces)
- 8 cups small broccoli florets
- 6 oz. diced pimentos, drained
- 2 ½ cups cooked long-grain rice
Directions:
- Preheat oven to 350 degrees.
- Melt the butter in a large skillet over medium heat. Add the onion and garlic and cook until softened, about 3-4 minutes.
- Add the milk, stirring constantly. Cook until thickened, about 2 minutes.
- Add the cream cheese and parmesan. Stir in the pepper, salt and paprika.
- Add the processed cheese, stirring until melted. Then add 1 ½ cups cheddar and stir until melted.
- Fold in the broccoli and pimentos.
- In a large baking dish, create a base with half the cooked rice. Top with half of the broccoli cheese sauce. Repeat.
- Sprinkle the remaining 1 ½ cups cheddar over the top. Bake until bubbly, about 30 minutes.
Desserts
Candy Cane Pie
This make-ahead, no-bake pie is the perfect festive touch for any holiday gathering.
Ingredients:
- 25 chocolate sandwich cookies (such as Oreos; about 9.5 ounces)
- 5 unsalted butter, melted
- 2 ½ cups heavy cream
- 1 cup powdered sugar
- 3/4 cup white chocolate chips
- 12 cream cheese, at room temperature
- 1 peppermint extract
- ½ cup coarsely crushed candy canes (from 8 candy canes), plus more for garnish
- Red gel food coloring, for the filling
- 2 mini candy canes, for garnish (optional)
Directions:
- Pulse the cookies in a food processor until fine crumbs form. Pour in melted butter and pulse until combined. Press the mixture firmly in a 9-inch-deep dish pie plate. Cover the crust and place it in the freezer for at least 15 minutes and up to a day.
- Whip the heavy cream and ½ cup of the powdered sugar on medium-high until stiff peaks form, about 3 minutes. Set aside.
- Microwave the white chocolate chips in 15-second intervals, stirring between each, until fully melted. Let cool for 2-3 minutes.
- Combine the cream cheese, peppermint extract, and remaining ½ cup powdered sugar. Beat on medium high speed until light, fluffy and smooth, about 2 minutes. Add the melted white chocolate and mix on medium speed.
- Carefully fold in 3 cups of the whipped cream. Cover and refrigerate the remaining whipped cream.
- Transfer half of the peppermint filling to a medium bowl. Fold in crushed candy canes and spread the mixture in the chilled pie shell. Freeze for 10 minutes.
- Add red food coloring to the remaining filling, mixing gently to avoid deflating. Spoon the pink filling over the chilled pie. Cover and refrigerate for 8 hours.
- Whisk the reserved whipped cream mixture back to stiff peaks. Dollop on the pie and decorate with crushed candy canes.
Layered Chocolate Marshmallow Peanut Butter Brownies
Swirls of chocolate, peanut butter, and marshmallow make these brownies an indulgent, show-stopping treat.
Ingredients:
- 1 ½ cups butter, divided
- 3/4 cup baking cocoa, divided
- 4 large eggs, room temperature
- 2 cups sugar
- 1 teaspoon vanilla extract
- 1 ½ cups all-purpose flour
- ½ teaspoon salt
- 1 jar (16.3 ounces) chunky peanut butter
- 1/3 cup 2% milk
- 10 large marshmallows
- 2 cups confectioners’ sugar
Directions:
- Preheat oven to 350 degrees.
- In a small saucepan, melt 1 cup of butter. Stir in ½ cup of cocoa until smooth. Remove from heat.
- In a large bowl, beat eggs, sugar and vanilla until blended.
- Combine flour and salt and gradually add it to the egg mixture.
- Beat in cocoa/butter mixture.
- Transfer to a greased 15x10x1 pan. Bake until the center comes out clean, about 18-22 minutes.
- Cool brownies on a wire rack. Microwave peanut butter until softened, about 30 seconds and spread on warm brownies. Refrigerate until peanut butter is set, about 45 minutes.
- In a saucepan, combine milk, marshmallows, remaining ¼ cocoa and remaining ½ cup butter. Stir over medium low heat until the mixture is smooth. Remove from heat and gradually stir in confectioner’s sugar. Spread over peanut butter layer.
- Refrigerate at least 30 minutes. Cut in squares and serve.
Have a go-to dish that always earns compliments? We’d love to hear it. Share your favorite holiday recipe in the comments.
Happy holidays from all of us at California Casualty!
This article is furnished by California Casualty, providing auto and home insurance to educators, law enforcement officers, firefighters, and nurses. Get a quote at 1.866.704.8614 or www.calcas.com.

by California Casualty | Health, Helpful Tips, Peace Officers |
Every call, every shift, every split-second decision places police officers under pressures most people will never experience. Over time, that constant strain can take a real toll — on mental health, physical well-being, and even job performance. The good news is that effective stress management isn’t just possible; it’s essential, practical, and within reach.
In this guide, we’ll explore strategies designed to help officers stay grounded, resilient, and ready for whatever the day demands.
Understanding Stress
Stress is your body’s natural response to perceived threats. It triggers a chemical reaction commonly known as “fight or flight.” While small amounts of stress can keep you alert and focused, prolonged stress can have serious consequences for both your body and mind.
Why Managing Stress Matters
Policing is high-stakes work. Your body and mind are on high alert for hours at a time, day after day. If stress is left unchecked, it can contribute to:
- Heart disease
- Post-traumatic stress disorder (PTSD)
- Sleep disturbances
- Depression and anxiety
- Marital and relationship strain
- Weight gain and poor nutrition
- Job burnout
Managing stress isn’t just about feeling better—it’s about protecting your health, your career, and your relationships.
Practical Steps to Take Control
1. Move Your Body
Exercise keeps you strong, alert, and mentally sharp. Even short daily workouts can help you manage stress levels and improve overall health. The key is consistency and enjoyment — choose activities you actually like. Include both:
- Strength training to build endurance and reduce injury risk
- Cardio to boost energy and clear your mind
2. Eat for Energy and Focus
Fast food and processed meals are convenient, but they can add to stress and fatigue. Limit saturated fats, added sugars, and mindless snacking. Plan meals that include:
- Fresh vegetables and fruits
- Whole grains and high-fiber foods
- Lean proteins
3. Prioritize Quality Sleep
Shift work can disrupt your body’s natural rhythm, making rest essential. Even a small nightly wind-down routine, like stretching, reading, or deep breathing, can dramatically improve your rest. Try these strategies:
- Set consistent sleep and wake times — even on off-days.
- Avoid caffeine or alcohol close to bedtime.
- Keep your bedroom dark, cool, and quiet.
- Limit screen time before bed; blue light can interfere with sleep.
- Use your bed for sleep only — avoid reading or scrolling in bed.
4. Master Relaxation Techniques
Taking time to unplug and recharge is critical. Slowing down can help your mind recover and make you more effective on the job.
- Turn off your phone and step away from emails.
- Try meditation, deep breathing, or journaling.
- Engage in hobbies or non-work activities.
- Schedule vacations and mental health days.
5. Lean on a Support System
Strong relationships can buffer the effects of stress. Maintaining connections and talking openly about stress reduces isolation and helps prevent burnout. Consider:
- Family, close friends, or faith-based communities
- Counseling or professional support when needed
- Fellow officers: use a buddy system to check in on each other
6. Separate Work from Home
Work-life balance is crucial. Clear boundaries protect your personal life and ensure you return to work refreshed. Techniques for creating boundaries include:
- Create a “shutdown” routine at the end of your shift.
- Take a moment to reflect on what you accomplished.
- Use your commute to decompress with music or a podcast.
- Avoid checking work email while at home.
7. Expand Your Social Circle
While friendships on the force are invaluable, it’s also important to connect with people outside policing. Non-police friends can provide a fresh perspective and a healthy break from work-related stress.
- Reconnect with old friends or family members you haven’t seen in a while.
- Join a hobby group, sports league, or community class to meet people with shared interests.
- Volunteer in your community to interact with different groups.
- Seek out social gatherings where you can talk about things other than work.
8. Practice Gratitude
Taking a moment to recognize what’s going well in your life can help shift focus from stressors to positives. Even a simple daily reflection can improve mood and resilience.
- Acknowledge people who help you. A quick thank you to a dispatcher, partner or supervisor and boost morale for everyone.
- Notice small wins — the successes that make you feel good about your job.
- Post a gratitude reminder on your dashboard, locker or phone to pause and reflect during stressful shifts.
- Share gratitude at home. Express your thanks to the people who are important in your life.
The Benefits of Stress Management
When you take intentional steps to manage your stress, you give yourself the best chance to stay healthy, think clearly, and show up as your strongest self — both on and off duty. Officers who actively manage stress often experience:
- Better physical health
- Greater mental well-being
- Improved job satisfaction
- Clearer decision-making
- Stronger community relationships
You give so much to your community every day, and you deserve resources that look out for you in return. At California Casualty, we are proud to provide police officers with quality, reliable, cost-effective home and auto insurance for added peace of mind.
This article is furnished by California Casualty, providing auto and home insurance to educators, law enforcement officers, firefighters, and nurses. Get a quote at 1.866.704.8614 or www.calcas.com.

by California Casualty | Helpful Tips, Pets |
If you’ve noticed your dog looking a little rounder than usual, you’re not alone. It happens gradually, almost sneakily — even to the most loving and attentive owners. The good news? Helping your dog get back to a healthy weight doesn’t have to be overwhelming. In fact, it can be a rewarding, bonding journey filled with new routines, more play, and a happier, more energetic pup.
Why Those Extra Pounds Matter
A chubby dog may look adorable, but the health risks are anything but cute. Obesity is linked to serious conditions in pets, including:
- Arthritis
- Diabetes
- Heart, liver, and kidney disease
- Certain cancers
- A shortened lifespan
Even a few extra pounds can place stress on your dog’s joints and organs. Think of weight-loss efforts not as a diet, but as an investment — one that pays off in more comfortable movement, better sleep, extra years of life, and that unmistakable sparkle in your dog’s eyes when they feel good.
Is Your Dog Overweight?
Every dog breed has its own natural shape, so it’s important to look at your pet’s individual build. Here are three simple checks you can do at home. These quick visual cues give you a starting point, but your veterinarian remains the best source for an accurate assessment.
- Rib Check
Run your hands along your dog’s ribcage. You should be able to feel the ribs easily beneath a thin layer of fat — not pressing hard, just lightly gliding your fingers.
- Waist Check
Look down at your dog from above. Do you see an obvious waistline behind the ribs? If not, or if the body looks oval instead of hourglass, that may indicate extra weight.
- Tummy Tuck Check
Now look from the side. Your dog’s abdomen should slope upward slightly from the ribcage toward the hind legs. A sagging or straight line usually means excess fat around the belly.
Start with a Vet Visit
Before making any changes, schedule a checkup. Think of your vet as your dog’s personal trainer and nutritionist rolled into one. Your veterinarian can:
- Rule out underlying health issues like arthritis or thyroid disease
- Identify an ideal weight goal
- Recommend a safe daily calorie target
- Suggest food options tailored to your dog’s needs
Think Slow and Steady
Crash diets are unsafe for dogs and ineffective long-term. A healthy pace for canine weight loss is typically 1–5% of current body weight per month. Gradual progress prevents metabolism slowdowns, reduces hunger-driven begging, and helps your dog lose fat while maintaining muscle. Small improvements, made consistently, lead to big results.
Choosing the Right Food
You may want to stay with your dog’s current food or switch to a healthier diet. That doesn’t necessarily mean buying the most expensive bag on the shelf. What matters is choosing a formula that aligns with your dog’s goals. Options to consider include:
- Prescription weight-loss diets: Great for dogs with significant weight to lose or underlying health issues.
- Low-calorie kibble: Many brands offer lighter formulas.
- Senior formulas: Often lower in calories to match lower activity levels in older dogs.
- Wet food: Higher water content keeps pups fuller while reducing overall calories.
Count the Calories (Yes, It Matters!)
Just like with people, portion size is often the real culprit.
- Measure every meal — don’t eyeball it.
- Use a kitchen scale or a measuring scoop for accuracy.
- Track calories from treats. (They count!)
When it comes to treats, think outside the (biscuit) box. Many dogs enjoy baby carrots, blueberries, plain green beans, or ice cubes. These crunchy snacks satisfy without blowing the daily calorie budget.
Smaller, More Frequent Meals
If your schedule allows, breaking meals into two or three smaller feedings throughout the day can help curb hunger and begging. This simple shift can make a big difference in your dog’s comfort—and your sanity.
Movement: Make It Fun — and Make It Daily
You don’t have to train for a marathon. You just need to get moving together. Aim for 30 minutes of daily activity, adjusted for your dog’s fitness and health. Options your dog may enjoy include:
- Walks
- Swimming
- Hiking
- Fetch
- Tug play
- Games
- Doggie playdates
- Agility or fitness classes
If your dog is significantly overweight, start slow. Watch for heavy panting, lagging behind, or signs of discomfort. Keep water available and increase activity gradually. Most importantly, make it enjoyable. Your dog will feed off your energy — so smile, laugh, chat with your pup, and celebrate the moments you’re spending together.
Keep Track of Progress
Some animal hospitals offer free weight checks, and many pet stores have scales as well. Progress can be subtle at first, but seeing those numbers shift (even a little!) is incredibly motivating.
Celebrating non-scale victories keeps the journey positive. You can also track:
- Energy level
- Mobility
- Ease of getting up
- Endurance on walks
- Coat condition
Get the Whole Family on Board
Helping your dog reach a healthy weight is an act of love, and consistency is key. If one person sneaks table scraps, adds extra kibble, or gives too many treats, progress stalls. Agree as a household on the plan — portions, treats, activity, and rules. That way, your dog gets a clear, consistent message and a greater chance at success.
A Final Note About Protection
Health journeys sometimes come with unplanned vet expenses. Having pet insurance can help offset larger costs and keep your dog’s wellness on track. You can easily add Pet’s Best pet insurance to your California Casualty auto or home policy. Talk with a California Casualty customer service representative to learn more about what pet insurance can cover.
This article is furnished by California Casualty, providing auto and home insurance to educators, law enforcement officers, firefighters, and nurses. Get a quote at 1.866.704.8614 or www.calcas.com.

by California Casualty | Helpful Tips |
Amid the rush of shopping, cooking, and gathering, it’s easy to overlook the quiet power of gratitude — the way it lifts spirits, strengthens connections, and brings a sense of peace to our busy days. This season, take a moment to slow down, look around, and start a practice of gratitude that can last well beyond the holidays.
Why Share Gratitude?
Being grateful isn’t just a nice idea — it can truly help your mind and body feel better. Research shows that practicing gratitude can:
- Boost your mood: Focusing on the good things in your day, big or small, can help you feel happier and more hopeful.
- Improve relationships: Saying “thank you” brings people closer, builds trust, and often inspires others to be kind in return.
- Reduce stress and worry: Gratitude helps you relax and see things in a more positive way.
- Make you stronger during tough times: The more you practice gratitude, the easier it becomes to stay steady and positive when life gets hard.
The key word here is practice. Gratitude isn’t something we turn on in November and turn off again in January. It becomes most powerful when woven into our daily routines — quietly, consistently, and intentionally.
How to Start
Notice the people, comforts, and experiences that bring meaning to your life. Think about family members who support you, friends who make you laugh, teachers and mentors who guide you, and the first responders, police officers, firefighters, nurses and healthcare workers who keep communities safe and strong. Then, decide how you would like to express your gratitude.
Below are some practical, heartfelt ideas you can use to show thanks this season — and make gratitude a natural part of your everyday life.
1. Write Handwritten Notes
A handwritten note carries a warmth that a text or email can’t match. It shows the recipient that you took time out of your day specifically for them. A simple “You make my days brighter,” written by hand, can become something the other person holds onto for years.
- Share why you’re thankful for them. The best notes are personal so make them specific as to how that person has helped you.
- Leave short notes of encouragement in unexpected places: a coworker’s desk, a child’s backpack, or a partner’s lunch bag.
- Keep a small stack of cards on hand so expressing gratitude becomes easy and spontaneous.
2. Express Gratitude Out Loud
Think about how many times you say “thank you” each day without really meaning it. This season, choose one of those moments and replace it with something deeper. Instead of a quick “thanks,” try: “Thank you for taking the time to help me today. I really appreciate your patience.”
- Give someone a call just to say thanks. It takes just a few minutes but is has a lasting impact.
- If you’re comfortable with technology, send a short, personalized video message to someone who has made a difference in your life.
3. Build gratitude into group settings.
Gratitude doesn’t have to be personal or private. When you bring it into a group — whether at work, with friends, or around the holiday table — you encourage others to slow down, notice the good, and join in. A small moment of appreciation can shift the energy of the whole room.
- Start a work meeting with a “gratitude huddle,” sharing bright spots from the week.
- Share messages of gratitude at the dinner table or family gathering.
- Create a simple “gratitude wall” using sticky notes where everyone can add something they’re thankful for during a meeting or event.
4. Spend Quality Time with Loved Ones
Time is one of the most meaningful gifts you can offer. Showing up — fully, without distraction — communicates appreciation at a deep level. When we give people our presence, we remind them they matter.
- Put your phone away and have a genuine, face-to-face conversation.
- Join your partner in a favorite hobby, even if it’s not your usual activity.
- Schedule a game night, a movie marathon, or a simple walk together.
5. Give Thoughtful, Small Gifts
Gifts don’t have to be extravagant to be meaningful. Often, the smallest items create the biggest emotional impact. These gestures reflect thoughtfulness — and the knowledge of what might brighten someone’s day.
- Frame a photograph that holds a cherished memory.
- Give a journal to someone starting a new chapter.
- Bring lunch to a stressed coworker or deliver treats to first responders, teachers, nurses, or police officers who serve your community.
6. Offer Acts of Service
Sometimes actions speak louder than words. Acts of service show appreciation for your family member or friend by easing their load. These gestures create a ripple effect — one thoughtful act often inspires another.
- Take over a chore your partner dislikes or normally handles.
- Cook a meal for a loved one who is overwhelmed or recovering from illness.
- Offer to run errands, shovel snow, or watch someone’s children so they can have a break.
7. Do a Random Act of Kindness
Kindness to strangers has a special kind of magic. It creates a chain reaction, encouraging others to pay it forward. These small surprises help build a sense of community during a season when it’s needed most.
- Bake cookies for a neighbor.
- Pay for the person behind you in the drive-through or at a coffee shop.
- Leave an uplifting note where someone else will find it.
8. Donate to Charity or Volunteer
Recognizing your own blessings often leads naturally to wanting to help others. Even small contributions — your time, your attention, your resources — can make a significant impact on someone else’s life.
- Donate to organizations that provide food, shelter, clothing, or holiday support to families in need.
- Volunteer at a local soup kitchen, shelter, or nonprofit.
- Participate in holiday giving programs that provide gifts for children or seniors.
9. Leave Positive Reviews and Show Appreciation for Service Workers
Gratitude extends far beyond our inner circle. Service workers often deal with long hours, high stress, and limited acknowledgment. A few kind words can make a big difference on a hectic day.
- Leave a positive review for a business you appreciate and explain why you’re grateful.
- Offer a generous tip to a waiter or waitress during the busy holiday season.
- Thank store employees, delivery drivers, pharmacists, and postal workers for their service.
10. Make Gratitude a Daily Habit
The most meaningful gratitude practice is one you return to day-after-day. These habits help anchor your days with purpose and positivity.
- Start a morning gratitude ritual. Ask yourself, “What am I grateful for today?”
- Keep a gratitude journal. Jot down three things each day — big or small.
- Create a gratitude jar. Write down moments of kindness or appreciation on small slips of paper, then review them monthly or at year’s end.
As we celebrate this season of gratitude, we’re reminded of the many people who make our work meaningful. At California Casualty, we are truly thankful for you. Thank you for trusting us to protect what matters most.
This article is furnished by California Casualty, providing auto and home insurance to educators, law enforcement officers, firefighters, and nurses. Get a quote at 1.866.704.8614 or www.calcas.com.
by California Casualty | Helpful Tips, Homeowners Insurance Info |
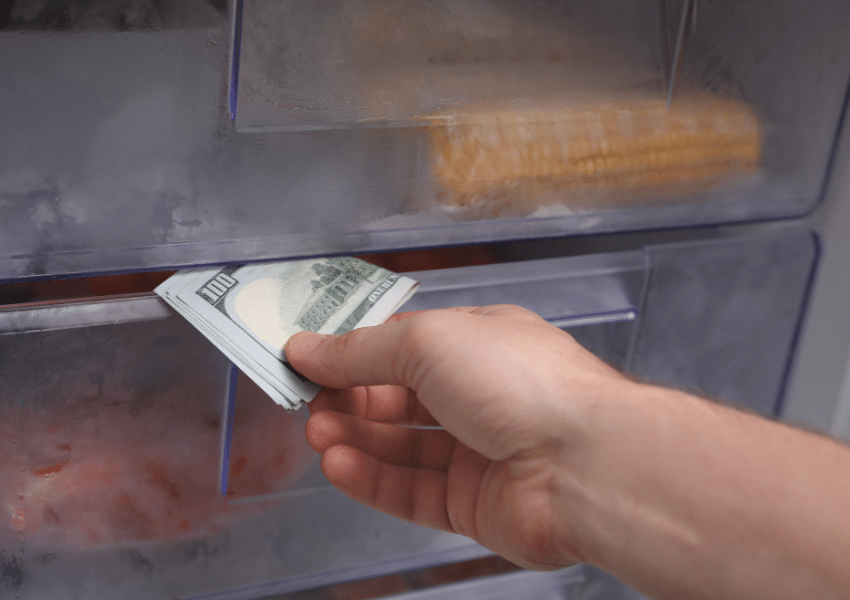
Think you’ve found the perfect hiding spot for your cash or jewelry? Think again. From the freezer to the sock drawer, burglars know all the “secret” places homeowners use to stash their valuables. Before you tuck away your treasures in plain sight, learn which hiding places offer false security — and where your valuables will truly be safe.
Front Door
We’ve all heard the advice about keeping a spare key “just in case,” but hiding one near your front door is practically an open invitation. The doormat, flowerpot, mailbox, or fake rock –these are the first places a burglar will check. If you need to keep an extra key, leave it with a trusted neighbor instead.
Entryway
Your entry table may be the perfect place for dropping your car keys, wallet, or spare cash when you walk in, but it’s also the first stop for an intruder. Those items are quick to grab and easy to carry. A thief could be in and out of your home in under a minute with your keys, ID, and bank cards in hand.
Bedrooms
Burglars make a beeline for the master bedroom because they know that’s where people store their most valuable items — cash, jewelry, and small electronics. They’ll check dresser drawers, armoires, sock drawers, and even the space under your mattress. Suitcases and storage boxes? Those are fair game, too. The very spots that are most convenient for you are the ones they will check.
Freezer
Think your freezer is foolproof? Think again. Many homeowners wrap cash or jewelry in plastic and tuck it behind the frozen vegetables. But this “clever” hiding place is common knowledge among burglars. If it’s easy for you to access, it’s easy for them to find.
Bathrooms
Your bathroom medicine cabinet may seem like a private place, but it’s often one of the first areas a thief will check — especially if they’re looking for prescription drugs to sell. Don’t keep cash or jewelry there either; it’s too easy to reach.
Cookie Jar
It might seem like a sweet spot to stash your grocery money, but thieves know this classic trick. The same goes for flour tins and coffee canisters. If it’s in plain sight in the kitchen, assume it’s on a burglar’s radar.
Home Office
Your office is a goldmine for identity thieves. Computers, passports, checkbooks, and tax forms can all be used to steal your identity or drain your accounts. Keep sensitive documents locked away and back up important files to a secure cloud account.
Portable Safes
A small safe can keep kids or guests out of your valuables, but it won’t stop a thief from carrying the whole thing out the door. Unless your safe is bolted to the floor or wall, it’s just another box waiting to be picked up and opened later.
Other Bad Spots
Anywhere damp, dirty, or difficult to monitor is also a poor choice. Inside toilet tanks, for example, may seem clever, but the moisture can ruin documents and cash.
Where to Hide Your Valuables Instead
The best hiding places are the ones that require effort to access or don’t make sense for a thief to bother with. Think inconvenient, hidden, or disguised. Here are some ideas.
Trash Can with a False Bottom
A cleverly designed trash can with a hidden compartment can be a surprisingly effective deterrent. Thieves are unlikely to rummage through garbage. Just make sure your valuables are sealed against moisture — and don’t accidentally toss them out on trash day!
Fake Wall Outlets
You can purchase wall outlets that look completely real but pull out to reveal a small hidden compartment. They’re perfect for storing cash, jewelry, or small documents. Just be sure the outlet isn’t connected to any wiring.
Hidden Household Items
Fake food cans or containers designed to mimic ordinary products — like shaving cream or soup — are a discreet way to hide valuables. You can even make your own by hollowing out real cans. Just be careful to make them look authentic, and don’t place them in high-traffic areas where someone might mistake them for the real thing.
Structural Hiding Spots
If you’re handy, consider creating built-in hiding spaces behind removable panels or trim. Hollowed-out wainscoting, door jambs, or floorboards can be excellent concealment spots. Pre-made versions are also available for purchase and can be installed without major renovations.
Books and VHS Cases
A hollowed-out book on a crowded bookshelf — or an old VHS tape in a dusty box — won’t draw a second glance. Just don’t use a book or a tape case you might mistakenly donate.
Storage Bins
Large, unlabeled bins can attract attention, so disguise your valuables among ordinary items. Label bins with dull titles like “Old School Projects,” “Holiday Décor,” or “Winter Clothes.” Even if burglars do open a few, they’re unlikely to dig deep through boxes of tinsel or kids’ art supplies.
Kids’ Bedrooms
While the master bedroom is a prime target, thieves usually skip children’s bedrooms. Consider stashing your valuables in a box on a high shelf in the closet. Further protect it with a misleading label.
Add an Extra Layer of Security
Even the best hiding spots can’t protect your valuables completely. Strengthen your security by:
- Installing a home security system with cameras and alarms to deter burglars.
- Using motion-sensor lighting around entry points to discourage nighttime intrusions.
- Keeping your valuables insured through your homeowner’s or renter’s policy so you’re financially protected even if the worst happens.
By avoiding the most obvious hiding places and thinking creatively about security, you can protect your valuables and your peace of mind.
This article is furnished by California Casualty, providing auto and home insurance to educators, law enforcement officers, firefighters, and nurses. Get a quote at 1.866.704.8614 or www.calcas.com.
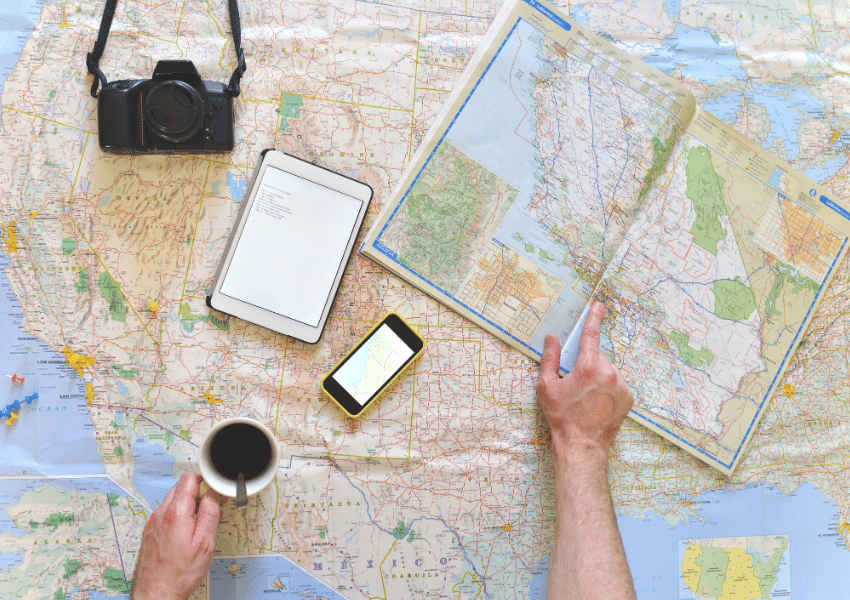
by California Casualty | Auto Insurance Info, Helpful Tips, Travel |
The fall and winter holidays are here, and that means one thing — road trip season! Whether you’re packing up the car for a cozy weekend with family or planning a winter getaway, a little prep now can make the miles ahead smooth and stress-free. So before you hit the highway, let’s make sure both your car and your crew are road trip ready.
1. Give Your Car a Quick Checkup
Take some time to make sure your vehicle is in good shape. A simple once-over now can prevent big headaches later.
- Tires: Start from the ground up. Check tread depth using the penny test — if you can see the top of Lincoln’s head, it’s time for new tires. Adjust the air pressure to the manufacturer’s recommendation (listed on the inside of your driver’s door), and make sure your spare tire is in good shape and properly inflated.
- Battery: Car batteries tend to struggle in extreme temperatures. If your battery is more than three years old, have it tested before your trip. A weak battery can leave you stranded in a rest area or gas station parking lot — never fun with a trunk full of luggage and kids in the back seat.
- Lights: Do a quick walk-around to check your headlights, taillights, brake lights, and turn signals. Replacing a bulb takes only a few minutes and improves both visibility and safety.
- Oil & Fluids: If you’re due (or close to due) for an oil change, take care of it before your trip. Clean oil helps your engine run more efficiently on long drives. Don’t forget to top off brake fluid, power steering fluid, windshield washer fluid, and coolant (anti-freeze) — especially if you’re heading into colder weather.
- Belts & Hoses: Pop the hood and look for cracks, fraying, or leaks. Worn-out belts and hoses are a common cause of breakdowns on long drives.
- Recalls: Before you leave, take a minute to look up your VIN at gov/recalls. It’s an easy way to see if your car has any unaddressed safety issues.
2. Stock Up and Plan for Emergencies
Even with the best prep, life can throw a curveball. A well-stocked emergency kit ensures you’re ready for whatever comes your way. Pack these essentials:
- Jumper cables
- First aid kit
- Flashlight with extra batteries
- Blankets or emergency thermal wraps
- Reflective triangles or road flares
- Tire pressure gauge
- Tire sealant for small punctures
- Multipurpose tool or pocketknife
You’ll also want to keep a portable phone charger or power bank handy, especially if your car doesn’t have USB ports. Toss in personal medications, a small stash of cash (for tolls or emergencies), and some bottled water and nonperishable snacks in case you get delayed. For comfort, include pillows, cozy blankets, and a travel cooler filled with snacks and drinks. A happy car equals happy passengers — and fewer unscheduled pit stops!
3. Keep It Clean and Comfortable
Nothing ruins a road trip faster than clutter and chaos. Before you go, clean out the interior and start with a fresh, organized space. Make sure to bring along:
- A small trash bag or reusable bin for wrappers and napkins
- Hand sanitizer and disinfecting wipes for quick cleanups
- A travel-size tissue pack or paper towels
If you’re traveling with kids, you may want to childproof your car and stock up on car-friendly activities — audio books, travel games, or coloring pads. For adults, download your favorite playlists or podcasts before leaving areas with spotty reception. Little touches like seat cushions, neck pillows, or a cozy throw blanket can turn long stretches of highway into something a bit more comfortable.
4. Don’t Forget the Paperwork
Make sure your essential documents are where they belong. Keep your driver’s license in your wallet and your vehicle registration and insurance card together in your glove compartment for easy access. It’s also a good idea to store digital copies of key documents in your phone’s secure folder or email for backup.
Bringing your pet along? Don’t forget their vaccination records, ID tags, and pet insurance information. Pack food, a collapsible water bowl, leash, and waste bags. Remember to plan regular stops for bathroom breaks and walks — both for safety and comfort.
A well-kept home sends the message that someone’s still around, discouraging would-be burglars and helping you relax on your trip. A few simple precautions can make it look like you never left.
- Let a trusted neighbor know your plans and how to reach you.
- Avoid posting your trip on social media until you’re back.
- Mow your lawn and tidy up the yard before you leave.
- Stop your mail and newspaper deliveries or ask a neighbor to collect them.
- Leave a car parked in your driveway or ask a friend to park there occasionally.
- Set indoor lights on timers to turn on and off automatically.
- Consider installing a home security system or video doorbell for extra reassurance.
6. Check the Forecast and Plan Your Route
Before you head out, check the weather — not just for your destination but for every major stop along your route. Knowing about snow, heavy rain, or construction zones can help you reroute or adjust your travel times. If the forecast calls for snow or ice, pack an ice scraper, small shovel, and sand or kitty litter for traction. You might not need them, but you’ll be glad to have them if you do.
Download a reliable navigation app like Google Maps or Waze and save offline maps in case of poor service. If you’ll be driving through rural or mountainous areas, keep a printed map as a backup — sometimes, old-school really is best.
7. Enjoy the Ride
Once your checklist is complete, it’s time to focus on the best part — making memories on the open road. Cue up a fun playlist, plan a few scenic stops, and don’t rush. Whether you’re watching the leaves change or catching a winter sunrise, the journey itself can be just as rewarding as the destination.
This article is furnished by California Casualty, providing auto and home insurance to educators, law enforcement officers, firefighters, and nurses. Get a quote at 1.866.704.8614 or www.calcas.com.
