
by California Casualty | Educators |
It’s that time of the year again, the time when we share important information about our student’s progress with their families. Parent-teacher conferences are wonderful opportunities to build bridges between home and school. But when you’re faced with doing 2 dozen or more of these meetings back-to-back, it can be daunting.
Whether you’re a newbie or a veteran teacher, here’s how you can prepare for, and organize, your parent-teacher conferences this year.
1. Send a pre-conference letter.
Not only does a letter get parents thinking about conferences, but it can also get them engaged. Include a section that asks for specific questions or concerns that parents want to cover at the conference. There could be a box to check that they have no questions or concerns at this time. See this free sample letter. Manage parent expectations by explaining the conference process and the need to stick to the schedule. Include clear directions on how to sign up for a timeslot.
Pro Tip: Send out the pre-conference letter as a Google form.
2. Schedule enough time.
Not all conferences have to last the same amount of time. Take each student into account and schedule extra time to discuss those who are struggling. You will need to have a more thorough conversation with those parents. You also will want to schedule more time with parents who have a lot of questions. (You’ll know from the pre-conference letters.) Offer flexibility, such as a Zoom, Google Meet, or Skype options for parents who cannot make it to school. They will appreciate that.
Pro Tip: Use a scheduling tool like Calendly or appointment slots on Google Calendar to allow parents to sign up for timeslots that are in-person and/or virtual.
3. Create a script and agenda.
You have a tight timeframe to accomplish a lot. That’s why writing down what you will cover will help. Start by sharing something positive about the student. Then summarize learning goals. Review student grades and work. Share student strengths and areas for growth. Answer questions and give your contact information. Remember that this is just a snapshot, and you can follow up as needed.
4. Gather student work and assessments.
Now that you know what you’re going to cover, it’s time to gather test results and other assessments, work samples, and anecdotal notes for your students. Then you’ll need to separate them by student in folders. Include any behavior concerns. Be honest in a caring way, and stress opportunities for growth.
Pro Tip: Ask students to choose work samples – one piece they are proud of and one where they feel they can improve.
5. Create a waiting space.
Inevitably, parents will show up early or you will run late and they will be waiting. Prepare a sign for the door that tells parents that you are still in a conference. When you are ready for them, you can invite them into the classroom. You also can create a small station where waiting parents can write notes to their children and put them in a class mailbox.
Pro Tip: If you have a classroom device, you can invite parents to leave a funny selfie to surprise their children.
6. Be welcoming.
Greet parents warmly. Sit side-by-side with them as you talk. It’s more friendly and non-threatening than sitting across a desk and sends the message that you are truly partners in their child’s education. Use positive body language. Finally, if parents have to bring their children, have an area set aside with puzzles and quiet activities to limit distractions.
Pro Tip: Prepare for parents who may have a language barrier. In these instances, you can invite them to bring the student to translate or you can ask them to have an interpreter on hand.
7. Encourage questions.
You will likely do most of the talking in a parent-teacher conference. Yet you do want to get parent input. Ask at least twice if they have any questions. Share how they can help their child at home. For example, students struggling with getting homework done can use a planner and parents can check it every night. Make sure that parents have your email address in case they need to contact you following the conference.
8. Remain professional.
You are representing the school. Don’t talk negatively about other teachers or administrators or complain about school policies. Never discuss other students’ behavior. If a parent becomes hostile, don’t argue. Use active listening. Discuss how both parties want what’s best for the child. Invite the parent to a follow-up conversation with you and the administration.
9. Set an alarm.
Your parents may need a cue that the conference is wrapping up. Set an alarm on your phone or another device to ring five minutes before you have to end. This will be a polite reminder that you have other families to see. If more time is needed with this particular parent, now is the time to schedule a follow-up conversation.
10. Practice self-care.
During conference week, you’ll likely log long hours. That’s why self-care is so important. Get enough sleep. Bring snacks and water. Schedule and take bathroom breaks. Plan a low-key, relaxing time leading into, and following, the conferences so that you can recharge.
Pro Tip: Some schools offer free childcare for teachers during conference week. Babysitting is done by PTO volunteers or high school students. Check if this is a possibility.
Finally, consider alternatives to and/or additions to parent-teacher conferences. Student showcases, group conferences, kid conferences, and grade-level dialogues are a few examples of how your district can reinvent the traditional parent-teacher meeting.
This article is furnished by California Casualty, providing auto and home insurance to educators, law enforcement officers, firefighters, and nurses. Get a quote at 1.866.704.8614 or www.calcas.com.
by California Casualty | Educators |
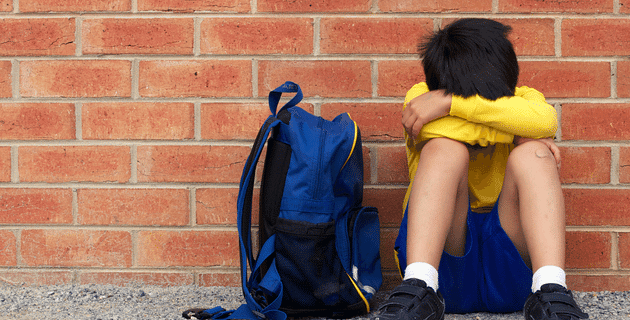
Students learn best when they feel safe, comfortable, and valued. But for students who are being bullied, that’s not the case. Bullying is distracting and anxiety-producing. It affects student self-esteem. It creates an unstable environment for the whole class.
As a teacher, you work hard to create that safe space to learn. Here are some strategies that you can incorporate into your teaching and into your classroom to help keep it that way, and prevent bullying before it starts.
Talk with students about bullying.
Most students know the term “bullying,” but the definition can be confusing. Is name-calling considered bullying? How about gossip? Teach your students that bullying involves words or actions that hurt others intentionally, and that often are repeated. Read and review examples of bullying. Teach kids safe ways they can stand up for others or share that they are being bullied. Your school’s guidance counselor can be a great resource and may even teach the lessons.
Pro tip: Assign a creative writing piece about bullying, such as a poem speaking out against it or a story or skit teaching others to help. Assign an art project about bullying. Display the posters around the classroom and school.
Watch for gateway behaviors.
Behaviors that exclude another student or defy authority are often the actions that can escalate into bullying. These include eye-rolling, staring at others for extended periods, teasing or name-calling, and sarcasm. Laughing when students get hurt or encouraging others to laugh also are concerning behaviors. Finally, excluding or ignoring classmates, refusing to work with certain students, and ignoring teacher or staff instructions are actions that can lead to bullying if not addressed. Make sure that students know that these behaviors are unacceptable in your classroom.
Look out for cliques.
You work hard to foster a sense of community in your classroom. Cliques can undo your good work, and isolate students. That’s why it’s important to keep an eye on them. Rotating seating can help. Use teacher-selected groups so that students get a chance to work with everyone. Remember that students don’t learn to be inclusive on their own, so you will need to teach them.
Look for silent signs of bullying.
When a student is being bullied, there may be subtle shifts in behavior. You may notice changes in the child’s schoolwork or class participation. You may observe signs of anxiety or depression. Maybe there are injuries, torn clothing, or damaged property. If you see any red flags, take the time to talk one-on-one with the student. Determine if there is a potential bullying situation, and then take appropriate action.
Listen to students.
Take every student complaint seriously. You may be the first, and only, trusted adult to be told this information. Don’t take the chance that it’s nothing. Intervene thoughtfully with both the victim and the bully separately. Remember that the bully needs guidance too. Know your students’ personalities. What may be a joke to one student could be humiliating to another.
Pro Tip: Create safe and confidential ways that students can report bullying.
Be visible and close by.
You can’t be everywhere all the time, but when you are working, you can put yourself in places to observe potential bullying situations. Stand outside the class in the hallway during class changes. Walk by the bathroom during high-use times, or by out-of-the-way corners, when your schedule allows. Sometimes the presence of an authority figure can help prevent poor behavior.
If you see bullying, intervene right away.
Avoid thinking that “kids will be kids.” That’s not an acceptable reason for bullying. When you see concerning behavior, stop the interaction. Remember that bullying is not the same as conflict. It is an unbalanced situation. Talk to those involved privately and separately. Follow your school’s protocol for bullying. Re-establish your classroom as a safe space. Keep an eye on those involved to help prevent future situations.
Be aware of cyberbullying.
Cyberbullying can happen outside the classroom and affect what happens in the classroom. Teach students how to protect themselves from cyberbullying. Tell them not to share their passwords. They also should not post anything online that would hurt someone or even share it privately with a friend (as that can be shared with all). Tell students to talk to a trusted adult about any messages that make them feel sad or scared.
Many schools have zero-tolerance policies on bullying with severe consequences such as suspension and expulsion. That can make staff and students less likely to report bullying behavior. Talk with your administration about any concerns you may have, and keep lines of communication open with students, parents, and staff. You can be a caring role model in creating safe spaces for all to learn, grow and find their full potential.
This article is furnished by California Casualty, providing auto and home insurance to educators, law enforcement officers, firefighters, and nurses. Get a quote at 1.866.704.8614 or www.calcas.com.
by California Casualty | Educators |
Written by Casey Jeffers, Owner of Fair Winds Teaching & MSEA Second Grade Teacher
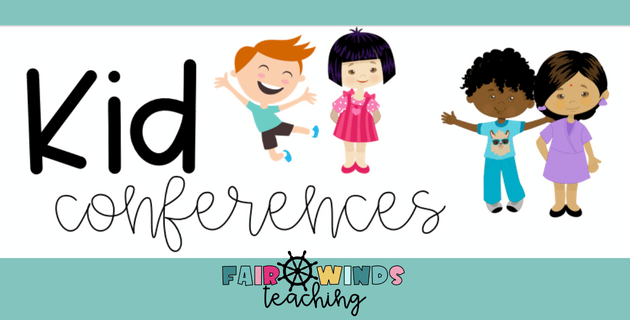
Ever wonder why, as elementary and middle school teachers, we meet with our student’s parents and never meet with our students one on one for a conference. Years ago, I held my very first Kid Conference with each one of my students. It was a precursor meeting before I held my October parent teacher conferences. I also always held another one after the long Winter break in January. This was a game changer for me and my students.
A Kid Conference is exactly what it sounds like, a conference with a kid. Some teachers host kid-led conferences, which is a different concept (a great one, but different). A kid-led conference is where you prep a student to lead the meeting you host with the child’s parent or guardian. The student is able to talk to their caregiver about their academics, behavior and more in the classroom. I love having my students lead during conferences and it is much easier for them to do once you host a private conference with them first. You do not have to have kid-led conferences to be able to host your own Kid Conference at school. Both are great and I suggest starting with hosting your very own Kid Conference.
A Kid Conference is a one on one meeting involving the classroom teacher and their student. It should be about 5 minutes long; depending on how many students you have in your classroom, you can make the meeting longer if you choose. With my second and third graders, 5 minutes is plenty to answer the questions that are important. During the conference, I welcome a student to my back table and ask a series of questions to better understand them, their learning style, and more about them as a person. My goal is to get to know them inside and outside the classroom.

Each of my Kid Conferences happen during the school day. I make sure my class has the directions they need to complete some independent work or centers while I am meeting with each student. Last year, I had my students rotate through my different Starting with STEAM bins to explore with creating.
I provide a sign up sheet for my students to come pick a 5 minute time block; this allows them to pick if they want to meet with me first or later in the day/week. I select times throughout the day that work best for my class’ schedule. They are not all back to back time slots because in order to complete a class of 25, it would take 2 hours. We all know that it would be very hard for elementary school students to focus on independent work for 2 hours straight. I suggest providing time slots for the morning and some in the afternoon over a couple days.

During this time, the students first work on a couple things to get ready for their Kid Conference. I give them a small slip of paper that says, “I wish my teacher knew…” This paper is for them to use if they want to tell me something (about home or school) that they don’t feel comfortable telling me out loud. This allows them to feel as if they have a safe space to let me know about a situation that might affect their schooling. The Kid Conference process in general allows students to open up to you more and share something (since they have one on one time), however, some students might still need that slip of paper to feel comfortable to say it. I have a little box with a sign that I allow all the students to put their “I wish my teacher knew…” slip in. That way, they don’t have to talk with me about it right then.

Each student will also be given a list of questions to read over beforehand to know the questions that will be talked about in the meeting. I also have a QR code available that the students can scan to listen to the questions read to them. I provided this in the resource because I knew I wanted them to be as independent as possible during this time so I can have uninterrupted time with each student.

I then have a list of the questions with a recording sheet for the teacher to use during each Kid Conference to take notes and keep them for their records. This is helpful for me to remember something or circle back to an item I learned about a student in the future. I can also use these notes for my parent teacher conference or my Kid Conference follow up meeting in January.
I can’t stress this enough… The things I learn in these meetings are so VALUABLE! Spending time to get to know your students on a one to one basis is so very important. If you don’t have a relationship with your student, they won’t feel comfortable learning as much from you as possible. We also all know that if something is worrying or bothering a child, it will distract them from their everyday school life.
Use this Kid Conferences sheet of questions, form and sign up sheet to host your next 5 minute student interview. Checking in with your students, creating goals and building relationships is a vital part of the classroom. Print these resources now to use for your own Kid Conference day.
What teachers are saying…
“I loved being able to sit down and conference with my students using this resource! It helped me get to know them better right from the start!” – Sarah C.
“I’ve been using this resource for a while! It is such an awesome idea. I love to give my kiddos some much needed 1-on-1 time…” – Heritage A.
“Great conversation starters with my students and I loved getting more in touch with them!” – Colleen
“This was a great way to start back to school after Winter Break! It allowed me to check in with each student and set goals for the new year 🙂 Thanks!” – Kaytlin G.


Casey Jeffers is a second-grade teacher at Butterfly Ridge Elementary in Frederick County, Maryland. She was recently recognized as the national winner of the NEA Foundation’s 2021 Teaching in Excellence Award. Casey is the proud owner of the Education Resource Blog, Fair Winds Teaching, and loves to connect with her education community through her TeacherPayTeacher’s business.
Like this article? Then you may also enjoy Casey’s post about Classroom Transformations!
by California Casualty | Educators |
Written by Casey Jeffers, Owner of Fair Winds Teaching & MSEA Second Grade Teacher
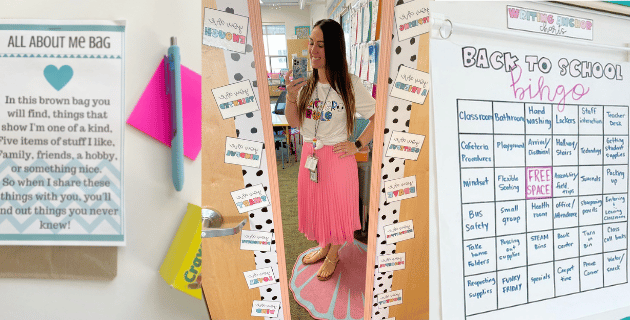
It’s back to school time and you have to start thinking about all the things you want to try to fit into your busy schedule for the first couple weeks of school. My number one priority is building relationships and routines within the first few days so we can get focused on the standards afterwards.
A great way to integrate some basic story elements while collecting work samples from students to help gauge their learning is to complete a back to school read aloud and activity each day. Each book can guide questions to help build student relationships and team building skills. You can integrate writing components to take work samples and help plan your instruction for the upcoming weeks.
I have created a FREE Back to School Ideas for the First 10 Days Guide! You can get an inside look into my classroom from over the years. I have everything from ELA read alouds, lessons, math activities, STEAM and SEL lessons and back to school Produces and set up. This 10 day guide helps me map out certain things I want to make sure I touch on while also working around the required items that my school will ask for me to complete.

During my teacher prep week (usually the week before the students start), my school will let us know of new initiatives and standards we must hit on those few first weeks. They will also give out the required and optional assessments we must fit into our schedule. The things I have listed on this guide is not a hard pressed schedule, but more of a flexible guide to the things I will fit into my days.
And then of course, there are the times I need to unpack their school supplies, practice walking down the hallways and give them a fun tour around our school. All important things to do when you are onboarding a new class, I wanted to take some of the planning off your plate and give you a leg up on heading back into the classroom.
Let’s start with some of my favorite Back to School books to read:

More Favs of Mine:
David Goes to School by: David Shannon
Miss Nelson is Missing by: Harry G. Allard Jr.
A Base Case of the Tattle Tongue by: Julia Cook
I understand that every classroom has a different schedule, teaches different subjects and has time blocks of time to start the school year. With that in mind, I created the First 10 Days of Plans – Idea board. The simple and easy to read board lays out most of the activities and lesson plans I do each year with my K-3rd grade students. The board consists of lesson plans connected to read alouds, Social and Emotional Learning lessons to help the students build relationships, introduction lessons to Math and STEAM standards. Lastly, I focus a lot on team building and school and classroom producers. The Back to School BINGO is my all time favorite product!
You can download the FREE Google Docs now that has everything you need linked to get started this week! In the first two weeks of plans, I have included 4 freebies and some fun activities that any grade level can do.
Want a sneak peak into some of the activities and plans outlined in the guide:
Time Capsule: Have your students fill out their first day of school questionnaire! Then have them come back to this time capsule on the last day of school! Check out the video here!

Free Write Fun Slides: Use these slides all year long! 15+ fun writing prompts per month to use. Start with August & September. Each slide helps guide the students with a writing prompt.
Procedures BINGO: Teaching students the school and classroom procedures are so important (this will last all week!) Maybe even into a second and third week. This is editable so you can add your own procedures too!
This Week Went Swimmingly: Grab a fun writing sample to wrap up the first week of school! Of course, it is mermaid themed. I use this as a writing sample to help group and guide my writing block the following week.
Two Truths, One Lie – (Flip) Formally FlipGrid Template: Use this organizer to introduce Flip (Formally Flipgrid) to your students. It’s a great getting to know you and tech activity. I love watching their videos and picking their lie!
Tiny Target: Wrapping up the first couple weeks can be difficult, reward the amazing work by opening your classroom store! These labels help make your own little Dollar Spot come alive.
Who Has the Number?: Use this fun get to know you activity that focuses on numbers in math. I love watching the students walk around and ask each other questions to get to know each other.
Exclusive Back to School Read Aloud Lessons: Want to have it all? Grab the Back to School Ultimate Bundle now. It includes 23 products and an exclusive freebie with THREE read aloud lessons for the books, First Day Jitters, The Invisible Boy, and Do Unto Otters.
Casey Jeffers is a second-grade teacher at Butterfly Ridge Elementary in Frederick County, Maryland. She was recently recognized as the national winner of the NEA Foundation’s 2021 Teaching in Excellence Award. Casey is the proud owner of the Education Resource Blog, Fair Winds Teaching, and loves to connect with her education community through her TeacherPayTeacher’s business.
Like this article? Then you may also enjoy Casey’s post about Classroom Transformations!
by California Casualty | Educators |
Written by Casey Jeffers, Owner of Fair Winds Teaching & MSEA Second Grade Teacher
Check out how I morph my classroom into an engaging learning lab for any subject! Anytime you can change up your student’s routine to engage them in a new learning experience is well WORTH IT! A classroom transformation creates an immersive experience for our students without having to leave the classroom.
I know that pulling off a classroom transformation can be stressful and overwhelming, however, if you follow these guiding points, you will be able to better understand what your day or week will look like beforehand.
First things first… ALWAYS START with the instructional goal/problem when planning a classroom transformation. You must have a standard or group of standards in mind to successfully complete a transformation. This is NOT about a theme or turning your classroom into an underwater shark tank, just because. You need to have a purpose…
My suggestion is to start by laying out the content you have been teaching and figure out what you are assessing your students on. This process will start about 2 weeks beforehand. Most subjects and content have the potential to lead to a classroom transformation idea. You just need to create those creative juices flowing!
For example, my class and I spent weeks learning how to measure distances and comparing lengths. We asked a lot of questions about diving into the water and compared two divers. This helped with the idea of having a Shark Diving day to help measure and compare sharks and divers. I started with the content and let the idea come to me. I would not suggest scrolling through Pinterest and just selecting a circus theme because you think the kids will like the circus.
If you are teaching elementary measurement standards this school year, check out this Shark Classroom Transformation here!
Next up, here are 5 questions you should ask yourself when planning your own classroom transformation or buying someone else online.
5 Questions to Ask Yourself When Planning a Classroom Transformation
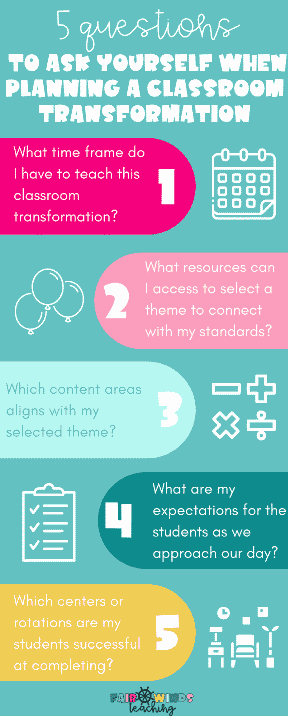
- What time frame will you have available to complete your classroom transformation? Is it a one-day or a week-long unit? Plan so you know how many centers, activities, or lessons you will need.
- What decoration resources/materials do you already have available to you that connect with your standards? Selecting the theme is the fun part! Think about – (kids’ birthday parties you have leftover decorations from, companies that can partner with to provide materials (Crumbl Cookie, Starbucks), or what is currently available at the dollar store) If you don’t have anything to start with, ask yourself… What are your students interested in? Poll them and see what is fresh and new! This might help spark an idea that connects with your standards.
- Can this theme/topic be connected over multiple content areas? Math, reading, and writing? Can you extend a restaurant theme over the science content you are currently working on? Can you add a STEAM or physical education component to your day?
- What expectations do I have for my students on an “out of the box” day like this? Make this clear to them beforehand. This will help plan your centers/activities accordingly.
- How many center/rotations or groups can they handle? Do you run a teacher-led group? Do you have other adults to help you on that day? Is a worksheet their best use of time or does every station need a recording sheet?

If you ask yourself these questions while designing or buying a classroom transformation, you have already set your students up for success. The day will go amazing and the kids are sure to remember the experience and content learned for years to come.
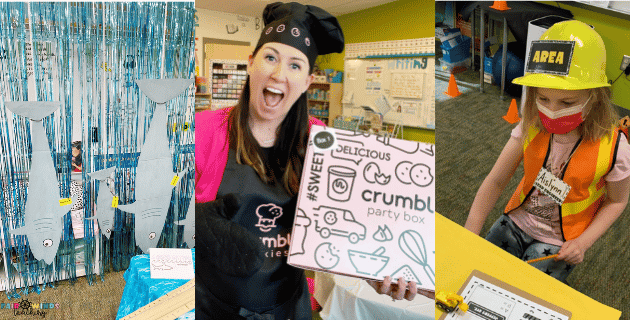
Let’s dive into some of the classroom transformations I have created for my 2nd and 3rd graders. We have transformed our room into a backyard BBQ and restaurant to have a book tasting or barbeque.
We have dressed up for the 101st day of school and transformed into the 101 Dalmation movie for the entire day!
We’ve taken on the world of road construction to assess area and perimeter for our all-week classroom transformation. Hard hats included!
My favorite of all time was our sweet-smelling bakery for our Crumbl Cookie day to learn about shapes and fractions! They had a blast and it also tasted amazing!

Whether you are ready to start designing your own classroom transformations or using someone else’s idea, here are some tips and tricks I have learned along the way!
10 Tips and Tricks for a GREAT Classroom Transformation:
- Showing your work is a must
- Label all of their supplies and papers BEFORE you start (things will get left around the room)
- Have a visual timer to show rotations
- Have a checking-in process (team leaders or individual students)
- Review expectations before the day starts
- Set up the room beforehand (but not too far in advance (they will move and ruin your stuff) – Here is a FREEBIE to show you are working on the process
- Fun background music is a must! It is fun and keeps everyone quiet (Spotify – Follow me here)
- Decide what you are keeping (to use again) and what the students are able to keep (let them know ahead of time)
- Have a clean-up crew ready at hand
- HAVE FUN – take a step back and spend some time listening to them work in groups, you will be amazed at how engaged they are! (take lots of pictures to remember it by)

Casey Jeffers is a second-grade teacher at Butterfly Ridge Elementary in Frederick County, Maryland. She was recently recognized as the national winner of the NEA Foundation’s 2021 Teaching in Excellence Award. Casey is the proud owner of the Education Resource Blog, Fair Winds Teaching, and loves to connect with her education community through her TeacherPayTeacher’s business.
by California Casualty | Educators |
Written by Casey Jeffers, Owner of Fair Winds Teaching & MSEA Second Grade Teacher
Setting up your classroom library can be a daunting task. Whether you are a brand new teacher or a teacher switching grade levels (this is a big deal because not all books are appropriate for all ages). Here’s my guide to collecting books from multiple locations without breaking the bank!
Where do I get my books from?
My favorite website to buy classroom books is Scholastic Book Clubs! Check out the best ways to earn points and FREE books year-round. Then you also can’t beat the deals that they have each month, a lot of them being only $1 a book!
Earning BONUS POINTS – Always fill out your back-to-school form to update your class size to earn your 100 points each year, save ALL the emails from Scholastic throughout the school year to build up coupon codes for your next order, and have a notebook to write down codes when they come up on the Scholastic IG/Facebook pages. I collect so many points throughout the year to earn so many FREE BOOKS and school supplies! If you don’t have a Scholastic Book Club account yet, use this link to earn a FREE 250 Bonus Points from me!

Birthday Coupons – In the beginning of each school year, you get an offer to buy a class book of b’day coupons. Each pack comes with 30-32 FREE book coupons and they are each worth up to a $5 FREE book. That is upwards to $160 worth of books, for a cost of $30.00! I have bought these for my students in the past and handed them out for their birthdays. They are to take them home and select their book with their family online. I don’t do that anymore because most of them lost the coupon or forgot to log on and redeem their book. Instead, I have them work with me on their birthday to select a $4-$5 book (no less than that- getting the best value) to buy a book with the coupon code on my account to add to our classroom library. Then when it comes in the mail, that student gets to present it to the class as a gift! They get to put their name in the book as a donation, it makes them so happy. That stocks my classroom with 32 new books each school year for $30!

Family Book Orders – Making the Scholastic Book flyers available to your families helps build your points so you can buy some classroom books for your classroom as well. Here are some of my favorite tips for boosting family orders!
-
- Let families know that every order, no matter how small or big, earns FREE Books for your classroom. Use this pack to help boost sales and recommend your families! This gets families involved by sharing your Class Code for online ordering and letting them know they can choose a FREE $5 Book with every $25 online order with code READS.
- Share photos of all the FREE Books and resources your class has earned. A picture is worth a thousand words! I even do #BookBoxDay unboxing videos for my students and families!
- Send home reminder armbands with the due dates and their wish lists, both of these are available in this pack!

Family/Friends for Donations
The second place I go to collect books is simply by asking family and friends. I use my personal and professional social media platforms to post about a need for used or new classroom books. You would be surprised how many households are sitting on dozens of children’s books that they don’t use anymore. I’ve had families with high schoolers now that hadn’t gotten rid of any of their elementary-aged books and simply had them sitting in a box in their garage. They were happy to donate and get them out of their space. It never hurts to ask! I especially reach out to my retired teacher friends! Then I go through the books and then any repeats I have I offer to other new teachers or give to the students to take home to start their library.

Visiting Your Local Public Library
Have you ever been to your local public library? Did you know they are always getting rid of books that are now out of circulation? My grandmother used to volunteer at our local library and she would say that books that weren’t checked out super often, had too many copies, or were a little damaged would be taken out of circulation. These were always donated but sometime she would be able to bring some home to be (knowing I was a classroom teacher). It is always good to ask or give them your contact information in case they have books to get rid of.
Amazon Wish-lists (#ClearTheList)
Have you heard!!?? Celebrities, companies, influencers, and so many other people are helping to #ClearTheList of teachers’ Amazon wishlists! If you haven’t made one yet, it is your time to take a second and add classroom books and other amazing supplies!
How to make a list:
- Login to your Amazon account
- Go to “Account & Lists” at the top right corner
- Click on “Your Lists”
- Create a list (make sure it’s public)
- Add items or books that you find on Amazon (if you want some classroom list ideas, check my favorites out here!)
If you want to share it with friends & family, click “Invite,” copy the link, send it out, or share it on your social media pages.

Sponsors
If you make your Amazon wish list, reach out to some local companies or popular businesses online and see if they would be willing to help out and donate. I use Twitter and Linkedin to reach out to a lot in my local area. Write them a letter introducing yourself, telling them a little about your school and students, and then tell them how they can help.
Thrift Stores/Facebook Selling Groups-
One of my favorite summertime activities is strolling through a good thrift store. Whether it’s a GoodWill, Wonder Book & Video, ReStore, or any local company, you can find gently used books for a very cheap rate. Make sure to save your receipts so you can write them off your taxes!
You can also join your local Facebook teacher groups (mine is called Teachers Sell Stuff (city, State) and see if anyone has books available for purchase.
As you are selecting books for your classroom make sure you gather a wide variety of books. I try to have some leveled books, picture books, just for fun books, magazines, comics, graphic novels, chapter books, maps, and much more. Get creative, the kids love a diverse set of things to get their hands on.
Other Helpful Classroom Library Tips and Tricks:
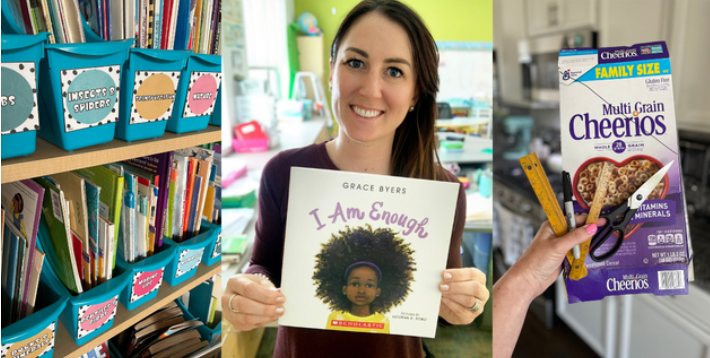
Make sure to have book bin labels for your students to be able to find and organize their books. Here is the set I use to label my 2nd-grade classroom. Hang some signs to help students to select their “Just Right Book,” grab this FREEBIE here. I also make sure to label ALL books that come into my classroom so I don’t lose track of them. I use these mermaid ones on Avery shipping labels (30 per page).

Where to buy your bins?? My favorite places are Storex, Dollar Store, The Target Dollar Spot, Walmart, Ikea (have the kids decorate them), or the DIY option, start collecting cereal boxes now! Simply save larger cereal boxes and cut them down like the pictures below. Cover them with paper, spray paint them, or leave them with the kids’ favorite cereal pictures.
Good luck and happy building up your library! 🙂
Casey Jeffers is a second-grade teacher at Butterfly Ridge Elementary in Frederick County, Maryland. She was recently recognized as the national winner of the NEA Foundation’s 2021 Teaching in Excellence Award. Casey is the proud owner of the Education Resource Blog, Fair Winds Teaching, and loves to connect with her education community through her TeacherPayTeacher’s business.


