
by California Casualty | Educators |
If you’re a teacher, chances are you’ve gotten your share of apple-themed gifts—and probably more than a few shiny red apples. In honor of National Eat a Red Apple Day, December 1, let’s explore the history of how the red apple became the iconic symbol for teachers everywhere.
Education for Apples
Early on in the U.S., teachers were housed, fed, and paid by the community in which they taught. Poor families who could not afford the teacher’s low wages would pay with produce. The early apples were bitter, sour, and smaller than the ones we’re used to. But apples were popular because of their bartering value. They could be made into hard cider, considered safer to drink than water. Apples also could be eaten fresh, fried, stewed, and baked. They could be made into vinegar, brandy, preserves, and apple butter. They could be dried for the winter and eaten year-round.
Years later, after Prohibition, apples started to become marketed as an essential part of a healthy diet- hence the term, “an apple a day keeps the doctor away”. Apples were still being given to teachers, but this time from their students.
The first day of school occurs near the beginning of September, coincidentally apple harvest time. Apples grow in every state in the continental U.S. They’re cheap and pretty, especially when they are buffed until they shine. That made apples the ideal first-day teacher gift. It was a way for students to show appreciation and get the year started on the right foot with a sweet, and healthy treat for their teacher.
Today, there are foundations and awards for educators, like the Golden Apple Foundation. Apples continue to decorate classrooms and hallways. Apple mugs, earrings, shirts, ties, notebooks, etc. line the aisles at grocery stores for teachers. The apple is and will continue to be a powerful symbol of knowledge and education because just like apples, teachers are an essential part of helping our children grow.
Celebrate Red Apple Day with your students!
Here are 5 apple-themed activities for Eat a Red Apple Day, or any day that you’d like to celebrate apples and sweeten the learning experience.
-
- Conduct an apple taste test. Put out samples of three varieties of apples. Then have students describe them and rank them.
- Read an apple-themed book.
- Teach fractions, counting/sorting or measurement using apple-inspired math.
- Make an apple-inspired art project.
- Visit an apple orchard, learn how to plant an apple tree, and more in these engaging videos.
Do you have a favorite apple-themed activity? Please share in the comments.
This article is furnished by California Casualty, providing auto and home insurance to educators, law enforcement officers, firefighters, and nurses. Get a quote at 1.866.704.8614 or www.calcas.com.
by California Casualty | Auto Insurance Info |
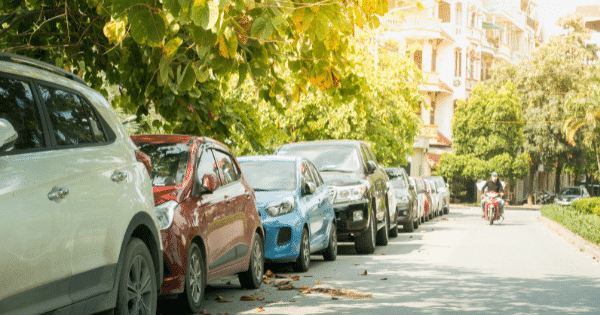
Have you ever passed up a spot because it required you to parallel park? Don’t worry, you’re not alone. The anxiety/stress that comes with parallel parking is well known. But it doesn’t have to be.
Whether you’re teaching your teen how to parallel park or you simply want to brush up on your technique, here’s a 5-step process to parallel park like a pro.
1. Find a parking spot.
Look for a spot that seems big enough. You will need a space about one and a half times the length of your car. It takes practice to estimate the right size so don’t get discouraged. If you’re not sure if the spot is big enough, pull away and find another.
2. Signal and get in position.
You will be pulling up alongside the car in front of the empty spot. Check your mirrors and your surroundings for other cars and pedestrians. Turn on your right turn signal. Position your car so that its center is even with the other car’s rear bumper. You should be parallel, about 2-3 feet away from the other car.
3. Turn the wheel to the right and reverse.
Sit up tall and turn your body 90 degrees. Again, check your surroundings. When all is clear, put the car in reverse and turn the steering wheel sharply toward the curb so you are approaching at 45-degree angle. Use your car’s backup camera to help guide you. Stop when you see the full front of the car in the back of you in your driver’s side mirror. If your right rear wheel taps the curb, move forward a bit.
4. Turn the wheel in the opposite direction to straighten out.
You can’t continue on that 45-angle without hitting the curb. That means that sometime during your reverse, you will need to stop turning toward the curb and start turning in the other direction. For most cars, you do this when your passenger’s side mirror is in line with the rear bumper of the car in front. As you turn the wheel in the other direction, continue backing up slowly until your car is parallel to the curb.
5. Straighten and align.
You want to make sure you’re between 12 and 18 inches from the curb. Your backup camera will give you an idea of how close you are. You also want to be centered in the spot so that you, and the cars in front and behind you, can get out easily. Creep forward until you are centered. Congratulations! You just parallel parked successfully.
Hi-tech help from your vehicle
When they first came out, backup cameras were revolutionary in helping with parallel parking. The latest technologies are even more so. Parallel parking assist is available on some newer models in a variety of price points. These systems use a camera and sensor-based guidance system that steers the car into the space with little help from the driver.
Simply drive past a parking spot and the car will notify you if it is large enough. Then, select the spot, put it in reverse, engage the parallel parking assist option, and remove your hands from the wheel. Self-parking cars can even do it themselves, and the driver is optional. You can even stand outside the car and use a remote control!
Quick Parallel Parking Safety Tip: Remember to never park in front of a hydrant or fire lane.
Drive safe!
This article is furnished by California Casualty, providing auto and home insurance to educators, law enforcement officers, firefighters, and nurses. Get a quote at 1.866.704.8614 or www.calcas.com.
by California Casualty | Auto Insurance Info |
You’ve been in an accident. Thankfully, you’re not hurt, but unfortunately, you can’t say the same for your vehicle. If the repairs on your car cost more than your vehicle is worth and it needs to be totaled, in the insurance world it is considered a ‘total loss.’
Sounds expensive, right? Don’t worry, your auto insurance policy is designed to protect you in case of an accident. Here are some FAQs to know what to do if this happens to you or a member of your family.
How do you know if your car is totaled?
A vehicle is usually considered a total loss if the damage meets or exceeds around 80% of its value. The insurance company will send an adjuster to look at your car in most cases. The repair shop also may weigh in. The mechanic will examine the structure of your vehicle. He or she will list the repairs needed. Your insurer will check state laws – because some states have rules about how much damage qualifies for a total loss. In all, this assessment will determine the cost to repair your car. If that amount is too much, your vehicle is considered “totaled.”
It is worth noting that you don’t have to be in a car accident to total your vehicle. Your car also could be damaged beyond repair by fire or extreme weather. If a tree falls on your car, that could total it too. The claim process works the same way for those situations.
How much will you get for your car if it is totaled?
If your car is totaled, your insurer will pay you for the actual cash value (ACV) of your car. That amount is determined by your vehicle’s age, condition, mileage, options, and resale value. Since newer vehicles depreciate once you drive them off the lot, the cash value of your car may not be the same as the price you paid—even if the accident occurs soon after you purchased the vehicle.
What if the accident was the other driver’s fault?
If the accident was not your fault, you can file a claim with the other driver’s insurance company. Their policy will pay you using their property damage liability coverage. But what happens If the other driver doesn’t have insurance, or doesn’t have enough insurance to cover damages? Then you will be covered under uninsured/underinsured motorist property damage. These are optional coverages in the majority of states. In some states, you are not allowed to carry collision and UMPD at the same time. Also, sometimes UMPD has a policy maximum or cap on the amount it will pay. If you have UMPD/UIMPD, and it isn’t enough to cover the total cost of your car, your own collision coverage will help.
What if the accident was your fault—or the fault of Mother Nature?
If you caused the accident, and your car is totaled, your insurance company will pay the cash value of your car minus your deductible and any state taxes or fees. When you are at fault, your collision coverage kicks in. Collision pays for totaled cars after colliding with another vehicle, tree, rail or other structure. You have this coverage if you are financing or leasing a vehicle; it’s required.
If Mother Nature caused the damage, comprehensive coverage pays for it. Again, this is coverage that is required if you are financing or leasing a vehicle. Comprehensive covers natural disasters, fires, vandalism, theft, and animals that damage your vehicle. However, if your car was paid off, and you don’t have comprehensive or collision insurance, you would be responsible for the full costs to repair your totaled vehicle.
Your car doesn’t look that bad. How could it be totaled?
You can’t always tell the extent of the damage by looking at a vehicle. For example, a car that sat in flood waters higher than the seat would have extensive flood damage to the engine. Looking at it after it has dried out might not tell you that parts need replacement. In addition,
repairs from collisions can cost more than you think. Finally, your state may have regulations that require vehicles with a certain amount of severe damage to be declared a total loss.
What if you want to keep your car anyway?
We understand that you may have a sentimental attachment to your car. Talk to your claims adjuster to see if you are able to keep it. Your settlement will be less if you decide to do so. In addition, you will have to talk to your insurance agent about the possibility of keeping a totaled vehicle on your policy or if you have to find other insurance. Proceed with caution. A car that has been totaled is usually better off replaced than rebuilt.
What if you haven’t paid off your car yet?
Accidents happen. That’s true whether your car is paid off or you’re still making loan payments. If you total your car and you’re still paying for it, you will continue to be responsible for the amount owed. That’s true even if you’re no longer able to drive the car. The good news is that you can use the money from the cash value of your totaled vehicle to repay the lender.
After you get the insurance check, there may still be an amount owed, and you will be responsible for it. Consider gap insurance also known as loan/lease insurance. This type of insurance covers the difference between the loan or lease payoff and the cash value of your car. It can provide peace of mind should you find yourself in this situation.
What if you totaled a leased car?
Your insurer will send the check for cash value to your lender. You will be responsible for any additional charges. If you still owe but the accident was not your fault, contact the other driver’s insurance company to cover that additional payment. It’s always a good idea to continue to make your lease payments until the insurance company issues the check so that your credit rating doesn’t suffer.
What if your teen totals your car?
In most cases, teen drivers are covered under their parents’ policies. The coverage selected by the policy owner will apply. If you have comprehensive and collision insurance, your teen will have the same deductible that you selected. Your or your son/daughter will pay the deductible and the insurance will cover the remaining cost. If, however, you don’t have comprehensive and collision, you will be responsible for the full amount.
Make sure you add your teen driver to your policy. Some insurers will deny coverage if your son or daughter is in an accident and not on your policy. Others will charge you for back premiums from the time the teen was licensed. National Teen Driver Safety Week is Oct. 17-23, 2021. It’s a good time to talk to your teen about car maintenance tips and distracted driving to help keep them safe on the roads.
What are the steps to take if your car is totaled?
After an accident, totaled vehicles are often sent to the impound lot, or tow yard, which is a holding place until the next step. If declared a total loss, they could be sent on to a salvage auction. Because the car may not be in your possession, you will want to remove all important information right after the accident.
-
- Make sure to clear out your personal belongings. Check all storage areas within your vehicle, including the glove compartment, trunk, and cubbies.
- Get all copies of the key.
- Get the title. If your car is leased, request that the title be sent to your insurance company. If you are not leasing, and you own the car, you can request a copy of the title from the DMV.
- Schedule vehicle pickup or drop-off with your insurer.
- Your adjuster will advise on handing over the title, and the keys if not already with the car.
- Sign the paperwork and receive payment.
This article is furnished by California Casualty, providing auto and home insurance to educators, law enforcement officers, firefighters, and nurses. Get a quote at 1.866.704.8614 or www.calcas.com.
by California Casualty | Homeowners Insurance Info |
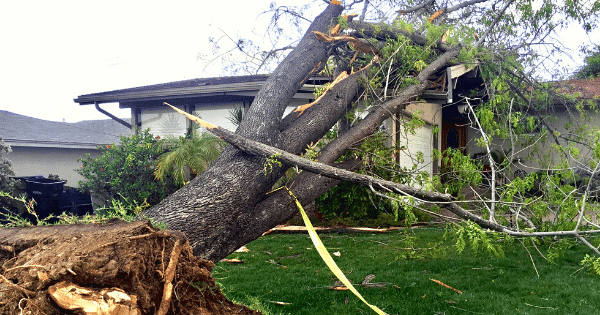
When storms and high winds take down trees, it can be frightening. If you’re not covered for the damage- the bill can be pretty scary, too.
If a tree fell on your home tomorrow, would you be covered by your insurance policy? Whether or not a fallen tree is covered depends on what caused the tree to fall and where it fell. Here’s everything that you need to know.
If a healthy tree falls on your home…
Strong winds can cause even healthy trees to fall. When a tree hits your house, your garage, your deck, your shed, or your fence, your homeowner’s policy usually covers the costs of repair. That also includes the cost of tree removal. Of course, you have to first pay your deductible. Check your property contract to see what is covered. There may be a cap – a maximum paid per tree. Finally, an annual policy review is a good time to review your coverages, before anything happens.
If an unhealthy tree falls on your home…
It’s a little different with diseased or dying trees. They’re more likely to fall—with or without a storm. As a homeowner, your responsibility is to check the trees on your property, trim the branches, and make sure the trees are healthy. If a diseased or dying tree falls on your home as a result of a severe storm or high winds, your policy most likely will not cover it.
If a tree falls but does not hit your home…
If a tree falls and doesn’t damage anything, that’s great (and lucky) news! However, a downed tree is considered a hazard and you are still responsible for removing it from your property. Unfortunately, in this case, your homeowner’s insurance does not cover that tree removal. The only exception is if the fallen tree is blocking a driveway or a ramp for someone who is handicapped. But proceed with caution – before you remove the tree, check with your local regulations. There are laws that govern tree removal in some states, and you may need a permit.
If your neighbor’s tree falls on your home…
It’s not uncommon for a tree in your next-door neighbor’s yard to fall on your home. If it’s a healthy tree that got knocked over in a storm, your policy will likely pay for damages just as if the tree fell from your own property. However, in this case, your insurer may go through your neighbor’s insurance provider for payment, and if that’s what happens, you will be reimbursed for your deductible. One word of warning: If a tree falls because your neighbor cut it down incorrectly, that’s on him to pay for damage and tree removal. Insurance does not cover that.
If a tree falls on your car…
It makes sense if you think about it. Homeowners’ policies do not cover trees that fall on cars. Car insurance policies do—but only those policies with comprehensive coverage. Check to make sure that you have comprehensive coverage so that you will be covered in the event of a fallen tree.
What To Do If A Tree Falls
-
- Assess the damage. Be careful and watch for fallen power lines as you do so.
- Determine who may be liable for the damage.
- Contact your insurance company if you believe you have a claim or if you are unsure.
- If you have a claim, make sure not to move anything until you have spoken with your agent. Take and submit photos or videos of the damage from all angles. Your insurer will guide you through the process.
- If you do not have a claim, you may still be responsible for removing a tree. Before contracting with a tree removal service, ask for proof of insurance. The company will then be responsible for any further damage they may cause.
Avoid a Disaster By Keeping Your Trees Healthy
-
- Water your trees regularly but don’t overwater. Consult a garden reference to determine how much water your species needs.
- Add mulch around the base of your trees. This will help protect the roots from weather conditions. It also will keep your mowers from bumping into the roots or the trunk.
- Visually inspect your trees for signs of disease. Look for discoloration and stunted growth or signs of pests. Mushrooms growing at your tree’s roots also can indicate decay.
- Remove any dead branches or large limbs that look like a liability. Prune your trees during the winter months.
- If you are removing a tree- be careful where you dig, as root systems of large trees can extend two to three times farther than the branches.
This article is furnished by California Casualty, providing auto and home insurance to educators, law enforcement officers, firefighters, and nurses. Get a quote at 1.866.704.8614 or www.calcas.com.