
by California Casualty | Travel |
Looking forward to relaxing on a warm beach, hitting the slopes on a scenic mountain, or choosing day trips for a stress-free staycation this Spring Break?
Check out our timesaving guide for planning your next vacation or staycation.
Set your budget.
Where can you go and what can you do? It depends on your budget. A travel budget is not an ironclad number; it’s more of an estimate. Think of a figure that you’d be willing to spend on a vacation or a staycation. Then determine if that amount covers the major expenses of your trip: accommodations and travel expenses.
-
- Research travel deals and airfare specials.
- Check out the rates of less popular airports near your destination to save money.
- Rent a car instead of flying.
- Check out different lodging options.
Choose your destination.
What’s your vacation style? Maybe you like touring museums and cultural attractions or you prefer lounging by the pool. You might like being active, such as skiing, hiking, or bicycling. The types of vacation that you most enjoy will help determine your destination. Match that to the budget and you’ll be able to choose a great destination.
-
- Take advantage of discounts, such as credit card points, AAA, or military.
- Check out additional discounts on Groupon, Kayak, Priceline, booking.com, and other services.
- Book your airfare and/or reserve your rental car.
- Create a draft travel itinerary. Buy tickets for popular activities so you won’t arrive and find them sold out.
Select your accommodations.
You may not be spending a lot of time in your room, but you do want a central location that allows you to do what you want to do. In some cases, like on a staycation, your lodging may be your entire vacation because it provides everything you need.
-
- Determine the amenities that are important to you. Do you want a kitchen where you can cook meals? A beachside location? A place that’s walking distance to everywhere you want to be? On-site entertainment? All-inclusive services?
- You can stay in a hotel, a cabin, a treehouse, a resort, a bed-and-breakfast, on a cruise ship, or any of a number of options. Choose the right lodging for your vacation style and your budget.
- Do you have friends or family that you’d like to visit? Consider staying with them and incorporating them into your vacation plans for all or part of spring break. Alternatively, see if they’d like to swap houses with you for the week.
Purchase insurance just in case.
Accidents happen and plans change. That’s where travel and rental insurance come in. Travel insurance can reimburse you if you are unable to go on your trip. Rental car insurance can help in the event of a collision or other damage to your rental car.
-
- Before you purchase rental car insurance, make sure your auto policy doesn’t already cover rental cars. Many policies do.
- If you’re renting a car out of the country, double-check that your auto policy covers you. For example, when traveling in Mexico, you will need a special Mexico policy.
- Travel insurance comes in many varieties. You can get trip cancellation, trip interruption, or trip delay insurance. You also can get baggage loss coverage. Talk to your insurance provider about what is available to you.
- You also can get medical expenses and medical evacuation coverage. This is important for trips outside the country. Once again, speak to your insurance provider to make sure you qualify for the coverage.
For the foreseeable future, you will want to take precautions to guard against COVID-19. After all, it’s no fun to be sick on vacation; neither is it a good idea to bring a virus back to your students. When traveling, follow these guidelines.
-
- Some destinations require COVID tests. Know the rules and regulations so that you can schedule your test before your trip or at the airport.
- Wear your mask at the airport and on the plane.
- Wash your hands frequently.
- Avoid crowds where possible, and stay 6 feet away from others.
Plan a staycation.
A staycation can be as much fun as a vacation with the advantage of being a lot more affordable. While you can certainly use the time for projects around the house, you can enjoy a real break by planning day trips and fun activities.
-
- You don’t technically have to stay home during a staycation. Consider one or two nights at a local hotel or other fun lodging.
- Choose a theme for your staycation, such as gourmet traveler, spa serenity, or tourist in your own town. Use it to inspire your activities.
- Enjoy fun takeout or restaurant meals that make the week feel special.
- Disconnect from social media and the news. Enjoy movie nights, game nights, and other interactive fun.
- Don’t forget that Educators & ESPs can win a $10,000 Staycation Giveaway from California Casualty!
What are your plans this Spring Break? Share it with your colleagues in the comments.
This article is furnished by California Casualty, providing auto and home insurance to educators, law enforcement officers, firefighters, and nurses. Get a quote at 1.866.704.8614 or www.calcas.com
by California Casualty | Auto Insurance Info |
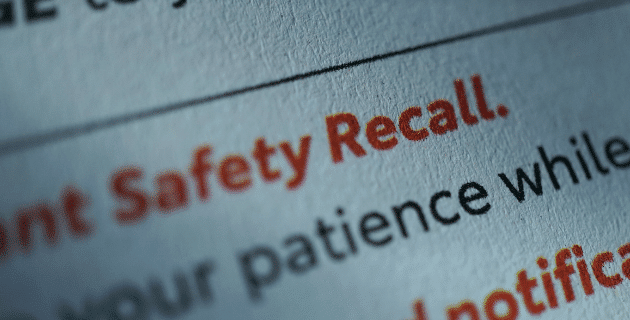
We want our cars to be safe and reliable, yet sometimes, parts malfunction. When it’s a defect that creates a safety risk, the automaker is responsible for fixing it. That’s when you get an auto recall notice. These notices inform car owners that something needs to be adjusted or replaced to make their vehicles safe to drive.
How common are recalls?
Recalls happen all the time. In 2020, there were nearly 900 safety recalls affecting 55+ million cars and equipment, according to the National Highway Traffic Safety Administration (NHTSA), the government agency responsible for exploring safety complaints. NHTSA looks at safety issues, both large and small. If the car doesn’t meet the minimum safety standard, automakers are required to announce a recall. The recall is usually for a specific make and model. The vehicle manufacturer is legally obligated to inform buyers and cover the costs of repairs. Even so, only about 75% of vehicles recalled in a given year are ever fixed, according to NHTSA.
Note: There is a time limit on recalls, usually 8 years. A repair after that timeframe usually means you have to cover the cost.
Why might my car be recalled?
Recalls affect parts of the car that could cause an immediate safety hazard. They could be small or large, and include airbags, tires, brakes, engines, and electrical components. They would not, however, include air conditioners, radios, or ordinary wear and tear. One recall that occurred this past year was for the seat belt in a Ford Motor F-150 Super Cab. The belt was installed incorrectly and as a result, didn’t provide enough restraint in the event of a crash. Takata airbags again surfaced this year as NHTSA looked at 20+ automakers who used the potentially explosive bags. Other 2021 recalls were for brake issues, hood problems, battery fire hazards, and diesel engine stalling, according to Car and Driver.
Why do people sometimes ignore recalls?
It may be because they are not aware of the recall. Perhaps the notice was mailed to an old address and not forwarded. Maybe they think it will take too much time or effort, or they could be without a car. Finally, they simply may not care.
Why should I pay attention?
It’s easy to ignore recall notices. Don’t. Even a small defect can put you in a life-threatening situation. Plus, ignoring a recall can affect your insurance. If you’re involved in an accident and the faulty part is the cause, you might not get reimbursed for repairs or for medical costs.
How do I know if my vehicle has been recalled?
If you’re the original owner of the car, you should get a recall notice in the mail. If you take your car in for regular maintenance at the dealership, you also should be notified. If, however, you purchased the vehicle as a used car, and you get your car serviced at a local mechanic, you may not be aware of a recall. It’s easy to check, however. Visit the NHTSA recalls website and input your vehicle identification number (VIN). You’ll find this 17-character number on the lower left of your car’s windshield, on the inside of your driver’s side door, or on your registration or insurance documents. Not only can you check car recalls, but you can find recalls on child car seats and tires. You can also download the app to your phone and get alerts.
What do I do if I get a recall notice?
If your car is recalled, contact the dealership and schedule a repair as soon as possible. Ideally, the dealership will provide a loaner car but if not, you may qualify for a rental car with your auto policy or be reimbursed. If the dealer gives you a rental car while yours is being repaired, you’ll want to verify that you have the right insurance coverage for a loaner. Finally, if you already fixed the defect before you learned about the recall, you can get reimbursed from the dealership.
Recalls keep us safe. Other ways that you can stay safe are to wear seat belts, practice defensive driving techniques, and maintain and insure your vehicle. After all, your car is one of your greatest investments. Safe travels.
This article is furnished by California Casualty, providing auto and home insurance to educators, law enforcement officers, firefighters, and nurses. Get a quote at 1.866.704.8614 or www.calcas.com.

by California Casualty | Educators |
Teachers and students alike have been working hard all year long and they’ve finally reached 100 days together in the classroom. It’s time to celebrate this milestone! Here are some fun activities you can do in your classroom when you reach 100 days of...

by California Casualty | Safety |
The power’s out and your phone is dangerously low. What can you do to keep its charge for as long as possible, and how can you possibly recharge it when there’s no electricity? Where there’s a will, there’s a way, and we’ve researched the top ways to do so.
After all, your smartphone is more than just a fun accessory and helpful convenience. It can give you access to local emergency updates and severe weather alerts. It also is your primary way to communicate with family and friends during an emergency.
Follow these tips to keep your phone charged during a power outage.
#1. Plug into your laptop.
Your laptop has USB ports that can charge cell phones. If your laptop is fully charged, you can power a phone for hours. Turn on the laptop but don’t unlock your screen. Plug your phone into the laptop USB port. (Note that if you have an iPhone, you may need a USB-C to USB adapter to match the port.)
#2. Use a portable charger or power bank.
You may have one on hand, or if not, you can pick one up. Most drug store chains sell them in addition to electronics stores. The portable chargers and power banks do need to be charged to work but they hold their charge for months, so you can charge one and put it in your emergency kit. Solar chargers are popular options; the advantage is that they can charge with the sun. But they vary widely in power capability so do your research.
#3. Plug into your car.
Most newer vehicles have USB ports where you can plug your phone. If not, you can buy an inexpensive USB car adapter that plugs right into your car’s dashboard in the space commonly known as the cigarette lighter. Simply turn on your car, and plug in your phone. This works even if you’re out of gas.
#4. Use an inverter.
Another way to charge from your car is to use a power inverter. This tool converts the 12-volt direct current in your car’s battery to the 120-volt alternating current for your phone. It’s a process similar to jump-starting your car. Do this outdoors and not in the garage to avoid carbon monoxide fumes. You connect the inverter to your car’s battery using alligator clamps, with the positive red cable on the positive battery terminal and the negative black cable on the negative battery terminal. Then plug your phone into the AC plug on the inverter, and start your car. You’ll be drawing power directly from the battery, so you’ll need to run your car afterward to recharge your battery.
#5. Use your car battery jump pack.
If you have a car battery jump pack – considered one of the must-carry items for your car — you may have a way to charge your phone. These jump packs usually come with USB charging ports.
#6. Try a crank-powered phone charger.
Crank-powered chargers are mechanical devices that harness your own physical power. You turn a handle, which spins a magnet, creating a magnetic field. It takes a lot of effort to generate enough to power your phone, but it’s a low-cost alternative that can be very effective.
#7. Use a Biolite CampStove.
A Biolite CampStove is a portable wood stove that actually generates electricity. If you have this camping appliance, you can cook your meals and charge your phone.
#8. Go to a place that has power.
If it’s not a region-wide power outage, you can drive to a place that has power, such as a coffee shop, restaurant, or store where you can plug in your phone. If your office or your school has power, try those places.
#9. Conserve your phone’s battery.
You don’t know how long the power will be out. That’s why the first step is to ensure your phone isn’t using any more battery than necessary. Here are some ways to do that.
-
-
- Dim the brightness of your screen. On an iPhone, go to Settings, then Display & Brightness. Drag the slider to dim it. On an Android, swipe down from the top to see the Notification Shade. Depending on your phone, you may have to swipe twice. Tap and hold the brightness slider and drag it to the right level.
- Put your phone into Low Battery Mode. On an iPhone, go to Settings, scroll down to Battery, and select Low Battery Mode. On an Android, swipe down from the top menu for the Power Saving icon.
- Shut down any applications running in the background. On an iPhone, swipe up from the bottom of the screen, pausing in the middle. Then, swipe right or left to find the app you want to close. Swipe up on the app to close it. On an Android, go to Settings, then Apps. Choose the app that you’d like to stop and then tap Force Stop.
- Turn off your phone’s WiFi location services and Bluetooth. On an iPhone, you’ll find that at Settings and Wi-Fi, and at Settings and Bluetooth. On an Android, swipe down from the top, and look for the Wi-Fi icon below the date. Select it and then tap the toggle switch to turn it off. For Bluetooth, go to Settings, then Apps. Find Bluetooth and tap the toggle switch to off.
- Put your phone into Airplane mode, which may disable WiFi and Bluetooth. This will prevent you from calling or texting, and also receiving calls and texts, so you will need to take it off for communication. On an iPhone, go to Settings, then Airplane mode, and enable it. On an Android, swipe down from the top of the screen two times to open Quick Settings. Look for Airplane mode and tap the toggle switch. (Pro tip: Phones being charged while they are in Airplane mode tend to charge faster.)
- Don’t use your phone to play music, podcasts, or games to pass the time. This will only drain your battery.
- If you won’t be using your phone for hours, shut it off to conserve the battery in the long run.
This article is furnished by California Casualty, providing auto and home insurance to educators, law enforcement officers, firefighters, and nurses. Get a quote at 1.866.704.8614 or www.calcas.com.

by California Casualty | Auto Insurance Info, Homeowners Insurance Info, Safety |
When the temperatures dip low, wind speeds hit high, and precipitation is in the forecast, you could be in the path of a winter storm. These powerful acts of nature have the potential to cut off power and trap you and your family in your home for days, and that’s not all… Winter storms have also been associated with hypothermia, frostbite, carbon monoxide poisoning, and even heart attacks.
Being well prepared is your best defense. Follow this guide so you can weather winter storms safely.
Know what to expect when
The National Weather Service issues severe weather alerts for winter storms. While the exact amounts of snow vary based on where you live, here are some general definitions.
-
- Winter storm watch – Conditions are right for hazardous winter weather within 48 hours. It doesn’t mean it will occur, but a winter storm is possible.
- Winter storm advisory – Usually issued within 36 hours of an expected storm, an advisory lets you know to anticipate snow, sleet and/or freezing rain.
- Winter storm warning – Expect snow, sleet, ice, freezing rain and/or hazardous winter conditions within the next 12-24 hours.
Get ready
Your primary concerns during a severe winter storm are the loss of heat, power, and communications, having enough food and supplies, and protecting your home from possible storm damage. Stock up on supplies, take protective measures for your home and create a disaster plan to share with everyone in the family. That may include planning for evacuation if needed.
Stock up and charge up- Building your emergency kit.
-
- Stock up on food that requires no cooking or refrigeration. Make sure you have a manual can opener if you’re planning to open cans.
- Include baby food and diapers if needed.
- Buy cases of bottled water to use in case the pipes freeze. You can use this for brushing teeth, flushing toilets, and bathing. Make sure you have at least 3 gallons of water per person. You can also fill the bathtub with water as an extra source.
- Make sure you have enough prescription medications, and any toiletries needed.
- If you have pets, stock up on food for them.
- Gather your flashlights and extra batteries. Collect candles and matches.
- Pull out the battery-powered radio for weather updates. You can also use it to play music to pass the time.
- Make sure you have lots of blankets and warm clothes for each member of the household.
- Charge all of your devices ahead of the storm. Charge any portable battery backups. Determine how you will charge your phone during a power outage.
Protect your home
-
- Make sure your home’s furnace is in good working order.
- Check for drafts and use these winter window hacks to keep your home warm and toasty.
- Know how to turn off your utilities, such as gas lines or water, in an emergency.
- Consider buying emergency heating equipment such as a wood or coal-burning stove or electric or kerosene heater. Review all safety precautions, and be careful of fire hazards when storing fuel.
- Consider installing a portable generator. Review generator safety and never run a generator in an enclosed space.
- Make sure your smoke detector and carbon monoxide detectors are working. If you’ll be using your fireplace or wood stove for heat, they should be near that area. Have a fire extinguisher nearby just in case, or try this way to put out fires without an extinguisher.
- Test your snow blower and have it serviced if necessary.
- Take a walk around your house and identify any trees that could fall. If there’s time, trim them back.
Be prepared to leave if needed
-
- Service your vehicle and make sure you’re prepared for winter. Have a mechanic check your antifreeze, windshield-washer fluid, defroster, wipers, battery, brakes, and tires.
- Keep your car’s gas tank full for emergency use.
- Stock your car with these must-carry items.
- Research local shelters and warming stations in your area in case you need to evacuate your home.
- Prepack a bag for each member of the family, including pets.
Once the Storm Arrives
During the storm…
-
- Limit your time outside. Hypothermia and frostbite are real dangers.
- Do not attempt to travel during treacherous conditions. You could find yourself in an accident or stranded on the road.
- Stay tuned to emergency weather alerts.
- Check on neighbors if they’re older or have young children who are more at risk in extreme cold.
After the storm…
-
- Avoid driving until conditions have improved. Follow winter driving safety guidelines.
- Keep a supply of kitty litter and/or ice melt to clear sidewalks.
- Be careful to not overexert yourself. It’s common for heart attacks to be brought on by overexertion from shoveling or clearing snow.
- Assess any damage to your home or property and alert your insurance company. You have home insurance for a reason. Put it to work if you need it.
This article is furnished by California Casualty, providing auto and home insurance to educators, law enforcement officers, firefighters, and nurses. Get a quote at 1.866.704.8614 or www.calcas.com.
