by California Casualty | Auto Insurance Info, Homeowners Insurance Info |
If you’ve ever sat down to read a declaration page on an insurance policy, you know there’s a lot that goes into the documentation. This information is clearly important, but there’s a lot of paperwork. Do you really need to keep it all, and for how long?
Here’s a quick reference guide for your insurance paperwork, including how to organize it, store it, and for how long.
Insurance Policy
Whether you have home insurance, an auto policy, a renter’s policy, or another type of coverage, you will be issued a document that spells out the insurance coverage. This main policy document is multiple pages. It includes all the details of your policy, including coverages and limits, discounts, and endorsements. It also is a resource with definitions of insurance terms and explanations of the claims process. If you are bundling your coverages, such as with home and auto, you will have an insurance policy document for each.
You need to know the coverage that you have, but you don’t necessarily need a hard copy of your policy document. If your insurer offers digital access on their website, you can toss the paper version. Either way, you will want to keep a hard copy of the declarations page.
Certificate of Insurance (COI)
This document is the summary of your coverage. Its format is easy to scan and provides a quick look at your coverage details. It’s especially useful to share with lenders who require proof of insurance if you are financing your home or car.
Keep a copy of your certificate of insurance for as long as the policy is active. It is your proof of insurance. When you renew your policy, you can throw out the old COI.
Insurance Claims Documents
Accidents happen, and things get damaged and stolen. You may file a claim with your insurance company when this happens. If your claim is for an auto policy, you will get an accident report. You also may have medical reports and bills. If your claim is for home damage or theft, you will have an inventory of damage. You also will have repair bills, receipts, and other paperwork. If it’s a third-party claim, where you caused injury or loss to another person, you will receive documentation as well.
Claims can sometimes take years, especially if medical bills are involved. As long as your claim is open, keep all of the paperwork. Only throw it out after you have received the payment.
Vehicle Insurance Card
Your auto insurance card fits in your wallet or glove compartment, which is where it should be kept. That way, you have a hard copy even if you have access to a digital version. Hard copies are useful in case you are pulled over by law enforcement or need to exchange the information with another driver in the event of an accident.
Keep the hard copy of your auto insurance card as long as your policy is active. You may dispose of it when the policy renews and you receive a new card.
Billing Statements
You will receive regular billing statements from your insurer, usually monthly. These may be by mail or online.
Keep your billing statements for tax purposes if you have a home business or you use your car for business purposes. If you’re audited by the IRS, you may need to show your bills for the last 7 years.
How to Store Documents
If you’re keeping paper copies of documents, you want to make sure that they remain in good, readable condition. Here are some recommendations to keep them that way:
-
- Never store your important papers in a basement in case of flooding.
- Keep your documents in a safe container in a climate-controlled space to reduce the possibility of mold and fading.
- Store papers in a waterproof and fire-resistant container. Consider a home lock box or safe or a filing cabinet.
- Consider digital storage as well, as a backup. You can store copies of papers on a flash drive. For a small fee, you also can store them in Dropbox and on iCloud and other services.
Pro Tip: Use plastic page sleeves for your documents for added protection. You can slide your documents into the sleeves and then file them in a binder or box.
How to Dispose of Documents
The general rule is that once a policy is done, you don’t need to keep the paperwork. (See the exceptions for claims documents and billing statements above.) But your insurance documents have personal information that could lead to identity theft if not disposed of safely.
-
- Always shred any old papers. Use a crosscut shredder that cuts in two directions to produce confetti.
- A small home shredder will work or you may find a free shredding event in your community.
- Local banks and other companies also may shred your papers for a fee.
- Remember to permanently delete old digital copies as well.
Going Paperless
Did you know, you can access your account online with California Casualty? Once you’ve signed up, you will have quick access to your policy(ies) at any time and from anywhere. You simply “Sign In” in the same right-hand corner where you created your account initially. And easy, secure access to this policy portal gives you the flexibility to:
-
- Download/Print ID Cards
- View/Download Your Declaration Pages
- Pay Your Bill Online
- Make Some Changes to Your Policy (Manage Drivers, Manage Vehicles, Manage Lienholders/Mortgagee)
- Contact Customer Service for Additional Support
- File a Claim
- Create/Save a New Auto Quote, etc.
Click here to learn more.
This article is furnished by California Casualty, providing auto and home insurance to educators, law enforcement officers, firefighters, and nurses. Get a quote at 1.866.704.8614 or www.calcas.com.
by California Casualty | Homeowners Insurance Info |
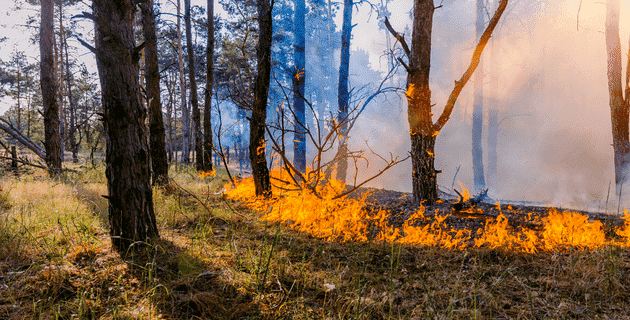
When the weather is hot and dry, and conditions are just right, wildfires happen. They are more common in some parts of the country than others, but it’s important to remember a fire can break out anywhere. And when it does, your home and your family are at risk.
Know whether your home is located in a high-risk fire zone and what to do to protect it.
What’s your zone?
A fire hazard zone is a region that has characteristics that put it at higher risk for wildfires, such as:
-
- A history of fires in the region over a 30-50-year period
- Dry, hot, and windy weather that cause fires to spread faster
- Forests and vegetation that act as fuel for fire
- Steep slopes where fire often burns faster
- The potential for fires to burn through the top layer of foliage
- Burning embers that could spread to urban areas
Millions of homes are located in or near fire hazard severity zones. U.S. states most impacted by wildfires include California, Oregon, and Arizona. California has classified its fire zones as moderate, high, and very high. These areas are mapped by the California Department of Forestry and Fire Protection. The zones help property owners and builders better protect structures in areas at high risk.
Other states also affected by recent wildfires include Washington, Colorado, Montana, Wyoming, Utah, Idaho, Nevada, Texas, Alaska, New Mexico, Oklahoma, and Florida. There’s been a population boom in these drought-sensitive regions, which means there’s an increased risk of human activity sparking a fire.
The nonprofit, First Street Foundation, has an online risk factor tool where you can search for your region’s fire risk. You also can find information from your state’s Department of Forestry. If your home is in a fire hazard zone, make sure that your community is an active Firewise USA® site working with local foresters to reduce risks.
How can you protect your home?
In addition to your community working to reduce risk, there are steps you can take to help better protect your home from wildfires.
The USDA Forest Service has divided your home and property into three zones based on research into how homes ignite. Addressing each of these zones will help to reduce the risk of a fire on your property.
Immediate Zone (Less than 5 feet) – your home and the area immediately surrounding it
-
- Seal your windows and doors to reduce the risk of embers getting inside your home. (Embers are burning pieces of wood that can be carried by winds for more than a mile.)
- Use insulated glass, which can hold heat longer than standard glass.
- Avoid acrylic skylights that could melt.
- Paint decking with fireproof paint.
- Consider other fireproof materials, from siding to roofing to metal or fiber-cement doors.
- Declutter the gutter.
- Replace missing shingles on roofs, to protect against embers.
- Install 1/8-inch metal mesh screening in exterior attic vents, also to protect against embers.
- Remove any flammable materials, including leaves, plants, or stored items away from your home’s exterior walls and from under decks or porches.
- Trim branches that hang over your home.
- Consider the installation of sprinkler heads on your roof, patio, or deck.
Intermediate Zone (5-30 feet) – landscaping and hardscaping around your home
-
- Slow the spread of fire toward your home with driveways and walkways to allow a safe area for firefighters to be able to fight the fire.
- Remove flammable vegetation and replace with stones or drought-resistant plants with high water content.
- Use crushed stone or gravel rather than flammable mulches.
- Remove vegetation underneath trees that could help the trees catch fire.
- Space trees in clusters that are 18 feet between the trees’ crowns. If there’s a slope, increase that distance.
- Keep the grass mowed short, to four inches.
- Emergency vehicles need driveways that are 12 feet wide and have a vertical clearance of 15 feet. Check that your property can accommodate them.
Extended Zone (30-100 feet) – the vegetation and land that extends 30 feet past your house
-
- Keep trees at least 12 feet apart (between canopy crowns) within 30-60 feet of your home. Keep trees at least 6 feet apart within 60-100 feet of your home.
- Pick up debris and dead plant material.
- Remove vegetation that is near storage sheds or other structures.
- Make sure your home and street are clearly marked for first responders.
Finally…
This article is furnished by California Casualty, providing auto and home insurance to educators, law enforcement officers, firefighters, and nurses. Get a quote at 1.866.704.8614 or www.calcas.com.

by California Casualty | Auto Insurance Info |
Kids spend a lot of time in and around vehicles. But they may not be aware of the potential risks, from automatic windows that can pinch tiny fingers, to cars that can back over their play areas without warning. Each year, more than 9,000 children are treated in the ER for injuries that happen in and around motor vehicles. Many of these injuries are preventable and teaching safe habits can help.
In honor of Child Passenger Safety Month in September, we’ve compiled a list of safety measures to teach your children so they can be safer in and around vehicles.
Safety Tips in a Vehicle
Buckle up.
Do:
-
-
- Have your child wear a seat belt for every ride.
- Position it correctly. The shoulder belt should be across the middle of the chest and shoulder. The lap belt should be low and snug across the hips.
Don’t:
-
-
- Place the shoulder belt under your child’s arm or behind his or her back.
- Play with seatbelts. Kids can easily become entangled.
Use a car seat or booster.
Do:
-
-
- Follow height, weight, and age guidelines for car seats and boosters in your state. This will ensure that seatbelts are positioned appropriately.
- Measure and weigh your kids a few times a year to determine which seat is best.
Don’t:
-
-
- Let your child ride in the front seat until about age 13 when airbags will not present a danger.
- Let kids lay down and sleep outside of their car or booster seats.
Practice safety around windows and doors.
Do:
-
-
- Explain that windows can go up and down, and pinch anything in their way.
- Teach that doors must stay closed when the vehicle is moving.
Don’t:
-
-
- Let your child touch the door handles or window controls unless an adult says it’s okay.
- Allow your child to stand on the armrest where controls are often located.
- Let your child put their hands or head outside the window.
Let the driver focus on the road.
Do:
-
-
- Encourage your child to sit quietly or find a quiet activity and enjoy the ride.
- Allow your child to ask appropriate questions and make polite conversation.
- Have your child ask the driver to pull over to a safe place if they need help with something (such as opening a juice box).
Don’t:
-
-
- Let your child be too loud. Your child should know that a car is not the place to argue or throw a tantrum.
- Encourage your child to ask the driver to look at something that’s not on the road.
- Allow your child to do anything that could lead to distracted driving for the driver.
A car is not a toy.
Do:
-
- Enforce the rule to stay safely in one’s seat when the car is moving.
- Encourage your children to find places other than the inside or the outside of a car to play.
Don’t:
-
-
- Let your children move around and play in a car even when it is not moving.
- Allow your kids to crawl into the trunk for any reason. It is not a good hiding spot and they could get trapped.
Pro Tip: Teach older children that cars (manufactured after September 2001) have glow-in-the-dark emergency release switches inside trunks. Show them how to find and release them in case of an emergency.
Safety Tips Around a Vehicle
Do:
-
-
- Help your children to pay attention to their surroundings. Look all around, and walk carefully and slowly.
- Show your children the white brake lights that indicate a car will be backing out.
- Require that your kids stay close to a supervising adult.
Don’t:
-
-
- Allow your children to run or play in a parking lot.
- Assume that parked cars will stay parked. Tell your children that cars often move suddenly.
Driveways are dangerous.
Do:
-
-
- Supervise children whenever they are playing in a driveway.
- Put up cones and flags when children are playing to alert cars and prevent them from pulling into the driveway.
- Designate a safe spot for children to stand when cars are pulling into or out of the driveway.
Don’t:
-
-
- Leave toys, chalk, bicycles, or any items that might entice kids in a driveway. Be sure to clean up after any driveway play.
- Allow your children to chase after balls or other toys that roll out of the driveway into the street.
- Assume a car sees you. Tell your children that just because you see them doesn’t mean that drivers see you.
Practice roadside safety.
Do:
-
-
- Teach your children the rules of the road for pedestrians.
- Toddlers should never be near a road without holding an adult’s hand. Teach them the difference between roads, sidewalks, crosswalks, and driveways. (Pro Tip: Play I Spy… and make it a game.)
- Preschoolers can recognize road signs by shape and color and traffic lights. Teach them the “stop, look and listen” rule, and to only cross the street with an adult.
- School-age children should be supervised by an adult. Teach them safe paths to walk and safe places to cross. As they get older, let the child take the lead to walk or bike to school, but go with them until you are confident that they can do it on their own.
- Pay close attention in school safety zones and around school buses.
- Reinforce safety skills with games like the Safe Paths to School downloadable board game for ages 4-12.
Don’t:
-
-
- Think that children can accurately judge distance and speed when it comes to moving vehicles.
- Forget to model the behaviors that you want your children to follow.
What Parents Can Do:
Do:
-
-
- Lock your car and put the keys out of reach of children.
- Create reminders so you don’t accidentally leave a young child in the car. Keep a stuffed animal in your child’s car seat, and place it in the front passenger seat when your child is in the car. That will be a visual reminder to check the back when you get out.
- Take a 5-second walk around your car before you back it up. Look to see if there are any children playing near it. The smallest kids are sometimes not seen, and children sometimes dart behind vehicles without thinking about it.
Pro Tip: Consider getting a backup alarm that sounds when you back up to help provide a warning to kids.
Don’t:
-
- Leave your children unattended in the car. Even if you have automatic safety systems, your child might find a way to test those. (If you see an unattended child, call 9-1-1.)
- Use your cell phone while driving. Model the behavior you want to see, and talk to your kids about the dangers of distracted driving.
Finally, maintain your car and insure your vehicle for additional peace of mind. Keeping you and your family safe is a wonderful way to celebrate Child Passenger Safety Month.
This article is furnished by California Casualty, providing auto and home insurance to educators, law enforcement officers, firefighters, and nurses. Get a quote at 1.866.704.8614 or www.calcas.com.

by California Casualty | Auto Insurance Info, Safety |
You’ve got the captain’s hat. You’re bringing the cooler. But what else do you need—or want—to have fun and stay safe on the water this summer?
There are literally hundreds of great boat accessories on the market, plus lots of safety gear to choose from. We’ve compiled a list of practical and fun items you’ll want to keep on your boat this summer. Scroll down for a list of what to leave at home, too.
First the fun…
A mounted grill – Treat everyone to a BBQ out on the open water. You can find boat grills in gas, charcoal, and electric. Just make sure to wait to grill until the boat has stopped, and don’t leave it unattended.
An inflatable boat slide – Everyone loves a boat slide! Choose one that inflates quickly, stores compactly, and holds adults as well as children. Durability is a plus.
Tow tubes – Give your passengers a ride on the waves using a tow tube. These fun accessories come in different shapes and sizes and accommodate a range of ages. Make sure you check the maximum weight and rider limit and equip all of your riders with life jackets.
Speakers – Crank up the tunes with some great speakers that are waterproof and can stand up to the elements, including wind, sun, and the motion of your boat.
Fish finder – Take the guesswork out of fishing. Today’s fish finders feature digital screens and include systems like GPS, electronic compasses, and radar. Starting at about $100, these instruments can go into the $1,000s.
Then the practical…
10-in-1 Boat Tool – This is the “Swiss Army Knife” of boat tools with every gadget imaginable. Not only does it include a fishing line cutter, a marine gas cap key, and a safety whistle, it includes a beer and wine bottle opener.
Telescopic boat hook – Until you have one, you don’t realize how useful these are! These hooks help you retrieve items that fall in the water. They also help you more easily get hold of the dock lines attached to pilings.
Underwater LED lights – If you take your boat out at night, an underwater light can help your boat be seen in the dark. These lights can come in different colors and add a cool ambiance.
Non-tipping can cooler – The rocking motion of your boat can easily tip your drinks. Secure them, and keep them cold, in a non-tipping can cooler.
Boat fenders – These cushions absorb the impact of bumps against docks and other boats.
And the necessities…
Don’t forget to pack a boat emergency kit full of the boat safety basics:
-
- Life jackets and throwable personal flotation devices in case someone goes overboard
- Fire extinguishers (check the regulations to see how many you need for the size of your boat)
- First aid kit, including motion sickness remedies
- VHF Radio for communications
- Signal flares (both visual and sound)
- Waterproof flashlight
- A way to get weather updates
- Basic tool kit for repairs and basic maintenance
Remember to leave these at home…
-
- Spray sunscreen which can leave a slippery film on deck
- Shoes with dark soles that leave marks
- Cigarettes/cigars that can accidentally cause a fire
- Perfume that attracts bees and can cause nausea in close quarters
- Glass containers that could shatter
- Plastic grocery bags that could fly off the boat and clog waterways
Finally, check your boat insurance. Make sure you’re fully protected from accidents, uninsured boaters, and liability claims.
Happy boating!
This article is furnished by California Casualty, providing auto and home insurance to educators, law enforcement officers, firefighters, and nurses. Get a quote at 1.866.704.8614 or www.calcas.com.

by California Casualty | Auto Insurance Info, Homeowners Insurance Info |
Do you want to save money on your insurance payments? Did you know there’s a way to do that without raising your deductible or lowering your coverage? The answer is bundling.
What is bundling? It’s a term to describe a multi-policy discount. If you have more than one policy with an insurance company, you may bundle those policies and, in the process, you can save on all.
Here’s why you might consider bundling:
-
- Bundling can save you money. Depending upon the amount of coverage for your policies, and your state, you can save from 5% to 25%.
- Bundling is convenient. It simplifies bill paying and record keeping since you interact with just one insurer.
- Bundling can help ensure you are fully covered. Having all policies with one company allows your insurance advisor to review any gaps in coverage.
There are many different ways to bundle your insurance.
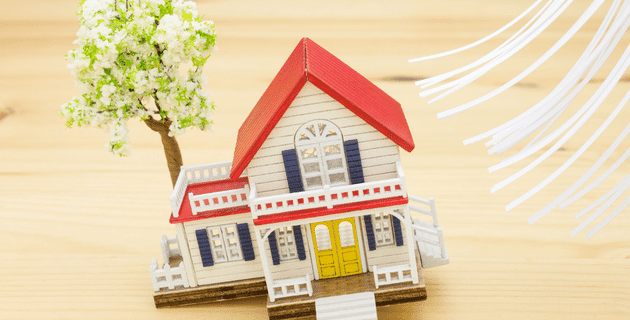
Homeowner’s Insurance Bundles
Your home is one of your greatest investments; you need to make sure that it’s fully protected. There are plenty of decisions to make when buying your own policy- from coverage limits to extra protection for your belongings. One of those decisions might be to incorporate additional coverage to enhance your policy. When you bundle those with your home insurance, you can save money.
You can choose to bundle your home insurance with:
- Sump pump endorsement: A sump pump is a device that collects excess water and drains it outside your home. Sump pump coverage covers the costs of repair and replacement in the event of a sump pump failure. Just a couple inches of water backup can cause thousands of dollars in damage – ruining carpets, destroying appliances, and crumbling drywall.
- Flood insurance: Regular home insurance does not cover flood damage. That’s why many people in flood zones purchase this extra policy. There is a 30-day waiting period to buy flood insurance, so take that into consideration.
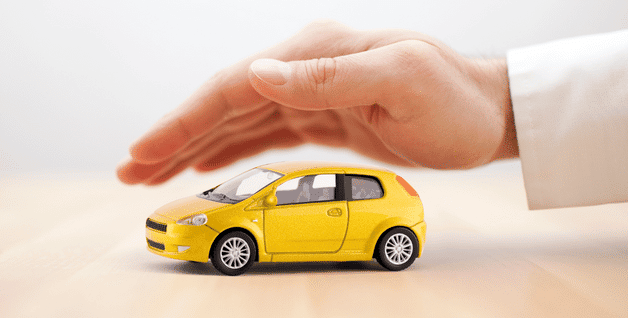
- Auto insurance: If you have a vehicle, you likely have liability, collision, and/or comprehensive insurance. Liability coverage is used to pay for damages that you cause. Collision coverage helps to pay to repair your vehicle or get one of equivalent cash value if yours is totaled. Comprehensive coverage is for damage to your vehicle other than collisions, such as natural disasters, fires, vandalism, theft, and animals that damage your vehicle.
- College students and renter’s insurance: If your college student* lives away at school, his or her belongings are covered by your homeowner’s policy at 10% of the limit of liability or $1,000, whichever is greater. You may want more coverage than 10%. Talk to your insurance advisor about expanding limits, such as an umbrella policy to cover expensive items your student is bringing to college. Alternatively, consider purchasing renter’s insurance for your college student for an off-campus apartment. Renter’s insurance not only protects your student’s possessions but offers them emergency housing if they are unable to reside in the rental unit. Renter’s insurance is surprisingly affordable, so when you bundle it with your homeowner’s, it could practically be free!
*Note that college students must meet certain requirements in order to qualify as an insured on your homeowner’s policy. This includes age limitations, family relationship, and full-time enrollment in school. In the event of theft coverage, they must have lived in the location 60 days immediately before the loss.
- Earthquake Insurance: If you live in an area that is prone to earthquakes, you may want to consider this additional coverage. Homeowner, condo, and rental insurance policies typically do not cover earthquakes.
- Umbrella policies: This type of policy provides additional personal liability insurance that starts to pay after your underlying limits of liability on your home insurance policy have been exhausted after a covered loss. While there’s no way to know for sure how much liability coverage you may need, understanding what you stand to lose is a good place to start. If you’re being sued, it’s possible that equity in your home, your personal savings, and your income may be at risk. If the value of two years of your annual income, the equity in your home, and your savings exceed the liability limits on your auto or home insurance policies, then you should consider an umbrella policy to protect your net worth.

Renter’s Insurance Bundles
Renter’s insurance is like homeowner’s insurance but for tenants. Starting at about $10 a month, it protects your personal belongings (that’s right, your landlord’s insurance policy will not cover your belongings) but that’s not all. It’s an important safeguard if you’re found at fault for property damage or injuries at your place (and even around the world). It also can help if you don’t have access to your apartment or home due to a covered loss.
You can choose to bundle your renter’s insurance with:
- Auto insurance: As described above, auto insurance helps protect you in the event of an accident or other damage to your car. When you bundle your renter’s policy with an auto policy that you already have, the savings can be substantial.
- Pet insurance: Our pets are like family and we want to keep them as healthy as possible. Pet insurance can help to offset those veterinary expenses. Depending on your policy, pet insurance may cover exams, prescriptions, lab tests and x-rays, surgeries, emergency visits, and even cancer. You make the initial payment and then are reimbursed depending upon the deductible and limits that you have selected. (Pet insurance also may be bundled with homeowner’s, too.)
Auto Insurance Bundles
Auto and homeowner’s insurance, and auto and renter’s policies, are among the most popular types of insurance bundles. However, you also may wish to bundle your car insurance with a boat policy.
- Boats and personal watercraft: If you have a boat, you will need a boat insurance policy. You also need a separate policy for personal watercraft such as jet skis. The policies protect you from vandalism, accidents, and liability for injuries to others.
*Note that motorcycle insurance is not eligible for a bundling discount. However, if you live in a cold climate state, and only ride your bike in warmer months, you can ask about seasonal coverage.
Each year, California Casualty policyholders save an average of $423* a year. That could be even more if you decide to bundle your coverages. See how much you can save and get started with a free quote today at mycalcas.com/quote.
This article is furnished by California Casualty, providing auto and home insurance to educators, law enforcement officers, firefighters, and nurses. Get a quote at 1.866.704.8614 or www.calcas.com.
