by California Casualty | Educators |
Hannah Davis is an educator and NEA Member. She works every day to inspire and educate her middle school science students. When she faced serious personal challenges, she turned it into a learning opportunity for her class. Watch the video above and learn how the support she received from students and her fellow educators became a defining moment in her career.
What’s Your #Moment?
Are you an educator, firefighter, nurse, or peace officer with an inspiring story? Share it on social media with #ThisIsMyMoment and tag us, and we’ll help spread the word!

by California Casualty | Auto Insurance Info |
Your car isn’t just a way to get from point A to point B—it’s a billboard for your personality. That minivan? Probably secretly a superhero in disguise. That flashy convertible? Definitely a thrill-seeker who lives for the spotlight. Buckle up, because we’re taking a fun ride into what your vehicle really says about you.
Let’s talk color.
Think of your car’s paint job as a giant mood ring on wheels—broadcasting your vibe before you even step out. Some shades whisper, others shout, and all of them say something about who’s behind the wheel.
- Red – Bold, fiery, and impossible to ignore. A red car screams, “Look at me!” Whether it’s passion, speed, or a thirst for adventure, red drivers are all about standing out.
- Yellow & Orange – Sunny, upbeat, and just a little bit quirky. These rare road gems belong to the optimists and free spirits who aren’t afraid to zig while everyone else zags.
- Green – From eco-warrior to outdoorsy adventurer, green says you’re in tune with nature—and maybe even a little creative. Go bright for playful energy, dark for polished sophistication.
- Blue – Calm, cool, collected. Blue is the color of trust, stability, and loyalty, which is why it’s often the family favorite. Blue-car drivers give off dependable vibes—even if they do secretly speed when no one’s looking.
- Black – Sleek, powerful, and timeless. Black cars exude confidence and prestige. They can be stylishly elegant… or just a little bit intimidating.
- Silver, Gray & White – Clean, crisp, and effortlessly cool. These neutral tones say you appreciate subtlety over flash. Bonus: they hide dirt and scratches better than most—practical and polished all at once.
- Brown, Bronze, Gold & Tan – Down-to-earth and unpretentious, these colors belong to the reliable realists. Whether it’s a latte-like tan or a deep chocolate brown, you’re all about substance over show.
Now let’s talk type.
Your car’s shape says just as much as its color. From low-slung convertibles to family-friendly haulers, the body style you choose is like a personality profile on four wheels. Let’s see what your ride reveals.
The Sleek Sports Car – The Adrenaline Junkie
You’re bold, confident, and not afraid of a little attention (okay, a lot of attention). Life for you is about speed, style, and seizing the moment. Whether you’re chasing the thrill of the open road or just pulling into the coffee shop parking lot, you love to make an entrance. Friends know you as the one who’s always up for an adventure, the one who adds a little spark—and maybe a little drama—to every outing. Buckle up, because with you in the driver’s seat, life is never stuck in the slow lane.
The Practical Sedan – The Organized Achiever
Reliable, steady, and efficient—if you’re behind the wheel of a sedan, people can count on you. You’re the type who actually reads the manual (and maybe highlights it). Schedules, routines, and to-do lists? You’ve got them down to a science. Your car choice reflects your ability to get things done without unnecessary flash. But don’t mistake your practicality for boring—you know exactly what you want, and you know the smartest way to get there. In a world full of detours, you’re the one who always finds the fastest, most sensible route.
The SUV or Crossover – The Adventurer/Family Hero
SUV and crossover drivers are the ultimate multitaskers. One day, you’re hauling soccer gear; the next, you’re loaded up with hiking packs and snacks for a road trip. You thrive on versatility and love knowing you’re ready for anything—from a weekend camping trip to a Costco run. Friends see you as dependable and fun, with a “why not?” spirit that’s always game for the next big adventure. Your car says, “Hop in, there’s room for everyone,” and that’s exactly how you live your life.
The Minivan – The Secret Superhero
You may not always get the flashy spotlight, but let’s be real—you’re the one holding everything together. Minivan drivers are the unsung heroes of the road, juggling schedules, passengers, and bags of snacks with ease. You’re resourceful, patient, and always prepared for chaos (with a pack of wipes hidden in the glovebox, just in case). Behind the wheel, you’re proof that practicality is powerful, and you manage to do it all while keeping your cool. Others might underestimate you, but those who know you understand—you’re the real MVP.
The Convertible – The Free Spirit
Top down, wind in your hair—you’re all about living in the moment. Convertible drivers thrive on freedom, sunshine, and a little bit of flair. You’re spontaneous, fun-loving, and happiest when life feels like a rolling playlist of good vibes. Your car doesn’t just get you places—it turns every drive into a mini vacation. If life is a highway, you’re the one singing at the top of your lungs in the fast lane.
The Electric/Hybrid – The Thoughtful Innovator
Forward-thinking and eco-conscious, you’re not just driving—you’re making a statement. Electric and hybrid drivers care about the bigger picture, and you like to be on the cutting edge of what’s next. You’re smart, intentional, and probably have a gadget or two that makes life easier (and cooler). Your car reflects your values: sustainability, progress, and a touch of sophistication. You’re not just keeping up with the future—you’re helping shape it.
The Vintage/Classic Car – The Nostalgic Romantic
Driving a classic car isn’t just transportation—it’s an art form. You appreciate craftsmanship, character, and things that last. Nostalgic at heart, you value stories, traditions, and the beauty of a simpler time. Friends might tease you for being “old school,” but they secretly admire your sense of style and your refusal to settle for the ordinary. Like your car, you’re timeless—and you wouldn’t have it any other way.
No matter what you drive—flashy, practical, adventurous, or timeless—your car is more than just transportation. It’s part of your story, and it deserves the same care and protection you give yourself. Be sure to protect it with the right insurance coverage to safeguard against the unexpected. Safe travels.
This article is furnished by California Casualty, providing auto and home insurance to educators, law enforcement officers, firefighters, and nurses. Get a quote at 1.866.704.8614 or www.calcas.com.

by California Casualty | Health, Helpful Tips |
Packing a lunch isn’t just about sandwiches and snacks—it’s a little daily opportunity to say, “I love you.” From notes that spark giggles to colorful, kid-approved meals that secretly pack in nutrition, your child’s lunchbox can become a tiny treasure chest of connection, creativity, and fun. Let’s explore playful ideas that make lunchtime a moment to smile, bond, and maybe even start a new family tradition.
Make Presentation Part of the Fun
Children eat with their eyes first, so the way food is presented can be just as important as what you pack. A lunchbox with a little personality is more exciting and encourages kids to try different foods.
- Cookie cutters for fun shapes: Cut sandwiches, cheese, or melon into stars, hearts, or animals. Even picky eaters are more likely to nibble on something shaped like a dinosaur.
- Bento-style compartments: Separate each item into neat sections. Not only does this make food look appealing, but it also prevents flavors from mingling (a lifesaver for kids who don’t want their carrots touching their crackers).
- Silicone baking cups: Bright and reusable, these cups help organize food and add a pop of color.
- Food on skewers: For older children, try non-sharp skewers or toothpicks to make fruit kebabs, veggie stacks, or mini sandwich bites. They feel like party food!
- A rainbow of colors: Add natural vibrancy with strawberries, blueberries, carrots, cucumbers, and yellow peppers. A colorful plate looks more appetizing and signals variety.
- Kid-friendly packaging: Avoid items that are difficult to open. A lunchbox should be a moment of joy, not frustration.
Tip: Pack bite-sized portions that engage all the senses—something crunchy, something smooth, something juicy, and contrasting textures like apple slices with cheese cubes.
Healthy Meals Kids Actually Want to Eat
Nutritious doesn’t have to mean boring. The key is balancing wholesome ingredients with kid-approved flavors. Here are some ideas that bridge both worlds:
- Pinwheel wraps: Spread hummus or cream cheese on a tortilla, layer with veggies or deli meat, roll it up, and slice into colorful rounds.
- Sandwiches with personality: Add banana “eyes” with blueberry pupils to a peanut butter and jelly sandwich. Try a carrot “nose” and a red pepper “smile” for a cheese sandwich. Hold them in place with a dab of cream cheese or peanut butter. Your child won’t forget the day their sandwich grinned at them.
- Stuffed pitas: Fill with lean protein and crunchy veggies for a handheld meal that feels different from the usual sandwich.
- Mini charcuterie board: Cheese cubes, crackers, rolled turkey slices, grapes, and pretzels. It’s snacky, customizable, and fun to assemble.
- Veggies and dip: Pair carrots, celery, or snap peas with hummus, guacamole, or ranch for dipping.
- Mini muffins: Bake ahead with fruit or shredded zucchini and carrots. They feel like a treat but sneak in extra nutrition.
- Yogurt parfaits: Layer yogurt, fruit, and granola in a small container for a colorful surprise.
- Mini bagels: Spread with cream cheese, nut butter, or avocado for a satisfying bite.
- Pasta salad: Toss whole-grain pasta with veggies, cheese, and a drizzle of dressing for a hearty option.
Tip: Involve your kids in the process: create a list of “parent-approved choices” and let them pick their favorites for the week. When children help pack their own lunches, they’re more likely to eat and enjoy them.
Jokes, Puns, and Motivational Messages
Lunchtime is a great time to connect with kids may be tired, missing home, or needing a boost of encouragement. A short note tucked into the lunchbox can do wonders. Kids love humor, and a silly joke can turn an ordinary lunch into a giggle break. Or maybe your child would love a pep talk before that big spelling test.
Jokes
Fold the paper so the joke is on the outside and the punchline is hidden inside. Here are some of our favorites.
Who is the king of the pencil case? The ruler.
- What did the ice say to the water? I’m cooler than you.
- What did the paper say to the pen? You have a good point.
Puns
As kids expand their language skills, they find delight in word play. Here are some food-inspired puns you can try.
Orange you glad it’s lunch time?
- Donut forget how awesome you are.
- Lettuce celebrate how great you are.
Motivational Messages
Kids of all ages appreciate messages of support. Share a favorite quote or saying that says you’ve got this.
If kids were flowers, I’d pick you every time.
- Today is a great day to learn something new.
- “The future belongs to those who believe in the beauty of their dreams.” – Eleanor Roosevelt
And More…
- Keep it short and sweet: A sentence or two is enough.
- Use color: Bright pens, stickers, or doodles make your message stand out.
- Think outside the paper: Write on a cupcake wrapper, a disposable container or on the outside of a banana.
- Try a game to make it interactive. Draw a simple maze or a word search. Just make sure to include a crayon.
Tip: To save time, write a batch of notes in advance. That way, when mornings get hectic (as they often do), you can simply slip one in.
Make It a Family Tradition
Lunchbox love doesn’t have to be just for the little ones. As kids grow, the ways you connect can evolve. Maybe your middle schooler prefers a thoughtful quote, or your high schooler enjoys a funny meme tucked in with their lunch. The point is the same: you’re reminding them that you care.
So, the next time you’re packing a lunch, think of it not as a chore but as a chance to sprinkle in a little joy. After all, love is the most important ingredient you can pack.
This article is furnished by California Casualty, providing auto and home insurance to educators, law enforcement officers, firefighters, and nurses. Get a quote at 1.866.704.8614 or www.calcas.com.
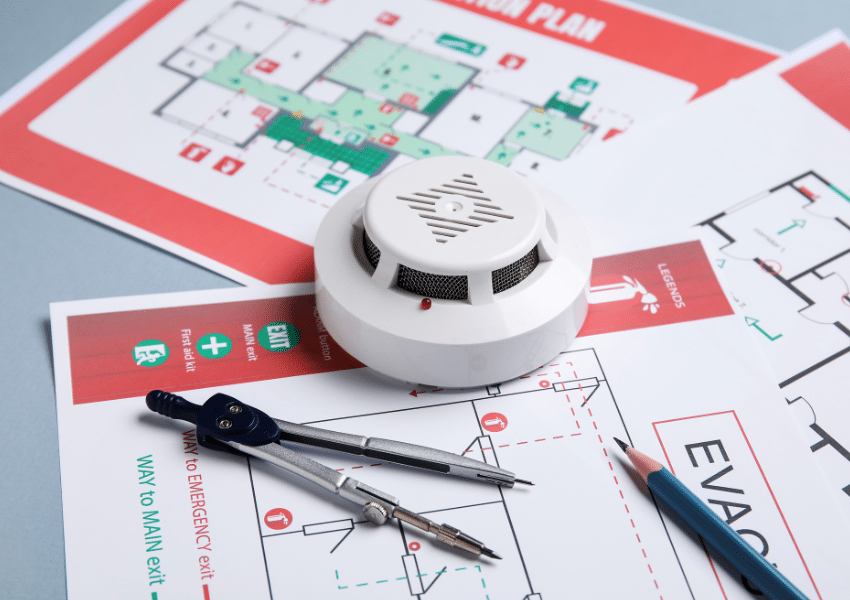
by California Casualty | Helpful Tips, Homeowners Insurance Info, Safety |
When fire breaks out, every second counts. Knowing exactly what to do—and what to avoid—can mean the difference between safety and tragedy. Whether you’re at home, at work, or out in public, understanding how to respond in a fire emergency gives you the power to act quickly, protect loved ones, and make it out safely.
Understanding the Phases of a Fire
Before you can respond effectively, it helps to understand how a fire behaves. Fires move through distinct phases, though the timing can vary depending on what is burning and where the fire occurs:
- Incipient Phase – This is the very beginning, when the fire first ignites. If detected quickly, it may still be possible to put it out safely with the right tools.
- Growth Phase – Flames spread, heat builds rapidly, and conditions begin to change. This is when a small fire can suddenly get out of control.
- Fully Developed Phase – At its peak intensity, a fire consumes all available fuel, producing thick smoke and toxic gases. Escape is the only safe option.
- Decay Phase – As the fire runs out of fuel, flames and heat decrease, but smoke and gases can still be dangerous.
What to Do in a Fire Emergency
When you encounter fire, your actions need to be quick, calm, and deliberate. Here are the key “Do’s” to remember:
1. Act Early if It’s Safe
If you catch the fire in its earliest stage (the incipient phase), and you have the right type of extinguisher, you may be able to stop it from spreading. Always aim the extinguisher at the base of the flames, not the middle or top.
In the kitchen:
- Turn off the heat source.
- Smother small stovetop flames with a metal lid, baking sheet, or fire blanket.
- Use baking soda or salt on grease fires—but never water or flour.
- Follow these tips for other ways to put out a fire.
- If a fire starts inside your oven or microwave, keep the door closed. The lack of oxygen will usually cause the fire to die down.
If the fire is spreading quickly, do not try to fight it. Get out immediately and call 911.
2. Get to Safety
Plan for at least two exits from every room in your home. Fires often make the most obvious path unusable. Heavy smoke can quickly disorient you, so it helps to know the layout of your home by memory. Practice fire drills with your family so that everyone knows how to react without hesitation.
3. Stay Low
Smoke rises and carries carbon monoxide, which can make you dizzy or even cause unconsciousness. Crawling low to the ground gives you cleaner air to breathe and increases your chance of escape.
4. Stop, Drop, and Roll
If your clothing catches fire, don’t run. Running only fuels the flames. Instead, stop, drop to the ground, and roll back and forth while covering your face. This smothers the flames and helps prevent serious injury.
5. If You’re Trapped
Sometimes escape isn’t possible. If you can’t get out:
- Stay away from doors that are hot to the touch.
- Block smoke by placing wet towels or blankets along the bottom of doors.
- Open windows cautiously, crouching down to avoid rising smoke and heat.
- Signal for help by waving a flashlight or cloth out the window.
What NOT to Do in a Fire Emergency
Just as important as knowing what to do is knowing what not to do. Certain instinctive reactions can actually make things worse:
- Don’t use elevators. Fires can cause electrical failures or trap you inside. Always use the stairs.
- Don’t pour water on grease fires. Water splashes burning oil and creates explosive steam.
- Don’t pour flour on a fire. Flour is combustible. Stick with baking soda, salt, or a fire extinguisher.
- Don’t use water on electrical fires. Water conducts electricity and can cause electrocution.
- Don’t fan flames. Adding oxygen only makes a fire grow.
- Don’t stand too close or reach over flames. Loose clothing can ignite quickly.
- Don’t move burning objects. This can spread flames to new areas.
- Don’t aim a fire extinguisher at the flames themselves. Remember: always target the base of the fire.
Preparing Before a Fire Happens
While these tips can help in the moment, preparation is your best defense. Here’s how to protect yourself and your loved ones:
- Install smoke alarms on every level of your home, especially near bedrooms. Test smoke detectors monthly and replace batteries at least once a year.
- Create and practice a fire escape plan with your household. Make sure every member—children included—knows how to get out and where to meet once outside.
- Keep fire extinguishers accessible. Place them in the kitchen, garage, and near exits. Learn how to use them before an emergency arises.
- Understand the common causes of fires so you can take steps to fireproof your home and minimize these risks.
- Know your insurance coverage. Even when you do everything right, fires happen. Having the right coverage can make the recovery process easier and less stressful.
This article is furnished by California Casualty, providing auto and home insurance to educators, law enforcement officers, firefighters, and nurses. Get a quote at 1.866.704.8614 or www.calcas.com.
by California Casualty | Auto Insurance Info, Helpful Tips, Safety |
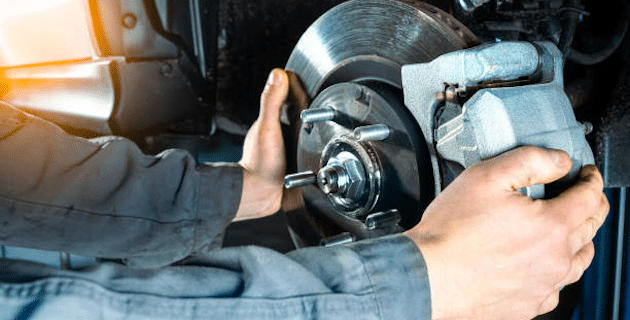
When it comes to keeping you safe behind the wheel, nothing works harder than your brakes. They’re your car’s first line of defense against accidents, yet most drivers don’t think about them until something goes wrong—a squeak, a grind, or that sinking feeling when the pedal doesn’t respond like it should.
The good news? You don’t need to be a car expert to understand how brakes work or how to spot trouble before it turns into a safety issue. With a little knowledge, you can keep your brakes in top shape and give yourself peace of mind every time you drive.
How Do Brakes Actually Work?
At their core, brakes use one simple idea: friction. When you press your foot on the brake pedal, you’re triggering a hydraulic system—a system powered by fluid—that pushes brake pads or brake shoes against a spinning surface attached to your wheels. That pressure and friction are what slow your car down.
Think of it like riding a bicycle. When you squeeze the hand brakes, the pads press against the rim of the wheel, creating friction that makes the bike stop. Your car brakes work on the same principle, just on a larger and more powerful scale.
Most modern cars also have power-assisted brakes, which make it easier for you to press down, and an anti-lock braking system (ABS), which prevents the wheels from locking up during sudden stops. That keeps your car more stable and easier to steer in an emergency.
Disc vs. Drum: The Two Main Types of Brakes
Most vehicles on the road today use a hydraulic braking system with either disc brakes, drum brakes, or a combination of both.
- Disc Brakes: These are the most common, especially on the front wheels (which handle most of the stopping power). A spinning disc, called a rotor, is clamped by a caliper holding brake pads. When you press the brake pedal, the pads squeeze the rotor, creating friction to slow the wheel.
- Drum Brakes: These are more often found on rear wheels. Inside the brake drum, brake shoes are pressed outward by pistons when you hit the brakes, rubbing against the drum to slow the car.
You don’t need to memorize the mechanics, but it helps to know that both systems rely on brake fluid, pads or shoes, and the principle of friction to get the job done.
Warning Signs Your Brakes Need Attention
Brakes give you plenty of signals before they fail completely. The key is to notice them early:
- Strange Noises: A squeal often means your brake pads are wearing thin. A grinding sound could mean the pads are worn down completely, with metal scraping against metal.
- Soft or Spongy Pedal: If the brake pedal sinks toward the floor or feels unusually soft, it may signal a leak in the brake system or air in the brake lines.
- Car Pulling to One Side When Braking: If your vehicle veers left or right when braking, it could be uneven brake wear, contaminated fluid, or a problem with the brake linings.
- Dashboard Warning Lights: Don’t ignore that glowing brake light. It’s your car’s way of asking for help.
If you notice any of these symptoms, it’s time to schedule a brake check before things get worse.
Simple Brake Maintenance Tips
You don’t need to be a mechanic to stay on top of basic brake care. A little attention can go a long way toward preventing costly repairs and keeping you safe. Here are some practical steps:
- Check Brake Pads: Brake pads wear down over time. If they’re less than ¼ inch thick, it’s time to replace them. Worn pads reduce your stopping power and can damage other parts of the braking system.
- Watch for Grease or Debris: Brake pads should be clean and dry. Grease or oil on them can reduce friction, making it harder to stop.
- Brake Fluid: Your mechanic should check the level and condition of your brake fluid regularly. Fresh brake fluid is clear or light in color. Dark or dirty fluid should be replaced.
- Rotors and Drums: Look for signs of grooves, cracks, or warping. Depending on the severity, they may need to be resurfaced or replaced.
- Brake Lines: Over time, brake lines can develop leaks from corrosion or damage. Any leak in the system reduces braking power and must be fixed immediately.
A good rule of thumb is to have your brakes inspected at least once a year—or sooner if you notice any changes in how they feel or sound. The cost of regular maintenance is small compared to the expense (and stress) of major repairs, not to mention the potential consequences of an accident.
Brakes may not be the flashiest part of your car, but they’re among the most important. Knowing how they work, spotting warning signs early, and keeping up with maintenance can give you confidence on the road and keep you—and your passengers—safe.
Of course, even the best brakes can’t prevent every unexpected situation. That’s where the right insurance comes in. Just as your brakes protect you in the moment, good coverage protects you afterward—helping you recover from accidents, repairs, or losses. Together, brake care and the right insurance give you the peace of mind to enjoy the drive, knowing you’re fully protected.
This article is furnished by California Casualty, providing auto and home insurance to educators, law enforcement officers, firefighters, and nurses. Get a quote at 1.866.704.8614 or www.calcas.com.
