by California Casualty | Good to Know, Safety |
As we head into the most wonderful time of the year, cybercriminals are gearing up for their busiest season.
While you are carefully crafting your holiday gift list (and checking it twice!) these criminals are perfecting their cyber scams, online fraud schemes, and identity theft plans.
So before you join the millions of others searching out those perfect stocking stuffers, check out these 10 tips to protect yourself and your family online.
1. Secure your home network – Use strong passwords and WPA2 or WPA3 encryption (see tips here to secure your network). Change your router/modem’s default name and pre-set password.
2. Update your antivirus software – Antivirus software is always being updated (thanks to a continuous stream of new threats) so make sure yours is up to date on all your household’s devices.
3. Use a password manager – Create strong passwords on all your devices and use a password manager to keep track. Consider using two-factor authentication to add an extra layer of protection.
4. Update your devices – Operating system and software updates often include security updates. Make sure your computers, tablets, and phones are all updated. Turn on auto-updates so you don’t have to think about it.
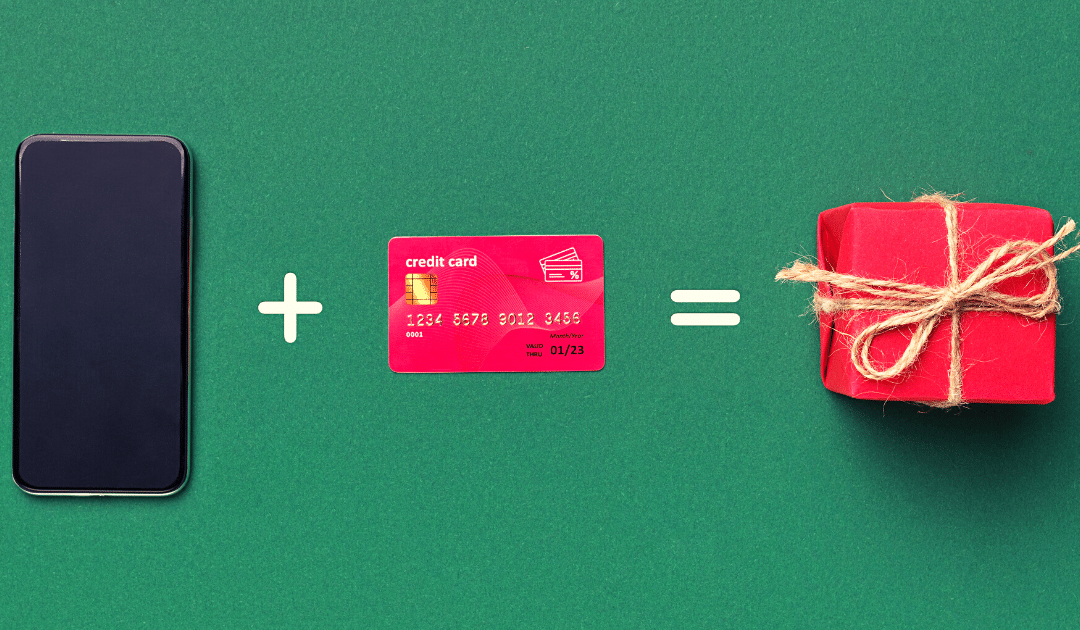
5. Use one or two credit cards and monitor them – Using just one or two cards for your holiday shopping will make it much easier to track purchases and spot any fraud early on. Some lenders will even alert you when your card logs transactions that are out of your normal spending pattern and ask your permission before completing the purchase. Mobile pay options such as Apple Pay or Google Pay also offer good protection because they use secure tokens instead of an actual card number.
6. Only shop reputable websites – Big brands and companies are more likely to have strong security on their sites’ transaction platform. But no matter the website, if a link, landing page or online shopping cart looks suspicious, log off immediately.
7. Watch for phishing – Phishing spikes during the holidays. These emails and texts usually look like they’re coming from a source or company you know. They typically ask for sensitive information such as personal or bank information and ask you to click on a link or attachment. Remember that government agencies and reputable companies will never ask you to send sensitive information this way. Delete these messages without clicking on anything. If you’re on the fence about its legitimacy, you can open a separate browser and log in to your account fresh – or call customer service to double-check.
8. Be smart on social media – If you’re headed out of town during the holidays, don’t post plans or info publicly on your social channels. This could make your home vulnerable to a break-in.
9. Be savvy with donations – Many people generously open their wallets during the holidays to help those in need or causes they support. If you’re planning on donating this year, be extra cautious. Stick to reputable, well-known charities. Contact them directly to donate, rather than clicking on a link or giving your information over the phone.
10. Watch your front porch – More online shopping means more deliveries. Bring packages in as soon as possible so they don’t tempt thieves. Neglected packages may also make it look like you’re out of town, making your home a target for burglars.
Make sure all family members are on board with, understand, and carry out the above tips before logging on to find those hot holiday deals. This includes kids and teens who are at home and on screens all day – and who usually aren’t as savvy about security and scams. For more safety tips, check out our articles here and here.
If you’re a California Casualty member, take comfort in the fact that you’re automatically enrolled in ID theft resolution services — which provides free help if you are ever the victim of identity theft. Learn more about the services here.
This article is furnished by California Casualty, providing auto and home insurance to educators, law enforcement officers, firefighters, and nurses. Get a quote at 1.866.704.8614 or www.calcas.com.
by California Casualty | Auto Insurance Info, Safety |
Teenagers and vehicles can be a deadly combination. Motor vehicle accidents are the leading cause of death in teens ages 15-20 in the United States.
It’s a terrifying thought that as a parent you can’t always be there to keep them safe when they are behind the wheel. Give yourself peace of mind by taking steps to educate your teen and give them the proper tools they need before they take off on their own.
This includes taking driver’s safety or education courses, practicing in all driving conditions, knowing what to do in an emergency, talking about the dangers of distracted driving; and most importantly doing your research and purchasing (or letting them purchase) a safe and reliable vehicle.
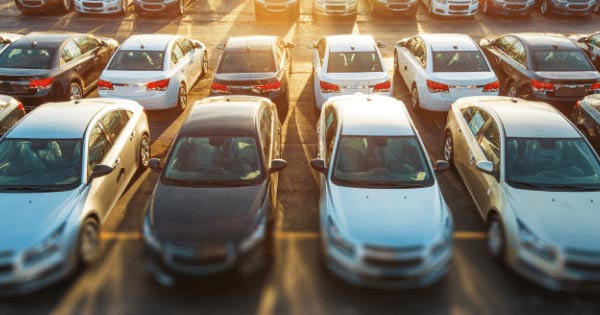
Now, we know looking for a new car can be stressful, especially with your teen who probably wants new-new and not new-to-them, so we’ve done the research for you.
Here are the best vehicles for teens in 2021 according to IIHS and Consumer Reports.
| Small cars |
Model years |
Price |
| Mazda 3 sedan or hatchback |
2014 or newer; built after October 2013 |
$8,100 |
| Toyota Prius |
2014 or newer; built after November 2013 |
$8,600 |
| Hyundai Elantra GT |
2018 or newer |
$15,200 |
| Subaru Crosstrek |
2017 or newer |
$17,900 |
| Honda Insight |
2019 or newer |
$18,200 |
| Toyota Prius Prime |
2017 or newer |
$18,200 |
| Toyota Corolla hatchback |
2019 or newer |
$18,300 |
| Kia Niro |
2019 |
$18,600 |
| Subaru Impreza sedan and wagon |
2019 |
$19,400 |
| Midsize cars |
Model years |
Price |
| Subaru Outback |
2013 or newer; built after August 2012 |
$8,700 |
| Subaru Legacy |
2013 or newer; built after August 2012 |
$8,800 |
| Mazda 6 |
2014 or newer |
$10,100 |
| Lincoln MKZ |
2013, 2016, 2018 or newer |
$10,300 |
| Honda Accord sedan or coupe |
2013 or newer |
$10,900 |
| Volkswagen Passat |
2016-17 |
$11,400 |
| Toyota Prius v |
2015-18 |
$11,600 |
| Volkswagen Jetta |
2017 |
$12,900 |
| Volvo S60 |
2016, 18 |
$14,100 |
| BMW 3 series |
2017 or newer; built after November 2016; 4-cylinder only |
$17,900 |
| Large cars |
Model years |
Price |
| Ford Taurus |
2014 |
$9,600 |
| Hyundai Genesis |
2016 |
$18,700 |
| Small SUVs |
Model years |
Price |
| Mazda CX-5 |
2014 or newer; built after October 2013 |
$9,300 |
| Nissan Rogue |
2014, 2016-18, 2020 |
$10,100 |
| Subaru Forester |
2016 or newer |
$13,500 |
| Honda CR-V |
2015 or newer |
$14,800 |
| Kia Sportage |
2017, 2018, 2020 |
$14,800 |
| Toyota RAV4 |
2015 or newer; built after November 2014 |
$14,900 |
| Honda HR-V |
2017 or newer; built after March 2016 |
$15,400 |
| Hyundai Kona |
2018 or newer |
$15,800 |
| Buick Encore |
2018-19 |
$16,300 |
| Hyundai Tucson |
2018 or newer |
$16,800 |
| Mazda CX-3 |
2019 or newer |
$17,800 |
| Volvo XC60 |
2017 |
$19,200 |
| Midsize SUVs |
Model years |
Price |
| Chevrolet Equinox |
2017, 2019 |
$13,700 |
| Nissan Murano |
2015 or newer |
$14,800 |
| GMC Terrain |
2017, 2019 |
$15,100 |
| Lexus NX |
2015-16, 2018 or newer |
$16,000 |
| Kia Sorento |
2017-18 |
$16,500 |
| Hyundai Santa Fe |
2017-19; built after March 2016 |
$18,700 |
| Ford Edge |
2018 or newer |
$19,600 |
| Mazda CX-9 |
2017 or newer; built after November 2016 |
$19,600 |
| Audi Q5 |
2016-19 |
$19,800 |
| Minivans |
Model years |
Price |
| Toyota Sienna |
2015-16 |
$13,900 |
| Honda Odyssey |
2016 |
$15,400 |
| Kia Sedona |
2017 |
$15,600 |
Remember, when looking at vehicles talk to your insurance agent to see what will save you the most with your teen on your policy. And don’t forget to look out for recalls or damage from previous owners.
This article is furnished by California Casualty, providing auto and home insurance to educators, law enforcement officers, firefighters, and nurses. California Casualty does not own the data table show above. Get a quote at 1.866.704.8614 or www.calcas.com.
by California Casualty | Auto Insurance Info, Safety |
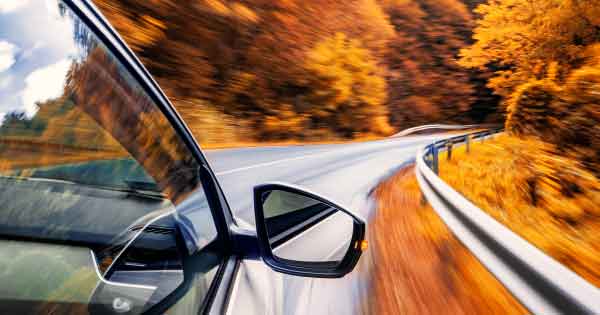
Fall brings cool, crisp weather, and beautiful colors, but it also brings its share of driving hazards. Autumn is damp and foggy in many places and temperatures tend to drop at night. These seasonal changes can impact road conditions.
Here’s what you need to know to stay safe when driving this fall.
Tip #1: Be aware of changing light patterns during shorter fall days.
Fall days naturally are shorter. The sun moves closer to the horizon, creating increased glare during sunrise and sunset hours. Once we end Daylight Savings Time on November 7, it will get darker earlier in the evening. “While we do only one-quarter of our driving at night, 50% of traffic deaths happen at night,” according to the National Safety Council. That’s because depth perception, peripheral vision, and color recognition are reduced in the dark.
-
- Keep a pair of sunglasses in your car for times when the sun’s blinding glare can obstruct your vision. In the fall, this often happens during morning and evening rush hour.
- Keep your windshield clean so that dirt streaks don’t contribute to the glare.
- Be especially careful driving in neighborhoods during dusk or dawn hours. The low light can make it harder to see children playing or people walking their dogs.
- At night, the glare of approaching headlights can be blinding. Do not wear sunglasses as they can obstruct your vision at night. The best strategy is to avoid looking directly into the lights of oncoming traffic. Glance toward the right and look for the white painted road line.
Tip #2: Slow down for leaves, which can make roads hazardous.
Autumn leaves are beautiful to behold but they’re also dangerous. Driving on wet leaves is as slippery as driving on ice. Leaves may be slippery when wet but If temperatures fall, those wet leaves actually become icy. Even dry leaves are dangerous. They can reduce traction and cause skidding. They can cover up road markings and potholes.
-
- Clean leaves off your windshield so they don’t get stuck in your wiper blades and block your vision.
- When driving on roads with leaves, slow down. Imagine hidden potholes under the leaves, which you would not want to hit at higher speeds.
- Give yourself plenty of distance between yourself and the car in front to avoid braking suddenly on a slippery surface.
- This is prime time for leaf gazing. Be aware that some drivers will have their eyes on the colorful fall foliage, rather than focusing on the road.
- Never drive through a leaf pile. Children love to jump and hide there.
- Do not park over a pile of leaves. It could create a fire hazard from the heat in your exhaust system.
Tip #3: Take care to see, and be seen, in fog.
Chilly fall mornings can create foggy conditions which reduce your visibility and the perception of distance when driving. You can take measures to see and be seen in fog.
-
- Keep your headlights on, even during the daytime in fog. Use fog lights if you have them. They are designed to shine low along the road.
- Avoid using your high beams. They do not work well in dense fog and will create a glare, making it harder for you to see.
- Keep moving at a safe speed, but put lots of distance between yourself and other drivers.
- Reduce distractions so you can focus completely on the road.
- Use your windshield wipers and defroster to keep your glass clear. Set your defroster to warm to help dry out any moisture.
- If you need to, pull over to a safe spot. However, you will want to turn off your lights. In a fog, other drivers may see lights and think you are in a traffic lane. That could cause a collision.
Tip #4: Slow down on bridges and overpasses, which can freeze before roads.
As overnight temperatures drop below freezing, you can expect morning frost. That frost can impact your commute.
-
- Warm-up your car and clear away any morning frost on your windshield and windows before driving.
- Slow down on bridges, overpasses, and shaded areas. Like the signs say, they really do freeze before roads.
- Be aware of black ice. It doesn’t have to be snowing to create those slippery surfaces.
Tip #5: Be alert for deer at dawn and dusk.
Fall is breeding season for deer. That means you may see them more as they travel to find mates. You are more likely to hit a deer in November than at any other time of year, according to the Insurance Institute for Highway Safety. An adult deer can range from 150 to 300 pounds, so hitting a deer can cause significant damage to your car as well as kill the animal.
-
- Deer are most active during dusk and dawn. Be watchful of the side of the road movement during those times, especially in areas where there are deer crossing signs.
- Deer travel in groups. If you see one cross the road, chances are there are others following.
- If you see a deer, avoid swerving. Try to come to a controlled stop and wait for the animal to pass by. Put on your hazard lights to alert other drivers that you are stopped.
Tip #6: Make sure your vehicle is in good working order.
Keeping your vehicle in top condition will help you navigate the challenges of fall driving more easily.
-
- Check your vehicle’s headlights, turn signals, and tail lights to make sure they are working. Make sure your headlights are aligned.
- Check your car’s wipers and replace the blades if they are showing signs of wear.
- Check your car’s heating system to make sure it’s working.
- Make sure your tires have enough tread and are inflated. As temperatures rise and fall, your car tires may expand and contract. This causes loss of air pressure. You will want your tires to be inflated to manufacturer specifications. Check your owner’s manual.
- Finally, make sure you have the proper car insurance. Coverage will give you peace of mind should anything happen.
This article is furnished by California Casualty, providing auto and home insurance to educators, law enforcement officers, firefighters, and nurses. Get a quote at 1.866.704.8614 or www.calcas.com.
by California Casualty | Good to Know, Safety |
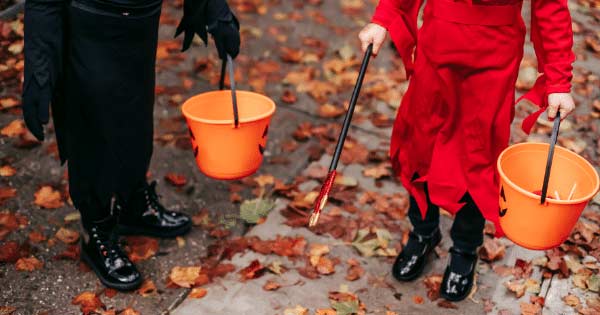
Get ready for a scary good time! Halloween is nearly here and kids everywhere will be out trick-or-treating. Remember a safe Halloween is a Happy Halloween; make sure your children are out and about in a way that they can be easily seen.
The ghosts and goblins (or more likely known as little trick-or-treaters) come out after the sun has gone down. Which is fun when you’re behind the mask, but not so fun if you are behind the wheel. When it’s dark, it’s harder for drivers to see pedestrians in the street. Add to that, excited children who may run out suddenly, and the results could be tragic. In fact, children are twice as likely to be hit by a car on Halloween than on any other day of the year.
That’s why it’s important to decide carefully on the costume your child will wear to ensure he/she is the most visible. And before they leave the house, you’ll also want to go over important pedestrian safety rules. You may even decide that accompanying your child is the best thing to do (recommended for children under 12).
Here are some more Halloween safety tips to consider for every vampire, witch, and werewolf!
Tip #1: Use reflective tape on your child’s costume.
Increase your child’s chances of being seen by adding pieces of reflective tape to his/her costume and/or jacket. Do so creatively and you may have a skeleton with glowing bones or a superhero with a gleaming emblem. Reflective tape works by reflecting light back, so wearers will be easily seen in a car’s headlights even in the pitch dark.
Tip #2: Add a glow stick or a clip-on light.
Decorate your child’s costume or candy bag with clip-on lights. These can be Halloween-themed lights or any small clip-on. Consider giving your child glow stick bracelets or necklaces; these are a festive, fun, and bright addition to any costume.
Tip #3: Select costumes with light colors.
Darker color costumes may be spooky but they are hard to see when it gets dark. When possible, choose lighter-colored outfits. If your child insists on a dark color, use tip #1 to lighten it up.
Tip #4: Choose face paint over masks.
Masks can block your child’s vision and depth perception. They also cover up your trick-or-treater’s face so it may not be easily seen. Face paint is a great alternative. You can even find glow-in-the-dark varieties for more visibility. Choose a face paint that is labeled safe for use with children. Test it on your child’s arm before Halloween. If you want a natural version, you can make homemade face paint.
Tip #5: Travel in groups and carry a flashlight.
Whether you walk around with your kids, or they travel with their friends, insist that they go in groups. Large groups – especially with both adults and children – are easier to see. If one or more group members carry a flashlight, that’s added protection. Having an adult also will help keep trick-or-treaters safe. The excitement of Halloween can overtake a child’s focus on safety.
Tip #6: Don’t walk and text.
You may often text while you’re walking but it’s not a good idea –and while supervising children on Halloween, it’s an especially bad idea. A study from Stonybrook University showed that we are 61 percent more likely to veer off course when we are walking and texting. Not only could you walk into traffic – or other people – or step off the curb, but your attention is distracted from the trick-or-treaters in your care.
Tip #7: Choose safe, lighted routes.
If you are able, choose a residential neighborhood with street lights and sidewalks for trick-or-treating. Walk on the sidewalk and cross at the corner, looking first for cars. If there are no sidewalks, and you need to walk in the street, you should keep to the left and walk facing cars. This will ensure you see cars coming toward you. Halloween is not the time to jaywalk; it can be especially dangerous. Do not walk out between cars, and definitely do not run into the street for any reason.
Tip #8. Watch for cars.
Watch for cars that are turning corners or pulling out of driveways. They could surprise you if you’re not expecting them—and you could surprise them by being in their path. If you’re the one driving at night on Halloween, look out for pedestrians.
For more safety tips, see our blogs on Halloween fire safety and Halloween safety tips for pets.
Have a Happy Halloween!
This article is furnished by California Casualty, providing auto and home insurance to educators, law enforcement officers, firefighters, and nurses. Get a quote at 1.866.704.8614 or www.calcas.com.
by California Casualty | Homeowners Insurance Info, Safety |
You’re used to seeing fire extinguishers in public buildings such as offices and schools in case of an emergency. But would you be prepared if a fire broke out at home? Almost 400,000 home fires happen every year in the U.S., causing thousands of deaths and millions of dollars in losses, but still,1 in 4 Americans say they don’t have a fire extinguisher in their home.
While you may not be able to predict a house fire, you can protect your family by being prepared. That includes owning fire extinguishers, knowing how to use them, checking your smoke alarms, and having a family disaster plan.
If you are one of the families that currently doesn’t own any fire extinguishers – we strongly recommend purchasing one as soon as you can. Don’t worry, there are other steps you can take to safely contain a small home fire. Here are some helpful home fire safety tips and guidance.
Know not all fires are the same.
Some fires are oil-based. Others are sparked by electricity or chemicals. Still, other fires are non-chemical. The way you put out a fire depends upon the type. It’s very important to know the kind of fire. In some cases, if you choose the wrong way to try to extinguish a fire, it could make it even worse.
Here’s how to put out a cooking fire.
Kitchens are common places for home fires. When you turn on your stove, you ignite a flame. If that flame combines with cooking grease, a fire can erupt. Fires also can easily start if you leave a stove unattended and the food or liquid in the pan or pot starts to burn.
Water will not work on kitchen fires- which are oil or grease-based. Upon contact with the oil, the water molecules quickly heat to steam and cause the oil to explode in all directions.
The best way to put out a cooking fire is to “snuff it out”. You want to cut the flow of air to the fire. Here are some options:
-
- If the fire is small enough, cover it with a metal cooking lid or cookie sheet. Keep it covered until it has cooled.
- Cover the fire with a fire blanket, a large piece of fire-resistant material such as fiberglass.
- Don’t swat at the flames. This could create airflow and make the fire worse, or ignite your clothes.
- Pour a large quantity of salt or baking soda over the fire. Make sure it is salt or baking soda and not flour. Flour adds fuel to the fire and will cause it to burn (or even explode).
- Turn off any heat source.
- If your fire is in the oven or microwave, keep the door shut. While it may look scary, the lack of air will eventually extinguish the fire.
Here’s how to put out a chemical fire.
Many common household items are chemical-based and highly flammable. This includes alcohol, rubbing alcohol, hand sanitizer, products in aerosol cans, nail polish and remover. Exposing any of these chemicals to an open flame is dangerous. Even doing your nails near a lit candle can spark a chemical fire.
Chemical fires are similar to cooking grease fires. You never want to use water to put out a chemical fire. It could cause the fire to spread.
Here’s how to handle a chemical fire:
-
- Cover the fire with a fire blanket.
- Pour a large quantity of baking soda or sand on the fire.
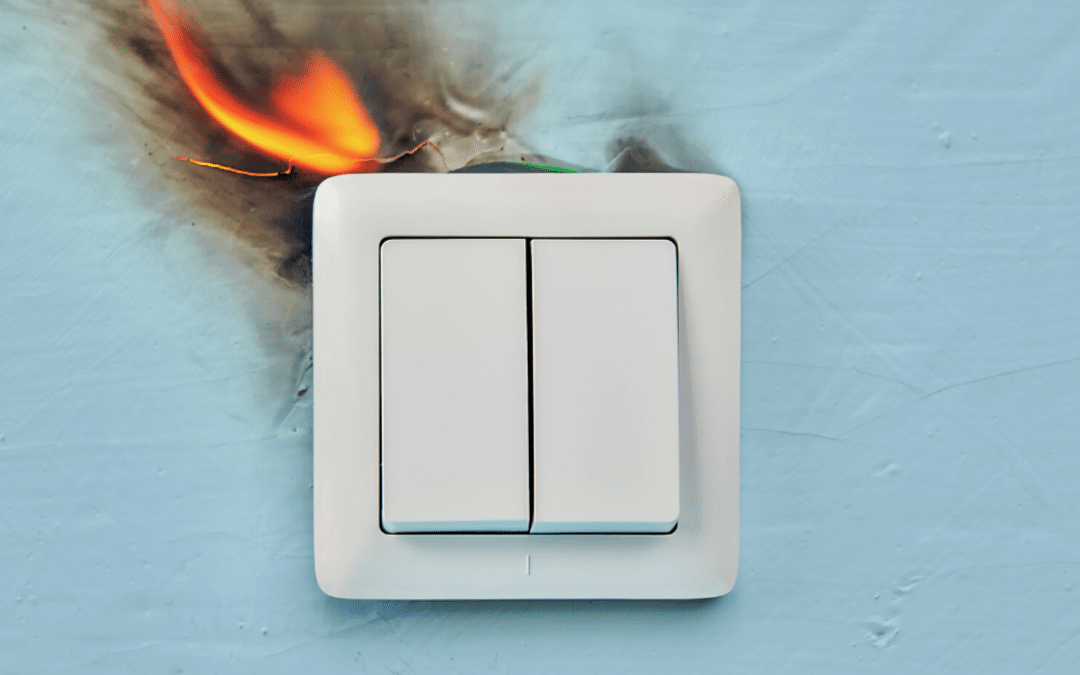
Here’s how to put out an electrical fire.
There are many possible causes of electrical fires. They can start due to overloaded circuits, faulty electrical outlets, and outdated appliances. Worn or frayed cords can cause heat to reach flammable surfaces in your home such as curtains and rugs. Installing a light bulb with a wattage that is too hot for the fixture can ignite fires. Electric space heaters also are known for starting fires when their coils are placed too close to couches, curtains, bedding, and rugs.
Never use water to put out an electrical fire. Water conducts electricity, and if you douse an electrical fire with water, you could be electrocuted.
Here’s some guidance on how to put out an electrical fire.
-
- If it is safe to do so, unplug the device causing the fire.
- Turn off the electricity on the house’s breaker box.
- Smother the flames by pouring baking soda onto them.
Here’s how to put out ordinary fires.
Ordinary fires involve paper, wood, clothing, trash, or plastic. This type of fire may occur if you knock over a candle or get a spark from the fireplace.
Unlike the other fires, these do respond well to water.
-
- Grab a bucket and fill it with water. Douse the flames.
- If you’re dealing with a wood-burning fireplace, you may wish to skip the water. That will create a mess and spread ashes throughout the room. Consider spreading out the logs and embers, and covering them with sand or baking soda.
Don’t try to put out a large fire by yourself.
If the fire becomes larger or out of control, you do not want to try to contain it. Your safety comes first. Get out of the house and call 9-1-1.
A fire extinguisher is a good investment for your home.
Finally, if your home does not have a fire extinguisher, you should invest in one. Fire extinguishers use either water, foam, dry powder, CO2, and wet chemicals to extinguish fires. Some use a combination. The basic classifications for home use include:
-
- Class A – This type is used on any fire that may be extinguished with water.
- Class B – This type is used for flammable liquids and grease fires.
- Class C – This type is used for fires involving electrical equipment.
Review your coverage with your homeowner’s insurance to know how you are covered in the event of a fire.
To help prevent fires in your home, see our blog on home fire safety tips.
This article is furnished by California Casualty, providing auto and home insurance to educators, law enforcement officers, firefighters, and nurses. Get a quote at 1.866.704.8614 or www.calcas.com.
by California Casualty | Homeowners Insurance Info, Safety |
Hurricanes are natural disasters that bring demolishing winds and massive amounts of rainfall to land from the ocean. Coastal towns and cities across the world have been torn apart by hurricanes, but they aren’t the only ones who are usually affected. Hurricanes can cause significant damage to towns over 100 miles inland! September, is the most active month of the year, so now is the time to protect yourself and your family from these deadly natural disasters.
The relative lack of storms so far this hurricane season is bringing both good and bad news. While we are all taking a sigh of relief that there has yet to be a major storm, it could also be bringing a false sense of security. Many people in states where hurricanes usually hit may be “dropping their guard.” A new survey finds only a quarter of those living in hurricane-prone states think they are prepared if a monster storm hits, and nearly half of the respondents say they have yet to make any preparations this year.
Remember all hurricanes, no matter what size, have the potential to cause significant damage and life-threatening situations. Looking back at the destruction previous hurricanes like Harvey, Sandy, and Katrina have caused, it is essential that you make sure your family, home, and belongings are completely protected.
Important Hurricane Coverages:
- Flood Insurance. A regular home insurance policy will not pay for damages caused by flooding, but when you add flood insurance to your policy it will cover all damages that happen to your property, even if you rent! Be aware that when you add flood insurance there is a 30-day waiting period until it goes into effect, so that means it is often too late to purchase it when a hurricane or tropical storm is approaching.
- Scheduled Personal Property Insurance (Floater). Many people find that after a natural disaster their insurance coverage is limited on expensive personal items (ex. jewelry, furniture, technology, firearms, collectibles, furs, instruments, etc.). Floaters protect your personal items for their full value.
Steps to Protect Your Home & Family
- Heed evacuation notices and keep your car’s gas tank full in case of evacuations
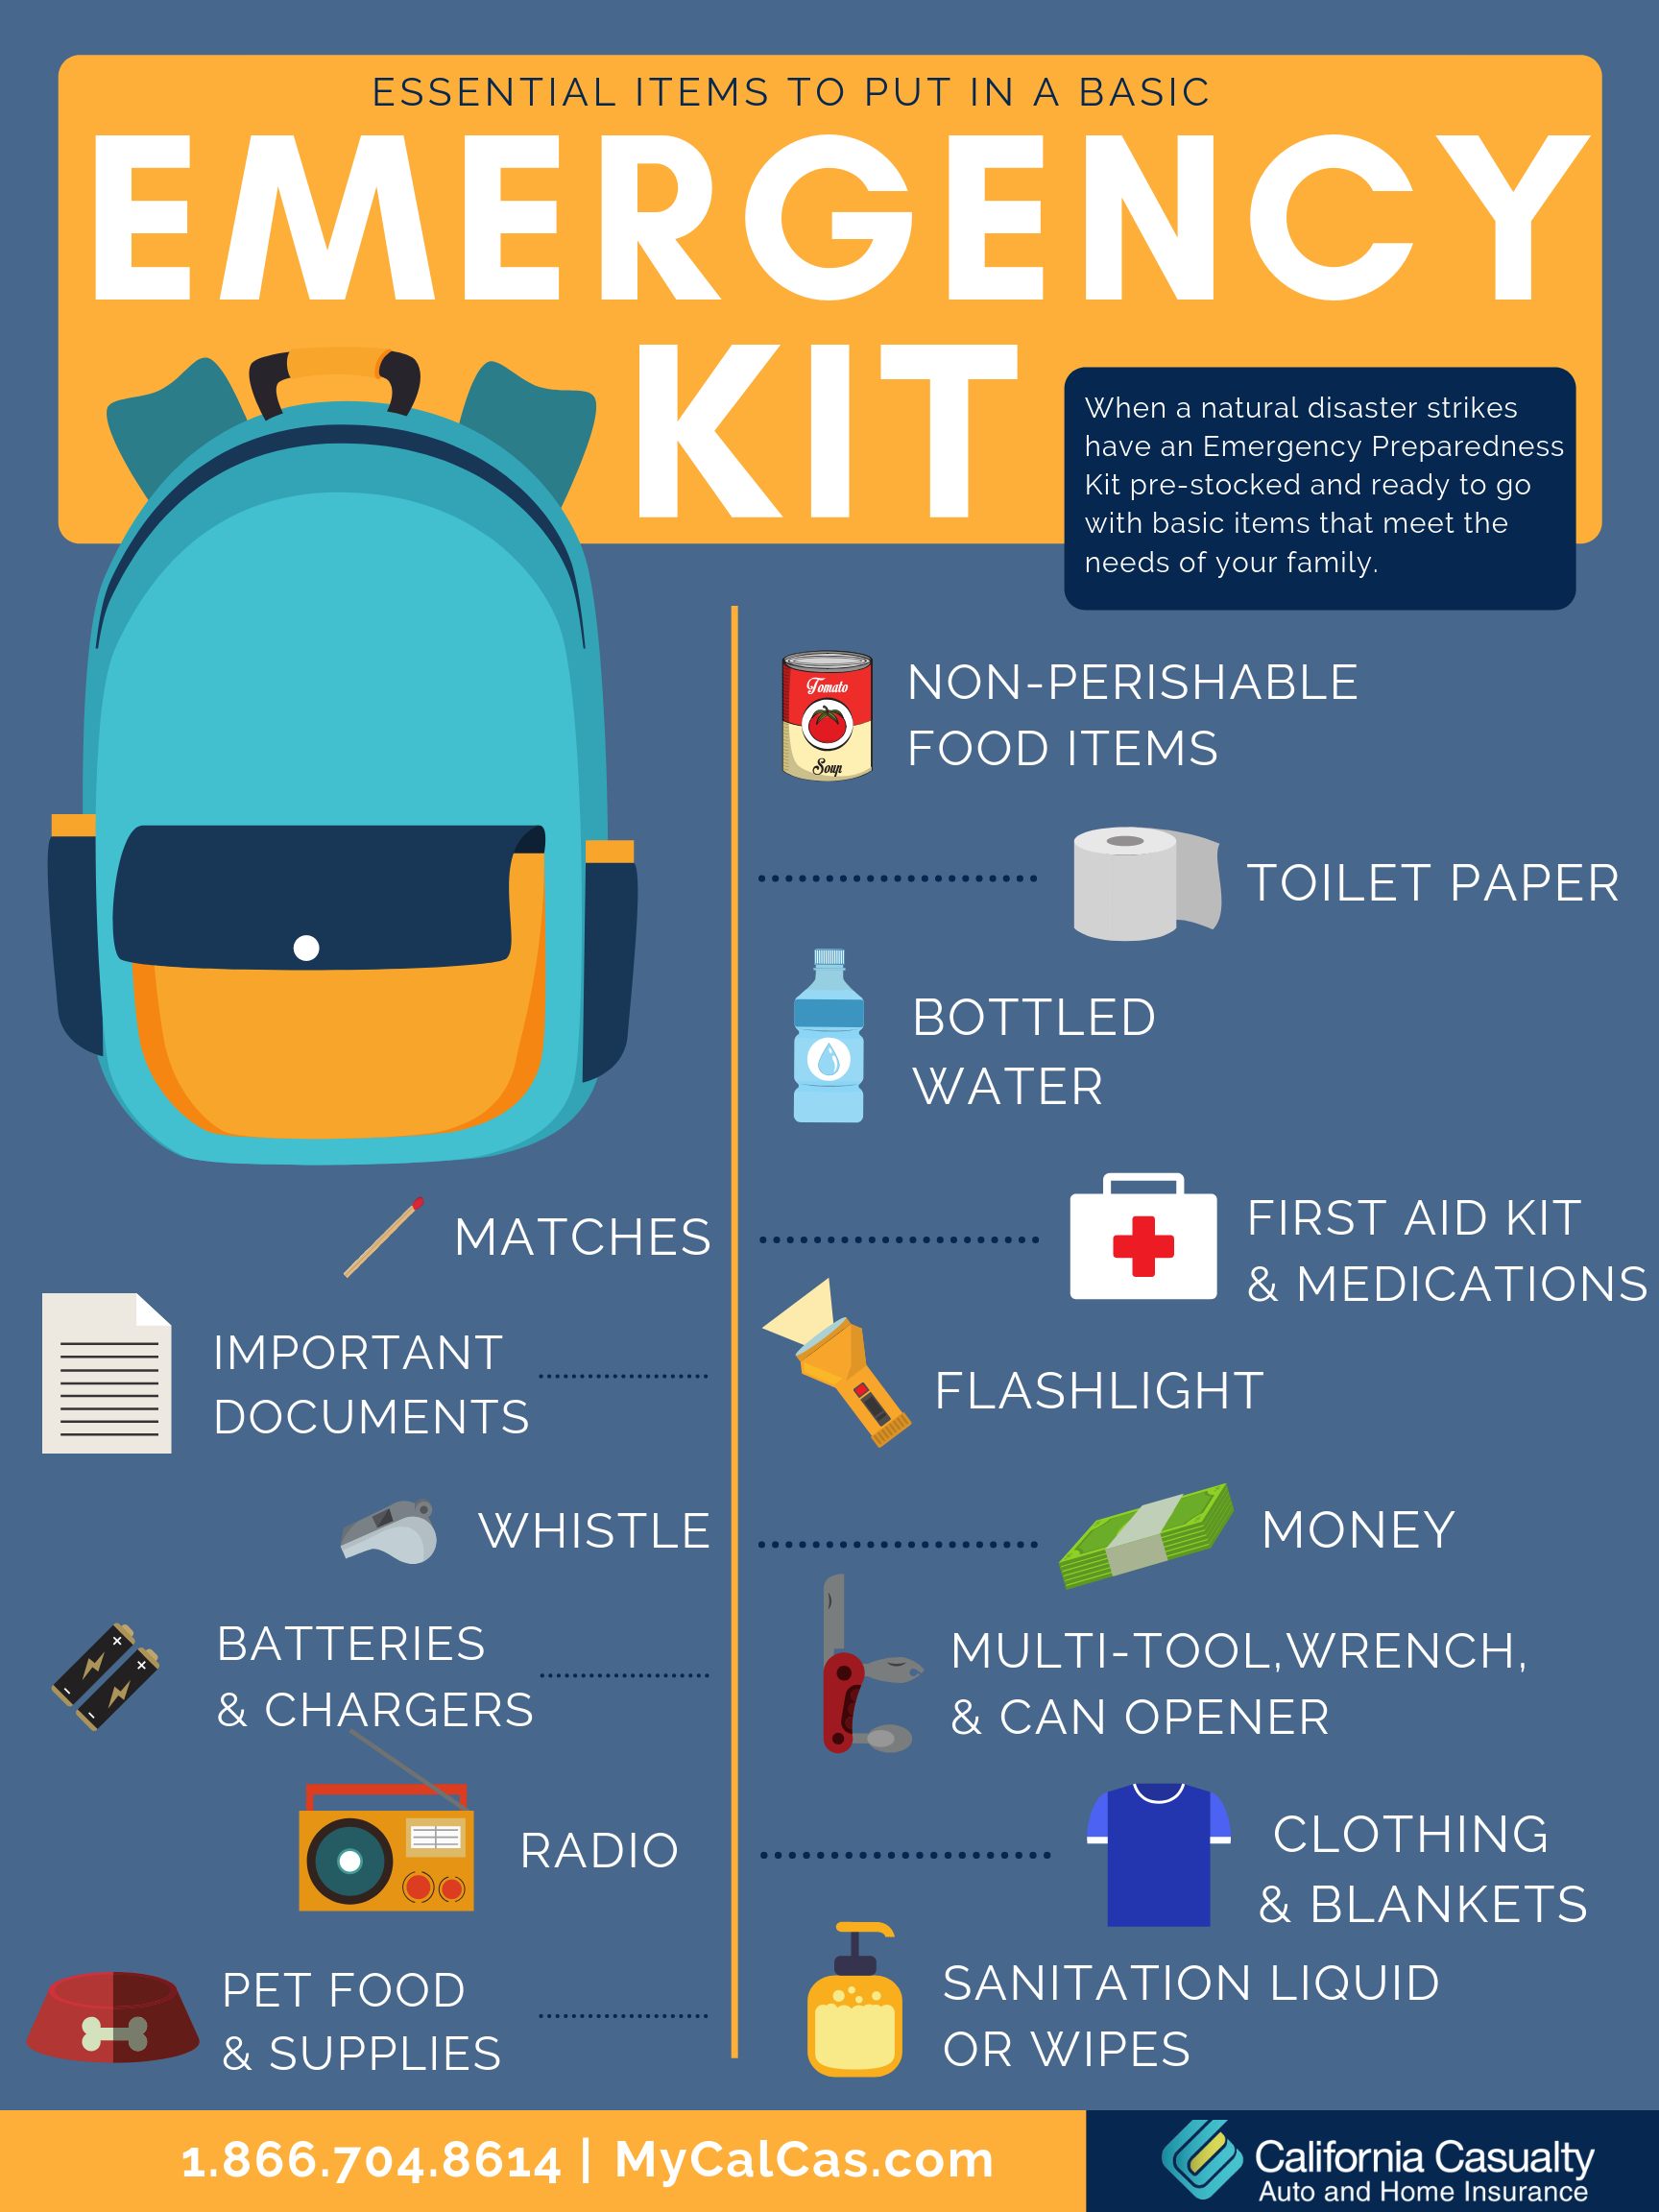
- Stock up on essentials like bottled water, non-perishable food items, toilet paper, and pet food
- Make sure pets are kept inside, safe, and have a spot to do their “business”
- Have a family evacuation and communication plan
- Prepare an emergency kit (ex. flashlight, medicines, cash, and important documents)
- Get a NOAA Weather Radio
- Sign up for National Weather Service storm texts at https://www.weather.gov/subscribe-hurricaneinfo
- Charge cell phones and other devices and have charged spare batteries
- Install storm shutters or purchase 5/8 exterior grade or marine plywood to cover windows or doors
- Add straps or additional clips to roofs to reduce damage
- Bring in or secure anything that can be propelled by wind (ex. grills, bicycles, lawn furniture, play equipment, etc.)
- Know how to turn off propane tanks and gas lines
After a Hurricane Strikes
- Make sure you, your family, and pets are safe and secure
- Register yourself as “safe” on the Safe and Well website
- Follow all city boil and curfew orders
- Secure the property from further damage or theft
- Contact your insurance company as soon as possible
- Keep or document receipts and other expenses if you are evacuated or forced to find another place to live because of damage to your home or apartment
- Be wary of unscrupulous contractors following a natural disaster
It’s important to know that flooding and storm surge are the biggest threats to life when hurricanes hit. Leave low-lying areas, never drive or cross through running water, and avoid rivers, streams, and creeks; which could flash-flood.
For more information visit:
https://www.ready.gov/hurricanes
https://mycalcas.com/?s=hurricane
https://www.iii.org/article/preparing-hurricane
https://www.cdc.gov/features/hurricanepreparedness/index.html
https://www.redcross.org/get-help/how-to-prepare-for-emergencies/types-of-emergencies/hurricane.html
This article is furnished by California Casualty, providing auto and home insurance to educators, law enforcement officers, firefighters and nurses. Get a quote at 1.866.704.8614 or www.calcas.com.
