
by California Casualty | Auto Insurance Info, Helpful Tips, Safety |
Whether you’re driving down a dark back road, navigating a rain-soaked highway, or flashing your brights to warn another driver, your headlights are doing far more than simply lighting the way. They’re keeping you safe, visible and aware of everything ahead. From classic halogen bulbs to cutting-edge LED, today’s vehicle headlights come in a variety of types — each designed to improve your driving experience in different conditions.
Before we get into the specifics, let’s break down the components that create that important illumination. Headlights are generally defined by three core factors:
- Halogen, HID, LED, or laser: the source of the light
- Reflector or projector housings: the architecture that shapes and directs the beam
- Adaptive systems: the intelligence that moves the light as you drive
Each layer plays a different role, and together they determine how confidently you can read the road ahead — and how clearly other drivers can see you coming.
The Light Source
Halogen Headlights (about 700 lumens)
How they work: When electricity flows through a tiny metal wire inside the bulb, the wire gets extremely hot. Because the bulb is filled with halogen gas, the heat makes the wire glow brightly, creating the light you see from a halogen headlight.
Halogen headlights are the most traditional type and are still common in older vehicles and budget-friendly cars. In setups that use separate bulbs for low and high beams, halogens are often the choice for high beams. Their main advantage is cost — they’re inexpensive to produce and replace. However, they use more energy and don’t last as long as newer lighting technologies.
High-Intensity Discharge (HID) Headlights (about 3,000 lumens)
How they work: HID headlights don’t use a wire to make light. Instead, they create a tiny electrical spark between two metal points inside a bulb filled with special gas. That spark glows extremely bright, producing a strong, efficient beam of light.
HID headlights — often referred to as Xenon headlights if they use Xenon gas — deliver a bright, intense light that makes nighttime driving noticeably clearer. Their distinctive bluish-white glow has made them a popular aftermarket upgrade.
LED Headlights (about 2,000-4,000 lumens)
How they work: LED headlights use tiny electronic components called diodes. When electricity flows through them, the movement of electrons creates light instead of heat. By grouping many of these small LEDs together, manufacturers can produce a bright, efficient, and tightly focused beam for the road.
LED headlights have become the go‑to choice for many modern vehicles—and for good reason. They’re extremely energy‑efficient, long‑lasting, and adaptable. Although they can be more expensive to replace, LEDs typically outlast halogen and HID bulbs by several years, which helps offset the cost.
One of their biggest strengths is flexibility. LEDs can be arranged in complex matrix patterns, allowing both low and high beams to be built into the same housing. Individual sections can brighten or dim independently, working seamlessly with automatic high‑beam assist systems that rely on forward‑facing cameras.
Laser Headlights (Advanced/Limited-Use Technology)
How they work: Laser headlights don’t shine lasers onto the road. Instead, tiny laser diodes fire into a phosphor material, which then produces a very bright white light.
Laser headlights represent the cutting edge of automotive lighting, but their high cost and limited availability mean they’re mostly found in luxury and performance vehicles. Because they generate such an intense beam, they’re usually paired with LED systems and often activate only at higher speeds to extend high‑beam range.
The Shape and Direction
While the bulb creates the light, the housing determines how that light is shaped and aimed.
- Reflector Headlights: Reflector headlights are the old-school standard. Early designs featured a bulb placed inside a reflective steel bowl, covered by a glass or plastic lens. The bowl spread the light, while the lens helped direct it forward. Over time, mirrored surfaces improved beam control and made it possible to replace just the bulb instead of the entire unit.
- Projector Headlights: Projector headlights take things a step further. In addition to the bowl, mirrors, and bulb, they include a magnifying lens that increases brightness and precision. A built-in shield directs the light downward, reducing glare for oncoming drivers. Projector housings can accommodate halogen, HID and LED bulbs, making them a common choice in modern vehicles.
The Intelligence
Adaptive Headlights
Adaptive headlights represent the most advanced lighting systems on the road today. These headlights can adjust brightness, direction, and beam pattern based on steering angle, speed, road conditions, and surrounding traffic. As you turn the steering wheel, the headlights swivel to illuminate curves and corners more effectively — improving visibility while helping to reduce glare for oncoming drivers.
A Word About Headlight Alignment
Even the best headlights won’t perform well if they’re not aimed correctly. Over time, bumps, vibrations, and normal wear can knock them out of alignment, reducing how far and how evenly they illuminate the road.
How to check alignment:
- Park within 5 feet of a wall or garage door.
- Mark the center of each beam with painter’s tape in a cross shape.
- Back up 20–25 feet.
- If the beam no longer lines up with the tape marks, the headlights need adjustment.
For the most accurate results, have a professional handle the alignment.
When to Replace Your Headlights
Halogen bulbs typically last around five years, though this varies with use. Consider replacing or testing your headlights if you notice:
- Dimming or reduced visibility
- Flickering or inconsistent brightness (may point to electrical issues, not just worn bulbs)
- One bulb burning out (the other is usually close behind)
Note that cloudy or yellowed headlight lenses can sometimes be restored with cleaning or polishing kits.
And while proper maintenance goes a long way, having the right insurance adds an extra layer of confidence every time you drive. Safe travels from all of us at California Casualty.
This article is furnished by California Casualty, providing auto and home insurance to educators, law enforcement officers, firefighters, and nurses. Get a quote at 1.866.704.8614 or www.calcas.com.
by California Casualty | Helpful Tips, Homeowners Insurance Info, Safety |
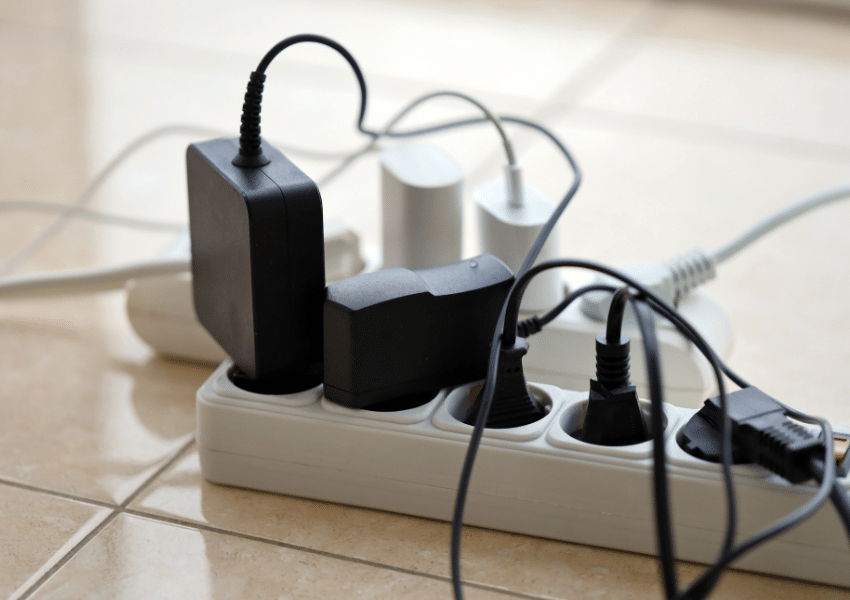
From curling irons to coffee makers, it’s tempting to plug just about everything into your power strip. But not all devices are meant to share that space. In fact, plugging the wrong items into a power strip can quietly overload your system and increase the risk of damage or even fire. Before you add one more cord, here’s what you need to know.
Power Strips vs. Surge Protectors: What’s the Difference?
Power strips are simply electrical outlets attached to a cord. They plug into a wall outlet to give you more places to plug things in.
Surge protectors, on the other hand, are power strips with a built-in safety feature. If there’s a sudden spike in electricity — such as during a lightning storm or a brief power fluctuation — they redirect excess voltage away from your devices to help prevent damage.
While surge protectors add a layer of protection, neither power strips nor surge protectors are designed to handle high-wattage appliances.
What Happens When You Overload a Power Strip?
Every device pulls a certain amount of electricity. When the combined demand of everything plugged into a power strip exceeds what it’s rated for, a power strip can overload. That overload can cause:
- Overheating
- Melted wiring or outlets
- Sparks
- Electrical fires
- Permanent damage to appliances
Most household power strips are rated for 15 amps at 120 volts, which equals 1,800 watts total. You can usually find this information printed on the strip’s label. Before plugging in any device, make sure its wattage keeps the total below this limit. As you add more devices, keep a running total to avoid exceeding the strip’s capacity.
Avoid Plugging in These Items
Just because a plug fits in a power strip doesn’t mean it belongs there. The items below use a lot of electricity — often in sudden bursts — which can overload a power strip and create serious safety risks.
1. Air Conditioners: Air conditioners cycle on and off, creating power spikes. Their continuous high electrical draw can overheat a power strip and melt internal wiring.
2. Air Fryers: Air fryers use short bursts of extremely high wattage. These surges can overwhelm a power strip and damage both the strip and your appliance.
3. Blenders: Blenders have powerful motors that draw a high amount of wattage, especially at startup—far more than a power strip can safely handle.
4. Curling Irons & Flat Irons: Hair styling tools heat quickly and often draw over 1,500 watts, pushing most power strips to their limit.
5. Coffee Makers: Coffee makers rely on heating elements that require intense bursts of power, increasing the risk of overheating or electrical damage.
6. Dehumidifiers: Like air conditioners, dehumidifiers use compressors that cycle on and off, causing power surges and sustained electrical loads.
7. Electric Blankets: These blankets contain heating elements that draw significant wattage for long periods, making them unsafe for power strips.
8. Extension Cords: Never plug an extension cord into a power strip. This practice, known as daisy chaining, is a well-known fire hazard.
9. Hair Dryers: Hair dryers frequently pull 1,500 watts or more, making them one of the most common causes of overloaded strips.
10. Microwaves: Microwaves draw between 1,000 and 1,500 watts and use powerful motors, which far exceeds what a standard power strip can handle.
11. Power Tools: Table saws, circular saws, chop saws, and air compressors all have high startup amperage surges that can overload a strip instantly.
12. Refrigerators: Refrigerators use compressors that cycle repeatedly, pulling a high current each time they start — something power strips aren’t built for.
13. Space Heaters: Drawing around 1,500 watts, space heaters push power strips to their absolute limit. Their constant cycling makes them especially dangerous.
14. Toaster Ovens: With powerful heating elements and rapid bursts of high wattage, toaster ovens should always be plugged directly into a wall outlet.
15. Washing Machines & Dryers: These appliances require high-current loads and, in many cases, 240-volt outlets. Power strips are never appropriate for them.
Warning Signs Your Power Strip Is Overloaded
Power strips don’t always fail dramatically. Often, they give subtle warning signs first. Knowing what to look for can help you catch a problem early and prevent damage or fire risk.
- The strip feels warm or hot to the touch
- The circuit breaker trips frequently
- Devices shut off unexpectedly
If you notice any of these signs, unplug devices immediately and move high-powered items to a wall outlet.
The Safer Rule of Thumb
If an appliance:
- Produces heat
- Has a motor
- Uses a compressor
- Or draws a lot of power
…it belongs directly in a wall outlet, not a power strip.
Finally, make sure to fully protect your home with the right insurance. If despite your best efforts to follow all the safety rules, a fire was to happen, your policy can provide added peace of mind.
This article is furnished by California Casualty, providing auto and home insurance to educators, law enforcement officers, firefighters, and nurses. Get a quote at 1.866.704.8614 or www.calcas.com.

by California Casualty | Helpful Tips, Homeowners Insurance Info |
While older homes are known for their craftsmanship and character, they often require extra attention when it comes to safety. Understanding potential hazards — from lead paint to carbon monoxide — can help you take the right steps to maintain a safe and healthy living environment. Here’s what you need to know.
Electrical Systems: When Yesterday’s Wiring Meets Today’s Demands
Many homes built before the 1940s still contain knob-and-tube or aluminum wiring. While these systems may have worked just fine decades ago, they often can’t handle the electrical load of today’s appliances, devices, and technology. That strain can increase the risk of overheating and fire.
Warning signs that your electrical system needs attention include flickering lights, frequently blown fuses or tripped breakers, and an overreliance on extension cords or power strips. Unusual odors or a burning smell near outlets are serious red flags. Stop using the outlet immediately and contact a professional.
Having a licensed electrician inspect your wiring is one of the smartest investments you can make in an older home. An evaluation will confirm whether your system is up to code and help identify upgrades that can significantly improve safety.
Plumbing: Old Pipes, New Problems
Older homes often have a patchwork of plumbing materials, including cast iron, galvanized steel, polybutylene, and even lead pipes. Over time, these materials can corrode, crack, or restrict water flow.
Galvanized steel pipes, in particular, are prone to corrosion that can cause low water pressure and discoloration, while polybutylene pipes are known for leaks and sudden failures. Slow or frequently clogged drains — in bathrooms, kitchens, or basement floor drains — can also indicate aging pipes.
Another hidden concern lies underground. Sewer lines in older neighborhoods may be compromised by roots from mature trees, potentially leading to backups and basement flooding. Replacing aging plumbing with modern materials like copper or PEX can reduce leaks, improve water quality, and prevent expensive damage down the road.
Heating, Cooling, and Insulation: Comfort Challenges in Historic Homes
Many older homes were built long before central air conditioning was common. Radiator heating systems are still found in houses from the early 1900s, and these homes often lack ductwork entirely. Thick plaster walls or walls that are too thin can make adding ducts difficult or impractical, leaving homeowners reliant on window units or ductless air conditioning systems.
Energy efficiency is another challenge. Drafty windows, uninsulated attics, and gaps around doors allow heated and cooled air to escape, driving up energy costs. Improving insulation, sealing cracks, and upgrading heating and cooling systems can make a noticeable difference in comfort and efficiency without sacrificing historic character.
Hazardous Materials: Hidden Risks You Can’t Ignore
Homes built before the late 1970s are more likely to contain hazardous materials, including lead paint and asbestos.
Lead-based paint is particularly dangerous for children and pregnant women. Even if it’s been painted over, deteriorating lead paint can create toxic dust and chips. Federal law requires sellers and landlords to provide a lead disclosure for properties built before 1978, and homeowners can use lead test kits or hire certified inspectors for peace of mind.
Asbestos may be found in insulation, floor tiles, siding, or roofing materials. When disturbed, asbestos fibers can cause serious lung disease and cancer, making professional removal essential.
Radon is another invisible threat. This naturally occurring radioactive gas forms from decaying rock and soil and can accumulate in homes, especially those with dirt or stone foundations. Testing is the only way to know if radon levels are high, and professional mitigation systems can effectively reduce exposure.
Windows and Doors: Drafts, Decay, and Energy Loss
Wooden window and door frames in older homes can rot or warp over time, making them difficult to open, close, or seal properly. Single-pane glass, which is common in vintage houses, offers little insulation and can significantly increase heating and cooling costs. Inspect windows and doors for drafts, gaps, and signs of decay. Installing weatherstripping, applying sealants, or upgrading to energy-efficient replacements designed to match the home’s style can improve comfort without compromising aesthetics.
Moisture and Mold: A Silent, Spreading Problem
Older homes weren’t built with modern moisture barriers, making them more susceptible to water intrusion, flooding, and mold growth. Basements and crawl spaces are particularly vulnerable, especially if the foundation has cracks or drainage issues. Plaster walls can also absorb moisture, creating ideal conditions for mold.
Mold isn’t just unsightly; it can pose serious health risks. Addressing moisture issues promptly is key. That may include improving exterior drainage, sealing foundation cracks, increasing ventilation, installing sump pumps, or applying waterproof coatings to basement walls.
Pest Infestations: Unwanted Tenants
Termites, carpenter ants, and rodents are especially attracted to older homes with untreated wood and small entry points. Left unchecked, pests can cause significant structural damage. Regular inspections and prompt treatment can help protect both your home and your investment.
Structural Issues: The Weight of Time
Decades of settling, moisture exposure, and pest activity can weaken a home’s foundation, beams, and joists. Homes built before the 1940s often rest on stone, brick, or early concrete foundations that don’t meet modern building standards.
Warning signs include uneven or sloping floors, doors that won’t close properly, cracks near ceilings or doorways, bowing walls, and large horizontal foundation cracks. Addressing structural issues early can prevent more extensive — and expensive — repairs later.
Roofing: First Line of Defense Against the Elements
Slate, clay tile, and wood shingle roofs are beautiful and durable, but even these materials wear down over time. Cracked tiles, missing shingles, water stains on ceilings, or visible sagging are signs it’s time for a professional inspection. Staying proactive helps prevent leaks and costly water damage.
Historical Preservation: When Rules Apply
If your home is located in a historic district or designated as a landmark, renovations may be subject to strict guidelines. Certain materials or methods may be required, and repairs often need specialized craftsmen. Understanding local regulations and working with experienced professionals can save time, money, and frustration.
Unique Insurance Considerations
Older homes can present unique insurance challenges, from higher repair costs to the need for specialized coverage. Rebuilding with like-kind materials, meeting updated building codes after a loss, or insuring valuables may require additional planning. A knowledgeable insurance provider can help ensure your coverage reflects the true needs of your home.
Owning an older home means embracing both its beauty and its quirks. With regular inspections, thoughtful upgrades, and a proactive approach to maintenance and insurance, you can enjoy its character while keeping your household safe and secure.
This article is furnished by California Casualty, providing auto and home insurance to educators, law enforcement officers, firefighters, and nurses. Get a quote at 1.866.704.8614 or www.calcas.com.

by California Casualty | Helpful Tips, Homeowners Insurance Info |
When your apartment is short on square footage but long on stuff, every inch suddenly feels like prime real estate. Closets overflow, kitchen cabinets turn into a never-ending game of Tetris, and don’t even get started on where to stash that extra set of sheets. The good news? You don’t need a bigger place — or a landlord’s permission — to get organized. With a little creativity and a few clever storage hacks, even the smallest apartment can feel spacious, stylish, and totally livable.
Start at the Door: Tame the Entryway Chaos
Your entryway sets the tone for your entire apartment, and it’s often the first place that clutter piles up. Even a tiny corner by the door can function as a drop zone with the right setup.
- Create a DIY entryway organizer using adhesive hooks, narrow shelving, or a pegboard so everything has a dedicated spot.
- Add a slim coat rack or a small storage bench for jackets, bags, and shoes.
- Baskets or bins under a bench help keep footwear out of sight.
Think Vertically (Your Walls Are Working Overtime)
When floor space is limited, the solution is simple: look up. The higher you go, the less clutter you see at eye level, which makes the whole apartment feel more open.
- Tall bookcases or floating shelves above the couch, bed, or desk keep clutter off surfaces and draw the eye upward.
- Wall hooks aren’t just for coats; use them for hats, bags, headphones, or even kitchen tools.
- Over-the-toilet shelving instantly adds storage in bathrooms without taking up valuable floor space.
- Over-the-door organizers are the unsung heroes of small apartments. Use hanging pocket organizers not just for shoes, but for:
- Pantry items or produce
- Cleaning supplies
- Hair tools and beauty products
- Hats, scarves, and gloves
Choose Furniture That Pulls Double Duty
In a small apartment, every piece of furniture should earn its keep. If it doesn’t multitask, it might not deserve a spot.
- Storage ottomans hold blankets, books, or extra pillows while doubling as seating.
- Beds with built-in drawers or hidden storage headboards eliminate the need for extra dressers.
- Use a dresser as a TV stand to sneak in additional storage.
- Fold-down dining tables or wall-mounted desks give you flexibility without sacrificing space.
Maximize What You Already Have
You don’t need new furniture to create more storage — you just need better organization.
- Cabinet door caddies are perfect for spices, cleaning supplies, or hair products.
- Double closet rods instantly double hanging space for clothes.
- Wall hooks inside closets keep belts, bags, and accessories from getting tangled.
- Under-bed storage bins are ideal for off-season clothes, shoes, or extra linens.
- Pegboards can organize everything from kitchen tools to office supplies.
- Stackable bins or storage cubes — especially clear or wire — let you see everything at a glance.
- Pull-out shelves for deep cabinets prevent items from getting lost in the back. (Ask your landlord’s permission if you’re installing them.)
Don’t Ignore the Corners
Corners are often wasted space, but they don’t have to be. Every awkward angle is an opportunity in disguise.
- Corner shelving units provide storage without dominating the room.
- Corner desks are perfect for work-from-home setups.
- Add a small chair or stool for flexible seating that tucks neatly away.
Get Creative with Sleeping Arrangements
Your bed takes up a lot of space. Make it work harder.
- Loft beds or Murphy beds free up floor space for a desk, sofa, or storage underneath.
- Ottoman beds offer hidden storage for bulky items.
- Sofa beds or daybeds are perfect for hosting overnight guests without sacrificing everyday space.
Storage That Doubles as Style
Storage doesn’t have to be boring; it can be part of your décor.
- Hang hats, scarves, or bags on the wall for a functional display.
- Use a cork wall or pegboard to showcase jewelry alongside photos or artwork.
- Hang a curtain or add a room divider to define spaces, then place storage cubes behind it.
- Think outside the box:
- A garden hose holder becomes a storage caddy
- A wine rack stores rolled towels
- A toilet paper holder organizes hair tools
- Storage ladders are both decorative and practical. Drape blankets, hang towels, or clip baskets to the rungs.
- Hang pots and pans to free up cabinet space and add a chef-inspired vibe.
- Use a rolling kitchen island or cart with drawers and a work surface, then roll it out of sight when not in use.
- Magnetic shelves on the fridge hold spices or everyday items, clearing precious counter space.
- Vacuum storage bags shrink seasonal clothing, bedding, and bulky items until you need them again.
Small Space, Big Potential
Living small doesn’t mean living cluttered. With smart storage solutions, multifunctional furniture, and a little creativity, your apartment can feel organized, stylish, and surprisingly spacious. The key is to make every inch count.
Finally, don’t forget the renter’s insurance. It’s an easy way to protect your valuables and other possessions for added peace of mind.
This article is furnished by California Casualty, providing auto and home insurance to educators, law enforcement officers, firefighters, and nurses. Get a quote at 1.866.704.8614 or www.calcas.com.
by California Casualty | Auto Insurance Info, Helpful Tips, Safety, Travel |
Your tires do a lot more than roll you from point A to point B. They keep you safe, improve fuel efficiency, and make every drive smoother and quieter. Yet terms like rotation, alignment, and balancing often sound like auto shop jargon best left to the pros. In this Tires 101 guide, we break down what these services really mean, why they matter, and how a little tire care can go a long way toward protecting your vehicle — and your wallet.
Tire Rotation
What is tire rotation?
Tire rotation is the practice of moving your tires to different positions on your vehicle — front to back, side to side, or diagonally — so they wear more evenly over time. Because each tire position experiences different forces, rotation helps distribute that wear instead of allowing one tire to do all the hard work.
Why tire rotation matters
Even tread wear means longer-lasting tires, better traction, and a smoother ride. Rotating your tires also helps maintain predictable handling and braking, especially in wet or slippery conditions. As a bonus, evenly worn tires roll more efficiently, which can help improve fuel economy.
What happens when you skip rotation
When tires are not rotated, they wear unevenly and wear out faster — sometimes thousands of miles sooner than expected. Front tires, in particular, tend to wear more quickly on most vehicles because they handle the bulk of steering, braking, and acceleration. Over time, uneven wear can lead to noise, vibration, and reduced grip on the road.
How often rotation is needed
Most vehicles benefit from tire rotation every 5,000 to 8,000 miles, or as recommended by your vehicle’s manufacturer. Many drivers pair tire rotation with routine oil changes, making it easy to remember and stay consistent.
How rotation is done
The rotation pattern depends on several factors: your vehicle’s drive system (front-, rear-, or all-wheel drive), whether your tires are directional, and whether the front and rear tires are the same size.
- Front-Wheel Drive (FWD): Front tires move straight back; rear tires move to the front and switch sides.
- Rear-Wheel or All-Wheel Drive (RWD/AWD): Rear tires move straight forward; front tires move to the back and switch sides.
- Directional Tires: Designed to roll in one direction only, these tires can move front to back but must stay on the same side.
- Staggered or high-performance setups: If front and rear tires are different sizes, they are typically rotated side to side only.
Pro Tip: If you have a full-size spare that matches your other tires, ask whether it can be included in the rotation to keep it in good condition and ready for use.
Tire Alignment
What is tire alignment?
Tire alignment — also called wheel alignment — ensures your wheels are perpendicular to the ground and parallel to each other. Alignment involves adjusting the angles of the wheels, so they point straight ahead and make optimal contact with the road.
Why tire alignment matters
Proper alignment helps your vehicle drive straight, handle predictably, and wear tires evenly. When your wheels are aligned correctly, your steering feels more responsive, your ride is smoother, and your tires last longer.
What happens when alignment is off
Misaligned wheels can cause tires to wear unevenly or prematurely. You may notice your vehicle pulling to one side, your steering wheel sitting off-center, or increased rolling resistance that forces your engine to work harder. Over time, poor alignment can reduce fuel efficiency, increase stopping distances in emergencies, and even cause steering wheel vibration.
How often alignment is needed
A good rule of thumb is to have your alignment checked once a year or every 10,000 to 15,000 miles. You may also need an alignment after hitting potholes, curbs, or other road hazards — or anytime your vehicle doesn’t feel quite right.
How alignment is done
Alignment adjustments are made to your vehicle’s suspension system, not the tires themselves. Technicians fine-tune three key angles:
- Toe: The degree to which tires point inward or outward when viewed from above.
- Camber: The inward or outward tilt of the tire when viewed from the front of the vehicle.
- Caster: The forward or backward tilt of the steering axis when viewed from the side.
Together, these adjustments ensure your wheels work in harmony rather than fighting against one another.
Tire Balancing
What is tire balancing?
Tire balancing ensures that the weight of each tire and wheel assembly is evenly distributed around the entire circumference. Proper balance allows your wheels to spin smoothly without vibration.
Why tire balancing matters
Balanced tires improve ride comfort, reduce vibration, and help your tires wear evenly. They also minimize stress on your suspension and steering components, contributing to better overall vehicle performance.
What happens when tires are unbalanced
When a tire has a heavy spot, it can wobble as it spins, causing noticeable vibrations, especially at highway speeds. Unbalanced tires may lose consistent contact with the road, leading to uneven tread wear and shortened tire life. Over time, this imbalance can also strain suspension and steering parts.
How often balancing is needed
Tires should be balanced every 6,000 to 8,000 miles, typically at the same time they are rotated. Balancing is also recommended whenever you install new tires or notice unusual vibrations.
How balancing is done
A technician mounts the tire and wheel assembly on a computerized balancing machine that detects weight imbalances. Based on the machine’s readings, small lead, zinc, or steel weights — either clip-on or adhesive — are placed on the wheel rim. The tire is then re-spun to confirm that the weight is evenly distributed.
General Tire Care
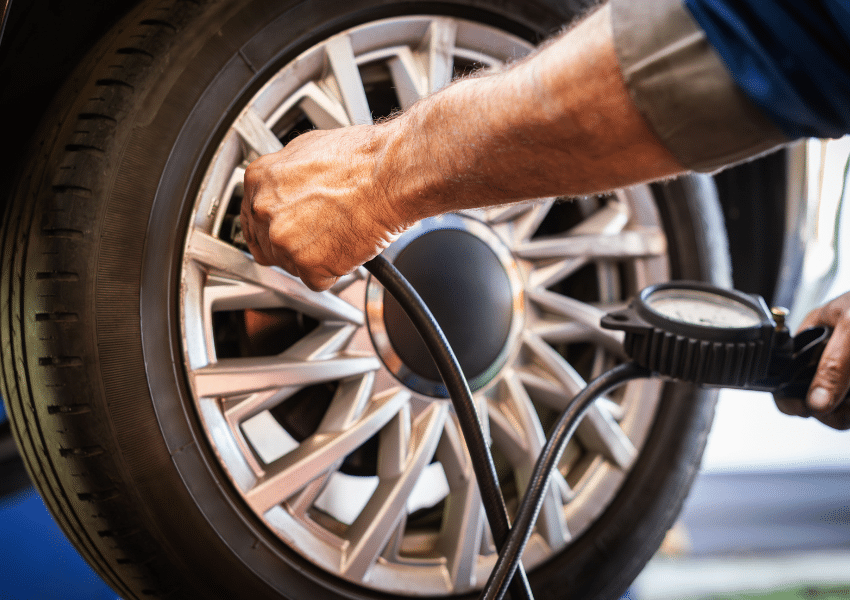
Keeping your tires in good shape goes beyond rotation, alignment, and balancing. Regular inspections and proper inflation play a critical role in tire safety and longevity.
Check tire pressure regularly using a gauge, ideally when tires are cold — meaning they haven’t been driven for at least three hours. The correct pressure can be found in your owner’s manual or on the sticker inside the driver’s side door.
- Underinflated tires generate excess heat and stress, leading to irregular wear and increased risk of failure.
- Overinflated tires are more susceptible to punctures and road damage.
It’s also wise to visually inspect your tires for cuts, cracks, bulges, or embedded objects so small issues can be addressed before they become major problems.
Finally, make sure your vehicle is fully insured for added peace of mind.
Safe travels from all of us at California Casualty.
This article is furnished by California Casualty, providing auto and home insurance to educators, law enforcement officers, firefighters, and nurses. Get a quote at 1.866.704.8614 or www.calcas.com.

by California Casualty | Helpful Tips, Homeowners Insurance Info, Safety |
The holidays sparkle with lights, candles, and festive meals. All that cheer makes the season special but it also brings a few fire risks we don’t always think about.
In fact, home fires happen more often between Thanksgiving and New Year’s than at any other time of year. The good news? With just a handful of easy precautions, you can keep the season safe, cozy, and full of joy. Here’s how to protect your home and loved ones while still enjoying all the magic of the holidays.
Holiday Cooking: The Heart of the Home — and a Common Fire Risk
Holiday meals often mean more time in the kitchen, more dishes on the stovetop, and more distractions. Cooking fires are the leading cause of home fires during the holidays, especially when distractions shift your attention away from cooking.
Fire Risks
- Leaving food unattended on the stove or in the oven
- Steam, splashing oil, or hot liquids causing burns or igniting nearby flammable items
- Grease fires that can flare up quickly if frying food overheats
- Stoves left on, long after cooking is complete
Safety Tips
- Stay in the kitchen while cooking, especially when frying, boiling, or broiling.
- Keep flammable items away from the stovetop, including oven mitts, wooden utensils, food packaging, towels, and curtains.
- Use a timer as a reminder that something is cooking, even if you step away briefly.
- Create a kid-free and pet-free zone of at least three feet around the stove and oven to prevent accidental bumps or burns.
- Avoid cooking if you’re sleepy or have consumed alcohol, as both can slow reaction time and increase risk.
Electrical Power & Holiday Lighting: Sparkle Without the Spark
Holiday lights add warmth and cheer, but faulty cords or overloaded outlets can quickly turn decorative into dangerous.
Fire Risks
- Flickering lights especially when other appliances are turned on (signals a loose connection)
- Discolored or warm outlets
- Burning plastic or rubbery smells near outlets or cords
- Buzzing, sizzling or cracking sounds from outlets or cords
- Frequently blown fuses or tripped breakers
Safety Tips
- Use lights that are tested and approved by a qualified testing lab.
- Make sure outdoor lights are rated for outdoor use and protected from moisture.
- Replace worn, frayed, or broken cords
- Avoid overloading outlets and skip multi-plug adapters whenever possible.
- Always turn off holiday lights before going to bed or leaving the house.
Christmas Trees: Festive Focal Points That Need Care
A Christmas tree — real or artificial — can be a stunning centerpiece, but it also deserves careful placement and maintenance.
Fire Risks
- Trees placed too close to heat sources such as fireplaces, radiators, or space heaters
- Frayed wires or overloaded extension cords igniting branches
- Live trees drying out and becoming increasingly flammable
Safety Tips
- Place your tree at least three feet away from any heat source, including fireplaces, heat vents, candles, or lights.
- Use lights labeled for indoor use and follow manufacturer guidelines on how many strands can be safely connected.
- Water live trees daily. A well-hydrated tree is far less likely to ignite.
- Turn off tree lights before going to bed or leaving the house.
- Dispose of live trees promptly after the holiday, before they dry out.
- For artificial trees, look for a fire-resistant label for added peace of mind.
Candle Fires: Warm Glow, Real Risk
Candles play a meaningful role in many holiday traditions, including the menorah of Chanukah and the kinara of Kwanzaa. Decorative candles are also popular throughout the season. While candles beautifully set the festive mood, open flames always require care.
Fire Risks
- Candles placed too close to decorations, curtains, or furniture
- Unstable candle holders that can tip over
- Curious children or pets knocking candles over
Safety Tips
- Place menorahs or kinaras on a nonflammable surface, such as a tray lined with aluminum foil to catch dripping wax.
- Never leave candles unattended. Blow them out when leaving a room or going to bed.
- Keep candles out of reach of children and pets. Curious hands and wagging tails can cause accidents in seconds.
- Keep lit candles well away from decorations and other flammable materials.
Decorations: Festive, Fun—and Sometimes Flammable
Holiday décor adds personality and warmth to your home, but many decorations are made from materials that can ignite if exposed to heat or sparks.
Fire Risks
- Decorations placed near heat vents, lights, or fireplaces
- Flammable materials igniting from a spark or hot surface
Safety Tips
- Choose decorations that are flame-retardant or flame-resistant whenever possible.
- Keep decorations away from heat sources, including vents, candles, and fireplaces.
Fireplaces: Cozy Comfort with Important Rules
A crackling fire is a holiday favorite, but fireplaces require extra attention during busy gatherings.
Fire Risks
- Stockings, garlands, or decorations hung on the mantel can ignite if exposed to heat or sparks.
- Embers or sparks can escape the fireplace and ignite nearby furniture, rugs, or wrapping paper.
- Creosote buildup in the chimney increases the risk of a chimney fire.
- Fires left unattended or not fully extinguished before bedtime can reignite overnight.
Safety Tips
- Never light the fireplace if stockings or decorations are hanging from the mantel.
- Keep wrapping paper, gift boxes, and decorations at least three feet away from the fire.
- Use a fire screen to prevent embers from escaping.
- Make sure all embers are completely out before heading to bed or leaving the room for the night.
- Install and maintain working smoke detectors on every level of your home.
- Keep a fire extinguisher accessible and make sure adults in the household know how to use it.
- Review your home insurance coverage to ensure you’re properly protected, an important step for peace of mind year-round.
A safe home is the foundation of a joyful holiday season. By staying mindful and taking a few proactive steps, you can focus on what truly matters — time together, cherished traditions, and making memories that last long after the decorations come down.
Happy holidays from all of us at California Casualty!
This article is furnished by California Casualty, providing auto and home insurance to educators, law enforcement officers, firefighters, and nurses. Get a quote at 1.866.704.8614 or www.calcas.com.
