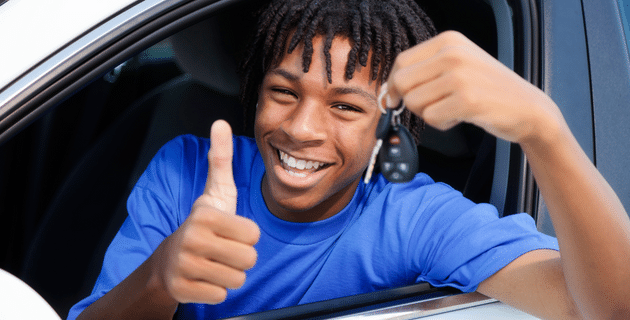
by California Casualty | Auto Insurance Info, Safety |
When your son or daughter starts driving, it’s a milestone moment. It can also be a little nerve wracking. You can’t be everywhere to keep them safe, but you can help them by choosing the right vehicle. In honor of Teen Driver Safety Week, we researched the best and safest cars for teens in 2023, according to the Insurance Institute for Highway Safety (IIHS) and Consumer Reports.
What makes a good vehicle for teens?
You want a car with strong reliability ratings and excellent crash test scores. Today’s cars also have hi-tech safety features that can help keep young drivers safe. These include:
- Blind spot monitoring to let you know if there is a vehicle in your blind spot.
- Automatic emergency braking when the car senses a potential collision.
- A lane departure warning that makes a sound or other signal if you veer toward the next lane.
- A lane-keeping assist that steers your vehicle back into your lane.
- Pedestrian detection that identifies people walking in front of the car.
- Built-in systems with teen driver controls, such as speed warnings and muting of audio while driving.
You will want to avoid:
- Sports cars, which have too much horsepower and could tempt a teen to drive beyond their skill level.
- Small cars that weigh under 2,750 pounds; their crumple zones are not good.
- Large vehicles with long braking distances.
- Vehicles with seats for lots of passengers. Each additional passenger increases the odds of an accident due to distractions.
Following is the list of vehicles with above average reliability scores and good crash tests. Prices provided are from Kelley Blue Book and are estimates for the lowest trim models as of May 2023.
New Cars
Small Cars
| Mazda 3 sedan or hatchback |
$23,000 |
Midsize Cars
| Subaru Legacy |
$25,100 |
| Subaru Outback |
$29,300 |
Small SUVs
| Honda HR-V |
$24,400 |
| Subaru Forester |
$27,700 |
| Mazda CX-5 |
$27,800 |
| Mazda CX-50 |
$28,900 |
| Toyota RAV4 |
$29,300 |
| Honda CR-V |
$29,700 |
| Lexus UX |
$36,000 |
Midsize SUVs
| Subaru Ascent |
$34,600 |
| Hyundai Palisade |
$36,600 |
| Toyota Highlander |
$37,100 |
| Mazda CX-9 |
$38,300 |
| Lexus NX |
$39,800 |
Minivan
Best Choices for Used Cars
Small Cars
| Mazda 3 sedan or hatchback |
2014-20; built after October 2013 |
$9,100 |
| Ford C-Max Hybrid |
2014-16 |
$10,000 |
| Toyota Prius |
2014; built after November 2013 |
$12,900 |
| Subaru Impreza sedan or wagon |
2018, 2022 |
$14,500 |
Midsize Cars
| Subaru Legacy |
2013-21; built after August 2012 |
$7,800 |
| Mazda 6 |
2014-18 |
$10,200 |
| Subaru Outback |
2015-18, 2022 |
$12,200 |
| Toyota Prius v |
2015-17 |
$14,500 |
| Volkswagen Passat |
2017 |
$14,500 |
| BMW 3 series |
2017 or newer; built after November 2016 |
$16,500 |
Large Cars
| Toyota Avalon |
2015 or newer |
$14,600 |
| Hyundai Genesis |
2016 |
$18,000 |
Small SUVs
| Volvo XC60 |
2013, 2017 |
$9,600 |
| Mazda CX-5 |
2014 or newer; built after October 2013 |
$11,800 |
| Mazda CX-3 |
2016, 2019 |
$13,900 |
| Honda CR-V |
2015 or newer |
$15,200 |
| Honda HR-V |
2017 or newer; built after March 2017 |
$16,000 |
| Toyota RAV 4 |
2015 or newer; built after November 2014 |
$16,100 |
| Kia Niro Plug-in Hybrid |
2018 |
$18,900 |
| Subaru Forester |
2018 or newer |
$20,000 |
Midsize SUVs
| Nissan Murano |
2015 or newer |
$12,400 |
| Hyundai Santa Fe Sport |
2018 |
$15,700 |
| Toyota Highlander |
2014 or newer |
$17.100 |
| Acura RDX |
2016 or newer |
$19,300 |
Minivan
| Toyota Sienna |
2015-20 |
$15,700 |
Pickup
| Toyota Tacoma extended car or crew cab |
2016 or newer |
$17,900 |
Remember, when looking at vehicles, talk to your insurance agent to see what will save you the most with your teen on your policy. And don’t forget to look out for recalls or damage from previous owners.
Finally, here are some other ways that you can help your teen stay safe.
- Sign them up for driver’s ed or safety classes.
- Make sure they get experience driving in all kinds of conditions.
- Teach them what to do in emergencies.
- Talk to them about how dangerous it is to drive while distracted.
- Make sure they are fully insured for peace of mind.
This article is furnished by California Casualty, providing auto and home insurance to educators, law enforcement officers, firefighters, and nurses. Get a quote at 1.866.704.8614 or www.calcas.com.

by California Casualty | Auto Insurance Info |
Buying your first car is a right of passage. Getting your first auto insurance policy is one, too. Whether you’ve graduated from your parents’ policy, just moved out, or purchased your first car, here’s what you need to know about getting that important first policy.
Learn about the types of coverages.
An auto policy is made up of different coverages. You choose the types you need from a range of options. Some coverages are required by law. Others are optional but will help to fully protect your investment.
- Liability: If you are at fault in an accident, and others are involved, it’s good to have liability coverage. Liability coverage is required by law in most states. It covers you for bodily injury and property damage you cause to others. However, it does not cover any damage to your own vehicle; that’s covered by collision. It also does not cover injury to you and your family; it only covers the people in the other car.
- Collision: This coverage is if your car is damaged in a collision with another car or an object, such as a fence. Your collision coverage will pay for repairs minus the deductible. Collision coverage is not required unless you’re leasing a car or paying off a loan on a vehicle. However, it may be good to have, especially in the event of an accident.
- Comprehensive: Comprehensive coverage is for natural disasters, fires, vandalism, theft and animals that damage your vehicle. Think of it as “bad luck coverage.” Comprehensive coverage is not usually required unless you’re leasing a vehicle or paying a car loan. However, it’s valuable to protect your car.
- Medical expenses: If you or others are hurt in an accident, you will want medical expenses covered. You will either be able to get medical payments coverage or personal injury protection (PIP). These coverages apply to everyone in your car whether or not you are at fault in the accident. This type of coverage is good to have, as your health insurance may not cover auto accidents and does not normally protect your passengers. PIP is only available in some states and may be mandatory if your state offers it.
- Uninsured or underinsured motorist: You may encounter drivers who are not insured or who are underinsured. If so, you will need insurance to cover your car and the people in your car if hit by an at-fault driver in that situation. Uninsured/Underinsured Motorist Property Damage (UMPD) helps pay for repairs to your vehicle. Uninsured/Underinsured Bodily Injury coverage pays for medical treatment, lost wages, pain and suffering for you and your passengers. These are optional coverages in most states. In some states, you are not allowed to carry collision and UMPD at the same time. Also, sometimes UMPD has a policy maximum, or cap on the amount it will pay.
See our infographic for a quick overview of car insurance, or consult our blog on liability, collision and comprehensive coverage for more detail on these coverages.
Know what affects your car insurance premiums.
Your car insurance premium will be determined by the coverages you select and other factors that contribute to the risk you present as a driver. These include, but are not limited to:
- Where you live: If you live in the city, there’s greater risk for vandalism and theft. If you live in a location prone to floods, wildfires or other disasters, you could pay more as well. You don’t necessarily have to move to get better rates, but sometimes moving into a neighboring zip code can save you some money.
- How often you drive: The more you drive, the greater chances you have to get into an accident—even if you’re a safe driver. So, people who only drive their car for leisure will pay less than others with a long commute.
- Your car’s make and model: Generally, cars that are more expensive will cost more to replace; therefore, it will cost more to insure them. Cars that are highly rated for safety, or that include certain safety features, may qualify for a reduction in your premium.
- Your driving record: Insurance companies use your past behavior to predict your future behavior. That’s why drivers with few or no accidents, and few or no moving violations like speeding tickets, pay less than those with lots of claims. In many cases, companies keep the violations on record for 3 years. If you have a clean driving record otherwise, you may qualify for a lower rate.
Tips to Save Money on Your Policy
- Shop around. You’ll pay more as a first-time driver and so it’s always good to compare pricing. Compare quotes for insurance but be sure that you are looking at similar coverages or it won’t be a fair comparison.
- Raise your deductible. Since the deductible is the amount your insurance provider will subtract from an insurance payout, you’ll want to select a deductible that you’re comfortable paying out-of-pocket after a loss. However, if you can afford to raise the deductible, you could lower your premium.
- Reduce your annual mileage. Consider carpooling or taking public transportation to reduce your mileage, which in turn can reduce your premium. In most states, your insurer pulls reports to determine annual mileage. But your daily commute mileage to work each day can impact rates so it’s a good idea to live close to where you work.
- Ask about discounts. You may get a discount for installing an anti-theft device. You may qualify for affinity or association member group discounts. At California Casualty, we offer special group rates for educators, nurses, and public safety employees.
- Maintain a good insurance score. This score, known as the Financial Responsibility (FR) Score, is allowed in most states, and has a big impact on your premiums.
Insurance companies use the same basic information to determine your rate. At California Casualty, we have our own unique formula to help our clients save money. Learn more by getting a free quote at https://mycalcas.com/quote.
This article is furnished by California Casualty, providing auto and home insurance to educators, law enforcement officers, firefighters, and nurses. Get a quote at 1.866.704.8614 or www.calcas.com.
by California Casualty | Auto Insurance Info, Safety, Travel |
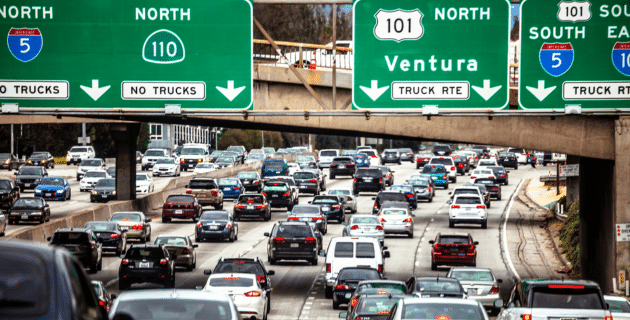
We’ve all had that uncomfortable feeling of being tailgated. It’s not just an annoyance. It’s a dangerous behavior that can lead to an accident. But just how risky is tailgating and what can we do about it? Read on.
What is tailgating?
When you’re too close to the car in front of you, you’re riding “on its tail,” or tailgating. Tailgating is an aggressive behavior that can be mistaken for road rage, and even lead to it. Interestingly, even though drivers who tailgate seem to rush ahead, tailgating has little effect on getting there faster.
Why do people tailgate?
There are many reasons why people tailgate. Here are a few of the most common ones.
- Aggressive drivers tend to tailgate. These are the same folks who speed and cut it close when making lane changes. They also can quickly escalate into road rage episodes.
- Drivers who are impatient or frustrated may tailgate. They’re in a hurry and they want to get past the traffic to their destination.
- Intoxicated or drowsy drivers may tailgate without realizing it. Their state of mind causes them to misjudge the distance to the car in front of them.
- Young drivers sometimes tailgate. They do not fully understand the safe distance between cars and/or the consequences of this risky behavior.
- Distracted drivers may tailgate because they’re not paying attention to the road. They’re on their phones or fiddling with something in the car.
Almost always, drivers who tailgate have a false sense of security. They think they can stop in time. Yet it may take longer than you think. Stopping distance is directly related to the size and weight of your vehicle. A large truck will take much longer to stop than a small car. Sharing the road with vehicles of all sizes is important. You need to give yourself an adequate cushion of safety so you have enough time to react and stop your vehicle.
What are the effects of tailgating?
At the very least, you can make the driver in front of you nervous by tailgating. You may even cause them to drive too fast or shift lanes quickly which can cause an accident. They also may tap on their brakes to tell you to back off. That can trigger an accident or road rage incident. In a worst-case scenario, they can stop short, causing you to rear-end them. You may even cause a chain reaction of rear-end collisions.
Rear-end collisions make up about 23% of all crashes, according to the National Highway Traffic Safety Administration (NHTSA). These types of collisions cause approximately 950,000 injuries and 2,000 deaths each year.
Who is liable for a tailgating accident?
In nearly all cases, the driver who is tailgating is the person at fault in a rear-end collision. Note that a single at-fault accident could raise your insurance premium.
Learn the 3-second Rule.
If you’re alert and focused on the road, it takes you about 2 seconds to react to a roadway hazard. That means a safe following distance is at least 3 seconds or more.
Use the 3-second rule as a starting point. You can measure the distance in seconds this way:
- Find a landmark such as a mile marker or telephone pole.
- Start counting once the car in front of you passes that landmark.
- Count slowly until your car reaches the same landmark.
- That is the number of seconds that you are traveling behind the vehicle in front of you.
You will want to increase your following distance when the weather is bad. It’s recommended to use 4 seconds for wet weather and 10 seconds for snow and ice.
How should you react if you are being tailgated?
The last thing you want to do is to be rear-ended by a tailgater. If you are being followed too closely, you will want to take evasive action.
- Don’t engage or look at the tailgater.
- Don’t tap your brakes to tell them to back off. This can be construed as hostile and can cause the driver to react.
- Change lanes and allow the driver to pass.
- Maintain your distance from the driver. Keep as far away as possible.
- Practice defensive driving as you continue on your way.
- Be aware that your car’s crash avoidance system could cause you to brake automatically and suddenly. That may play a role in future tailgating incidents.
Your car is one of your greatest investments. Keep your car well maintained and protect it with the right insurance.
This article is furnished by California Casualty, providing auto and home insurance to educators, law enforcement officers, firefighters, and nurses. Get a quote at 1.866.704.8614 or www.calcas.com.
by California Casualty | Auto Insurance Info, Safety, Travel |
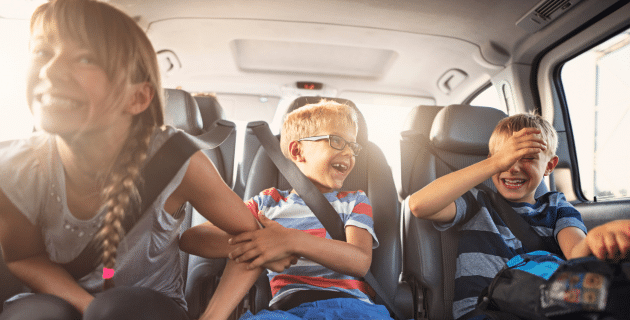
Some days it seems we’re practically living in our cars. Having the right things on hand can make our lives that much easier.
As you’re going from soccer practice to dance and back again, make sure you have the kid-friendly “must-haves” in your vehicle. In honor of Child Passenger Safety Week, we’ve also included some important items to keep everyone safe.
Essentials
Stock the basic travel items to keep everyone clean and comfortable.
- Wipes: These include wet wipes to clean hands and faces as well as disinfecting wipes for surfaces such as car seats. Up your game with stain remover wipes for those “oops” moments.
- Tissues: Travel packs are easy to store. Not only are they good for the sniffles, but they can also double as napkins after eating, or toilet paper if you’re in a bathroom that has run out.
- A towel: Dry off, clean off, or use to cover a hot seat. Towels can even double as a blanket or a napkin in a pinch.
- Scissors: These are helpful in case you need to cut a seatbelt in an emergency. In non-emergency situations, use them to cut open items that won’t easily tear.
Pro Tip: Use a laundry basket for the things going from the car into the house and back again. It’s especially useful for sports equipment.
Clothing
Keep some extra things for everyone in your family.
- Ponchos and/or umbrellas: You’ll want these for when you’re caught in the rain. You can find inexpensive disposable ponchos that do the trick.
- Extra pair of clothes: Include a change of clothes with underwear, and a plastic bag for dirty or wet things.
- Flip flops: It’s easier storing these than shoes for those times when your child splashes in muddy puddles. They’re more forgiving in size and you buy them on clearance.
- Coats, sweatshirts, and blankets: These are great when the air conditioning is blasting, or the weather turns colder unexpectedly.
Snacks and Water
Sometimes plans change, or things take longer than you expected. This way, you’ll avoid the question, “can we stop somewhere for dinner?”
- Snacks: Stock child-friendly snacks and update even nonperishable ones regularly.
- Self-serve containers: Invest in spill-proof cups and containers that enable toddlers and young children to serve themselves.
- Water: Choose reusable bottles, filled with fresh water to keep everyone hydrated. Water is also helpful when someone has sticky hands or sandy/dirty feet.
- Trash bag: You want a place where the kids can throw their trash. Disposable plastic or paper bags are good options. Make sure to empty them often.
Entertainment
Keep them occupied with their favorite activities so that you can stay focused on the road.
- Shoe box of toys: Let them decorate a shoe box and choose their favorite toys for the car. Include crayons and add some coloring books to your bag of books, below.
- Reading: Pack a bag of books for every age level. Consider audio books for longer trips.
- Power converter: Charge everything from phones to kids’ tablets to portable DVD players.
- Restaurant backpack: Stopping to eat? Fill a backpack with toys and activities for kids to use at the restaurant.
Safety
We recognize Child Passenger Safety Week each September. It’s a reminder to keep safety in mind when we’re on the road.
- LifeVac anti-choking device: Enjoying snacks in the car? This rescue suction device can save a life in a choking emergency.
- Safewise seat alarm: This device detects when you open a back door before starting the engine. It sounds a chime, then issues escalating reminders so that you won’t accidentally leave a child behind in a hot car.
- First aid kit: From band aids to antibiotic ointments, chances are you’re going to have to take care of minor injuries on the road. Make sure your first aid kit is fully stocked with the items you need. Include a first aid manual for those situations where you’re not exactly sure what to do.
- Emergency roadside kit: Make sure you’re fully prepared in case you get stuck or stranded. Flares, flashlights, and jumper cables are good things to have in your emergency car kit.
Teach your children safety in and around vehicles for added protection. Finally, protect your car with the right insurance. It will give you peace of mind as you take care of your most precious cargo—your children. Safe travels.
This article is furnished by California Casualty, providing auto and home insurance to educators, law enforcement officers, firefighters, and nurses. Get a quote at 1.866.704.8614.
by California Casualty | Auto Insurance Info, Safety, Travel |
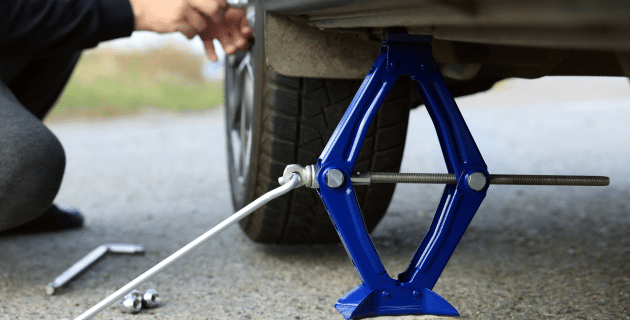
Thump, thump, thump. The sound of a flat tire doesn’t have to ruin your day. Be prepared for a future blow-out or puncture by reviewing how to use a car jack safely. In honor of National Preparedness Month, we’ve prepared a step-by-step guide. Bookmark this or print it out for when you need it.
First, what kind of jack do you have?
There are different kinds of jacks, and they operate slightly differently. Know which one you have.
- Chances are you have a scissor jack. These are the jacks that typically come with new cars. Their compact size allows them to easily fit in a vehicle’s trunk. They look like two pairs of scissors joined at the tips, creating a diamond shape. Scissor jacks are designed to get the job done but they’re not meant for repeated use over time.
- Hydraulic floor jacks are used by car enthusiasts. They’re also known as bottle jacks. They have a metal base with a lever extending to the side. They can be used repeatedly over time. However, their bulkier size makes them harder to store.
Step-by-step Instructions
Step 1: Park the car.
- You saw the tire warning light or heard the thudding sound of a tire going flat. Safely pull over away from traffic. Don’t try to drive on a flat tire; it can cause harm to the wheel.
- Make sure you are parked on solid ground. Don’t put a jack on dirt or grass. It will not be stable enough. (If you have to park on dirt or grass, use a thick, flat piece of wood to create a stable platform for the jack.)
- Don’t use a jack on an incline. If you must, make sure you’re close to the curb. If you’re parked downhill, turn your front wheels toward the curb. If you’re parked uphill, turn your wheels away from the curb.
- Put the car in park and engage the parking brake. If your car has a manual transmission, put it in first gear and engage the parking brake. Turn the engine off and put on your hazard lights.
Step 2: Secure the wheels.
- For an added precaution, you will want to “chock” at least one wheel. A chock is a block or wedge placed against a wheel to prevent it from moving.
- You can buy an inexpensive chock block or wheel wedge from an auto or big box store. If you don’t have one, you may use wood blocks or bricks.
- If you’re lifting the front of the car, put the chock behind the back tire.
- Do the opposite of the corner that you’re going to lift. If you’re lifting the front right wheel, then chock the rear left and vice versa.
Step 3: Set up the jack.
- You will find your jack in the trunk or under the luggage floor cover.
- Jacks are not labeled with “this side up.” Make sure that it’s not upside down when you place it on the ground. For a scissor jack, look for a larger flat base at the bottom and a smaller “saddle” pad at the top.
- If you have a handle assembly, put the handle together. For scissor jacks, slip the included rod tool through the hole and turn to pull the sides of the scissor inward and the top and bottom of the jack apart. For hydraulic jacks, you will need to place the handle in the opening. To operate hydraulic jacks, simply pump the handle.
- Practice without a load. You can use silicone spray if the jack is tight or jerky.
Step 4: Place the jack.
- On most vehicles, there are 4 jacking points with reinforced metal to safely lift your car.
- Look just behind the front wheels and just in front of rear wheels or consult your owner’s manual.
- If you are lifting just one wheel, choose a jack point near that corner. Most likely, the right place is on the pinch weld (where the metal pieces are welded together) between the front and rear tires. There may be a solid square of metal underneath the car for your jack point.
- Stay away from fuel lines and fragile parts.
Step 4: Raise the car.
- Turn the handle of your scissor jack to the right (or pump your hydraulic jack). There will be some initial resistance, but the tire will eventually come off the ground.
- Make sure the jack stays straight up. If it’s leaning, it will not be able to support the car correctly.
- Pay attention to sounds. You may hear a pop or a thud if the jack shifts slightly. Check that it hasn’t slipped out of position.
- Stop when the wheel is just a few inches off the ground. You don’t need much room to change a tire.
- Check your jack. Give your car a gentle shake to make sure it’s secure. If the jack moves, then raise or lower it to the point where there’s no movement.
Step 5: Add jack stands (optional).
- Jack stands will help provide additional support. They are essential if you are working under the car but optional if you are changing a tire and not going underneath.
- Place your jack stand directly under the lifting point. Use the pin or screw to lock it in place, per the manufacturer’s instructions.
- Do not use cinder blocks or bricks as a substitute for jack stands.
Step 6: Lower the car.
- When you are done changing the tire, it is time to lower the car. Raise the car an inch or two so you can remove the jack stands.
- To lower the car, turn a scissor jack counterclockwise or to the left.
- For a hydraulic jack, open the relief valve to let the fluid drain. This will lower the arm. Make sure to open the valve slowly so you don’t drop the car down too fast.
- Put the jack away for use at another time. Congratulate yourself on a job well done.
Your car is one of your greatest investments. Keep your car well maintained and protect it with the right insurance. Safe travels.
This article is furnished by California Casualty, providing auto and home insurance to educators, law enforcement officers, firefighters, and nurses. Get a quote at 1.866.704.8614 or www.calcas.com.
