by California Casualty | Helpful Tips, Safety |
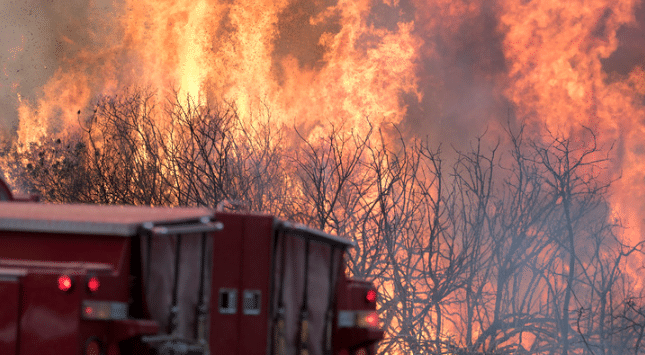
When there’s a wildfire near your home, every second counts. Leaving quickly can help you steer clear of thick smoke, dangerous conditions, and even traffic jams as everyone heads to safety. The key to a quick exit lies in preparation—having a well-thought-out plan and essential items ready to go.
Pre-Evacuation Prep
Follow this general guide to know what to pack. Keep this as a checklist and refer to it as you assemble everything that you need.
Food and Water
- Put together a 3-day supply of food for everyone in your family (unless you’re going to a relative’s or friend’s home who lives far away from the fire zone).
- Bring 3 gallons of water per person.
- Pack utensils and bowls, as you don’t know what might be available in emergency shelters.
Pet Supplies
- Pack kibble, bowls and bring water for pets.
- Bring a leash, collar, pet bed, crate or carrier, litter box, and litter as needed for your pet. Include treats and toys.
- Pack pet medications.
- Check that your pet’s microchip details are up to date.
- Bring contact information for your pet’s vet and/or your pet’s vaccine records.
Medicine and Hygiene
- Bring prescription medications and any medicines that your family may use on a regular basis: pain relievers, allergy medicines, contact lenses and solution, inhalers, etc.
- Pack hygiene items such as shampoo, soap, deodorant, toothbrushes, toothpaste, disposable razors, shaving cream, and towels.
- For infants and toddlers, bring diapers and baby wipes.
Safety
- Keep a first aid kit in your car should you need it.
- Include N95 masks if available to limit your exposure to smoke.
- Pack flashlights and batteries.
Clothing and Bedding
- Pack for practicality and safety. Layer clothes for a range of temperatures. Don’t forget PJs, socks, and underwear, as well as a raincoat or all-weather jacket.
- Comfortable, closed toed shoes work best in emergency situations.
- Bring sleeping bags, pillows and blankets. Include a portable crib for infants and toddlers.
Electronics
- Bring chargers for smartphones, laptops, and devices. Include a solar charger if you have one.
- Keep your devices well charged before you leave so you won’t have to search for a place to charge.
- Pack a battery powered radio and spare batteries in case the power goes out.
Special items
- There are some things you that you cannot replace. If you have the room, and they are easy to carry, plan to bring up to 3-5 of these special items.
- Your planning time is a good time to do a home inventory of all your possessions. Take pictures and notes of big items. This will help if your home is partially or completely destroyed by a wildfire, and you need to file a claim.
Documents
- Prepare a binder with key documents: mortgage or rental agreement, insurance policies, birth certificates, passports, bank information, and investments.
- Make sure your wallet or purse has your driver’s license, registration, health insurance cards, debit and credit cards.
- Complete a cell phone list for neighbors, family. Designate a person outside the wildfire area who can be the main contact should family members get separated or have trouble with cell service.
- Make copies of everything and keep them in a secure password protected digital space.
Prepare Your Home & Vehicle
During a wildfire, embers can travel quickly and ignite your home and property. Here are some steps to take to prepare your home and vehicle.
- Keep the vehicle that you’ll be leaving in fully gassed and well maintained. Park it in the direction it needs to go when you leave.
- Make sure that you know how to manually open the garage door in case you lose power.
- Make sure everyone in the household knows what to do to quickly evacuate.
- Close all windows. Close all interior doors.
- Take down flammable window treatments like curtains and store them out of the way.
- Turn off the gas and pilot lights. Shut off propane tanks.
- Turn off your air conditioning.
- Leave lights on to allow firefighters to see your home in the dark.
- Bring potentially flammable outside furnishings, toys and doormats inside or place them in your pool.
- Attach garden hoses to outside taps for firefighters to use. Placed filled buckets of water around your home.
- Listen to first responders and be ready to act when they recommend evacuation.
Pro Tip: California Casualty policyholders may be able to get immediate help if they are evacuated by fire. Evacuation expenses, such as hotel or other temporary housing, and meals are reimbursable with most policies.
Review your wildfire evacuation plan often. Keep it updated as your family grows and needs change. Finally, protect your home with the right insurance for added peace of mind.
This article is furnished by California Casualty, providing auto and home insurance to educators, law enforcement officers, firefighters, and nurses. Get a quote at 1.866.704.8614 or www.calcas.com.
by California Casualty | Helpful Tips |
It’s easy to get caught up in summer fun. But it’s important not to overlook home maintenance. Taking care of your home during the summer months can prevent costly repairs down the road and help avoid unwelcome surprises. So, while you’re planning your beach trips and barbecues, don’t forget to give your home some much-needed TLC.
Interior Maintenance
- Air Conditioning:
- Look at your outdoor unit and clean away any debris. Replace the air filters. A clogged filter can cause your system to shut down. Have a professional check that the condensate drain is clear, the condenser coils are clean, and that the coolant lines are insulated. If you choose to do work on your air conditioner yourself, make sure to shut off the circuit breaker first.
- Attic and Basement:
- Check for signs of mold and mildew, leaks, holes in the roof, and pests. Mold often looks dark green or black on the surface of wood and other materials. Water damage can appear as peeling paint or discoloration. You also may notice a musty smell. Take action to correct any of these issues.
- Ceiling Fans:
- Check that your fans are working properly. If your fan allows you to change its direction, switch it so it runs counterclockwise in the summer months. This will help push cooler air down and allow you to keep your home at a slightly higher temperature while still feeling comfortable. This will save energy. Not sure if your fan changes direction? Look for a switch in the fan’s motor or on the box underneath the fan.
- Chimney:
- The perfect time to clean your chimney is when you are not using it. You will want to remove the highly flammable creosote buildup that is caused by burning wood. Hire a professional. If you prefer to DIY the cleanup, get your chimney inspected by a qualified chimney sweep. They are trained to recognize chimney deterioration and venting problems.
- Dryer:
- Lint and debris in your dryer vent and exhaust duct can be a fire hazard. If it’s taking longer than usual for your clothes to dry, that probably means your duct and vent needs to be cleaned. It’s a simple do-it-yourself process.
- Garage:
- Check your garage for hazardous materials, like paints, cleaning supplies, and lawn chemicals. When combined with summer heat, some of these items could become dangerous. Arrange for a safe place to store them where the temperature is more moderate.
- Smoke Detectors:
- Water Fixtures:
- Check for leaks from your water faucets, plumbing and pipes. This is wasted water that can result in higher water bills. Pro tip: Install a leak detection device.
- Windows and Doors:
- Patch holes in window screens or replace mesh if there is a lot of damage. Clean windows inside and out, using a foam paintbrush for the tracks.
- Check the seals on windows and doors. If you see daylight around the door or window frame, there’s an air leak. Seal it with caulk as needed.
Exterior Maintenance
- Decks and Patios:
- Look for loose boards, screws or nails on your deck. Clean and reseal wood decks to prevent rotting and protect it from UV rays. Check for loose tiles or broken cement on your patio and make those repairs. Clean patio furniture.
- Fence:
- Look for any problem areas in your fence that makes it less secure. Check the upright supporting posts for wear and tear. Fill in any holes under the fence. Repair chipped paint and clean dirty or stained spots.
- Foundation:
- Summer heat can cause the soil under your home to shrink. This can create gaps and cause your foundation to settle. Keep your eye out for exterior foundation cracks. You also may notice interior wall cracks or slanted floors. Acting sooner rather than later will help minimize damage.
- Grill:
- Your grill is your outdoor kitchen during the summertime. Make sure it is clean and in good working order. Check for rust, cracks and any parts that may need repair. For gas grills, examine the gas lines and connections for leaks. Use a stiff brush to clean away food particles and grease that could cause dangerous flare-ups. Cover your grill when not in use to keep pests and animals from nesting there.
- Gutters:
- If water doesn’t flow through your gutters, it can build up and damage your roof. Inspect your gutters and clean out the debris. Don’t forget to clean the drains and downspouts too.
- Lawn Maintenance:
- Keep your mowed grass on a taller setting so the blades will help shade the soil. This will help reduce water evaporation. Use a water calculator to give your lawn the ideal amount for your region.
- Play Equipment:
- Make sure swing sets and other play equipment are still sturdy and safe for use. Repair or replace any that could be dangerous.
- Pool:
- Vacuum your swimming pool to remove dirt and debris. Clean your pool’s filter. Keep an eye on the water chemistry. Pro tip: Toss in a tennis ball. The wool and nylon help to absorb oils like sunscreen that are in the water.
- Roof:
- Get up on your roof to see if there are any damaged or missing shingles, signs of leaks, and problems with flashing. Repair and replace as needed.
- Siding:
- Look for loose or damaged siding, and signs of rot. Repair or replace as needed. You can pressure wash siding to remove built-up debris.
- Sprinkler Systems:
- Test your sprinkler system and outdoor faucets and look for leaks. These are also places for wasted water that could increase your bill.
- Trees:
- Trim your tree branches so you don’t give squirrels a highway to your house. Branches should be at least 8 feet from your roof.
- Walkways and Driveways:
- Inspect and patch any cracks with flexible sealant. Pressure wash walkways and driveways to remove dirt and stains.
Finally, protect your home with the right insurance for peace of mind. Enjoy your summer!
This article is furnished by California Casualty, providing auto and home insurance to educators, law enforcement officers, firefighters, and nurses. Get a quote at 1.866.704.8614 or www.calcas.com.
by California Casualty | Auto Insurance Info, Calcas Connection, Good to Know, Helpful Tips |
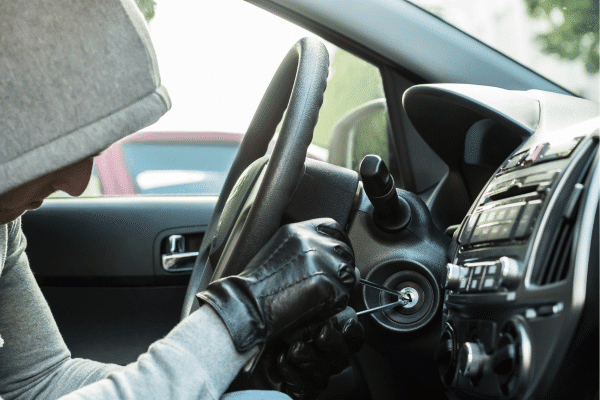
You’re ready to head home after a night out, but there’s one thing missing: your car. You could have sworn you parked it right here, but it’s no longer there. Vehicle theft can happen anytime, anywhere. When it comes to keeping your car safe, where you park can make all the difference.
Theft by the Numbers
A vehicle is stolen every 32 seconds, according to the National Insurance Crime Bureau. More than a million vehicles are reported stolen each year. California and Colorado have some of the highest number of auto thefts in the country, and of course, urban centers are hotspots for theft. However, thefts happen in the suburbs too, and cars can even be taken from your driveway. In honor of July, National Vehicle Theft Protection Month, we’re taking a look at what you need to know to keep your vehicle safe.
The Worst Places to Park Your Car
Thieves are looking for a chance to steal a car. Don’t give them the opportunity to steal yours. Before you park your car for a short time, or overnight, look around and assess the area for theft potential. Is the area well lit? Are other vehicles parked nearby? Are people around? Is there a security camera or guard? Are there signs of break-ins or damage? All of these can offer clues to an area’s safety.
Avoid empty streets.
Quiet streets and alleyways offer thieves a place to work without interruption. With no one around to witness the theft, they can get in and out quickly with your vehicle.
Avoid poorly lit areas.
Thieves prefer locations where they can work without being seen. Well-lit areas increase their chances of being noticed, while poorly lit and dark locations offer cover.
Avoid high-crime areas.
Do your research before parking in a new place. If the crime rate is high, it’s worth paying for a more secure parking option. High-crime areas aren’t just seedy sections of town. They could be residential neighborhoods that are targeted by thieves.
Avoid empty lots.
You may see lots of cars at office parking lots or at schools. However, when these buildings are not in session, the empty lots provide an easy place for thieves to work. Don’t be tempted to park in an empty lot and put your vehicle at risk.
Avoid remote locations.
Places that are less frequently traveled can be attractive for thieves. Chances are these locations are less often patrolled.
Avoid parking near large vehicles.
Parking your smaller car next to a larger vehicle automatically gives thieves cover. The truck or large car blocks the view so they can work without being easily seen.
How to Protect Your Vehicle
A skilled thief can steal a car in about a minute. However, there are things you can do to make your car seem harder to steal because it will take longer, or they are more likely to get caught.
When parking away from home:
- Park in a garage with security cameras. Park in view of the cameras.
- Be aware of tow truck thieves who come in and tow away your vehicle. When you park, turn your wheel as far to one side as possible. If you have front-wheel drive, park forwards in the spot. For rear wheel drive, back into the spot. This will make it harder to tow your car.
- If you’re parking on the street, choose a busy road where there will be people and other cars the whole time your car will be there.
- Lock your vehicle. The first thing that thieves do is try the doors.
- Hide your valuables out of sight. Even loose change, phone chargers, and other items can tempt thieves to break in.
- Don’t crack your window open on a hot day. An experienced thief can use that to get inside.
- Protect your catalytic converter by etching your VIN onto it.
- Don’t run your car with the keys in it – while you’re somewhere else.
- Keep your registration and insurance in your wallet rather than your glove compartment. That will help prevent the risk of identity theft if your car is stolen.
- Use an anti-theft system. New cars come with one, and you can also add one after market.
When parking at home:
- If you can, park inside your home’s garage. Don’t leave the garage door open. Out of sight is out of mind, and thieves won’t try to steal a car they cannot see.
- Add motion sensor lights to your home and driveway area.
- Don’t leave your key fob in the car. Don’t put it near a door or window inside your home either. Thieves can use the signal to break into your vehicle. Consider keeping keys in a container that doesn’t allow digital signals to pass through.
If your car is stolen, be aware of resources for auto theft victims. Your vehicle is one of your greatest investments. Protect it with the right insurance.
This article is furnished by California Casualty, providing auto and home insurance to educators, law enforcement officers, firefighters, and nurses. Get a quote at 1.866.704.8614 or www.calcas.com.
by California Casualty | Helpful Tips |
You’re ready for a new car. That means you’ll have to decide what to do with your old one. Either you’ll want to sell your car or trade it at the dealer. Ultimately, the choice comes down to what matters most to you—getting top dollar for your vehicle or taking care of it quickly and easily. Here’s what you need to know.
Trading in Your Car
When you give your vehicle to a dealership in exchange for a credit toward a new car, that is a trade-in. Dealers take your used car and resell it, so that means you won’t get exactly what it’s worth. You’ll be offered a little less. Trade-ins work best with lower mileage cars. Cars over 100,000 miles cannot be re-sold by dealers as certified used cars.
Advantages
-
- Trade-ins are convenient and require minimum time and effort from you.
- Car dealers may be less picky about the car’s condition than an individual buyer.
- Dealers will handle all the necessary paperwork.
- You will have a credit to apply to a new car.
- You also might save on taxes. While some states tax buyers on the value of a new car, others tax you on the value, minus the trade-in.
Disadvantages
-
- You may not get as much money for a trade-in, as if you sold your car privately.
- If your car is old and has high mileage, the dealership may not want it or may offer a less-than satisfactory value.
Tips for Trading
-
- Don’t trade in a car for less money than you owe on it. You are still responsible for paying the lease in full.
- Having your original paperwork will make the trade-in process easier.
- Do your research and find your potential trade-in value.
- Check with multiple dealers to see if there is a difference in trade-in value.
- Don’t be afraid to walk away from the deal if you don’t get your price.
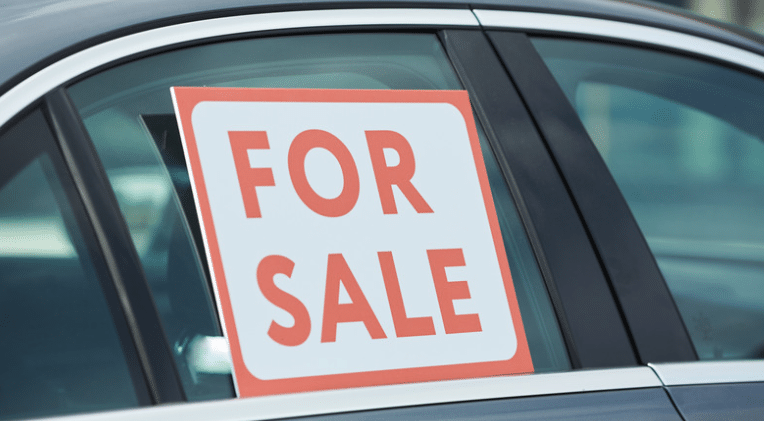
Selling Your Car
If you have the time, you can sell your car privately. You can generally get more money for a private sale, but it’s a lot more work. You will need to take photos of your vehicle, write an ad and post it, and then answer all the people who are interested. You also may need to negotiate for the price you want. Generally, selling independently works well if you have a car that’s high in demand, and if you are comfortable with the sales process.
Advantages
-
- You will probably get a better price than at the dealer.
- There are lots of online sites where you can post your car.
- If you sell your vehicle online, escrow services can help coordinate the sale while protecting both parties.
Disadvantages
-
- It takes a lot of time to sell a car. You may not be able to sell your old car before you buy your new car.
- It takes a lot of work to sell a car. You must create the ad and publicize the sale either online or locally with a sign on your car displayed in a prominent place.
- You will be responsible for any accidents that potential buyers cause in your car. That’s because insurance follows the car not the driver.
- You can put yourself in a risky situation with the exchange of funds. A bank check or direct wire might be best. You can also do the transaction in the parking lot of a police station.
- You must do the paperwork. This includes creating a bill of sale and making sure that the title is transferred correctly.
Tips for Selling
-
- Clean your car and remove bumper stickers.
- Take professional looking photos.
- Research the right asking price.
- Make any necessary repairs.
- Be honest in your ad.
- Advertise on safe sites.
- Potential buyers will want to do test drives. You will need to make sure they will not drive away with your car. Take a picture of the buyer’s driver’s license.
Beware of Car Selling Scams
- Car Sale Phishing: Scammers that pose as customers can steal your private information. In this scam, they ask for extra verification to get as much information about you as they can. They then use it to set up credit cards, access your bank accounts, or steal your identity.
- Confirmed Buyer: You may get a notification from an online site that you have a confirmed buyer. The email will request a finder’s fee before releasing the information. Usually they include a money-back guarantee, which is also fake. You end up being out the money.
- Fake Escrow: The buyer sets up a fake escrow account to hold funds until the vehicle is purchased. They will link to your bank account and steal your information and often, your money.
- PayPal Scam: The buyer will need your car quickly because of a transportation issue, and likely not haggle over price. They will say they can only pay via PayPal. They will send you an email from PayPal saying that the payment is awaiting approval to be released and ask you for a shipping fee. Once you send the payment, the buyer disappears and you’re out several thousand dollars.
- Payment Plan: The buyer will offer you a price above market value with a decent amount of interest to pay the car off over time. They’ll make the first payment and then you’ll never hear from them again.
Whether you sell or trade-in your vehicle, take precautions to do it safely. Your car is one of your greatest investments. Protect it with the right policy for added peace of mind.
This article is furnished by California Casualty, providing auto and home insurance to educators, law enforcement officers, firefighters, and nurses. Get a quote at 1.866.704.8614 or www.calcas.com.
by California Casualty | Auto Insurance Info, Helpful Tips |
It never feels good to fall victim to a scam or pay more for a product because of it. That’s what it is like with car insurance fraud.
Car insurance fraud happens when someone lies to get a better rate or a larger payout. It could be intentional or accidental, but either way it can cost you money in premiums. The FBI estimates that car insurance fraud costs the average family an additional $400 to $700 every year. In addition, nearly 7 in 10 consumers are tricked into illegal schemes, according to the Coalition Against Insurance Fraud. Here’s what you need to know about car insurance fraud, including some clever scams that could catch you unaware.
What are the types of fraud?
Staged Accidents
In staged accidents, dishonest people intentionally cause a collision with an unsuspecting driver. Then they misrepresent the situation, putting the other driver at fault—and thus get a payout that they don’t deserve. Common scenarios for staged accidents include:
-
-
-
-
- Two vehicles trap your car and force you into a rear end collision.
- Someone waves you on that it is safe to pull out, and then another car collides with you.
- You are tricked into turning early and the oncoming driver moves forward and collides with you.
- Another car purposefully sideswipes your vehicle in a dual left turn intersection.
- A car deliberately and abruptly brakes in front of you.
Injury Fraud
Dishonest people can file claims for unnecessary medical treatments or for treatments that they did not receive. Injury fraud also includes claims where people exaggerate the extent of their injury to get a bigger payout.
Exaggerated Claims
Sometimes after an accident, a dishonest person can cause additional damage to their vehicle to receive a bigger payout. That’s why taking photos of the damage is so important to do at the scene of the accident. Another exaggerated claim could be to file multiple claims for the same accident. Finally, disreputable shops can charge for repairs that weren’t made or for substandard work.
Counterfeit Airbags
If you have your airbag replaced by a dishonest shop, you might be charged for the original equipment manufacturer (OEM) bag but get a counterfeit one installed. In a worst-case scenario, a disreputable shop could install a garbage bag stuffed with rags. Counterfeit bags are dangerous and may not protect you in the event of an accident. The good news is that it’s easy to check. With an airbag, the light on your dashboard will flash when you start the car. You can also ask an authorized dealer to check that you have a quality airbag.
Windshield Replacement Scams
There are a variety of different scams associated with windshield replacement. Here are some of the most popular.
-
-
-
-
- A stranger approaches you in a parking lot and offers a free windshield replacement. They point out nonexistent damage that can be fixed. They take your insurance information and file an exaggerated or false claim.
- Windshield scam artists also could go door-to-door or call you with a “special” for customers in your area. Then they follow a similar process of filing a false claim.
- If you live in one of the states that has no deductible for windshield replacement, con artists can file a claim for your windshield and charge you for the deductible.
Tow Truck Scams
Tow trucks that appear right after your accident could be “bandits” who will only tow your vehicle to their shop and charge you hundreds to repair and release it. Calling your own tow truck will help you to avoid this scam.
False Reports of Stolen Vehicles
Reporting a vehicle that hasn’t really been stolen as stolen is illegal. So is misrepresenting the value of a stolen vehicle.
False Documentation
Intentionally providing a false address for your policy to get a better rate is a form of fraud. Understating the annual mileage, misrepresenting the use of a commercial vehicle, and failing to add a new driver also is fraud.
What are the consequences of fraud?
It depends on the seriousness of the fraud. For minor infractions, your claim can simply be denied. For more serious offenses, your policy may be canceled, you could be fined or even serve jail time. A misdemeanor for auto insurance fraud can come with a fine and probation. A felony conviction can result in significant fines and prison time.
How can you fight against fraud?
- Carefully check your insurance application forms for mistakes.
- If you’re in an accident, take good notes of all those involved. Take pictures at the scene. Don’t sign any documents or agree to any terms at the scene of the accident.
- Don’t accept fault for an accident if you believe you are not at fault.
- Be wary of individuals offering services that you didn’t request. Avoid sharing details about your auto policy with those who may be disreputable.
- Don’t tailgate. This gives criminals a chance to take advantage.
- If your car needs repairs or maintenance, go to a trusted professional.
- Don’t accept a windshield replacement offer.
- Choose OEM parts for vehicle repairs to avoid counterfeits. Before buying a used car, have a certified mechanic check that there are authentic air bags.
- Avoid rushed decisions. If someone is pressuring you into something, that could be a red flag.
If you suspect fraud, report it to your insurer as well as to the National Insurance Crime Bureau at 800-835-6422 https://www.nicb.org/.
This article is furnished by California Casualty, providing auto and home insurance to educators, law enforcement officers, firefighters, and nurses. Get a quote at 1.866.704.8614 or www.calcas.com.
