by California Casualty | Helpful Tips, Homeowners Insurance Info |
There’s nothing like sipping a cold drink on your backyard deck, soaking up the sunshine or hosting a summer barbecue with friends. But before you roll out the grill and string up the lights, it’s time to show your deck a little love. Whether it’s blazing sun, pouring rain, heavy snow, or constant foot traffic, your deck weathers it all—and proper maintenance is the key to keeping it safe, sturdy, and looking its best. Ready to give your deck the TLC it deserves? Let’s dive in!
Know Your Type of Deck
Before you start, it’s important to know what kind of deck you have. Different materials require different levels of care.
- Wood Decks: These are traditional and beautiful but need the most maintenance. Hardwoods like cedar, redwood, and teak are more durable than softwoods like pine and fir.
- Composite Decks: Made from wood fibers and plastic, these are lower-maintenance and usually come with UV protection built in. However, they still require periodic cleaning and inspection.
Summer Deck Maintenance
Now is the perfect time to inspect, clean, and reseal your deck as part of summer home maintenance. Here’s your seasonal to-do list:
1. Inspect and Repair
Your first step should be a thorough inspection:
- Check for damage such as cracked, warped, or splintering boards.
- Look for discoloration, rot, and peeling. Soft, spongy areas or visible decay could mean the wood is rotting.
- Inspect fasteners. Tighten loose screws and replace any that are rusty.
- Examine the flashing—the water barrier where your deck attaches to the house. Damaged or missing flashing can lead to major water issues.
- Ensure that stairs and handrails are stable and secure.
Warning signs your deck may need replacing:
- Severe rot or decay
- Multiple loose or broken boards
- Deep discoloration or widespread splintering
- Rusty or failing hardware
Make minor repairs now to prevent costly fixes later.
2. Clean Your Deck the Right Way
Before you clean, protect nearby plants by covering them with a breathable tarp. Many deck cleaning products contain chemicals that can harm vegetation.
- Remove all furniture, plants, and décor.
- Sweep off leaves, dirt, and debris.
- Spray down the deck with a garden hose using a strong stream.
- Apply a wood-safe cleaner or a composite-safe cleaner according to the product instructions. You can also use warm soapy water.
- Scrub using a stiff-bristled brush.
- Rinse thoroughly and let dry completely before applying any sealant or stain.
Pro Tip: Avoid using chlorine bleach—it can damage wood and composite decks. For stubborn stains on a wood deck, make a paste of baking soda and water, apply it to the stain, let it sit, then scrub and rinse. For composite decks, try a composite-safe cleaner.
Power washing caution: You can power wash occasionally, but not every year. Used incorrectly, a pressure washer can gouge wood and composite decks, and cause more harm than good. When in doubt, a hose with a hard spray setting often does the trick.
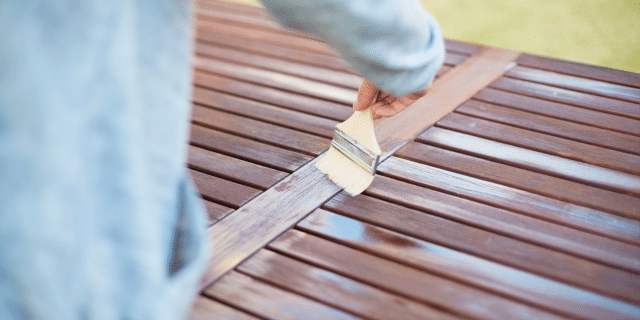
3. Seal and Stain (for Wood Decks)
Sealing and staining are critical to protect your wood deck from sun, moisture, and wear. (Composite decks do not need to be stained or sealed.)
- Frequency: Seal every 1–2 years, depending on the product and your climate.
- Timing: Make sure your deck is clean and completely dry. Sand any splintered or rough areas before you begin.
- Product selection:
- Choose a UV-protective stain that complements your home’s exterior.
- Use a clear or semi-transparent sealant with strong water resistance.
- Avoid paint—while it may look good initially, it tends to crack, peel, and deteriorate quickly on deck surfaces.
- Application tips:
- Follow the wood grain to prevent streaks.
- Use a brush, roller, or sprayer to apply an even coat.
- Apply in the early morning or late afternoon to avoid direct sun, which can cause uneven drying.
4. Deck-Safe Furnishings and Accessories
Your furniture and décor choices can impact your deck’s longevity.
- Skip natural fiber rugs (like jute or bamboo). These absorb moisture and promote mildew. Opt for synthetic, quick-drying outdoor rugs instead.
- Protect your deck from grill heat. Place grills on a nonflammable grill pad or mat to prevent grease stains and fire risks. Practice grill safety.
- Use furniture with rubber or plastic feet to prevent scratching or gouging the surface.
Year-Round Deck Care Tips
While summer is deck maintenance season, a few habits year-round can help preserve your investment:
- Sweep regularly to prevent leaves and debris buildup, which can cause staining and mildew.
- Shovel snow carefully in winter using a plastic shovel and always with the grain of the boards.
- Trim nearby trees and bushes to reduce moisture buildup and leaf litter.
Your deck is an extension of your home—and like any living space, it deserves care and attention. By inspecting it annually, cleaning it regularly, and sealing it as needed, you can enjoy a beautiful, safe, and functional outdoor retreat for years to come.
This article is furnished by California Casualty, providing auto and home insurance to educators, law enforcement officers, firefighters, and nurses. Get a quote at 1.866.704.8614 or www.calcas.com.

by California Casualty | Helpful Tips, Homeowners Insurance Info |
Is your backyard begging for a summer glow-up? Whether you’re dreaming of sunset dinners under twinkle lights, weekend BBQs with friends, or just a quiet oasis to sip your morning coffee, now’s the perfect time to turn that outdoor space into your personal slice of paradise. As you spruce things up, don’t forget the essentials—like safe grilling practices, checking your deck for wear and tear, and making sure your outdoor setup is as secure as it is stylish. A little planning now means more peace of mind—and more time to kick back and enjoy summer under the sun.
Refresh Your Patio or Deck
Your patio or deck sets the stage for everything from quiet mornings to lively get-togethers. Start by giving it a thorough clean:
- Sweep away debris. Use a broom or blower to clear leaves and dirt.
- Wash the surface. A gentle cleanser and stiff brush work well on most patio materials. For concrete, brick, or stone, consider renting a commercial-grade power washer. Avoid power washing stained wood—it could strip the finish.
- Inspect and repair. Check for loose boards, protruding nails, or splintered surfaces. Make necessary repairs before the space gets regular use.
Clean and Style Outdoor Furniture
Outdoor furniture can take a beating over the seasons. Give it some love:
- Clean according to material. A hose and mild dish soap work well for plastic and metal furniture. For wood or wicker, use a damp cloth to avoid water damage.
- Dry thoroughly. Use old towels to prevent water spots and prolong the life of your pieces.
Once clean, it’s time to rethink your layout and decor.
Envision How You’ll Use the Space
Think about how your outdoor area will serve you this summer. Will it be:
- A dining spot? Add or update a table and chairs for al fresco meals.
- A game zone? Leave room for yard games and flexible seating.
- A cozy retreat? Set up a hammock, reading nook, or fire pit lounge.
Consider lightweight furniture that can be easily rearranged depending on the occasion. And remember—comfort is key. Add cushions, throws, and cozy seating to encourage lingering.
Streamline and Elevate with Smart Decor
Keep clutter in check by choosing multi-purpose pieces, like:
- Benches with storage or outdoor storage bins. Great for stashing games, cushions, or grilling supplies.
- Plants and greenery. Choose pet-safe plants for your own fur babies or visiting ones.
- Vertical accents. Use walls or fences to hang lanterns, shelves, or planters—leaving more ground space open.
- Add personality with pops of color—pillows, cushions or a bold outdoor rug can instantly refresh the vibe.
Shade and Light: Must-Haves for Comfort and Style
Don’t forget about two key ingredients to outdoor enjoyment: shade and lighting.
- Shade solutions: Umbrellas, pergolas, or canopies offer protection during peak sun hours.
- Lighting layers: String lights bring magical ambiance. Solar-powered fairy lights, path markers, and outdoor pendant fixtures add both safety and charm.
Fire Pits & Grilling: Safety First, Fun Always
Fire Pit Safety: A fire pit is the ultimate backyard upgrade, but it must be used safely.
- Keep it at least 10 feet from your house or flammable materials.
- Burn only untreated, dry wood.
- Never use accelerants like lighter fluid to start or relight the fire.
- Use a fire screen to catch sparks.
- Keep a fire extinguisher, hose, or bucket of water nearby.
Grill Safety: Summer barbecues are a beloved tradition—but don’t forget basic safety.
- Clean your grill before the first use to prevent flareups.
- Check propane connections and ensure the tank is full.
- Keep the grill away from structures and flammable materials.
- Store propane and charcoal safely.
- Supervise children and pets around the grill.
Grilling Pro Tips:
- Bar cart transformation: Repurpose a bar cart as a mobile grilling station. Load it with spices, utensils, and condiments.
- DIY condiment carrier: Give those cardboard six-pack beer caddies new life as a picnic-friendly condiment holder. Wrap it in contact paper for a stylish touch.
Don’t Forget Bug Control
Nothing ruins a backyard vibe faster than a buggy swarm. Take steps to protect your space:
- Remove standing water. Check flowerpots, gutters, and birdbaths regularly.
- Use citronella candles or torches. These can help deter bugs while adding ambiance.
- Consider natural repellents. Lavender, rosemary, and marigolds are mosquito-resistant and look great in planters.
- For added peace of mind, you can install a screened canopy or consider a misting system for high-traffic areas.
Your outdoor space should be an extension of your home—a place to relax, connect, and create lasting summer memories. With a little effort and intentional design, you can transform your backyard into a functional and fabulous retreat.
Pro tip: Take a few photos now, then again at the end of summer. You’ll love seeing how your outdoor makeover paid off.
Finally, make sure you’re insured for summer fun, and protect your home and property with the right insurance for added peace of mind. Here’s to your best backyard summer yet!
This article is furnished by California Casualty, providing auto and home insurance to educators, law enforcement officers, firefighters, and nurses. Get a quote at 1.866.704.8614 or www.calcas.com.
by California Casualty | Auto Insurance Info |
You take pride in your car’s appearance—shiny, clean, and polished to perfection. But even the most careful car owner can fall victim to everyday threats that silently sabotage that showroom sparkle. From spilled coffee to sunbaked bird droppings, the dangers are everywhere. Here’s what to watch out for—and how to fight back.
1. Parking Under Trees
Shady spots might seem like a great way to beat the heat, but trees come with risks. Sticky sap, falling branches and twigs, and even acorns can wreak havoc on your paint. Sap is especially stubborn—it bonds with the surface and can damage the finish over time. Use a bug and tar remover from your local auto store to gently lift it off.
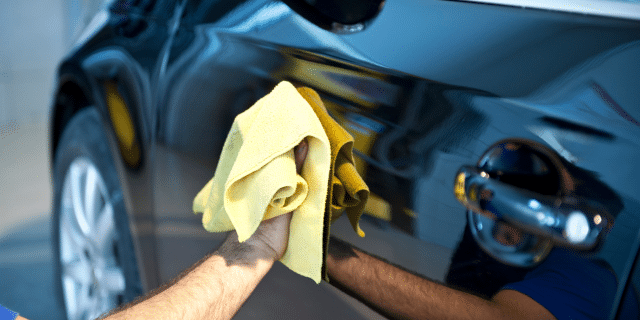
2. Bird Droppings
Think of bird droppings as acid bombs for your paint job. They harden in the sun and can etch into your car’s finish if left too long. Wipe them off with a wet microfiber cloth using a gentle lifting motion (don’t scrub!). You can let the cleaner sit for a few minutes if needed to soften hardened spots.
3. Bug Splatter
Bugs on the windshield are just an annoyance. But bugs on your paint? That’s a problem. Many insects contain acidic compounds that can damage your finish. Clean them off ASAP with a dedicated bug remover or mild soap and water.
4. Fuel Spills
Fuel stains are more than ugly—they’re damaging. Gasoline can eat away at your paint and leave behind stubborn marks. Avoid topping off the tank to help prevent the chance of spills. If there’s a spill, clean it up immediately. Pro tip: Older brake fluid is also a known paint-stripper, so be extra careful when topping off your fluids.
5. Road Salt
Winter driving means road salt—and that means potential rust. Salt can corrode your car’s underbody and eat away at the paint if left unwashed. Rinse your car regularly in the winter and consider a protective wax coat before the first snowfall. Coastal drivers, take note: salty ocean air can do the same.
6. Writing in the Dust
We get it—drawing “Wash Me” on a dusty car is tempting. But those dust particles? They’re basically sandpaper. Dragging them across the surface can create micro-scratches. Dust mixed with rainwater can also become acidic, further damaging your finish. When you see dust, that’s a great time to run your vehicle through a car wash.
7. Dirty Sponges & Harsh Car Washes
Washing your car with a dirty sponge just grinds more grime into the paint. Stick to clean microfiber cloths, and avoid old-style brush car washes, which can leave swirl marks. Soft-cloth or touchless car washes are safer choices.
8. Coffee and Soda Spills
Placing your cup on the roof while fumbling for keys? We’ve all done it. But if you spill sugary or acidic drinks, they can stain your paint fast. Wipe off any spills immediately, especially soda and coffee.
9. Silly String & Shaving Cream Pranks
They might seem harmless, but Silly String contains resins and dyes that can bond to your paint, and shaving cream can leave behind lasting stains. If your car becomes the victim of a prank, rinse and wash it thoroughly as soon as possible.
10. Sprinkler Water Spots
Those white spots you see after a sprinkler hits your car? That’s mineral buildup from hard water, and over time, it can wear away your clear coat. Always dry your car with a microfiber towel—don’t let it drip dry.
Protect Your Paint Like a Pro
You can take steps year-round to protect your paint, and help it last longer.
- Park in a garage or covered area whenever possible.
- Wash your car regularly, especially after road trips or storms.
- Dry it completely with a microfiber towel to avoid water spots.
- Remove bird droppings, sap, and bugs as soon as you spot them.
- Wax your car every 3 to 6 months to maintain a protective barrier.
Your car is one of your biggest investments. Protect it with the right insurance for added peace of mind.
This article is furnished by California Casualty, providing auto and home insurance to educators, law enforcement officers, firefighters, and nurses. Get a quote at 1.866.704.8614 or www.calcas.com.

by California Casualty | Pets, Safety |
Summer is here, and our four-legged friends are ready to make the most of it—soaking up the sun, chasing butterflies, and joining us for backyard barbecues and beach days. But while the season is packed with tail-wagging fun, it also brings a few hidden hazards that can sneak up on even the most watchful pet parents. From sizzling sidewalks to tempting picnic snacks, summertime can be trickier than it looks. Here’s how to keep your fur babies safe, healthy, and ready for all the warm-weather adventures ahead!
Barbecues, Picnics, and Parties
Nothing says summer like a backyard cookout—but it’s not always a pet-friendly affair. Popular BBQ foods like rib bones, corn on the cob, and watermelon rinds may seem harmless but can cause serious health issues, including choking and intestinal blockages. Onions, grapes, and alcohol are outright toxic to pets, and treats like ice cream and potato salad can upset sensitive stomachs. Also be mindful of wooden skewers and toothpicks, which can splinter and cause internal injuries if chewed or swallowed.
Remind your guests not to share their food with your pet. Instead offer pet-safe treats as an alternative. Supervise your furry friend closely, especially if they’re known for getting into mischief—or are particularly sociable.
Lawn and Pool Chemicals
Beautiful lawns and sparkling pools can hide serious dangers. Fertilizers, pesticides, and pool chemicals are harmful if ingested, inhaled, or absorbed through your pet’s paws. Always store chemicals securely, clean up spills right away, and keep pets off freshly treated grass. When possible, choose pet-safe products that reduce the risk while still maintaining your outdoor space.
Dangerous Plants
Gardening this summer? Be sure your landscaping isn’t a hidden health hazard. Azaleas, lilies, rhododendrons, tulips, and daffodils are just a few of the plants that can be toxic to pets. Ingesting them can lead to vomiting, seizures, heart issues, and even death. Before heading out on a walk or letting your pet explore the garden, brush up on which plants are safe. (Check out our pets and plants blog for a detailed guide.)
Itchy and Stinging Insects
Summer means bugs—and lots of them. Fleas, ticks, and mosquitos can make your pet miserable and may carry dangerous diseases like heartworm and Lyme disease. Bees, wasps, and fire ants also pose risks, especially to curious pets who like to sniff and paw at anything that moves.
To protect your pet:
- Use flea, tick, and heartworm preventatives
- Check daily for ticks, especially after walks in wooded or grassy areas.
- Eliminate standing water and trim overgrown plants to deter pests.
- Monitor your pet for signs of bites or stings, such as swelling, excessive scratching, or difficulty breathing. In the case of a severe allergic reaction, seek veterinary help immediately.
Heat and Humidity
High temperatures and humidity can quickly lead to heat exhaustion or heatstroke, especially for older pets, overweight pets, or breeds with short snouts like pugs and bulldogs. Signs of heatstroke include excessive panting, drooling, and dry gums (a sign of dehydration). Your pet also may appear lethargic.
Always provide shade and fresh water and avoid intense activity during the hottest parts of the day. Never leave your pet in a parked car—not even for a few minutes. On a 75-degree day, the temperature inside a vehicle can soar to 100 degrees in just 30 minutes.
Also, be cautious of hot pavement and sand. Use the hand test: place your hand on the sidewalk for seven seconds. If it’s too hot for your hand, it’s too hot for paws. And don’t forget about sunburn! Pets can get burned too—especially on ears, noses, and bellies. Use pet-safe sunscreen, never human sunscreen, to protect exposed areas.
The Beach and the Pool
Many dogs love the beach, but it can come with unexpected dangers. Hot sand can burn sensitive paw pads, and ingesting sand can lead to a dangerous bowel obstruction. Sand can also irritate your pet’s eyes if it gets lodged under their eyelids.
As for water safety, not all dogs are natural swimmers. Never force your pet into the water, and always use a pet lifejacket, especially if you’re on a boat or near deep water. After a swim, rinse your dog off to remove salt or chlorine.
Fireworks and Thunderstorms
The loud booms of summer storms and fireworks can terrify pets, causing stress, anxiety, or even escape attempts. Prepare a safe, quiet space indoors where your pet can retreat. You can also try anxiety wraps, pet pheromone sprays, and soft music or white noise. For severe anxiety, talk to your vet about possible calming medications. And always secure doors, gates, and windows in case your pet tries to bolt.
Traveling with Your Pet
Planning a road trip with your fur baby? Keep your pet secured in a well-ventilated carrier or use a pet seatbelt harness. Never leave them unattended in a parked vehicle. Bring along water, treats, and poop bags, and schedule regular breaks.
Make sure your pet is microchipped and wearing ID tags with up-to-date contact info—just in case you get separated. If you’re flying, be sure to review your airline’s pet policy or check out our blog on flying with pets for extra tips.
One More Layer of Protection
We love our pets and no matter how careful we are, accidents happen. Pet insurance can offer peace of mind, helping cover unexpected vet bills so you can focus on keeping your pet happy and healthy all summer long.
This article is furnished by California Casualty, providing auto and home insurance to educators, law enforcement officers, firefighters, and nurses. Get a quote at 1.866.704.8614 or www.calcas.com.

by California Casualty | Auto Insurance Info |
The freedom of summer is calling, and for many teens, that means hitting the road—often for the first time without a parent in the passenger seat. With new jobs, beach days, late-night hangouts, and spontaneous road trips on the agenda, it’s easy to forget that driving comes with serious responsibility. For parents, this season is a crucial time to set clear expectations behind the wheel. From curfews to passengers to phone use, establishing ground rules now can help your teen build smart habits that last far beyond the summer.
Follow intermediate licensing laws in your state.
Most states have graduated driver licensing (GDL) programs designed to help teens gain experience behind the wheel while minimizing risks. These often include rules like curfews, limits on passengers, and restrictions on highway driving. Start by familiarizing yourself with your state’s laws at www.ghsa.org. Then, build on those requirements with your own family rules. For instance, you might allow only daylight driving for the first month, then gradually expand driving privileges as your teen demonstrates responsibility.
Establish a nighttime curfew.
Driving at night is inherently more dangerous due to decreased visibility and increased likelihood of encountering impaired drivers. Teens, who are still developing experience and judgment, are especially vulnerable. Even if your state allows nighttime driving, consider setting a curfew that keeps your teen off the road during high-risk hours—often between 9 p.m. and 6 a.m. You might also require that they log a certain number of supervised nighttime hours with you before being allowed to drive alone after dark.
Ban cell phone use while driving.
Distracted driving is a leading cause of accidents, and teens are especially susceptible. While some states ban any cell phone use for drivers under 18, it’s smart to create a zero-tolerance rule at home regardless of local laws. That means no texting, no scrolling, and ideally, no hands-free calls unless absolutely necessary. Consider installing monitoring apps that block texts and calls while driving, and most importantly, model good behavior yourself—your teen is watching.
Talk about speeding—and how to avoid it.
Speeding contributes to nearly a third of all fatal teen crashes. Stress the importance of following posted speed limits, adjusting for weather conditions, and maintaining safe following distances. Teach your teen the three-second rule for following other vehicles, and how to give extra space to large trucks. Encourage them to build in extra time when leaving for work or social plans so they’re never tempted to rush.
Enforce seat belt use—every ride, every time.
Seat belts save lives, plain and simple. Make it a non-negotiable rule: the car doesn’t move until everyone is buckled up. Remind your teen that they are responsible for their passengers’ safety, too. Unbelted passengers can become deadly projectiles in a crash—even in the back seat.
Address impaired driving before it happens.
Teens may face peer pressure to drink or ride with someone who’s been drinking. It’s essential to talk openly about these situations and offer a safe exit plan. Let your teen know they can always call you for a ride—no questions asked—if they’re ever in an unsafe situation. Emphasize that driving under the influence of any substance, including marijuana or even some medications, is never acceptable.
Being a safe driver also means being prepared. Make sure your teen knows how to check the gas gauge and fill up when needed—ideally before it dips below a quarter tank. Show them how to recognize warning lights, check tire pressure, and know what to do in case of a breakdown. A quick review of the vehicle’s manual can go a long way in empowering your teen behind the wheel.
Know your teen’s driving plans.
As your teen begins driving independently, stay in the loop. Ask them to let you know where they’re going, who they’ll be with, and when they plan to return. If plans change, they should update you before getting behind the wheel again. Keeping control of the car keys is one way to ensure that you stay informed.
Put it in writing.
Consider drafting a parent-teen driving agreement that outlines the rules and consequences clearly. This written commitment can serve as a helpful reminder and a great conversation starter. It also opens the door for regular check-ins to reassess the rules as your teen gains experience. Be sure to revisit the agreement periodically, especially if any violations or concerns arise.
Don’t forget the insurance.
Before your teen starts driving, make sure they are properly insured. In some cases, good student discounts and safe driving programs can help lower costs. Most importantly, you want to be sure your teen is covered in the event of an accident.
Summer driving can be a rite of passage for teens—and a nerve-wracking time for parents. But with the right rules and a foundation of open communication, you can help your teen navigate this new freedom safely. Remember, driving is a privilege that comes with responsibility. By setting clear expectations and modeling safe behavior yourself, you’re laying the groundwork for a lifetime of smart driving choices.
This article is furnished by California Casualty, providing auto and home insurance to educators, law enforcement officers, firefighters, and nurses. Get a quote at 1.866.704.8614 or www.calcas.com.
