
by California Casualty | Auto Insurance Info |
If you’ve ever been in a car for hours on end, you know the challenges of long-distance driving. It can be uncomfortable, boring, and if you’re tired, even dangerous. Here’s how to stay safe and comfortable during your next long distance road trip.
Plan your route.
Even if you’re using a GPS, you will want to take a look at a map to know where you are going. That allows you to plan your trip, including where to stop to ensure that you’re not driving too long without a break.
-
- Try to take a 15-minute break for every 2 hours of driving.
- Plan your rest stops, not only for mealtimes, but also consider interesting places to visit to break up the trip.
- Account for peak travel times. You may make less progress during rush hours, so consider getting off the road during that time.
Prepare your vehicle.
There’s nothing worse than breaking down on the road for something that could have been prevented with regular maintenance. Before your trip, take a good look at your car, and have it serviced at your local mechanic to make sure it’s in good condition for the trip.
-
- Check fluid levels (brake, coolant, engine oil), tire pressure, and tread depth.
- Make sure that your windshield wipers are in good condition and your lights are working.
- Pack an emergency kit for your car, just in case. This should include safety flares, a flashlight and extra batteries, and a first aid kit.
- Clean and vacuum your car. Sitting in a clutter-free car makes the trip so much nicer.
- Childproof your car before the trip. Make sure it’s safe for your youngest passengers.
Make sure you’re well-rested.
Driving when you’re tired can lead to poor decisions and reduced reaction time which can cause accidents. A study by the AAA Foundation for Traffic Safety estimates that 328,000 crashes each year are caused by drowsy driving. Researchers believe there may be even more than reported. Don’t put yourself or your family at risk.
-
- Get enough sleep the night before your trip, and if possible, the night before that as well.
- Don’t drive when you’re already tired. Avoid planning long drives after work.
- If you feel tired, pull off the road. You can even take a short nap in your car in a safe place, such as a rest stop.
- You can also try short-term pick-me-ups, such as caffeine. Chewing gum can work to keep you awake. Or try an energizing scent. The scent of peppermint can help make you temporarily more alert.
Stay hydrated.
You may be reluctant to drink a lot on your trip, for fear of having to stop more often to go to the bathroom. However, it’s important to stay hydrated. Dehydration can make you feel more tired and cause blurry vision.
-
- Avoid sugary drinks which can cause dehydration.
- Avoid coffee or tea, except as the occasional pick-me-up. They also can dehydrate you.
- Drink water. Pack a cooler and keep it nice and cold so it will feel refreshing.
- You can add citrus or berries to your water for some healthy flavor.
Prepare and plan food and snacks.
Mealtime and snacks are some of the fun of long-distance road trips. Whether you check out a new restaurant or munch on some home-brought favorites, food can be a highlight. Plan for your meals and snacks ahead of time so that you’re not searching for food when you’re hungry, and so that you make the most of your travel time.
-
- Pack sandwiches, put them in a cooler, and then stop for a picnic lunch at a rest stop or park.
- If you have family along the route, stop for a visit around mealtime. You’ll enjoy some homemade food and family time as a bonus.
- Research restaurants along your route. You might find some local fare that you otherwise wouldn’t have a chance to try.
- Choose healthy snacks that keep you full and that aren’t overly messy for the car. These include mixed nuts, trail mix, jerky, granola bars, crackers, carrots, celery, and fresh fruit.
- Bring wipes and designate a trash bag. If you need the floor space for luggage or legs, try a trash container that hangs on the back of the seat.
Stock your car with entertainment.
Long car rides can be boring, and not only for children. Planning things to do can help make the time pass more quickly. If you’re not the one driving, you may even be able to use the downtime productively.
-
- Make a playlist of your favorite songs. Take requests from your (future) passengers and you’ll have everyone engaged.
- Listen to an audiobook or podcast. You can borrow one from your local library or use a favorite streaming service.
- Keep the children occupied with books, puzzles, Mad Libs, Rubberneckers or car games that you can play without any materials, such as I Spy or “find the license plate.”
- Complete a mini-project if you’re not driving, such as organizing your Smartphone screen, deleting photos and emails, brainstorming goals, or practicing a new language.
Finally, make sure you have the proper car insurance. Coverage will give you peace of mind should anything happen on your long distance road trip.
Safe travels.
This article is furnished by California Casualty, providing auto and home insurance to educators, law enforcement officers, firefighters, and nurses. Get a quote at 1.866.704.8614 or www.calcas.com.

by California Casualty | Homeowners Insurance Info |
Is there anything better than knowing your vacation is near? You’ve taken off work and you’re busy planning and packing. But while you’re focused on your destination, don’t forget that you’ll also be leaving your home unattended.
Whether you’re heading out of town for two days or two weeks, take the time to prepare your house and property so there will be no unfortunate surprises (or visitors) while you’re away.
Make your home looks lived-in.
Savvy thieves look for signs that you are away, such as an overgrown lawn, a pile-up of mail or packages, or an empty driveway. A well-maintained home and property reinforce the fact that people are living here, and most likely at home.
-
- Mow and edge your lawn before you leave. Trim your bushes, especially around windows and close to your house.
- Pick up any debris and any personal items in your front or backyard.
- Stop your mail and newspapers, and arrange for a neighbor to pick up any packages.
- Leave a car parked in your driveway or ask a neighbor to park in front of your house.
- Invest in an inexpensive light timer to turn the lights on and off while you’re away.
Secure your home and property.
There’s a lot more than simply locking the doors that goes into securing your home and property. You want to make it unlikely that a thief would target your home, and also protect its contents should a neighborhood fire or disaster occur.
-
- A security system can help protect your property and also reduce the cost of your home insurance policy.
- Consider a motion-sensor floodlight, which can help to deter trespassers.
- Make sure your important papers are in a fireproof container or safe.
- Leave an emergency contact number and a spare key with a trusted neighbor. (Don’t hide your key in a rock. That’s the first place a thief will look.)
- Don’t advertise that you are going away on social media. Wait until you return home to post photos.
Clean thoroughly.
Coming home to a dirty house is no fun. Neither is being greeted by week-old smells of stinky garbage. Take the time to clean up before you leave so everything is fresh and ready for your return.
-
- Give your house an overall cleaning.
- Empty the refrigerator of perishable items.
- Empty all of the trashcans, especially the kitchen trash, right before you leave. Ask your neighbor to put out your trash cans on the next trash day.
- Run your garbage disposal with half a cup of vinegar and some water.
- Do the laundry and change the sheets.
Make plans for your pets and your plants.
It goes without saying that you won’t leave your pets or plants unattended if you’re going to be away.
-
- Depending on the type of pet, you may need a pet sitter or boarding facility. Make those plans well in advance of your trip.
- If you’re leaving pets at home, make arrangements for someone to check on them. You will provide them with food and water of course. But even low-maintenance animals can get accidentally trapped in spaces or encounter other mischief.
- Ask a neighbor to water your plants at your home or theirs. If you dole out your plants to multiple neighbors, make a list of plants and locations so you know who has what.
Put your systems in vacation mode.
If no one will be living in your house, why pay for gas, electric or water? It’s a good time to save energy by shutting down the home systems that you don’t need, taking into account if there are any pets or plants that will need them.
-
- Put your water heater in vacation mode. It’s a setting that allows your water heater to run your boiler at a lower temperature than normal.
- Turn off the water valves to the dishwasher, washing machine and all sinks, if no one is going to be using them (such as a neighbor watering plants).
- Set your thermostat to a temperature closer to the outside temperature. Just remember to adjust it for pets and plants as needed.
- Change the batteries in your smoke detectors if you have not recently done so.
Do a final check the day you leave.
There’s a lot to think about as you’re leaving for vacation, and likely your mind is more focused on the trip ahead than what’s happening at home. This is where a final “to do” list and check-in helps. Plan to do these things on the day you leave.
-
- Unplug and shut off appliances not in use. Not only does this save on your electric bills, it protects items from power surges.
- Close all doors and windows. Close the curtains and blinds.
- Leave on a light or two on or set a lamp timer.
- Set the thermostat appropriately.
- Check the washer. The last thing you want is old (and smelly) wet laundry to greet you when you return.
- Make sure your oven is off. Make sure your iron is off.
- Pro tip: Take pictures of items you’re worried about, such as oven knobs to show they’re off. That way, you can check back if you’re concerned about them.
Check-in while you’re away.
You may be out of town, but you’ve got great ways to check in to see what’s happening in the neighborhood.
-
- Subscribe to a local app such as NextDoor.
- Look at online footage from your home’s security camera.
- Text or call a neighbor to check in.
You also may consider hiring a house sitter so that you don’t have to worry about what’s happening at home. If you do choose that route, make sure that the person is a reputable one. Establish a set of rules, so it is clear what your house sitter can and cannot do (for example: can watch Netflix; can’t have parties).
Don’t forget to thank the neighbors who helped you. Bring them a souvenir or small gift from your vacation or get them a gift card for a dinner out.
Finally, know that your home and property are protected by homeowner’s insurance. Should anything happen while you’re gone, your policy helps provide that peace of mind.
Have a great trip.
This article is furnished by California Casualty, providing auto and home insurance to educators, law enforcement officers, firefighters, and nurses. Get a quote at 1.866.704.8614 or www.calcas.com.
by California Casualty | Homeowners Insurance Info |
There’s a reason spring cleaning is so popular-the birds are chirping, the sun is shining, and there is a sense of newness in the air! There’s no better time to open up those windows and scrub away all signs of winter. However, spring cleaning isn’t just for dusting and decluttering. It’s also a great chance to assess and address safety issues, especially fire hazards.
Every 89 seconds, a fire department responds to a home fire in the U.S. And according to the National Fire Protection Association, in 2020, home fires were responsible for 3,500 deaths, 15,200 injuries, and $21.9 billion in property damage.
When you clean with fire safety in mind, you help protect your home and family from these often-unforeseen fire safety dangers. To help you stay safe this season, we’ve compiled the top safety cleaning tips from fire departments around the country.
Tip #1: Clear your stovetop of fire hazards.
Stovetops account for the majority of kitchen fires. Making sure that there are no flammable hazards nearby will help prevent the flames from catching and spreading a fire.
-
- Keep your stovetop clean between cooking meals.
- Put space between your stove and anything flammable: oven mitts, wooden utensils, towels, wooden stove covers, and kitchen curtains.
- Keep your kitchen counter free of grease or clutter.
- Always stay near the food you are cooking.
- Turn pot handles inward so you can’t accidentally bump them.
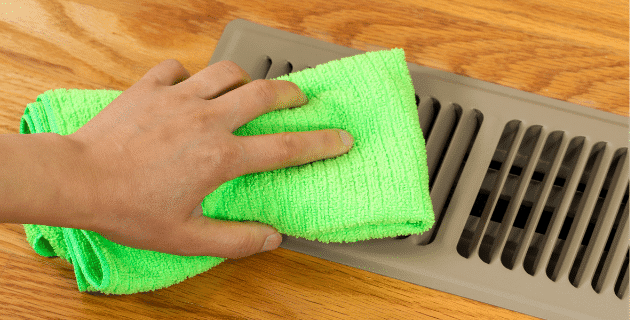
Tip #2: Clean the lint trap in your dryer.
Dryers are a common cause of home fires, and too often, the lint traps are the culprit. Making sure your lint trap is not too full will help.
-
- Clean lint filters before or after each load.
- Remove lint from around the dryer rim.
- Make sure the air exhaust vent pipe is free and clear, and that the outdoor vent flap opens when the dryer is on.
- Move flammable items like cardboard and cleaning supplies away from the dryer, especially when it is on.
Tip #3: Check extension cords, outlets, and wiring.
Damaged cords, overtaxed outlets, and old wiring can cause electrical fires. Check these items to make sure that your electrical setup is not putting your safety at risk.
-
- Check for frayed or damaged extension cords. If you find any, throw them out and replace them.
- Make sure your extension cords are rated for the appliances and items that they are powering.
- Do not put electric cords under carpets or across doorways.
- Check to make sure that your outlets aren’t overloaded.
- If an electric appliance smokes, smells funny, or is drawing heat when plugged in, unplug it.
- If you’re familiar with your home’s electrical system and you can take a look, check for scorch marks or frayed wires. Call an electrician to update or rewire the system.
Tip #4: Check for potential fire hazards.
As you do your spring cleaning, check your home for possible fire hazards. Then, take the steps to minimize their risk.
-
- Keep space heaters at least 3 feet from anything that can burn. Turn them off before leaving the room and before going to sleep.
- Practice safety with candle flames. Store matches where children cannot get them. Alternatively use child-resistant lighters.
- If you have a chimney, get it professionally cleaned and inspected. Chimneys can have a build-up accumulation of creosote, a flammable substance that lines the flue.
- Keep cleaning fluids away from heat sources. Many are combustible. These chemicals could even heat up to dangerous levels outside in the sun. (Consider non-toxic cleaners that are safer when heated, such as vinegar mixed with water.)
Tip #5: Remove potential hazards from the garage.
The garage is where we often store our extra stuff. That includes items that could fuel a fire. As part of your cleaning routine, declutter the garage.
-
- Remove stored newspapers, wrapping paper, blankets, and other flammable items that you may be storing in the garage.
- Dispose of oil or greasy rags. Never leave them in a pile. If you must keep them, store them in a labeled metal container.
- Move propane or gasoline outside your home to a shed or detached garage.
- Check your lawn mower’s gas tank for rust. Make sure the fuel line has no leaks. Check any other gas-powered tools, too.
Tip #6: Clear your outside space.
Even fallen leaves and grass clippings can become fuel for a fire. That’s why clearing your yard is so important.
-
- Clean away dead vegetation, fallen branches, and any debris.
- Clean leaves from your roof and gutters.
- Move trash and woodpiles at least 30 feet away from your house.
- Replace mulch, and keep it at least 3 feet from the house.
- Position your barbecue grill away from your home. Also, keep it away from windows, heating and air conditioning units, and vegetation. Clean the grease or fat buildup every time you cook.
- Make sure your propane hose has no leaks or cracks. If you smell gas when you turn it on, shut it off immediately.
Tip #7: Be prepared.
Despite your best efforts, fires can happen. Make sure you are fully prepared to know about them and to take action.
-
- Test smoke alarms monthly. Make sure they have working batteries. Replace batteries every six months. Replace the smoke detectors every 10 years.
- Make sure smoke detectors are on every level of the house, including the basement, and outside every bedroom. Consider interconnected smoke alarms, so if one goes off, then all will sound the alarm.
- Keep fire extinguishers fully charged and easily reachable.
- Make sure doors and windows easily open in case of the need to escape fast.
- Display your house number prominently in case you need to call for help.
- Create a family escape plan. Include a map of each level of your home. Make sure there are 2 escape routes for each room, such as a window and door. Make sure you account for pets, and also name an outside meeting place in the event of an emergency.
- Practice the plan so that everyone is ready, just in case.
For more home tips on fire safety this spring, check out our blog on The 6 Most At-Risk Fire Areas of Your Home.
This article is furnished by California Casualty, providing auto and home insurance to educators, law enforcement officers, firefighters, and nurses. Get a quote at 1.866.704.8614 or www.calcas.com.

by California Casualty | Auto Insurance Info, Homeowners Insurance Info, Safety |
There’s a reason why a tornado strikes immediate fear for those in its path. These violent storms can flip cars, uproot trees, and destroy entire properties. Their powerful winds can even lift objects hundreds of feet off the ground and leave complete devastation in their wake.
Here’s what you need to know to keep your home, your vehicle, and your family safe from tornadoes and high winds.
What is a tornado?
A tornado is a spinning, funnel-shaped cloud usually formed as part of a thunderstorm. Tornadoes can be over a mile wide and as much as 50 miles long. Their narrow funnel shape extends from sky to ground with winds that can reach speeds up to 300 mph. (To put that in context, the average car can be moved by a 90-mph wind.)
While certain regions of the country have been dubbed “Tornado Alley,” it’s not true that tornadoes are prone to occur in those places. Tornadoes can occur anywhere and anytime and have been reported in all 50 states.
How do we predict tornadoes?
Tornados, and their paths, are notoriously difficult to predict. Even meteorologists who study the weather don’t know for sure how they form. However, the National Weather Service is able to track conditions that can contribute to tornadoes—and issue tornado watches and warnings as needed.
A tornado watch means to prepare for severe weather. A tornado warning means that a funnel cloud has been reported by spotters or indicated by radar.
What are the warning signs of a tornado?
By the time you see warning signs, that means a tornado is well on its way. You’ll need to act fast. Here are just some signs to look for:
-
- Large hail without rain
- Dark or greenish sky
- An approaching cloud of debris
- A loud roar like that of a freight train
- How do you prepare for a tornado?
You can take the steps to protect your home, your car, and your family right now.
1. Sign up for severe weather alerts. You can get critical and timely information from local media broadcasts and the emergency alert system on your TV or desktop and mobile devices. In addition, your local utility company, township, city, or state may offer free alerts. Check with your electric or gas company, and with city hall or municipal government.
2. Develop a family disaster plan. Your plan of action will identify where you and your family will shelter in place, and what to do if you get separated. It also will address any special needs of family members and your pets.
3. If there is not a safe space in your home to wait out a tornado, research local public shelters. For example, if you live in a mobile home, tornadoes can easily turn over mobile homes. Plan to go to a public shelter.
4. Gather emergency supplies in case you need to shelter in place. Keep them together in an easily accessible place. Include water, nonperishable food, and medication. Pack a first aid kit.
5. If there is a tornado watch, store items like outdoor furnishings that could become flying debris. Make sure cars are parked well away from trees.
How do you stay safe during a tornado?
If you’re home…
-
- Go immediately to a safe place such as a basement, storm cellar, center hall, or small interior room in your home. Choose the lowest floor possible and avoid windows. Also, avoid places where heavy items like refrigerators may be directly above you. If a tornado strikes, it could come crashing down.
- For added protection, get under a table. Cover yourself with thick padding such as blankets or even a mattress. This will help in case the ceiling falls in.
- If the power goes out, use flashlights rather than candles if you need a light. An open flame can create a fire hazard if gas lines are damaged by severe weather.
- Have a weather radio or your phone tuned into local weather. Tornadoes can be accompanied by flooding. Know when the tornado is gone and it is safe to emerge.
If you’re driving…
-
- Do not try to outrun a tornado in a car. Pull over.
- Tune into your local weather radio station, or if you are traveling, call the weather emergency number listed on the signs along the highway.
- Park in a low, flat location. Avoid bridges or overpasses.
- If you can, leave your car and get to safety inside a sturdy building.
- If you cannot find adequate shelter, then stay in your car with your seat belt buckled. Put your head down below the windows. Cover your body with a coat or blanket and your head with your arms.
What do you do after a tornado?
Once it is safe to venture out, it’s time to inspect the damage. Wait until daylight and make sure to look around safely. Stay clear of fallen power lines. Stay out of damaged buildings. Make a plan to clear away debris and downed trees from your yard.
If your home, car, or property suffered damage from the tornado, you will want to take the following steps:
-
- Secure your property from further damage.
- Take photos to document what has happened.
- Alert your insurance company, determine if you are covered for the damage, and file a claim.
You have home and car insurance for a reason. Put it to work if you need it. Make sure you and your family are fully protected in the event of a tornado, and any damage that follows, such as flooding. Call a California Casualty agent today at 1.866.704.8614 or visit our website www.calcas.com.
This article is furnished by California Casualty, providing auto and home insurance to educators, law enforcement officers, firefighters, and nurses. Get a quote at 1.866.704.8614 or www.calcas.com.

by California Casualty | Safety |
The power’s out and your phone is dangerously low. What can you do to keep its charge for as long as possible, and how can you possibly recharge it when there’s no electricity? Where there’s a will, there’s a way, and we’ve researched the top ways to do so.
After all, your smartphone is more than just a fun accessory and helpful convenience. It can give you access to local emergency updates and severe weather alerts. It also is your primary way to communicate with family and friends during an emergency.
Follow these tips to keep your phone charged during a power outage.
#1. Plug into your laptop.
Your laptop has USB ports that can charge cell phones. If your laptop is fully charged, you can power a phone for hours. Turn on the laptop but don’t unlock your screen. Plug your phone into the laptop USB port. (Note that if you have an iPhone, you may need a USB-C to USB adapter to match the port.)
#2. Use a portable charger or power bank.
You may have one on hand, or if not, you can pick one up. Most drug store chains sell them in addition to electronics stores. The portable chargers and power banks do need to be charged to work but they hold their charge for months, so you can charge one and put it in your emergency kit. Solar chargers are popular options; the advantage is that they can charge with the sun. But they vary widely in power capability so do your research.
#3. Plug into your car.
Most newer vehicles have USB ports where you can plug your phone. If not, you can buy an inexpensive USB car adapter that plugs right into your car’s dashboard in the space commonly known as the cigarette lighter. Simply turn on your car, and plug in your phone. This works even if you’re out of gas.
#4. Use an inverter.
Another way to charge from your car is to use a power inverter. This tool converts the 12-volt direct current in your car’s battery to the 120-volt alternating current for your phone. It’s a process similar to jump-starting your car. Do this outdoors and not in the garage to avoid carbon monoxide fumes. You connect the inverter to your car’s battery using alligator clamps, with the positive red cable on the positive battery terminal and the negative black cable on the negative battery terminal. Then plug your phone into the AC plug on the inverter, and start your car. You’ll be drawing power directly from the battery, so you’ll need to run your car afterward to recharge your battery.
#5. Use your car battery jump pack.
If you have a car battery jump pack – considered one of the must-carry items for your car — you may have a way to charge your phone. These jump packs usually come with USB charging ports.
#6. Try a crank-powered phone charger.
Crank-powered chargers are mechanical devices that harness your own physical power. You turn a handle, which spins a magnet, creating a magnetic field. It takes a lot of effort to generate enough to power your phone, but it’s a low-cost alternative that can be very effective.
#7. Use a Biolite CampStove.
A Biolite CampStove is a portable wood stove that actually generates electricity. If you have this camping appliance, you can cook your meals and charge your phone.
#8. Go to a place that has power.
If it’s not a region-wide power outage, you can drive to a place that has power, such as a coffee shop, restaurant, or store where you can plug in your phone. If your office or your school has power, try those places.
#9. Conserve your phone’s battery.
You don’t know how long the power will be out. That’s why the first step is to ensure your phone isn’t using any more battery than necessary. Here are some ways to do that.
-
-
- Dim the brightness of your screen. On an iPhone, go to Settings, then Display & Brightness. Drag the slider to dim it. On an Android, swipe down from the top to see the Notification Shade. Depending on your phone, you may have to swipe twice. Tap and hold the brightness slider and drag it to the right level.
- Put your phone into Low Battery Mode. On an iPhone, go to Settings, scroll down to Battery, and select Low Battery Mode. On an Android, swipe down from the top menu for the Power Saving icon.
- Shut down any applications running in the background. On an iPhone, swipe up from the bottom of the screen, pausing in the middle. Then, swipe right or left to find the app you want to close. Swipe up on the app to close it. On an Android, go to Settings, then Apps. Choose the app that you’d like to stop and then tap Force Stop.
- Turn off your phone’s WiFi location services and Bluetooth. On an iPhone, you’ll find that at Settings and Wi-Fi, and at Settings and Bluetooth. On an Android, swipe down from the top, and look for the Wi-Fi icon below the date. Select it and then tap the toggle switch to turn it off. For Bluetooth, go to Settings, then Apps. Find Bluetooth and tap the toggle switch to off.
- Put your phone into Airplane mode, which may disable WiFi and Bluetooth. This will prevent you from calling or texting, and also receiving calls and texts, so you will need to take it off for communication. On an iPhone, go to Settings, then Airplane mode, and enable it. On an Android, swipe down from the top of the screen two times to open Quick Settings. Look for Airplane mode and tap the toggle switch. (Pro tip: Phones being charged while they are in Airplane mode tend to charge faster.)
- Don’t use your phone to play music, podcasts, or games to pass the time. This will only drain your battery.
- If you won’t be using your phone for hours, shut it off to conserve the battery in the long run.
This article is furnished by California Casualty, providing auto and home insurance to educators, law enforcement officers, firefighters, and nurses. Get a quote at 1.866.704.8614 or www.calcas.com.
