by California Casualty | Homeowners Insurance Info |
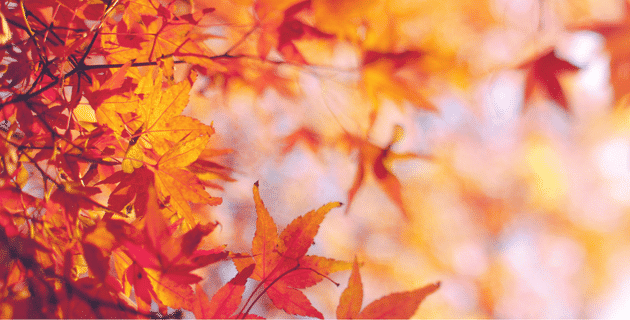
It’s the beginning of the holiday season. In the coming weeks, you’ll be hosting guests, gathering with family, and celebrating in your home.
As a host, there’s a lot to do, so we’re here to help you get organized. From fall home safety updates to getting ready to entertain, we’ve got your November Home Checklist.
Entertaining
Entertaining is a big part of the season, no matter which holiday you celebrate. Here’s how to get your home ready.
Clean and prepare guest rooms.
Are you going to be hosting guests? Get a jump start on preparing the guest room. That way, you can give it a quick touch-up just before your guests arrive.
• Make the bed with fresh linens.
• Dust, vacuum and clear out any clutter. Empty the waste basket.
• Clear out the closet. Make sure there are empty hangers and room for a suitcase. Put an empty laundry basket in the closet for your guest’s dirty clothes.
• Set up the nightstand with a box of tissues, and don’t forget to leave the WiFi password!
Deep clean your bathrooms.
Whether or not your guests stay over, they will be using the bathroom. Do a deep clean of all of your bathrooms, but especially the ones your guests may use.
• Wash all washable items such as towels and mats.
• Scrub the shower, tub, and toilet.
• Clean the floors, walls, mirrors, and vanity. Dust the blinds.
• For overnight guests: Add a basket of travel-size toiletries your guests may have forgotten to pack.
Get your linens and serving pieces ready.
Whether you’ll be using the fine linens and China, or saving yourself some time and choosing to go with disposable utensils, make sure they are ready to go when you are.
• Launder and press fancy linens and napkins.
• Sharpen your kitchen knives. You’ll be doing a lot of cooking.
• Stock up on disposable items to get you through multiple snacks and meals.
• Pull out your favorite holiday pieces, inspect them and clean them.
Pro tip: Roll up fancy linens on old wrapping paper tubes to store them in a way that prevents wrinkles.
Decorate inside and out.
If you love to decorate for the holidays, now is the time to start. Make a realistic plan for your décor so you can ensure it’s safe and so it’s not too overwhelming.
• Many holiday traditions revolve around light. Add lights or candles, but keep fire safety in mind. Don’t overload extension cords.
• Decorate with a shopping bag nearby so you can easily toss old items you no longer use. You can donate or trash them.
• Immediately get donations out of your house by boxing them up and putting them in your car.
• Keep your holiday spending on budget whether for décor, entertaining, or gifts.
Pro Tip: To make decorating easier next year, take a picture of each room so you can easily duplicate it.
Home Maintenance
You’ll need to perform fall maintenance for your appliances and home systems. In addition, you’ll want to address common problem areas before they become problems during the holiday season.
Fix any plumbing issues.
That slow drain, finicky toilet, or nonworking garbage disposal can get worse over time. Take the time to look at these and see if you can DIY a fix or if they need professional help.
• Clean your garbage disposal to prevent it from growing bacteria.
• Use a “snake” tool to pull up debris from a slow drain.
• Fix your dripping faucets and address your running toilets, both of which can waste water on a daily basis.
• Make sure your sump pump is working before rainy season.
Cover gaps in your home.
Mice can squeeze through a gap that is about the width of a pencil. Bugs can enter even tinier cracks. To prevent rodents and bugs from taking refuge in your nice warm home, you will want to check your home for any gaps and cover them.
• You can use caulk to seal skinny gaps, squirt foam for medium-size gaps, and wire mesh and plaster for larger ones. Cover exterior vents with hardware cloth, a type of wire mesh.
• Common places for gaps are around doors and windows, where pipes and wires enter your home, or vents for exhaust fans. You also may find gaps where the wall and floor connect, and inside and around cabinets.
• Attach door sweeps to the bottoms of exterior doors.
Guard against carbon monoxide poisoning.
With the stove and fireplace in use, a buildup of carbon monoxide is common. Carbon monoxide is produced when we burn gasoline, wood, propane, charcoal, and other fuel. This gas is colorless and odorless, and can be deadly.
• Install battery-operated carbon monoxide detectors in your home (and replace the batteries each spring and fall).
• Have a professional check your heating system, water heater, and any gas or oil-burning appliances every year.
• Be careful about burning any fuels inside your home. Make sure there is proper ventilation.
• Be aware of the signs of carbon monoxide poisoning: headache, dizziness, nausea or vomiting, shortness of breath, and confusion. Get outside to fresh air, and seek medical attention.
Protect against slips and falls.
You and your guests will be walking in and around your house this season. Make sure the walkways are safe.
• Do a walk-through inside and outside your home. Make sure that there are no obstructions on common paths.
• Check that stairs and paths inside and out are well-lit. Falls can happen when you can’t easily see where you are going.
• Check railings to make sure they are secure and not wobbly.
• If you’re using a ladder for holiday decorations, make sure it is sturdy. Place it on firm, level ground. Maintain 3 points of contact whenever you climb it.
Other
Do your fall yard cleanup.
It will be winter soon. Make sure you have cleared your yard and prepared it for what’s to come so you will avoid any winter home hazards.
• Finish raking any leaves. Use a tarp to haul them to the curb or to a compost pile. Or you could run your lawn mower over them to shred them. They will decompose into a natural fertilizer.
• Remove any dead shrubs or trees. (Check for signs of life by scratching the bark at the base. If you see green, it’s alive.)
• Bring in, or cover, patio furniture.
• Only cut your grass if it is still growing. Once it’s below 50 degrees consistently, you can put your mower away.
Stock up for the winter
It’s been a while since you’ve had to use your winter gear. Make sure that it’s there and in good shape, and replace what is needed.
• Check your snow shovels, ice scrapers, and other snow tools.
• Service your snow blower and buy fuel.
• Order firewood if you use it.
• Pick up a bag of pet-safe ice melt.
• Restock emergency kits.
Check in on your home insurance policy.
For added peace of mind, check with your insurer and make sure your homeowner’s policy covers your current needs. Ask your provider about how to lower your home insurance costs.
What else is on your November Home Checklist? Tell us in the comments.
This article is furnished by California Casualty, providing auto and home insurance to educators, law enforcement officers, firefighters, and nurses. Get a quote at 1.866.704.8614 or www.calcas.com.
by California Casualty | Homeowners Insurance Info |
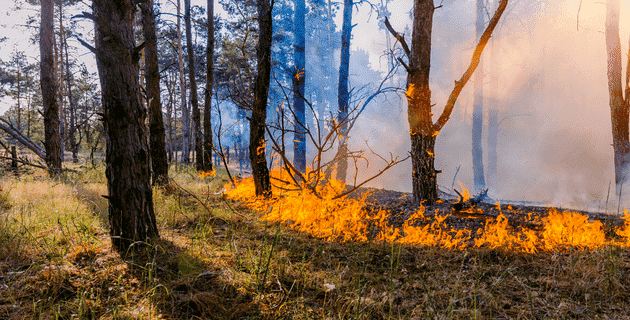
When the weather is hot and dry, and conditions are just right, wildfires happen. They are more common in some parts of the country than others, but it’s important to remember a fire can break out anywhere. And when it does, your home and your family are at risk.
Know whether your home is located in a high-risk fire zone and what to do to protect it.
What’s your zone?
A fire hazard zone is a region that has characteristics that put it at higher risk for wildfires, such as:
-
- A history of fires in the region over a 30-50-year period
- Dry, hot, and windy weather that cause fires to spread faster
- Forests and vegetation that act as fuel for fire
- Steep slopes where fire often burns faster
- The potential for fires to burn through the top layer of foliage
- Burning embers that could spread to urban areas
Millions of homes are located in or near fire hazard severity zones. U.S. states most impacted by wildfires include California, Oregon, and Arizona. California has classified its fire zones as moderate, high, and very high. These areas are mapped by the California Department of Forestry and Fire Protection. The zones help property owners and builders better protect structures in areas at high risk.
Other states also affected by recent wildfires include Washington, Colorado, Montana, Wyoming, Utah, Idaho, Nevada, Texas, Alaska, New Mexico, Oklahoma, and Florida. There’s been a population boom in these drought-sensitive regions, which means there’s an increased risk of human activity sparking a fire.
The nonprofit, First Street Foundation, has an online risk factor tool where you can search for your region’s fire risk. You also can find information from your state’s Department of Forestry. If your home is in a fire hazard zone, make sure that your community is an active Firewise USA® site working with local foresters to reduce risks.
How can you protect your home?
In addition to your community working to reduce risk, there are steps you can take to help better protect your home from wildfires.
The USDA Forest Service has divided your home and property into three zones based on research into how homes ignite. Addressing each of these zones will help to reduce the risk of a fire on your property.
Immediate Zone (Less than 5 feet) – your home and the area immediately surrounding it
-
- Seal your windows and doors to reduce the risk of embers getting inside your home. (Embers are burning pieces of wood that can be carried by winds for more than a mile.)
- Use insulated glass, which can hold heat longer than standard glass.
- Avoid acrylic skylights that could melt.
- Paint decking with fireproof paint.
- Consider other fireproof materials, from siding to roofing to metal or fiber-cement doors.
- Declutter the gutter.
- Replace missing shingles on roofs, to protect against embers.
- Install 1/8-inch metal mesh screening in exterior attic vents, also to protect against embers.
- Remove any flammable materials, including leaves, plants, or stored items away from your home’s exterior walls and from under decks or porches.
- Trim branches that hang over your home.
- Consider the installation of sprinkler heads on your roof, patio, or deck.
Intermediate Zone (5-30 feet) – landscaping and hardscaping around your home
-
- Slow the spread of fire toward your home with driveways and walkways to allow a safe area for firefighters to be able to fight the fire.
- Remove flammable vegetation and replace with stones or drought-resistant plants with high water content.
- Use crushed stone or gravel rather than flammable mulches.
- Remove vegetation underneath trees that could help the trees catch fire.
- Space trees in clusters that are 18 feet between the trees’ crowns. If there’s a slope, increase that distance.
- Keep the grass mowed short, to four inches.
- Emergency vehicles need driveways that are 12 feet wide and have a vertical clearance of 15 feet. Check that your property can accommodate them.
Extended Zone (30-100 feet) – the vegetation and land that extends 30 feet past your house
-
- Keep trees at least 12 feet apart (between canopy crowns) within 30-60 feet of your home. Keep trees at least 6 feet apart within 60-100 feet of your home.
- Pick up debris and dead plant material.
- Remove vegetation that is near storage sheds or other structures.
- Make sure your home and street are clearly marked for first responders.
Finally…
This article is furnished by California Casualty, providing auto and home insurance to educators, law enforcement officers, firefighters, and nurses. Get a quote at 1.866.704.8614 or www.calcas.com.
by California Casualty | Safety |
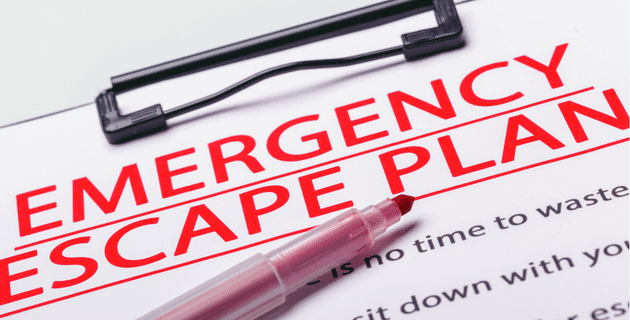
When disaster strikes, you may have only minutes to gather your loved ones, your pets, and your belongings, and get on the road. Are you ready?
Whether it’s a flood, fire, or other emergency, there are times when evacuations are necessary. These are often stressful times when you need to move quickly, and might not have time to grab everything you need. Preparing for emergency evacuations ahead of time will help you and your family know exactly what to do, and what to bring with you, in times of crisis.
Here’s what you need to consider when planning to evacuate.
Learn about local disasters and policies.
-
- Your place of work, your children’s school or daycare, and your local community probably have evacuation plans. You’ll want to find out about them, so that you can incorporate that information in your plan if it applies. Ask these places how they communicate about disaster procedures and what their policies are for emergencies and evacuations.
Pack it up.
-
- Pack an emergency kit full of essential items and documentation your family will need that’s ready to go and keep it in a place where you can grab it easily. Make sure it’s one you can carry or transport easily if you have to walk long distances or travel on public transportation in an emergency.
- Pro Tip: Revisit the content of your kit every six months. That’s when food may expire and children’s clothing sizes may change.
-
- You will need nonperishable food, bottled water, and supplies for 3 days. This includes soap, hand sanitizer, disinfecting wipes, and prescription medications. Make sure you include supplies for pets or infants, such as food and formula, and for any special dietary needs for members of your family. Also pack clothes and pajamas for every member of your family, as well as any bedding, pillows and sleeping bags. Finally, bring a first aid kit and all of your devices and chargers, as well as a battery-powered radio to stay on top of news and information.
-
- Keep a small amount of cash or traveler’s checks at home in a safe place where you can access them in case of evacuation. Store important papers in a fireproof, waterproof container that may be grabbed in case of an emergency. These may include birth certificates, marriage certificates, passports, insurance policies, wills and deeds, and even treasured photos.
Plan your escape route.
-
- Plan for the worst-case scenario. You want to make sure that every member of the family can exit your home safely in the event of an active disaster, such as a fire or earthquake.
-
- Draw a floorplan for your home. Use a blank sheet for each floor. Mark 2 escape routes from each room. Hang the drawing at eye level in each child’s room. Make sure children understand the drawings. Do a room tour and point out the exits. Practice using them. Talk about when your children might have to use them.
-
- Plan for which adults are bringing which items packed in the previous section. Dividing the responsibilities will help you get out more quickly.
Know where to go.
-
- Know your options about where you can evacuate. You may choose to evacuate to a shelter in your town, to a local hotel or motel, or to family or friends in another town, away from the danger. It also may depend on the type of disaster. You may not be able to stay local in a widespread flood but might be able to shelter in a hurricane. Download the FEMA App to locate emergency shelters in your area.
-
- If you choose the local shelter, find out the rules. You want to make sure that they can accommodate your family. You’ll also have to make separate arrangements for pets. (See the pet section below.)
-
- Choose destinations in different directions in case the emergency is in one part of town. Have the addresses and phone numbers handy for easy access.
Map it out.
-
- Keep a full tank of gas if evacuation seems necessary. Gas stations may have long lines or not be able to pump during a power outage.
-
- Be familiar with alternate routes in case you cannot take the route you know. Be alert for road hazards, washed-out bridges, and downed power lines. Avoid driving in flooded areas.
-
- Bring a physical map in case you don’t have access to a GPS or if satellites go down or your devices run out of power.
Plan for pets.
-
- You want to protect your pets during a disaster. That means you will need to find them a safe place to shelter, whether it’s with you at a pet-friendly location or at an animal boarding facility. Know that facility’s evacuation plan if they may be in the region.
-
- Pack pet food, leashes, litter boxes, crates, beds, toys, and any other supplies needed by your pet. Bring a copy of updated veterinary records.
-
- Make sure your pet is microchipped and has a proper ID on his or her collar if applicable. Bring a photo of you and your pet together, which can help if for any reason your pet gets separated from you.
Stay in touch.
-
- Establish a place to meet near your home in case you get separated. Choose a place immediately outside (such as the driveway), a little bit further (such as the stop sign at the end of the street), and a location even further (such as the neighborhood grocery store).
-
- Choose an out-of-state contact that you all can call if needed. Update that person when you are evacuating and as you change locations.
Ready, set, go.
Take the 10-minute evacuation challenge. See if you can get your family and belongings in a car in just 10 minutes. Then, practice your evacuation drill regularly.
Finally, check that you have enough insurance to cover your home, car, and possessions in case they are destroyed in a natural disaster or other emergency. You’ll all have peace of mind knowing that you are fully prepared and know exactly what to do.
This article is furnished by California Casualty, providing auto and home insurance to educators, law enforcement officers, firefighters, and nurses. Get a quote at 1.866.704.8614 or www.calcas.com.

by California Casualty | Homeowners Insurance Info |
Is there anything better than knowing your vacation is near? You’ve taken off work and you’re busy planning and packing. But while you’re focused on your destination, don’t forget that you’ll also be leaving your home unattended.
Whether you’re heading out of town for two days or two weeks, take the time to prepare your house and property so there will be no unfortunate surprises (or visitors) while you’re away.
Make your home looks lived-in.
Savvy thieves look for signs that you are away, such as an overgrown lawn, a pile-up of mail or packages, or an empty driveway. A well-maintained home and property reinforce the fact that people are living here, and most likely at home.
-
- Mow and edge your lawn before you leave. Trim your bushes, especially around windows and close to your house.
- Pick up any debris and any personal items in your front or backyard.
- Stop your mail and newspapers, and arrange for a neighbor to pick up any packages.
- Leave a car parked in your driveway or ask a neighbor to park in front of your house.
- Invest in an inexpensive light timer to turn the lights on and off while you’re away.
Secure your home and property.
There’s a lot more than simply locking the doors that goes into securing your home and property. You want to make it unlikely that a thief would target your home, and also protect its contents should a neighborhood fire or disaster occur.
-
- A security system can help protect your property and also reduce the cost of your home insurance policy.
- Consider a motion-sensor floodlight, which can help to deter trespassers.
- Make sure your important papers are in a fireproof container or safe.
- Leave an emergency contact number and a spare key with a trusted neighbor. (Don’t hide your key in a rock. That’s the first place a thief will look.)
- Don’t advertise that you are going away on social media. Wait until you return home to post photos.
Clean thoroughly.
Coming home to a dirty house is no fun. Neither is being greeted by week-old smells of stinky garbage. Take the time to clean up before you leave so everything is fresh and ready for your return.
-
- Give your house an overall cleaning.
- Empty the refrigerator of perishable items.
- Empty all of the trashcans, especially the kitchen trash, right before you leave. Ask your neighbor to put out your trash cans on the next trash day.
- Run your garbage disposal with half a cup of vinegar and some water.
- Do the laundry and change the sheets.
Make plans for your pets and your plants.
It goes without saying that you won’t leave your pets or plants unattended if you’re going to be away.
-
- Depending on the type of pet, you may need a pet sitter or boarding facility. Make those plans well in advance of your trip.
- If you’re leaving pets at home, make arrangements for someone to check on them. You will provide them with food and water of course. But even low-maintenance animals can get accidentally trapped in spaces or encounter other mischief.
- Ask a neighbor to water your plants at your home or theirs. If you dole out your plants to multiple neighbors, make a list of plants and locations so you know who has what.
Put your systems in vacation mode.
If no one will be living in your house, why pay for gas, electric or water? It’s a good time to save energy by shutting down the home systems that you don’t need, taking into account if there are any pets or plants that will need them.
-
- Put your water heater in vacation mode. It’s a setting that allows your water heater to run your boiler at a lower temperature than normal.
- Turn off the water valves to the dishwasher, washing machine and all sinks, if no one is going to be using them (such as a neighbor watering plants).
- Set your thermostat to a temperature closer to the outside temperature. Just remember to adjust it for pets and plants as needed.
- Change the batteries in your smoke detectors if you have not recently done so.
Do a final check the day you leave.
There’s a lot to think about as you’re leaving for vacation, and likely your mind is more focused on the trip ahead than what’s happening at home. This is where a final “to do” list and check-in helps. Plan to do these things on the day you leave.
-
- Unplug and shut off appliances not in use. Not only does this save on your electric bills, it protects items from power surges.
- Close all doors and windows. Close the curtains and blinds.
- Leave on a light or two on or set a lamp timer.
- Set the thermostat appropriately.
- Check the washer. The last thing you want is old (and smelly) wet laundry to greet you when you return.
- Make sure your oven is off. Make sure your iron is off.
- Pro tip: Take pictures of items you’re worried about, such as oven knobs to show they’re off. That way, you can check back if you’re concerned about them.
Check-in while you’re away.
You may be out of town, but you’ve got great ways to check in to see what’s happening in the neighborhood.
-
- Subscribe to a local app such as NextDoor.
- Look at online footage from your home’s security camera.
- Text or call a neighbor to check in.
You also may consider hiring a house sitter so that you don’t have to worry about what’s happening at home. If you do choose that route, make sure that the person is a reputable one. Establish a set of rules, so it is clear what your house sitter can and cannot do (for example: can watch Netflix; can’t have parties).
Don’t forget to thank the neighbors who helped you. Bring them a souvenir or small gift from your vacation or get them a gift card for a dinner out.
Finally, know that your home and property are protected by homeowner’s insurance. Should anything happen while you’re gone, your policy helps provide that peace of mind.
Have a great trip.
This article is furnished by California Casualty, providing auto and home insurance to educators, law enforcement officers, firefighters, and nurses. Get a quote at 1.866.704.8614 or www.calcas.com.
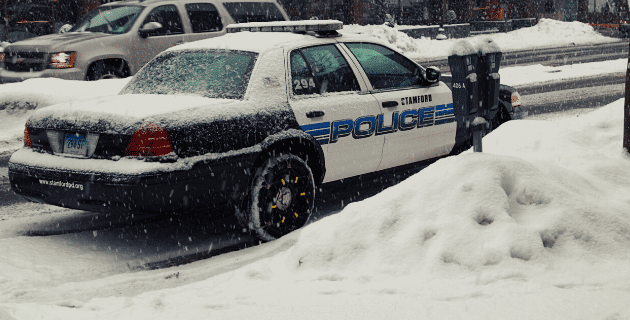
by California Casualty | Peace Officers |
It’s cold out there, and if you’re a cop on the beat this winter, you’ll definitely feel it. While winter weather may be uncomfortable, exposure to the cold can be deadly, and frostbite can be permanently disabling.
Take steps to make sure you’re safe and comfortable this winter with a cold weather survival kit for your patrol vehicle. Most of these items you can find inexpensively locally or online, or you may already have them on hand. So the next time the temperature dips, and you’re driving around this winter, you’ll be ready.
1. Thin wool or fleece gloves – Use these as your backup pair in case you need them, or as additional insulation under your heavy gloves. Inexpensive military surplus glove liners work well because they don’t take up much space. The wool keeps you warm even if it gets wet.
2. Hand warmers – These warmers are oxygen-activated. You can get ones that last for 12 hours, which will cover your shift. You can place them in gloves, boots, hats, vests, or pockets for an extra boost of warmth when you’re patrolling, directing traffic, or standing around in the cold.
3. Snowmobile balaclava – This windproof headwear is thin and stretchable, so it easily fits under hats and works well with uniforms. It’s made to wear under a snowmobile helmet, and it effectively shields your head, face, and neck.
4. Plastic trash bag – Trash bags have great insulating properties, which makes them ideal for covering up a tear in a uniform. They also are effective barriers from wet, icy or snowy surfaces if you might have to sit down on one.
5. Glow stick necklaces – Snap these necklaces and they give off a glow that can be seen at night. If you’re ever about to fall unconscious, wrap one around your arm or attach one to your neck. You can also use them in a pinch if the battery in your flashlight dies. These sticks will glow for 8 to 12 hours.
6. Packets of instant coffee, hot cocoa, tea bags – Pack your hot beverage of choice for a quick pick me up. Just add hot water, available at most convenience stores. A hot beverage can help you maintain body temperature on frigid nights and keep you hydrated.
7. A large zipper food bag or vacuum pack bag – Store your kit in a waterproof bag that’s easy to carry. A large zipper food bag is light and foldable. You also could pack everything in a vacuum-sealed food bag. Whatever you use, make sure your cold weather survival kit is with you wherever you go this winter.
More cold weather tips
Working in the cold is an added stress for law enforcement. Make sure you are fully prepared.
- Police uniforms are not necessarily made for warmth, and you may not even be issued a winter version. Make sure you’re protected with good outerwear and base layers, especially if you’re working in conditions under 30 degrees Fahrenheit.
- Insulated underwear comes in different weights. Choose the weight you need based on the weather. Remember that a good base layer is odor resistant, quick to dry, and soft on the skin.
- Insulated duty boots protect your feet and keep them warm during the toughest conditions.
- Warm socks made for the weather will help. Wool retains heat even if wet and lets your feet” breathe.”
- Insulated hats prevent heat loss through your head.
- Warm gloves protect your hands but can affect your fingers’ ability to move. Make sure you practice with your gloves on as you deploy your baton, TASER, OC, handcuffs, magazines and pistol.
- Equipment can freeze and malfunction due to the cold. Keep a small black sack with hand warmers and put your radio in it to keep the battery from freezing. Wrap your flashlight with hockey friction tape so the cold metal won’t stick to your skin if you touch it with bare hands. Put a coat of silicone inside your holster to more easily draw your weapon, and do a half-draw if you’re out in the cold for a period of time.
- You depend on your cars to keep you warm. Snap-on grille covers help keep the cold air outside from coming in.
Stay safe out there.
This article is furnished by California Casualty, providing auto and home insurance to educators, law enforcement officers, firefighters, and nurses. Get a quote at 1.866.704.8614 or www.calcas.com.
