
by California Casualty | Safety |
A motorcycle helmet is more than a fashion statement. It’s what stands between you and serious injury, or even death, in an accident. Not only that, but helmets also offer important protection against flying debris, pesky bugs, gusty wind, noise, and the ever-unpredictable weather.
There’s an art and a science to picking the right motorcycle helmet. Here’s what you need to know.
First, ask yourself these questions.
- What type of motorcycle riding do you do?
- What material do you want around your head?
- How much of your head do you want covered?
- How much money do you have to spend?
If you primarily ride on pavement, you’ll want a full-face, modular, or dual sport helmet. If you go off-road, you’ll need a dirt helmet. If you do a little of both, you’ll want to consider a dual-sport helmet that can handle the speed of the highway and the flying debris of gravel roads. You’ll also need to decide how much of your head you want covered. Helmets range from full-face to the top of your head. The more coverage, the more protection your helmet can offer.
Helmet shells are made of a variety of materials. These include hard plastic, carbon fiber, carbon Kevlar, and woven fibers with hard shells. Some materials are more costly than others. Helmets can range from a couple of hundred dollars to thousands. The price also depends on features like built-in communications for riding in a group. Just remember that double the price doesn’t necessarily mean double the safety.
Choose a helmet style.
Full-face helmets cover your entire head and face. They are made to offer full protection for street use, highway riding, and racing. The downside is that these helmets can get hot. They also may have a smaller field of vision than a dual sport helmet. Full-face helmets may be fitted with removable face shields or have vents that open and close to address these issues.
Dirt helmets are designed for off-road use. They are typically lighter than full-face helmets, offering more ventilation. They have a peak like a baseball cap that protects from sun. Instead of a closable shield, they have an opening where you can fit pair of motocross goggles.
Dual sport helmets are where road helmets meets dirt styles. They offer the comforts of road travel with the practical elements for off-road rides. There’s a larger field of vision than full-face helmets. The visor cuts down on sun glare.
Open face helmets protect your head and ears but not your face. They provide more visibility and ventilation than full-face and dual sport. There are even some open face helmets that have shields that can be snapped on. The downside is that, without a shield, your face is exposed to the elements. An upside is that you can eat and drink without taking your helmet off.
Modular helmets are a cross between full-face and open face helmets. The chin bar is hinged so that it can be flipped up out of the way. You can drink and it with it on. However, the chin bar must be down when you ride. Modular helmets are good for hot climates where a full-face helmet gets too hot after a short ride.
Dome Helmets/Skull Caps cover just the top of a rider’s head. While lighter and allowing more airflow, they lack serious protection. They don’t protect the ears, face, or chin.
Determine your head shape and size.
The shape of your head is different from the shape of your face, and just like faces, heads have different shapes and sizes. Knowing yours will save you a lot of time when finding the perfect fit.
The three basic head shapes are:
- Long oval where the head is longer front-to-back than it is side-to-side.
- Intermediate oval where the head is slightly longer front-to-back than side-to-side.
- Round oval where the head is about the same front-to-back and side-to-side.
To find out your head shape, take a selfie from above your head or ask a friend to do it. If your head looks long and thin like a wide football, you probably have a long oval. If it resembles a slightly squashed soccer ball, you probably have an intermediate oval. If your head looks more like a soccer ball, you probably have a round oval.
To find out your head size, measure your head with a cloth tape measure:
- Start the end of the tape about an inch above your eyebrows.
- Circle it around so it goes above your ears and meets at the front, like you are wearing a headband.
- That is your side-to-side measurement. Take the measurement in inches as well as centimeters as some brands use the metric system.
Try helmets on for size.
Now that you know your size and head shape, and the type of helmet that you want, you’re ready to try some on. Find your measurement on the size chart. Try different models and brands for the best fit possible. Some may be better for your head shape.
- A well-fitting helmet should fit snugly.
- Hold the helmet by the chin straps and roll your helmet onto your head from front to back. Don’t pull it straight down onto your head.
- Once it’s on, try to roll the helmet forward off your head. You should not be able to do so.
- Hold the helmet at the sides and try to move it up and side to side. The helmet should move your scalp and cheeks along with it.
- Wear the helmet for as long as possible. There should be no pressure points or hot spots.
- After trying it on, take it off and note any red spots or sore spots.
Check the safety certifications.
Helmets in the U.S. must be DOT-approved and manufactured according to safety guidelines. To qualify for DOT certification, they must pass four tests: impact test, penetration test, retention strap test, and peripheral vision test. DOT-approved helmets have a sticker at the back that includes the manufacturer/brand name, model number, and certification number.
Look for organizations like Snell that also test helmets. Snell is a third-party independent nonprofit standard and testing organization. They test in addition to DOT, but manufacturers must pay them to do so. The Economic Commission for Europe (ECE) and the European Safety Commission FIM also do additional testing. The more testing, the more assurance that your helmet meets safety requirements. However, additional testing also can raise the price of a helmet.
Pro Tip: Beware of imposters who sell novelty helmets with fake DOT labels. These helmets will be less than an inch thick and weigh a pound or less. By contrast, reputable helmets weigh about 3 pounds.
When to replace your helmet
Motorcycle helmets wear out after use. You should replace yours every 3-5 years or if your helmet sustains any damage. For added peace of mind, protect yourself with the right motorcycle insurance so that if you do get into an accident, you’re fully covered.
With the right helmet and the right gear, you’re ready to hit the road. Safe travels.
This article is furnished by California Casualty, providing auto and home insurance to educators, law enforcement officers, firefighters, and nurses. Get a quote at 1.866.704.8614 or www.calcas.com.
by California Casualty | Auto Insurance Info, Safety |
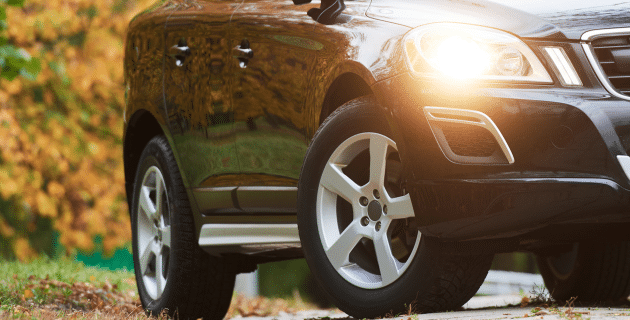
The nights are getting longer. That means your headlights are more important than ever. Keeping them clean and in good working order will help you stay safe. Follow this guide to keep your headlights shining bright and sparkling like new.
Why are clean headlights important?
You might think that foggy headlights don’t make that much of a difference. In reality, their light can be dangerously dim. Foggy headlights emit only about 20% of the light that new headlights do, according to AAA. Not only is that a problem at night, but cloudy headlights can limit your visibility in rain and fog, too. It is just as important to replace your headlights as it is to replace your windshield wipers.
What causes headlights to wear out?
Most headlights today are made of thick plastic. While these lenses are more scratch-resistant than glass and can last a long time, their surfaces do wear out. The sun’s UV rays cause the lenses to oxidize, which creates microscopic cracks and yellowing. That impacts the quality of light they can emit. A car wash won’t be able to clean this type of damage.
Pro Tip: You can help limit your headlights’ exposure to UV rays and slow the yellowing process. Park in a cool, dry place that is away from direct sunlight. Consider a protective cover for your vehicle. Park your car inside whenever possible.
Every vehicle is different, and some methods work better than others.
There are a variety of ways to clean your car’s headlights. You can do many of them with supplies you already have around the house. Depending on your vehicle, you will find that some methods work better than others so feel free to experiment.
How to Clean Your Headlights
Start with a clean surface. Headlights pick up dirt, grime, and dust. Before you dive into the deep cleaning, you want to remove that debris. Here are several ways to do so. (You just need to choose one method for the initial clean; you won’t want to do them all.) Remember to wear latex gloves to protect your skin.
- Soap and water: Use car wash soap that is made for plastic headlight lenses. Mix one part of the soap with two parts of water. Put the mixture in a spray bottle. Spray it directly onto your headlights and then wipe it off with a microfiber cloth.
- Use a specialized cleaner such as bug-and-tar remover. Spray it on your headlights. Let it sit for a few minutes, and then wipe it off with a sponge or microfiber cloth.
- Try rubbing alcohol. Dip a soft cloth into the alcohol and then gently scrub the headlights. Rinse with water.
Protect your vehicle’s paint. It’s a good idea to cover the painted finish around each headlight so that you don’t damage your car’s paint. Use a tape without a strong adhesive. Painter’s tape works well.
Method #1: Using a Restoration Kit
You can buy headlight restoration kits at your local auto shop. These kits come with sandpaper that help you to gently remove the microscopic cracks.
- Start with the roughest piece of sandpaper in the kit.
- In between sanding, keep headlights wet using water in a spray bottle.
- Repeat with the next coarsest sandpaper and continue to the finest one.
- Clean your headlights with soap and water. Use car soap made for headlights.
- Seal with a clear coat if the kit includes one.
Method #2: Vinegar and Baking Soda (or Toothpaste)
Common household supplies like vinegar and baking soda are effective cleaners. Alternatively, you can use toothpaste with baking soda. Just make sure the toothpaste does not have flavor crystals which can scratch the surface. Here’s how to use them to clean your headlights.
- Mix up a paste of baking soda and vinegar. Use two-parts distilled white vinegar to one-part baking soda. (You also can use toothpaste without the vinegar instead.)
- Apply the mixture using a microfiber cloth. Rub it on each headlight. Then let it dry.
- Wipe it off with a clean microfiber cloth.
- Rinse with water.
Method #3: Window Cleaner or WD-40
Chemical agents like glass cleaner and WD-40 also can do the job.
- For window cleaner, spray a generous amount onto your headlights. Let it soak in. Then, use a microfiber cloth to wipe it down.
- For WD-40, apply it with a clean, soft cloth. Rub it firmly in a circular manner. Rinse with car soap and water when you are done.
- Apply a car polish using a clean cloth to help protect the surface.
Method #4: A Quick and Temporary Fix
You can help fill in the microscopic cracks and scratches with petroleum jelly or olive oil.
- Put a coin-sized amount petroleum jelly or olive oil on a microfiber cloth.
- Rub it into your headlights.
- Do not rinse. The thin layer will coat your headlights but will disappear the next time it rains.
If you cleaned your headlights and it didn’t help:
- Check their alignment. Consult your owner’s manual on how to adjust your headlights or bring them to a professional.
- Check the inside if the headlight. Dissemble your headlight and use car soap and water or glass cleaner to clean the inside. Make sure to completely rinse and wipe away any liquid. Any residue can be heated by the powerful bulbs.
How to Change Your Headlights
Most new cars have LED headlights which can last the lifetime of the vehicle. However, if you have an older car, you will need to change your headlight bulbs. There are different headlight setups, with the most common being the twist and lock and the spring clip. Check your owner’s manual to see which one you have. Remember to replace bulbs in pairs. If one bulb went out, chances are the other is likely to go out soon.
Directions
- Make sure your car is turned off. Open the hood.
- Disconnect the negative ground cable from the battery.
- Look for the headlight connection. Disconnect the wires from the headlight bulb.
- For at Twist and Lock:
- To pull the bulb out, you will need to push the tab and twist the headlight counterclockwise.
- To install the new bulb, you will need to put it in and twist it clockwise until it locks.
- For a Spring Clip:
- Press the spring to release the bulb. Then pull it out.
- Put the new bulb in and lock it in place.
- Reconnect the wires to the headlight.
- Reconnect the negative ground cable to the battery.
- Close the hood.
Halogen Bulbs
Note that classic cars may use a sealed-beam halogen bulb. You can’t replace these bulbs. You must replace the entire headlight housing.
- Make sure your car is turned off. Open the hood.
- Disconnect the negative ground cable from the battery.
- Find the headlight housing and unplug the wires for the blinker and headlight.
- Disconnect any electrical connections from the back of the housing.
- You will need a screwdriver to loosen the bracket on the housing and remove it.
- Replace it with the new housing.
- Reconnect the housing to the headlights and blinker.
- Reconnect the negative ground cable to the battery and close the hood.
Your car is one of your greatest investments. Keep your car well maintained and protect it with the right insurance. Safe travels.
This article is furnished by California Casualty, providing auto and home insurance to educators, law enforcement officers, firefighters, and nurses. Get a quote at 1.866.704.8614 or www.calcas.com.
by California Casualty | Auto Insurance Info, Safety |
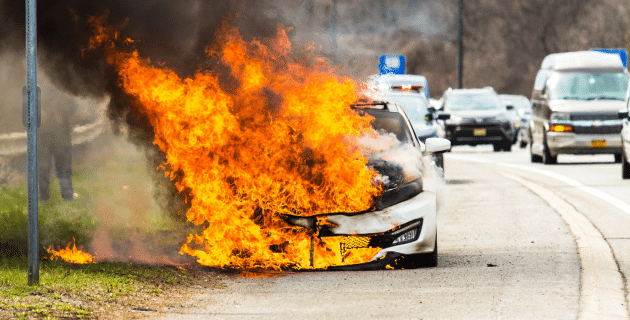
Are you more likely to encounter a vehicle fire in an electric vehicle or a gas-powered one? The answer may surprise you. We’re breaking down the risks of each, and sharing important tips to help keep you safe from a car fire no matter which type of vehicle you drive.
Fires happen in all types of vehicles.
Despite articles circulating on the Internet, there is no government agency tracking fires by the type of vehicle. So, we don’t have a clear idea of which type of vehicle is more prone to fires: gas, electric or hybrid. You’re more likely to see a fire in a gasoline-powered engine than an EV or hybrid, simply because there are more of those vehicles on the road.
We do know that less than half of one percent (or 0.04) vehicles catch fire in any given year. Even though that seems like a low percentage, consider that there were more than 200,000 vehicle fires in the U.S. in 2018, as reported by the National Fire Protection Association (NFPA).
What causes vehicle fires?
Engines produce heat, and when heat connects with a spark or a flammable liquid, a fire can start. Here’s a quick overview of how fires typically happen in gas versus electric vehicles.
Gas-powered combustion vehicles
- Fuel system leaks are the most common causes of fires in gas-powered vehicles. Gasoline is highly flammable and can catch fire from a single spark. Gasoline at a high enough temperature can ignite by itself.
- Electrical system failures are the second most common cause of gas-powered car fires. The electric current produced by a standard lead-acid battery, along with faulty or loose wiring, can produce sparks. Those sparks can ignite a fluid leak or hydrogen gas buildup.
- Flammable fluids can cause fires if their lines, hoses, or containers are damaged. These fluids circulate through your gas-powered engine, and include oil, transmission fluid, power steering fluid, brake fluid, engine coolant and gasoline or diesel. An overheated engine can sometimes cause these fluids to seep out of their designated areas. The anti-lock brake system also can leak brake fluid that can cause an electric short, which can lead to a fire.
- Exhaust-related fires can come from catalytic converters. These parts can be so hot that they can ignite grass under your vehicle. Catalytic converter fires usually occur if your car’s engine doesn’t burn fuel properly, and extra stuff winds up in the exhaust. That causes your catalytic converter to work too hard to burn off those extra pollutants.
- Crashes can cause fires, even though most vehicles are designed with crumple zones that protect the engine, battery, and gas tank. Even so, a crash can cause fluid to leak, and create heat and smoke, which are the ideal conditions for a fire.
Electric vehicles
- Batteries can cause fires in electric and hybrid vehicles. This can happen if the battery is overcharged, damaged, or has a faulty design. The battery is short-circuited, causing a chemical reaction that results in flammable, poisonous gases. This can even happen when a car is not being driven.
- Crashes can damage the battery. If the coolant surrounding the battery leaks out, it can quickly heat up and cause a fire. A crash can also compromise the battery so that it short circuits and heats up. Manufacturers have included safety features such as automatic shutoffs for batteries during a crash, and coatings that help fire from spreading.
EV Car Fires: Much Tougher to Control
Lithium-ion batteries provide their own fuel source, and as a result, can burn for hours on end. They are sometimes hotter than gasoline-powered fires, and therefore harder to cool down. If you call 9-1-1 for a car fire involving an electric or hybrid vehicle, make sure you mention that fact. There are specialized fire extinguishers and firefighting techniques for electrical fires.
Signs Your Car May be in Danger of Catching Fire
Older vehicles may have wiring or other issues that can lead to a fire. However, any car could be at risk. If your vehicle exhibits any of the following signs, take it to your mechanic immediately.
- Quick drops in fuel levels or oil levels
- Wide ranges and changes in your engine’s temperature
- Fuses that repeatedly that pop
- A smoky or burning smell
- Smoke or sparks
- Fluid leaking under your car
What to Do if Your Car Catches Fire
Here’s what to do if your car catches fire.
- Pull over safely as soon as you can.
- Turn the engine off.
- Get everyone out of the car and at least 100 feet away.
- Call 9-1-1.
- Don’t go back into the vehicle for any reason.
- Don’t open the hood. A burning car can explode at any moment.
Your car is one of your greatest investments. Keep your car well maintained and protect it with the right insurance. Safe travels.
This article is furnished by California Casualty, providing auto and home insurance to educators, law enforcement officers, firefighters, and nurses. Get a quote at 1.866.704.8614 or www.calcas.com.
by California Casualty | Homeowners Insurance Info, Safety |
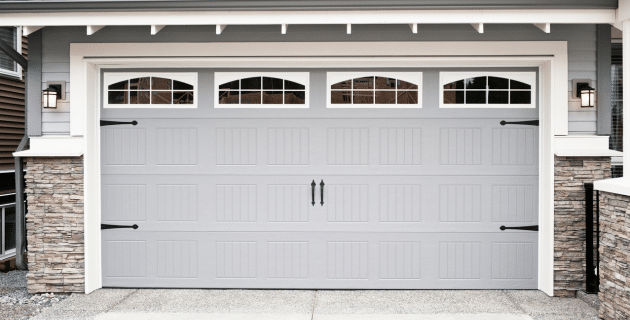
It’s relatively easy to break into a garage. Thieves can do it in a matter of seconds, and grab your tools, sports equipment, and other high-value items before you know it. Fortunately, you can take steps to protect your garage from a break-in. Follow these tips to make your garage door more secure.
Tip #1: Light the way.
Thieves lurk in the shadows. Add motion-activated flood lights around your garage. The sudden blaze of light is sure to startle a burglar and could scare him away. It also could alert neighbors or passersby to their activity, which could deter them as well.
Tip #2: Cover your windows.
You probably store high-value items in your garage, including your vehicle. Don’t broadcast that fact to everyone. Use interior curtains or blinds to cover your windows. You also can use an adhesive window film. Windows also are easy to break. Consider garage door windows with panes that are too small to use to enter.
Tip #3: Trim your landscaping.
Make sure there are no bushes near your garage where thieves can hide. You want your neighbors and every passerby to be able to see what’s going on. Pro Tip: Plant thorny shrubs under garage windows to discourage thieves from getting in that way.
Tip #4: Reinforce your service door.
If your garage has a service door that leads to the outside or inside of your home, make sure it’s secure. Most garage service doors can be broken with a well-placed, solid kick. Reinforce your door with a strike plate, using 3-inch screws to secure it.
Tip #5: Add a layer of protection with a lock.
Many garages use keyless locks which open the door with a keypad, fingerprint reader, or remote control. Alternatively, you can use a deadbolt or padlock, which require keys. You can even use a combination of locks, such as a garage door lock bar which stops the door from being raised, in combination with another type of lock for added security. Choose the one(s) that works for your budget and your needs. Pro Tip: Keep the keypad clean. A thief can look at the dirty keys to guess your garage door code.
Tip #6: Update your remotes.
If your garage door remote is old, chances are it is easy to hack. Thieves can use a code grabber that copies your signal. Then they can send it to your garage door to open it. Newer remotes use a rolling code, which slightly changes the signal that your remote sends every time. That’s a good reason to update your garage remotes to a newer model.
Tip #7: Don’t clip your garage remote to your car visor.
It’s like giving thieves a key to your home. They can just break into your car to get your remote. Consider using a smart garage door opener from your smartphone or attach your remote to your keychain so it’s always with you.
Tip #8: Close your garage door.
It may seem simple but sometimes we forget to close our garage doors. Don’t tempt thieves by leaving yours open. Consider an automatic door closer that will shut the door after a specified amount of time. You also may wish to invest in a garage door monitor, which displays whether the garage door is open or closed.
Tip #9: Protect your garage’s emergency release cord.
The emergency release cord is designed to open the garage door in a power outage. Thieves however use it to their advantage. They can push the door inward to create enough of a gap to insert a wire hook. Then they pull down on the cord. There are a few ways that you can protect the cord from this hack. You can pull the cord through a PVC pipe that is too thick and bulky to be pulled by the wire. You can cut the cord very short so thieves cannot easily grab it. You can zip tie it so it cannot be pulled. You can create a door lock shield with a scrap of plywood screwed to the opener’s arm.
Tip #10: Install a security camera.
Security cameras can help deter thieves, especially if they are visible. Make sure that the ones you buy are designed for outdoor use and specifically for the seasonal temperatures in your region. Consider features like motion-activated recording, and WiFi or mobile access via your smartphone or other device. Add a door alarm or security sensor to alert you of a breach. This is especially valuable if you are not home or are on vacation.
Finally, for added peace of mind, you will want to make sure that you fully protect your home with the right coverage. After all, your home is one of your greatest investments.
This article is furnished by California Casualty, providing auto and home insurance to educators, law enforcement officers, firefighters, and nurses. Get a quote at 1.866.704.8614 or www.calcas.com.

by California Casualty | Auto Insurance Info, Safety |
When your son or daughter starts driving, it’s a milestone moment. It can also be a little nerve wracking. You can’t be everywhere to keep them safe, but you can help them by choosing the right vehicle. In honor of Teen Driver Safety Week, we researched the best and safest cars for teens in 2023, according to the Insurance Institute for Highway Safety (IIHS) and Consumer Reports.
What makes a good vehicle for teens?
You want a car with strong reliability ratings and excellent crash test scores. Today’s cars also have hi-tech safety features that can help keep young drivers safe. These include:
- Blind spot monitoring to let you know if there is a vehicle in your blind spot.
- Automatic emergency braking when the car senses a potential collision.
- A lane departure warning that makes a sound or other signal if you veer toward the next lane.
- A lane-keeping assist that steers your vehicle back into your lane.
- Pedestrian detection that identifies people walking in front of the car.
- Built-in systems with teen driver controls, such as speed warnings and muting of audio while driving.
You will want to avoid:
- Sports cars, which have too much horsepower and could tempt a teen to drive beyond their skill level.
- Small cars that weigh under 2,750 pounds; their crumple zones are not good.
- Large vehicles with long braking distances.
- Vehicles with seats for lots of passengers. Each additional passenger increases the odds of an accident due to distractions.
Following is the list of vehicles with above average reliability scores and good crash tests. Prices provided are from Kelley Blue Book and are estimates for the lowest trim models as of May 2023.
New Cars
Small Cars
| Mazda 3 sedan or hatchback |
$23,000 |
Midsize Cars
| Subaru Legacy |
$25,100 |
| Subaru Outback |
$29,300 |
Small SUVs
| Honda HR-V |
$24,400 |
| Subaru Forester |
$27,700 |
| Mazda CX-5 |
$27,800 |
| Mazda CX-50 |
$28,900 |
| Toyota RAV4 |
$29,300 |
| Honda CR-V |
$29,700 |
| Lexus UX |
$36,000 |
Midsize SUVs
| Subaru Ascent |
$34,600 |
| Hyundai Palisade |
$36,600 |
| Toyota Highlander |
$37,100 |
| Mazda CX-9 |
$38,300 |
| Lexus NX |
$39,800 |
Minivan
Best Choices for Used Cars
Small Cars
| Mazda 3 sedan or hatchback |
2014-20; built after October 2013 |
$9,100 |
| Ford C-Max Hybrid |
2014-16 |
$10,000 |
| Toyota Prius |
2014; built after November 2013 |
$12,900 |
| Subaru Impreza sedan or wagon |
2018, 2022 |
$14,500 |
Midsize Cars
| Subaru Legacy |
2013-21; built after August 2012 |
$7,800 |
| Mazda 6 |
2014-18 |
$10,200 |
| Subaru Outback |
2015-18, 2022 |
$12,200 |
| Toyota Prius v |
2015-17 |
$14,500 |
| Volkswagen Passat |
2017 |
$14,500 |
| BMW 3 series |
2017 or newer; built after November 2016 |
$16,500 |
Large Cars
| Toyota Avalon |
2015 or newer |
$14,600 |
| Hyundai Genesis |
2016 |
$18,000 |
Small SUVs
| Volvo XC60 |
2013, 2017 |
$9,600 |
| Mazda CX-5 |
2014 or newer; built after October 2013 |
$11,800 |
| Mazda CX-3 |
2016, 2019 |
$13,900 |
| Honda CR-V |
2015 or newer |
$15,200 |
| Honda HR-V |
2017 or newer; built after March 2017 |
$16,000 |
| Toyota RAV 4 |
2015 or newer; built after November 2014 |
$16,100 |
| Kia Niro Plug-in Hybrid |
2018 |
$18,900 |
| Subaru Forester |
2018 or newer |
$20,000 |
Midsize SUVs
| Nissan Murano |
2015 or newer |
$12,400 |
| Hyundai Santa Fe Sport |
2018 |
$15,700 |
| Toyota Highlander |
2014 or newer |
$17.100 |
| Acura RDX |
2016 or newer |
$19,300 |
Minivan
| Toyota Sienna |
2015-20 |
$15,700 |
Pickup
| Toyota Tacoma extended car or crew cab |
2016 or newer |
$17,900 |
Remember, when looking at vehicles, talk to your insurance agent to see what will save you the most with your teen on your policy. And don’t forget to look out for recalls or damage from previous owners.
Finally, here are some other ways that you can help your teen stay safe.
- Sign them up for driver’s ed or safety classes.
- Make sure they get experience driving in all kinds of conditions.
- Teach them what to do in emergencies.
- Talk to them about how dangerous it is to drive while distracted.
- Make sure they are fully insured for peace of mind.
This article is furnished by California Casualty, providing auto and home insurance to educators, law enforcement officers, firefighters, and nurses. Get a quote at 1.866.704.8614 or www.calcas.com.
by California Casualty | Auto Insurance Info, Safety, Travel |
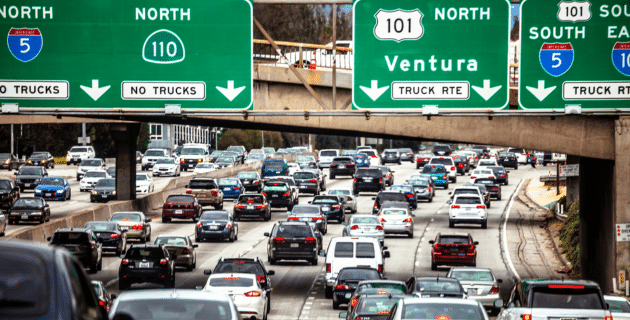
We’ve all had that uncomfortable feeling of being tailgated. It’s not just an annoyance. It’s a dangerous behavior that can lead to an accident. But just how risky is tailgating and what can we do about it? Read on.
What is tailgating?
When you’re too close to the car in front of you, you’re riding “on its tail,” or tailgating. Tailgating is an aggressive behavior that can be mistaken for road rage, and even lead to it. Interestingly, even though drivers who tailgate seem to rush ahead, tailgating has little effect on getting there faster.
Why do people tailgate?
There are many reasons why people tailgate. Here are a few of the most common ones.
- Aggressive drivers tend to tailgate. These are the same folks who speed and cut it close when making lane changes. They also can quickly escalate into road rage episodes.
- Drivers who are impatient or frustrated may tailgate. They’re in a hurry and they want to get past the traffic to their destination.
- Intoxicated or drowsy drivers may tailgate without realizing it. Their state of mind causes them to misjudge the distance to the car in front of them.
- Young drivers sometimes tailgate. They do not fully understand the safe distance between cars and/or the consequences of this risky behavior.
- Distracted drivers may tailgate because they’re not paying attention to the road. They’re on their phones or fiddling with something in the car.
Almost always, drivers who tailgate have a false sense of security. They think they can stop in time. Yet it may take longer than you think. Stopping distance is directly related to the size and weight of your vehicle. A large truck will take much longer to stop than a small car. Sharing the road with vehicles of all sizes is important. You need to give yourself an adequate cushion of safety so you have enough time to react and stop your vehicle.
What are the effects of tailgating?
At the very least, you can make the driver in front of you nervous by tailgating. You may even cause them to drive too fast or shift lanes quickly which can cause an accident. They also may tap on their brakes to tell you to back off. That can trigger an accident or road rage incident. In a worst-case scenario, they can stop short, causing you to rear-end them. You may even cause a chain reaction of rear-end collisions.
Rear-end collisions make up about 23% of all crashes, according to the National Highway Traffic Safety Administration (NHTSA). These types of collisions cause approximately 950,000 injuries and 2,000 deaths each year.
Who is liable for a tailgating accident?
In nearly all cases, the driver who is tailgating is the person at fault in a rear-end collision. Note that a single at-fault accident could raise your insurance premium.
Learn the 3-second Rule.
If you’re alert and focused on the road, it takes you about 2 seconds to react to a roadway hazard. That means a safe following distance is at least 3 seconds or more.
Use the 3-second rule as a starting point. You can measure the distance in seconds this way:
- Find a landmark such as a mile marker or telephone pole.
- Start counting once the car in front of you passes that landmark.
- Count slowly until your car reaches the same landmark.
- That is the number of seconds that you are traveling behind the vehicle in front of you.
You will want to increase your following distance when the weather is bad. It’s recommended to use 4 seconds for wet weather and 10 seconds for snow and ice.
How should you react if you are being tailgated?
The last thing you want to do is to be rear-ended by a tailgater. If you are being followed too closely, you will want to take evasive action.
- Don’t engage or look at the tailgater.
- Don’t tap your brakes to tell them to back off. This can be construed as hostile and can cause the driver to react.
- Change lanes and allow the driver to pass.
- Maintain your distance from the driver. Keep as far away as possible.
- Practice defensive driving as you continue on your way.
- Be aware that your car’s crash avoidance system could cause you to brake automatically and suddenly. That may play a role in future tailgating incidents.
Your car is one of your greatest investments. Keep your car well maintained and protect it with the right insurance.
This article is furnished by California Casualty, providing auto and home insurance to educators, law enforcement officers, firefighters, and nurses. Get a quote at 1.866.704.8614 or www.calcas.com.
