
by California Casualty | Auto Insurance Info, Safety |
There’s nothing quite like prom and graduation season—the photos, the dresses and tuxes, the flowers, the celebrations. But while your teen may be focused on finding the perfect outfit or planning the after party, you’re likely thinking about something else entirely: their safety on the road.
Here are some tips to help your teen navigate prom, graduation, and all the celebrations in between—safely.
1. Make “leaving early” a habit.
Encourage your teen to leave at least 10 minutes earlier than needed—more if weather conditions are poor. This reduces the urge to speed and gives them time to react calmly to traffic or detours. If they’re heading to the same event as many others, they might also encounter fewer cars and pedestrians if they beat the rush.
2. Limit passengers.
It’s fun to pile into a car with friends, but the more people you have, the more distractions the driver encounters. Set limits on how many friends can ride with your teen and remind them that safety comes before socializing.
3. Always buckle up.
Seat belts are simple but lifesaving. Make sure your teen—and everyone in their car—buckles up before the engine starts. Reinforce the message that seat belts are non-negotiable, even for short trips.
4. Phones down, eyes up.
Phones are one of the biggest distractions for drivers, especially teens. Talk with your teen about putting their phone away while driving. There are apps that can silence notifications, send automatic replies, and even block texts while the car is in motion. Sharing their location with you is also a smart move in case you need to reach them in an emergency.
5. Minimize all distractions.
Texting isn’t the only distraction. Eating, drinking, adjusting the music, or checking makeup can all take attention off the road. Remind your teen to stay focused and wait until they’re parked to multitask.
6. Don’t drive while drowsy.
With finals, late-night celebrations, and packed schedules, your teen may not be getting enough sleep. Driving tired is just as dangerous as driving under the influence. If they feel themselves nodding off, they should pull over in a safe place and rest before continuing.
7. No drinking and driving—ever.
This one may seem obvious, but it bears repeating. Teens should never get behind the wheel after drinking or using any substance. Have an open conversation about peer pressure and agree on a “safe word” they can use if they need you to pick them up—no questions asked.
8. Keep an emergency kit in the car.
Whether it’s a flat tire, dead battery, or a minor fender bender, your teen should know what to do in case of a car emergency. Pack a basic kit with a flashlight, jumper cables, water, a first-aid kit, and emergency contact numbers. Make sure they know how to use everything in it. Teach your teen basic vehicle care and warning signs.
9. Be accident-ready, just in case.
Teens are often accident-prone because of their inexperience behind the wheel. Make sure your teen knows what to do if they’re ever in a crash. Go over the basics together: stay calm, check for injuries, move to safety, call 911, and exchange information with the other driver. Keeping an emergency kit in the car and insurance details in the glove box can also help them feel more prepared and confident.
10. Set a curfew.
More than 40% of fatal crashes involving young drivers happen between 9 p.m. and 6 a.m. It’s not just the challenge of driving in the dark—late-night trips are often social outings where distractions and peer pressure can run high. Even rule-following teens can be tempted to take risks. Setting an earlier curfew than your state requires can help keep your teen safer. Bonus: Offer to drive them and pick them up for late night outings.
11. Control the keys.
When teens have to ask for the car, it naturally opens the door for conversation. It’s a built-in pause that gives parents a moment to check in—about where they’re headed, who they’ll be with, and when they plan to return. It’s also a subtle reminder that driving is a privilege, not a right, and that responsibility comes with it. Keeping the keys in your hands helps reinforce expectations and encourages accountability.
12. Monitor risky behavior.
Consider a monitoring device or app that can track risky behaviors such as speeding, abrupt acceleration and sudden braking. You can also keep tabs on your teen’s location with GPS tracking. Some systems have a silent alarm so your teen can signal SOS if they feel unsafe.
Finally, this is a good time to review your insurance. Is your teen properly covered? Have you discussed all the ways you can save with a teen driver? Ensuring your policy is up to date can give both of you peace of mind during this high-risk season.
Prom and graduation are once-in-a-lifetime milestones, and you want your teen to enjoy them to the fullest—safely. Start the conversation early, model safe driving behavior yourself, and let them know you’re always just a phone call away. Your guidance and trust go a long way in helping them make smart decisions behind the wheel.
This article is furnished by California Casualty, providing auto and home insurance to educators, law enforcement officers, firefighters, and nurses. Get a quote at 1.866.704.8614 or www.calcas.com.
by California Casualty | Auto Insurance Info, Safety |
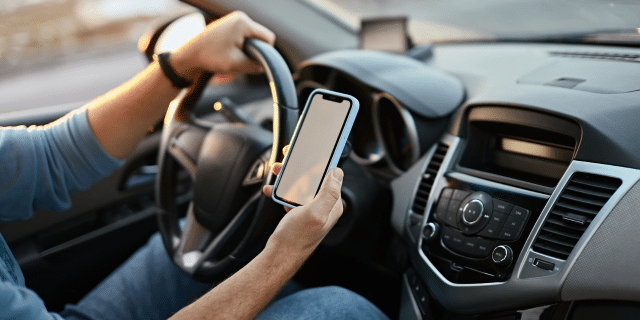
We’ve all seen it—or maybe even been guilty of it ourselves. A quick glance at a text, adjusting the GPS, or sipping that morning coffee behind the wheel. Distracted driving is a dangerous habit that can have devastating consequences. But what exactly is distracted driving, and how can we break the cycle?
What Is Distracted Driving?
Distracted driving is any activity that takes your attention away from the road. It’s often associated with texting or talking on the phone, but it also includes:
- Eating or drinking
- Adjusting the radio or GPS
- Using electronic gadgets
- Personal grooming
- Tending to Rover or Kitty
- Daydreaming or zoning out
Distractions come in three forms:
- Visual – Taking your eyes off the road
- Physical – Taking one or both hands off the wheel
- Cognitive – Mental distractions that shift your focus away from driving
Many distracted driving habits involve one or more of these forms, but using a cell phone or electronic device is especially dangerous because it engages all three at once.
The Science Behind Distracted Driving
Driving demands our full attention, yet many of us still text, call, or use electronic devices behind the wheel. Why do we do it, even when we know it’s dangerous? One reason is that our brains crave the small dopamine boost we get from checking messages—almost like a drug, it can override our sense of risk. We may also feel pressure to respond quickly to work or friends. And often, we overestimate our ability to multitask, believing we can manage both driving and distractions.
However, the reality is that multitasking behind the wheel is dangerous. Studies show that even hands-free phone use can cause “inattentional blindness,” where drivers fail to notice crucial details like stop signs or pedestrians. Distracted driving significantly delays your reaction time.
When attention is split, the brain struggles to process different tasks efficiently, increasing the risk of an accident. Staying fully present while driving isn’t just a good habit—it’s a necessity.
The Impact: Alarming Statistics
Research suggests that sending or reading a text takes your eyes off the road for about five seconds—long enough to travel the length of a football field at highway speeds. That’s a terrifying thought. Think of what could happen while driving that distance at that speed if you’re not paying attention.
More statistics paint a grim picture of distracted driving’s consequences:
- In 2022, over 3,300 people in the U.S. lost their lives and nearly 290,000 people were injured in crashes involving distracted drivers.
- About 1 in 5 people killed in these crashes were not in vehicles—they were pedestrians, cyclists, or bystanders.
- Texting while driving increases your crash risk by 23 times compared to driving undistracted. It can double or even triple your reaction time.
- Talking on the phone increases risk of a crash by 4 to 6 times.
- Cell phone use while driving is comparable to driving under the influence.
These statistics are sobering, but the good news is that distracted driving is preventable.
Laws to Keep Drivers Safe
Today’s cell phones and electronic devices allow us to scroll through social media, watch videos, stream music, take photos, and more. That increases our chances to be allured by distracted driving. To combat this growing problem, many states have implemented strict laws, particularly against electronic devices. These include:
- Handheld device bans – Prohibiting texting or holding a phone while driving
- Hands-free laws – Requiring drivers to use voice commands or Bluetooth systems
- Teen driver restrictions – Limiting phone use for young drivers, who are at higher risk
Currently 16 states ban drivers from holding electronic devices. There are 34 states and DC that ban teens from electronic device use, including hands-free use. Fines and penalties for violations are becoming more severe, reinforcing the message that distracted driving is not worth the risk.
How to Break the Habit
Stopping distracted driving starts with personal responsibility. You can take the steps needed to break the habit. Here are some strategies that can help you to stay focused behind the wheel:
- Put your phone away. Keep it in the glove compartment or enable “Do Not Disturb” mode while driving or try one of the many safe driving apps available to minimize distractions. Some apps even “pay” you to drive with your phone locked down. You earn points toward discounts and coupons.
- Plan ahead. Set your GPS, load your playlist, and adjust climate controls before you start driving. Make sure your children and pets are securely seated for the ride.
- Designate a “co-pilot.” Let them adjust audio, GPS or other settings for you. You can ask them to respond to texts as needed.
- Use voice commands. If you must take a phone call, use a hands-free system.
- Pull over if needed. If something requires your full attention, find a safe place to stop.
- Suggest a distracted driving policy for work. Talk to your employer about setting a policy that allows work calls or texts to wait until you are safely parked.
- Avoid reaching. If something falls while driving, don’t reach for it. Either ask a passenger to do so, wait until you’re parked to get it, or pull over safely before you reach.
- Model good behavior. Your passengers are noticing, and so are your kids. Teen drivers often inherit their parents’ driving habits. Remind them, and yourself, why you are doing this. Take the National Highway Traffic Safety Administration Pledge to reinforce your commitment.
Distracted driving is a preventable danger. By understanding the risks, following the laws, and making a conscious effort to stay focused, we can all do our part to keep the roads safer. Breaking the habit starts with a single decision—choosing to prioritize safety over distractions. Safe travels.
This article is furnished by California Casualty, providing auto and home insurance to educators, law enforcement officers, firefighters, and nurses. Get a quote at 1.866.704.8614 or www.calcas.com.

by California Casualty | Auto Insurance Info, Helpful Tips, Safety |
Age may bring wisdom, but it also comes with new challenges behind the wheel. From adapting to changing reflexes to navigating the latest technology in cars, senior drivers face unique hurdles. If you are a senior driver, or know one, here are simple tips to help stay safe and confident on the road.
How does age affect your driving?
As we get older, changes in our bodies can affect how safely we drive. Stiff joints, muscle weakness, or arthritis can make it harder to turn your head, press the brakes, or react quickly in traffic. If you’ve lost some feeling in your fingers or feet, it might slow down your reaction time or make it harder to stay in control of the car. Vision changes can make it tough to see at night or read road signs quickly, and hearing loss might mean you don’t notice important sounds like sirens or horns. On top of that, some medications can cause drowsiness, dizziness, or slower reactions, which can all affect your driving.
Tip #1: Stay on top of your health.
- Regularly check your vision, hearing, and mobility to ensure they’re not affecting your ability to drive safely. Minimize distractions, such as loud music or other sounds, to help you hear important traffic cues like horns or sirens.
- If you have limited mobility, consider vehicle modifications. For example, hand controls can replace traditional gas and brake pedals if leg movement is a challenge. Consult with your doctor and an occupational therapist to explore your options.
- Be mindful of how medications impact driving. Avoid driving if you’re taking anything that causes drowsiness or lightheadedness.
Tip #2: Make sure your car is the right fit for you.
- If it’s an option, select larger dials and easy to read symbols on your car’s dashboard. Turn brightness up on your instrument panel so it is easy to see.
- Adjust your seat so you’re not sitting closer than 10 inches to the steering wheel. Make sure your feet can easily press the pedals, without your having to reach with your toes. Pedal extensions are available for those who need it.
- Check out the CarFit program sponsored by AAA, AARP Driver Safety, and AOTA (American Occupational Therapy Association). This program can help educate you on ways you can make your car more comfortable and safer as you age.
Tip #3: Understand your car’s safety technology.
- Check your owner’s manual to determine the advanced safety technologies in your vehicle. This may include blind spot monitoring, automatic braking, lane-keeping assist, rearview camera, automatic crash notification, navigation, and more.
- Seek help from tech-savvy family or friends who can explain features and help you practice. Watch online tutorials—many car manufacturers offer easy-to-follow videos on their websites or YouTube channels. You can also ask your dealer for a demonstration when servicing your car.
- If new tech seems overwhelming, take it slow. Practice one new feature at a time to get comfortable with it. Start with the safety features like blind spot monitors. Don’t get discouraged as it can take time to learn new technology.
Tip #4: Drive safely and defensively.
- Maintain a safe following distance. Avoid tailgating and give yourself plenty of space to react to sudden stops or changes in traffic. This is especially important in bad weather or heavy traffic.
- Drive at a comfortable speed. Stick to the speed limit and, if you prefer driving slower, stay in the right lane to let faster traffic pass safely.
- Stay focused and alert. Avoid distractions like using your phone, eating, or multitasking while driving. Never drink and drive and be mindful of any medications that might impair your ability to focus.
Tip #5: Avoid driving certain times of the day or night.
- If driving at night feels difficult or uncomfortable, try to avoid it. Similarly, be cautious around sunrise and sunset when glare from the sun can impact your visibility.
- Refrain from driving when you’re stressed, tired, or not feeling alert. Skip rush hour or heavy traffic areas to reduce stress and risk.
- Avoid driving in rain, snow, ice, or other challenging weather conditions. Consider using rideshare services, public transportation, or asking for a ride from friends or family during these times.
Tip #6: Know how to deal with night driving.
- Make sure your headlights, taillights, windshield and side windows are clean.
- Allow for more space between you and the car in front to allow for additional stopping room – it’s harder to judge speed and distance in the dark.
- If headlights of oncoming vehicles are too bright, look down and to the right. It will help deflect the light and you can use the right side of the road as your guide.
- Do not wear sunglasses or tinted lenses at night. It reduces the amount of light that reaches your eyes and can make driving hazardous.
Tip #7: Take advantage of available support.
- Refresh your knowledge of driving rules with a program like AAA’s RoadWise Driver Course. Completing the course may even qualify you for a discount with certain insurance providers.
- Consider hiring a driving rehabilitation specialist. These professionals assess key factors such as muscle strength, flexibility, reaction time, and decision-making skills to help ensure safe driving.
- Talk to trusted friends and family about your driving. Their honest feedback and support can help you identify areas for improvement and give you confidence behind the wheel.
Tip #8: Is it time to stop driving? Know the warning signs.
- Be alert for warning signs such as multiple accidents, near-misses, or new scrapes and dents on the vehicle. Pay attention if you have received two or more tickets or warnings within the past two years.
- Watch for signs of erratic, unsafe, or aggressive driving from your loved one, or if you’re the driver, for times you felt out of control.
- Take seriously any recommendation from a doctor to change driving habits or stop driving altogether.
- Approach the conversation with your loved one with empathy, focusing on positivity and support. Together, you can explore alternative ways to maintain their freedom and connection to the world around them.
Finally, make sure your car is fully protected for added peace of mind. Safe travels.
This article is furnished by California Casualty, providing auto and home insurance to educators, law enforcement officers, firefighters, and nurses. Get a quote at 1.866.704.8614 or www.calcas.com.
by California Casualty | Auto Insurance Info, Helpful Tips, Safety |
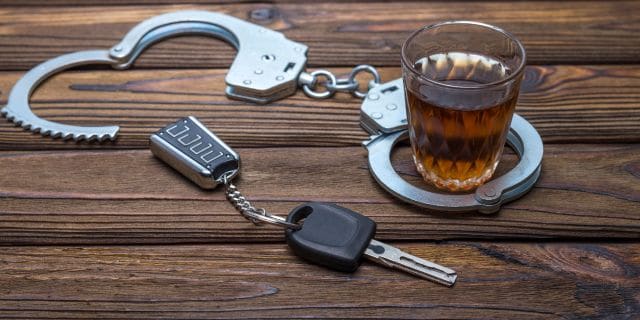
Every day, lives are lost, and families are affected by drunk driving. Yet, these tragedies are entirely preventable. By raising awareness and taking action, we can help ensure safer roads for everyone. Whether it’s through planning a safe ride home or promoting responsible behavior, we all have a role to play in preventing drunk driving and saving lives. Let’s explore how simple choices can make a world of difference.
The Reality of Drunk Driving
The Numbers: Nearly 40 people die each day in drunk driving crashes, according to the National Highway Traffic Safety Administration. That’s about one person every 39 minutes. In fact, almost a third of all deadly crashes in the U.S. involve drunk drivers.
The Legal Consequences: The penalties for drunk driving include fines, license suspension, and even jail time. Consequences vary from state to state, but most use blood alcohol content to measure intoxication. In nearly all states, 0.08% is the threshold for drunk driving. Some states have zero tolerance for drivers under age 21 with any amount of alcohol in their system.
The Emotional and Financial Costs: If you’re convicted of driving under the influence (DUI) or driving while intoxicated (DWI), it’s an expensive proposition. You may have fines to pay. Your insurance rates will increase. You will have to arrange for transportation if you cannot drive while your license is revoked. The emotional toll is significant as well, especially if the crash caused injuries and/or the loss of a loved one.
Why Drunk Driving Happens
Impairment: Alcohol affects your brain, causing you to react more slowly and lose coordination. It can make you drowsy. You may have trouble judging distances and tracking moving targets. If you have enough to drink, you could have difficulty maintaining your lane, braking appropriately, and controlling your vehicle.
Overconfidence: Many people overestimate their ability to function after drinking. They believe they are less impaired than they truly are. They may not realize how even small amounts of alcohol can affect their judgment and reflexes. This false sense of control increases the likelihood of accidents and mistakes.
Social Norms: Social pressure often plays a role in drinking. Friends or colleagues might encourage you to drink more, dismissing concerns about impairment or consequences. This can make it difficult to set personal boundaries or say no, leading individuals to drink more than they intended.
Practical Tips to Prevent Drunk Driving
Drunk driving remains a significant danger on the roads, but it’s one that can be prevented with proactive measures. Here’s how to play your part in keeping yourself and others safe:
Plan Ahead
A little foresight can go a long way in avoiding risky situations:
-
- Be the hero. Volunteer as a designated driver and coordinate with friends to rotate this role for group outings.
- Choose alternative transport. Opt for a rideshare, taxi, or public transportation if you plan to drink. These options are often cheaper than the cost of an accident or a DUI.
- Stay the night. If you’re attending a gathering where you’ll be drinking, ask the host if you can crash on their couch.
Know Your Limits
Understanding your own boundaries can prevent poor decisions:
-
- Be alcohol aware. Alcohol affects everyone differently based on factors like weight, drink strength, and tolerance levels. Know how it impacts you.
- Use tech tools. BAC calculators or personal breathalyzers provide a snapshot of your intoxication level—but don’t rely solely on them to decide if you’re fit to drive.
- Err on the safe side. If you’ve consumed any alcohol, you could be impaired. Make decisions accordingly.
Host Responsibly.
When hosting, you can create an environment that discourages drunk driving:
-
- Offer alternatives. Serve non-alcoholic beverages alongside alcoholic ones to give guests choices.
- Feed your guests. Snacks or meals can slow alcohol absorption, helping guests pace themselves.
- End alcohol service early. Stop serving drinks at least an hour before your event ends.
- Keep an eye out. Pay attention to your guests. If someone appears intoxicated, offer them a ride home or a place to sleep.
Speak Up.
Your intervention could save a life:
-
- Step in when needed. Offer to drive friends home if they’ve been drinking or insist they use alternative transport.
- Take the keys. It’s tough to confront someone, but preventing an impaired friend from driving is worth it.
- Be firm about your safety. Refuse to ride with anyone who’s been drinking.
- Educate teens. Have open conversations about the dangers of drunk driving and ensure they know they can always call you in an emergency.
Drive Defensively.
Even if you’re sober, staying alert can protect you from impaired drivers on the road:
-
- Stay vigilant. Watch for erratic driving behavior like swerving, inconsistent speeds, delayed reactions, or incorrect signaling.
- Maintain distance. If you suspect someone is driving drunk, give them plenty of space to minimize risk.
- Report suspected drunk drivers. Call local law enforcement with details such as the vehicle’s make, model, color, license plate, and location. Never try to stop the driver yourself.
Finally, protect your vehicle with the right insurance. Happy holidays and safe travels from all of us at California Casualty.
This article is furnished by California Casualty, providing auto and home insurance to educators, law enforcement officers, firefighters, and nurses. Get a quote at 1.866.704.8614 or www.calcas.com.

by California Casualty | Auto Insurance Info, Helpful Tips, Safety |
As temperatures drop and roads become icy, taking steps to winterize your car ensures you stay safe and stress-free. From checking your battery to swapping out wiper blades, preparing for the season is all about protecting yourself and your ride. Ready to keep your car in peak performance through the cold months? Let’s get started!
Take care of your tires.
You depend on your tires to grip the road. Make sure they’re in the best condition to help you maneuver safely.
- Check the tread. Tread gives you traction, and worn tread will take longer to stop on slippery roads with ice and snow. Put a penny into one of the grooves with Lincoln’s head facing you and upside down. If you see all his head, your tread depth is dangerously low. Replace your tires.
- Rotate your tires. Tires don’t wear evenly. The front tires usually have more wear on the outside edges, because they lean when you turn right or left. The front tires also hold the weight of the engine. To help your tires wear evenly, you need to rotate them every 5,000-7,000 miles.
- Align your tires. If you’ve ever taken your hand off the wheel while driving, and notice your car veering toward the side, you need an alignment. You need to align your tires to keep them pointing straight ahead. You can easily knock them out of alignment by going over a pothole. If you don’t align your tires, you can experience steering problems, poor fuel economy, and uneven tire wear.
- Consider snow tires. If you live in a place where snow is heavy, you may wish to switch to snow tires. Their softer rubber remains flexible in cold weather and helps them grip the road. Their wider grooves also are better at repelling water and gaining traction in snow.
- Check your tire pressure. As the weather changes, you will notice corresponding changes in your tire pressure. That’s because air expands as it gets hotter, which raises the pressure. It contracts as it gets colder, which lowers it. In cold weather, tire pressure can decrease about 1 psi for every 10-degree drop in temperature. That’s why it’s important to check your tire pressure when the weather changes, in extreme heat and cold, and adjust as needed.
Take care of your fluids.
Cold weather affects your car’s essential fluids.
- Change your oil. Cold weather thickens engine oil. That makes it harder for parts to turn. It also puts a strain on the starter and the battery. Choose a lighter weight oil for winter. Check your owner’s manual for the proper oil weight.
- Top off coolant (antifreeze) Coolant prevents your engine from overheating or freezing. Check the reservoir tank (not the radiator) and ensure the level is between the “min” and “max” lines. Use the correct coolant specified in your owner’s manual, as using the wrong type can damage the engine. Mix coolant with water in the ratio recommended in your manual.
- Refill windshield fluid. We use our windshield wipers a lot in the snow and rain. Make sure you have enough wiper fluid. Use a formula designed for low temperatures to avoid freezing. Keep an extra gallon in your car for emergencies.
- Change differential fluid if needed. This fluid helps to lubricate the gears and helps the wheels rotate at different speeds. It should be changed every 30,000 to 60,000 miles as the fluid breaks down over time.
Take care of your car’s components.
Cold weather can wear down critical parts of your vehicle. Getting your vehicle checked out with routine maintenance helps you stay on top of things.
- Test your battery. Cold temperatures slow down chemical reactions in the battery, reducing power. Check for corrosion and ensure it holds a charge. Replace old batteries to avoid breakdowns.
- Inspect belts and hoses. Cracks or wear in belts and hoses can lead to failures in cold weather. Address any issues immediately.
- Check your brakes. On slippery winter roadways, your brakes must be in good condition. Check and make sure your pads are not worn down. Otherwise, it will take longer to stop and could cause an accident.
- Check your spark plugs. Worn spark plugs can make your car more difficult to start in the winter. Look for signs of wear like carbon buildup, a damaged ceramic insulator, or oil deposits. Check your owner’s manual for recommended replacement intervals.
- Change your wiper blades. Snow, salt and slush builds up on your windshield. Your wipers need to work well. If your wipers look dry and feel brittle, if they make noise, or if they leave streaks, you will want to replace them. You can also get winter wipers which have a rubber edge and are heavier than regular wipers. A heavier weight makes the wiper motor work harder so make sure to remove them come spring.
- Change the cabin air filter if needed. A dirty filter can cause your HVAC system to perform poorly. It can slow down defogging of your windows, and not screen airborne contaminants. Change the filter at recommended intervals.
Equip your car with emergency essentials.
Winter driving can be unpredictable, so pack for the unexpected.
- Stay warm. Include hand warmers, blankets, and a winter emergency kit.
- Be ready for snow and ice. Make sure you have an ice scraper and snow brush.
- Bring along cat litter. Keep a bag of cat litter to sprinkle if you get stuck in the snow or on a slick patch. The extra weight will also increase your tire’s grip on the road.
- Stay fueled. Fill up your gas tank every time it hits the halfway mark. That way if you’re stranded, you’ll have gas to run the heat and keep you warm until help comes.
- Stock up. Keep bottled water and snacks handy. In case of a breakdown, that will help.
Finally, protect your vehicle with the right insurance for added peace of mind. Safe travels this season.
This article is furnished by California Casualty, providing auto and home insurance to educators, law enforcement officers, firefighters, and nurses. Get a quote at 1.866.704.8614 or www.calcas.com.
by California Casualty | Auto Insurance Info, Safety |
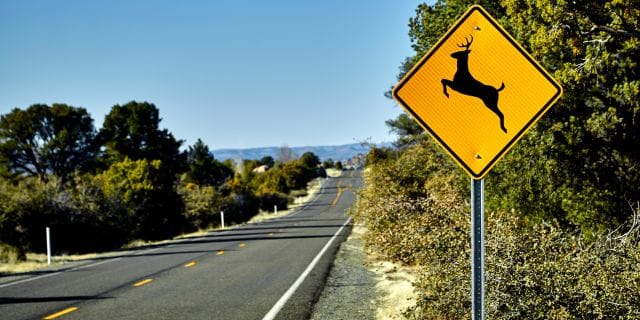
It’s a moment every driver dreads: the sudden thud, the jolt of your car, and the sinking realization that you’ve hit an animal. Your heart races, and questions flood your mind—what should you do next? Knowing how to respond calmly and responsibly in this situation can make all the difference. Let’s break down the steps to take if you find yourself in this unfortunate situation.
Honk and brake.
You see a deer—or a raccoon, coyote or other animal. Your first instinct might be to swerve. Think twice, as it could put you directly into oncoming traffic or cause you to crash into the trees. The best thing to do is sound your horn and hit your brakes. The hope is the animal will be startled and run, or that you’ll slow down enough to lessen the impact. The only time you should swerve is for animals, like moose, that weigh 1,000 lbs. or more.
Pull over to the side of the road.
Hitting an animal can be nerve-wracking. Do your best to remain calm. You’ll want to pull over safely to the side of the road as soon as possible. Turn on your hazard lights. Put up flares if you have them so you’re visible to other drivers. If it’s dark and the animal is lying on the road, you can point your headlights toward it, so the animal is visible to other motorists.
Check yourself and your passengers for injuries.
You just experienced a collision. Check yourself and your passengers for injuries, and if anyone needs immediate medical attention, call 9-1-1. Otherwise, attend to any pressing injuries using your first aid kit.
Call the police.
Report the accident to the police. (In some areas, there are fines for not reporting collisions with animals who are 55 lbs. or more.) You will want to let them know if the animal is obstructing the road and is a danger to other drivers. The police will file a report which you can use when you submit an insurance claim.
When it’s safe, get out of your vehicle.
The only times you shouldn’t exit your vehicle is if you hit a predatory animal like a mountain lion or bear, or if conditions outside are dangerous. When you feel comfortable, get out of your car and survey the scene. Carry a light so that any approaching vehicles will be able to see you.
Do not approach the animal.
Take stock of the animal from a safe distance but do not approach. If the animal is hurt, it could be afraid, dangerous and unpredictable. Do not try to move the animal; wait for police or wildlife control assistance. If you hit a farm animal or a family pet, there may be a tag or other identification. This will allow you to contact the owner. Owners of farm animals that are not correctly corralled could be charged with negligence and could be required to pay for your damages.
Take photos of any damage.
Collisions with animals could cause significant damage to your vehicle, including dents you can see and issues you cannot. Take pictures of any damage to your car’s body or bumper. Also take photos of the area around the accident. Make notes about what happened, including road conditions, exact location, date, time, and any other details that tell the story.
Contact your insurance company.
If your car is damaged, you may want to file a claim with your insurance company. You will need comprehensive coverage for collisions with animals. This is an optional addition to your standard vehicle insurance policy. If you don’t have this coverage, you may want to consider adding it.
Take your car to a reputable auto body shop.
You had an accident, and you want to make sure there’s no damage below the surface that you cannot see. If you have a diagnostic scan tool, you can use it to pinpoint issues and know whether your car is safe to drive. You will want to get your car checked out with your trusted mechanic to make sure everything is still working well.
Reduce Your Risk of Hitting an Animal.
You can take steps to reduce your risk of hitting an animal in the future. Follow these guidelines.
- Animals are more active at dusk and dawn. Be alert during these hours.
- Pay attention to animal crossing signs. These are areas where animals are likely to be.
- Look for movement along the side of the road. That could indicate an animal nearby.
- Be careful when roads are slippery, and visibility is reduced.
- Use your brights to see farther at a distance, if other cars are not coming the opposite direction.
- Ask your passengers to watch out for animals too. Another set of eyes is always helpful.
- Avoid distractions that could take your attention away from the road.
Finally, make sure your vehicle is protected with the right insurance. This will help your peace of mind should you get into an accident. Safe travels.
This article is furnished by California Casualty, providing auto and home insurance to educators, law enforcement officers, firefighters, and nurses. Get a quote at 1.866.704.8614 or www.calcas.com.
