
by California Casualty | Helpful Tips, Homeowners Insurance Info |
Is your house trying to tell you something? From mysterious knocks to unsettling creaks, the noises in your home could be more than just background sounds—they might be early warnings of bigger issues. Listen closely, because ignoring these whispers from your walls could cost you more than a good night’s sleep.
Heating and Cooling Systems
Unusual sounds from your HVAC (heating, ventilation and air conditioning) system might mean that it’s struggling. Get these issues checked before you lose heat during the frigid winter months or cooling relief during the hottest time of year.
- Squeaking or Squealing: Bearings in the motor may need oiling or a piece could be broken. You also could have a worn-out or misaligned fan belt. Ignoring this sound can lead to motor failure, so address this soon.
- Whistling: This could be the sign of air leaks in the ductwork or a dirty air filter. Try replacing the filter first and see if the sound disappears. Filters should be replaced every three months.
- Grinding: Moving parts aren’t operating smoothly or it could be worn-out bearings in the motor. Get that checked out.
- Popping: This can indicate moisture or a clog in the gas line. It also could be expansion or contraction of the ductwork, especially when turning on the heat.
- Clanking or Banging: This happens in air handlers or furnaces due to rusted or chipped metal, or soot buildup.
- Clicking: A malfunctioning electrical relay could create a clicking sound.
- Boiler Knocking: The circulation pump may be failing.
- Hissing: This could signal a leak in the refrigerant line, or there could be an internal valve leak. The compressor pressure also could be too high.
- Gurgling: You could be low on refrigerant or have a coolant leak.
- Booming: There could be airflow issues where the ducts connect.
- Buzzing: This sound could be caused by loose wiring, a failing motor, or capacitors that are malfunctioning.
- Rattling: There may be loose parts within your unit, such as screws or fan blades.
Appliances
Unusual noises from appliances with motors might mean a mechanical problem. Homeowner warranties usually cover this type of issue.
- Humming Dryer: Your clothes dryer could have an object caught in its blower.
- Buzzing Refrigerator: The refrigerator could have an ailing compressor.
- Grinding Dishwasher: If your dishwasher sputters or grinds, something could be stuck in its chopper blade.
- Popping or Rumbling Water Heater: Water heaters operate almost silently, so if you hear sounds, don’t ignore them. Popping or rumbling could be due to sediment buildup on the bottom. It means it’s struggling to operate and might fail. You may need to flush the inside of the tank.
- Noises from Gas Appliances: Don’t wait on gas appliances that are making noises. This may indicate a leak that could be serious.
Plumbing and Pipes
You want your plumbing and pipes to work properly. Water can cause significant damage if problems aren’t addressed in a timely manner.
Clanking: This sound could be a steam radiator that is not draining properly. It also could indicate a loose pipe. Get that fixed, as loose pipes moving around could lead to burst pipes.
- Banging or Thumping: This is caused by water changing direction or being brought to a sudden halt. Usually, it doesn’t cause problems, but the sound can be annoying. You can buy a water hammer arrestor for appliances that reduce the noise.
- Gurgling Toilet: This could indicate a plumbing backup somewhere. It could be a partially clogged drain, a problem with the flush value, a buildup of sediment in the tank, or inadequate venting in the plumbing system. You will want to call a plumber sooner than later.
- Dripping: Water leaks inside a wall can lead to mold or mildew and can destroy insulation. Try to isolate where the dripping sound is coming from. Get professional help as needed.
- Water Loss Test (water meter): If you cannot find the leak, try a water loss test. Look at the water meter and write down the reading. Stop all use of water in your home for 30 minutes. Do not flush the toilet or use the sink, tub, shower, dishwasher or washing machine. Turn off the ice maker and sprinkler. Then check the water meter at the end of the half hour. If the reading is unchanged, you do not have a leaky pipe. You could have a leaky toilet or appliance.
- Water Loss Test (well water): If you have well water, you won’t have a water meter to check. Stop all water use and stand near your water pump for 30 minutes. Listen for clicking sounds from the pump which could indicate a water leak.
Lights and Outlets
The lights and outlets in your home are connected to the electrical system. When components of this system fail, it not only is frustrating but could be dangerous.
- Humming, Buzzing, Hissing, Crackling or Popping (light switches and outlets): Buzzing is the sound of electricity arcing across a bad connection. If you hear buzzing from your light switch or outlet, or a hissing/crackling/popping sound, stop using it immediately and call an electrician.
- Humming, Buzzing, Whining (bulbs or dimmers): If a fluorescent bulb is making the noise, it means a ballast likely needs to be replaced. That is the part that controls the voltage to the bulb. If the dimmer is making the noise, replace it. You can also try changing the bulb as some bulbs work better with dimmers.
Walls, Ceilings & Windows
Unexpected sounds from above or behind the walls might mean unwanted guests. Noises from your windows could signal hidden openings. Both could translate to expensive repairs if not addressed.
- Skittering: This is the sound of critters in your home: raccoons, squirrels, birds, and even insects. The longer they are there, the more damage they can do, from chewing through wiring and insulation to giving birth to babies. When these animals die in your walls, they also cause an awful lingering odor. Take note of when you hear the sounds. Rodents are nocturnal. Call an exterminator. Be sure to search and seal the openings that allowed critters into your house or more could follow.
- Buzzing: If you hear a buzzing sound in your walls, it could indicate a colony of bees making their nest there. Carpenter bees are especially known to do lots of damage by burrowing in your wood. Contact a professional pest removal service to safely get rid of this hazard.
- Creaking and Squeaking (floors): These sounds could be the house settling, or they could be caused by temperature changes that result in the wood boards rubbing against each other. However, when the squeaking is accompanied by sagging or gaps in the floor, you will want to consult a professional.
- Whistling (windows): Whistling sounds could point to improper installation, worn weather stripping, or poor seals. Check the seal around your windows for signs of wear, and caulk or reseal as needed.
- Rattling (windows): Something is not fitting quite right if you hear rattling. Get it checked out as this could lead to cracks in the glass.
Your home is your greatest investment. Keep up with winter home maintenance and protect your home with the right insurance for added peace of mind.
This article is furnished by California Casualty, providing auto and home insurance to educators, law enforcement officers, firefighters, and nurses. Get a quote at 1.866.704.8614 or www.calcas.com.
by California Casualty | Helpful Tips, Homeowners Insurance Info |
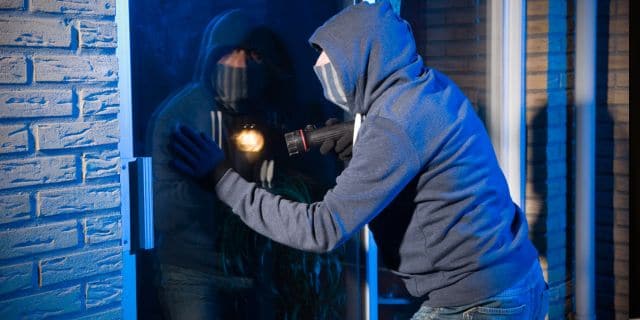
There’s no place like home. It’s where life unfolds, memories are made, and your most treasured belongings reside. Protecting it means safeguarding not only your possessions but also your sense of security. From simple habits to smart upgrades, here are some practical tips that keep your home safe and your peace of mind intact.
Secure your doors and windows.
Your doors and windows are the primary entry points to your home, so it’s essential to ensure they only welcome invited guests. Here’s how to keep them secure.
- Check and maintain locks: Regularly inspect locks on doors and windows. Repair or replace any that are broken or show signs of wear.
- Lock up when you leave: Always keep doors and windows closed and locked when you’re not at home to deter unwanted visitors.
- Install window alarms: Affordable, adhesive window alarms are a simple way to deter burglars. These devices emit a loud sound if tampered with, scaring off potential threats.
- Enhance front door visibility: Ensure you can see who’s at your door without opening it, whether through a peephole, camera, or nearby window. This reduces the risk of letting in uninvited visitors.
Light your home inside and out.
Lighting isn’t just about setting the right mood—it’s also a powerful tool for keeping your home secure.
- Illuminate the exterior: Ensure outdoor areas like entryways, driveways, and pathways are well-lit to make your property less appealing to unwanted visitors.
- Use layered lighting: Combine porch lights, path lights, and landscape lighting to eliminate dark spots around your home, making it harder for anyone to hide.
- Install motion sensor lights: These lights activate with movement, startling potential intruders and drawing attention to their presence.
- Automate your lighting: Use a smart device or timer to turn lights on and off when you’re away. This creates the illusion that someone is home.
Landscape your yard with safety in mind.
Take a look at your landscaping. Are there spots where intruders could hide, or easy access points like tree branches that could lead to an upstairs window?
- Clear overgrown areas: Remove any dense bushes, tall grass, or other overgrown spots that could provide hiding places near your home.
- Trim trees: Ensure tree branches are cut back so they don’t offer a foothold to access upper windows or levels.
- Secure your outdoor valuables: Make sure that your grill, lawn mower, and bicycles are out of sight. Lock your shed and your garage.
- Walk your property: Approach your home as if you were a stranger. Look for areas where an intruder could observe your comings and goings without being noticed. Take action to eliminate those hiding spots.
Invest in a security system.
A professionally installed security system not only deters burglars but also alerts authorities in the event of a break-in.
- Keep your alarm panel hidden: Avoid placing your alarm panel in view of the outside, where someone could see you arming or disarming it.
- Test your system regularly: Ensure your security system is functioning properly by testing it periodically.
- Address faulty alarms: If your alarm goes off frequently for no reason, that can cause it to be ignored. Have it repaired. Then tell your neighbors it is fixed.
- Advertise your security system: Display a window sticker or lawn sign to let potential intruders know your home is protected.
Don’t advertise to potential intruders.
Sharing certain information or leaving items visible can attract burglars and provide them with the perfect opportunity to strike. Protect your home by taking these precautions.
- Keep valuables out of sight: Avoid placing valuable items where they’re visible from the street, such as near windows or in open garages. Keep your most important items in a safe.
- Secure garage windows and doors: Frost or cover garage windows to prevent anyone from peeking inside and always keep the garage door closed when not in use.
- Be cautious on social media: Avoid posting about recent purchases. Don’t share vacation photos while you’re away.
- Avoid obvious signals: Never leave notes on your door indicating you’re not home.
- Don’t leave spare keys outside: Common hiding spots like under a planter or welcome mat are the first places burglars will check. Instead, leave a spare key with a trusted neighbor or friend.
Don’t have packages on your porch.
Porch pirates are a common danger in many neighborhoods, but a few simple steps can make it harder for them to steal your deliveries.
- Choose secure delivery locations: Have packages delivered to a secure pickup location or a locker if possible.
- Request signature confirmation: Require a signature for delivery to ensure someone is home to receive the package.
- Disguise your disposal: Avoid leaving branded boxes from expensive items, like TVs, in your trash or recycling where they’re visible. Break them down and conceal them to avoid drawing attention.
Establish a home safety network.
Do the things you need to do on a regular basis to check in on security for your home and your area.
- Get to know your neighbors: Build a network of trust by watching out for each other’s homes and reporting any suspicious activity.
- Connect with local police: Ask local law enforcement about past incidents in your area so you can take precautions against those types of incidents.
- Plan for when you are away: Stop mail deliveries or ask a trusted neighbor to collect your mail, newspapers, etc. Arrange for services like lawn care, snow removal, or garbage pickup to make your home appear occupied.
Finally protect your home and your belongings with the right insurance, including personal property coverage. Taking these steps gives you peace of mind and ensures your home is protected no matter where life takes you.
This article is furnished by California Casualty, providing auto and home insurance to educators, law enforcement officers, firefighters, and nurses. Get a quote at 1.866.704.8614 or www.calcas.com.

by California Casualty | Auto Insurance Info, Calcas Connection, Finances, Helpful Tips, Homeowners Insurance Info |
We understand that changes to insurance premiums can be concerning, and we want to help you understand the factors that influence your rates. Insurance rates are determined by a combination of external conditions and personal policy coverage selections. Below, we’ll explain some of the most common reasons rates can increase and what changes in your policy could impact your premium.
External Factors That Can Cause Rate Increases
1. Rising Costs of Repairs and Replacements
For auto insurance, advanced technology in vehicles, like sensors and cameras, makes repairs more expensive. In the case of a total loss, rising prices for new and used vehicles drives up the cost of replacement. Similarly, home insurance is impacted by increasing prices for building materials and labor, making it more costly to repair or rebuild homes after a loss.
2. Weather and Natural Disasters
Severe weather events, such as wildfires, floods, and hailstorms, are happening more frequently and with greater intensity. These events lead to higher claim payouts and cause insurance rates to rise, even in areas that haven’t been directly affected.
3. Inflation
General inflation affects nearly every industry, including insurance. The rising cost of goods and services —from everything associated with a minor vehicle repair all the way to restoring extensive home damage, like parts, materials, labor, rental cars, temporary housing, legal and medical expenses —can result in an adjustment of premiums to align with the amount that is paid out on claims.
4. Increased Claim Frequency
More claims being filed—whether due to a rise in car accidents, litigation, or property damage—paired with increased claims costs can lead to paying out more on claims than what is collected in premium. When this happens, a rate increase can occur.
5. Reassessment of Risks
Insurance companies regularly re-evaluate risks in specific areas. If you live in a region that’s seen more accidents, theft, or natural disasters, your premiums may increase to reflect the heightened risk.
How Policy Changes or Adjustments Affect Your Premium
1. Adding or Removing Coverage
Expanding your coverage—such as adding comprehensive auto coverage or increasing your home insurance policy limits—will raise your premium. Conversely, reducing coverage may lower your rate but could leave you underinsured.
2. Adjusting Deductibles
Choosing a higher deductible typically lowers your premium since you agree to pay more out-of-pocket in the event of a claim. However, a lower deductible means your insurer covers more upfront, which increases your premium.
3. Policy Discounts and Loss of Discounts
We offer many discounts including affiliated group membership, bundling auto and home, multi-vehicle, safe driving, home security, non-smoking, good student, mature driver, etc. If you no longer qualify for a discount, your rate may increase.
4. Changes in Your Personal Profile
Life changes such as adding a new driver to your policy, changes to the number or type of covered vehicles, or moving to a different area can impact your premiums.
5. Claims History or Driving Record
Filing a claim can result in higher premiums at renewal. Additionally, if a ticket or accident is charged against your driving record, you may be subject to a surcharge that will likely raise your rates.
How You Can Help Manage Your Premiums
While some factors are out of your control, there are steps you can take to keep your premiums manageable:
- Bundle Policies: Combining your auto and home insurance or having multiple vehicles on one policy can help you save more.
- Review Your Coverage: Call us for a free policy review to make sure you’re not paying for coverage you don’t need.
- Increase Your Deductibles: Opting for a higher deductible can lower your premium but be prepared to cover more out-of-pocket costs in the event of a claim.
- Maintain a Safe Driving Record: Avoid accidents and traffic violations to keep your auto insurance costs down.
- Home Upgrades: A new roof, installing alarms, fire-resistive updates, or upgrading plumbing, electrical or HVAC systems can help you qualify for discounts.
- Ask About Discounts: Let us know if there have been changes, like completing a mature driving course, a child away at school without a vehicle, or reaching a milestone like retirement. We also offer discounts for multi-home, years claim free, good student, safe driving, and driver training for youthful drivers
We’re Here to Help
Whether it’s an auto accident or a home repair after a storm, having insurance helps ensure you’re not left to bear the full financial burden – so maintaining adequate coverage is crucial.
We understand that insurance can feel complex, but we’re here to make it simple and help make sure you have the coverage that’s right for you. Our trusted advisors are available to review your current policies, provide guidance on your coverage options, help explore ways to save, and answer any questions you have.
Thank you for trusting us to protect what matters most to you.
This article is furnished by California Casualty, providing auto and home insurance to educators, law enforcement officers, firefighters, and nurses. Get a quote at 1.866.704.8614 or www.calcas.com.
by California Casualty | Helpful Tips, Homeowners Insurance Info, Pets |
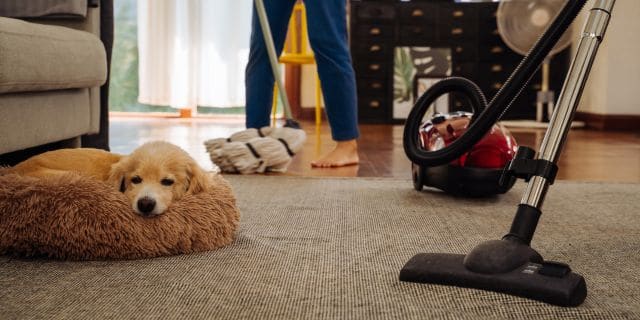
Thinking of adding a furry friend to your family? Or maybe your relatives are bringing their four-legged companion for a visit? Either way, ensuring your home is safe and welcoming for pets is important. From curious kittens to energetic pups exploring every corner, pet-proofing your space is essential to prevent mishaps. With a few simple tweaks, you can create a cozy and secure environment that’s perfect for both pets and people. Here’s a room-by-room guide.
Family Room/Living Room
- Furnishings: Pets love to jump, even if you don’t allow them on your furniture. Make sure it’s safe in case they get up there. Remove furniture that moves when jumped on (rocking chairs and chairs with wheels), and don’t leave reclining chairs open. They can close from the momentum of the jump, entrapping your pet. Add anti-scratch tape to the couch and other furniture to discourage scratching.
- Cords and wires: Pets love to play with dangling wires. Make sure cords from lamps, TVs, and other appliances are out of reach or taped down. You can use a pet-safe bitter apple spray to deter chewing. Cover electric cords or put them away when not in use. Follow guidelines for extension cord safety.
- Knickknacks and toys: Be prepared for décor and knickknacks to be knocked over. Keep them out of reach of curious pets. Remove children’s toys to avoid damage and potential choking hazards.
- House plants: Many plants can be poisonous to pets. Move them out of reach, possibly to a room where the door is closed so pets have no access. Fortunately, there are many pet-friendly plants that you and your fur baby can both enjoy.
- Fireplace and heaters: Place dog beds and blankets away from fireplaces or heaters. Block off access to the fireplace for pets just as you would for young children.
- Windows: Pets love to look out the window. Make sure your windows are closed. Install window guards so curious pets don’t accidentally fall through.
Kitchen
- Cabinets: Pets can pry open cabinets. Add childproof latches to cabinets within their reach so curious paws and noses can’t get in.
- Stove: Put up a stove guard to keep cats from jumping on a hot surface. Always supervise cooking. Don’t leave your stove unattended with pets in the house.
- Dishwasher: Close the dishwasher when not in use. Dishwasher detergent has chemicals that can cause severe irritation to the mouth and well as gastrointestinal upset. Plus, sharp objects like knives with food residue can be enticing for pets, and cause injury.
- Counters: Food can entice pets to jump up on counters. Even if the food is safe for them to eat, you don’t want them there. Store food in containers with tightly closed lids or in the fridge. Layering aluminum foil can keep cats from jumping on counters.
- Trash cans: Keep garbage in pet-safe trash containers. Some are heavy enough so they can’t easily be knocked over and others come with locks. You can also tuck trash cans away in a closet or cabinet.
Bathroom
- Cleaners: Store cleaning products and other hazardous chemicals out of reach to keep curious pets safe. Consider using cabinet latches to secure lower cabinets, and for dogs, placing items on high shelves can provide extra protection.
- Medication: Always store medications in a secure cabinet or drawer. Even small amounts of medications can be toxic to pets if ingested.
- Toilet: Keep the toilet lid closed to prevent pets from drinking water that may contain harmful chemicals. Use a toilet roll protector to keep playful pets from making a mess.
- Accessories and bath items: Keep small items like hair accessories, loofahs, and razors out of reach. These items can pose choking or ingestion risks and laceration hazards.
- Hair-styling heat tools: Always unplug and store curling irons, straighteners, and other heat tools immediately after use to prevent burns or accidents.
Bedroom
- Closets: Keep closet doors closed to prevent pets from accessing laundry or shoes. Items like drawstrings, buttons, or small accessories can be dangerous if chewed or swallowed. Don’t forget to check under the bed for loose socks or undergarments and store them safely out of reach.
- Curtain Cords: Dangling cords can be irresistibly tempting for pets but pose serious risks of entanglement or injury. Tie them up securely or opt for cordless window treatments to eliminate the hazard.
- Bedside Table: Store medications, lotions, and cosmetics in drawers or on higher shelves, away from curious noses and paws. These items can be harmful if ingested.
- Charging Cables and Electrical Cords: Keep electrical cords out of reach to prevent chewing, which can lead to electric shocks or burns. Charge devices on a high shelf, and tuck away charging cables when not in use.
Other Spaces
- General: Use pet gates to section off certain areas for dogs. Keep in mind that gates are less effective for cats, as they can climb or jump over them.
- Laundry Room: Always keep washer and dryer doors closed. Before starting the dryer, ensure no pets, especially cats, have climbed inside. Block small spaces behind washer and dryer units to prevent pets from getting stuck. Store dryer sheets in a sealed container on a high shelf; they contain chemicals that can cause gastrointestinal upset, skin irritation, and other serious health issues.
- Garage: Store chemicals like antifreeze, paints, and cleaners on high shelves or behind locked doors. Clean any antifreeze spills immediately—just a small amount can be lethal if ingested. Keep sharp tools and objects safely stored and remove any mouse or insect traps that could harm pets.
- Yard: Avoid letting pets into the yard immediately after applying pest control chemicals. Check that all outdoor plants are safe and non-toxic for pets. Repair holes in fences to prevent pets from escaping. Store lawn and gardening tools securely when not in use. Keep pets away from compost piles, mulch, and fertilizers, which can be harmful if ingested. Choose a pet-safe ice melt for your property during the winter months.
- Balconies and Swimming Pools: Block access to balconies or use barriers to prevent falls, especially for small pets. Restrict access to swimming pools when not supervised to prevent drowning accidents.
- Finally, don’t forget to protect your fur baby with pet insurance for added peace of mind, and to save on your vet bill. Remember, you can easily add pet insurance from Pet’s Best to your California Casualty auto or home policy. Find out more about what pet insurance can cover by talking with a California Casualty customer service representative today.
This article is furnished by California Casualty, providing auto and home insurance to educators, law enforcement officers, firefighters, and nurses. Get a quote at 1.866.704.8614 or www.calcas.com.
by California Casualty | Helpful Tips, Homeowners Insurance Info |
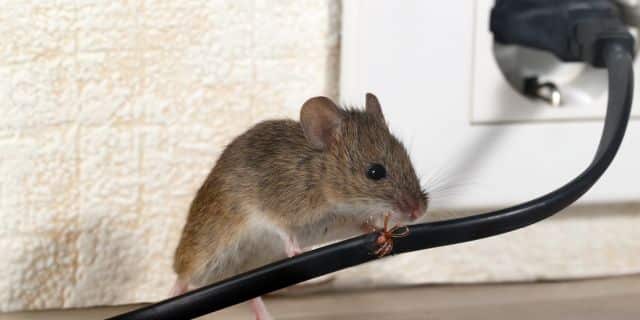
As the temperature drops, uninvited guests may view your home as the perfect winter retreat. Small critters like mice, squirrels, bats, and raccoons are experts at finding cozy nooks to ride out the chill. But don’t worry—keeping your home critter-free this winter is easier than you think. With a few simple steps, you can secure your space against these furry invaders and avoid the damage and mess they can bring.
Ready to critter-proof your home? Let’s get started!
Steps to Take Outside
Animals live outside and you would expect them to be there. However, you don’t want them nesting so close to your home that they may be tempted to venture inside.
- Trim landscaping. Keep shrubs close to the house well-trimmed so there are not places for them to build a home. Trim your trees so squirrels won’t be able to easily jump from there to your roof. Avoid using wood chips as mulch, as these make wonderful nesting material.
- Store firewood safely. Firewood can be a cozy hideout. Place logs at least 20 feet away from your house. Not only will that keep critters farther away, but the distance will also help protect against a fire risk. Keep the wood at least 18 inches off the ground to reduce the chance of rodents seeking shelter there.
- Remove food sources. Food is a major draw for animals. Place bird feeders away from your home and use squirrel guards to keep unwanted visitors out. Store food in sealed containers, and ensure garbage cans are securely closed and inaccessible.
- Secure decks and porches. The spaces beneath decks and porches are prime nesting spots. Look for signs of activity like gnawed wood, droppings, or burrow holes. Animals prefer dark, quiet areas, so deter them with a combination of radios, flashing lights, and apple cider vinegar-soaked rags. Once the critters leave, block openings with decorative lattice, burying the bottom edge to prevent reentry.
A note: Groundhogs who burrow under concrete slab, deck, porch are hibernators. You do not need to worry about them in the winter. They will not bother anything. However, during the springtime, you can use some of the above actions to get them to leave. Mylar windmills that move with the wind also will frighten them away.
Steps to Take in the Garage
Your garage is the midpoint between the outside and your house. Due to its proximity to your home, and the amount of stuff you probably store there, it could be inviting for critters.
- Seal openings. Garages offer shelter that is relatively warm, dry and protected from the elements. It’s no wonder critters want to be there. They don’t need a lot of space to get inside. Mice can enter in a ¼ inch gap. Check your garage for any openings. Caulk and fill in any cracks. Install a garage weather seal to close the gaps at the bottom of the doors.
- Clear the clutter. Critters do not like being out in the open. They are seeking cozy spaces where they can hide. This includes behind boxes, under shelves, beneath insulation, inside old tires, and so on. Remove any unnecessary boxes. Use plastic bins with tight lids so they can’t get inside. Raise items off the floor as a further deterrent.
- Eliminate food sources. Don’t keep trash or store food in your garage. Animals can smell a food source. If you must keep food in your garage, seal it in a container that will help prevent the scent from being detected.
- Insulate cavity walls. If your garage has cavity walls, you may find them make great homes for smaller animals such as mice. Consider filling them with a spray foam insulation. Not only will it help prevent critters from nesting there, but it will keep your garage warmer. Pro Tip: Choose a foam that includes rodent repellent.
Steps to Take in the Attic and Chimney
Both attics and chimneys are popular places for critters to nest. They are often easily accessible to the outside, and like garages, they offer protection from the outside elements. They also are generally dark and quiet, something critters enjoy.
- Check for signs of critters. Listen for noises. Look for droppings or urine stains and for damage such as chewed wood or ripped ventilation ducts. If you suspect that there are animals, take steps to remove them safely. Your local wildlife organization or a professional exterminator are good resources.
- Seal entry points. Animals enter your attic through small openings. The easiest way to check is to look during daylight, and see the places where light is coming in. Common spots are by attic vents, and openings in your roof soffits or eaves. Take steps to seal those openings. For attic vents, put a screen to cover the entire vent using ½ inch mesh. Use gutter guards on your roof to keep critters from settling there.
- Install chimney covers. These mesh screens allow airflow while blocking access to birds, squirrels, bats and other animals. In addition, make sure your chimney damper is properly closed when you’re not using your fireplace.
Steps to Take Inside
Your home is a warm, comfortable sanctuary for you, but it can also be an inviting retreat for unwelcome critters. With countless hiding spots, from behind your walls to under your cabinets, pests can easily find cozy nooks. The key to keeping them out is vigilance and preparation.
- Inspect every room. Conduct a room-by-room inspection to identify potential entry points. Focus on areas where gaps might exist along your floors, under cabinets, or around doors. Pay close attention to places where wires, pipes, or vents penetrate walls; even a tiny ¼-inch gap is enough for a mouse to slip through. Use caulk or sealant to close these gaps and consider plugging larger holes with steel wool, as rodents find it difficult to chew through.
- Secure doors and windows. Install or upgrade weather stripping around your doors and windows to seal off any openings. For exterior doors, consider adding a sweep or brush strip to block even the smallest gaps at the bottom. These simple steps help keep pests—and drafts—out.
- Examine vents and exhausts. Check your dryer vent, stove exhaust vent, and other external openings. Birds and small animals often see these as perfect nesting spots. Install vent covers or screens to prevent intrusions while maintaining proper airflow.
- Store food properly. Avoid leaving food out in the open, including pet food. Store all pantry items in sealed, airtight containers. This not only deters pests but also keeps your food fresher for longer.
- Try natural deterrents. Use the power of scent to repel pests naturally. Peppermint oil, for instance, is a proven deterrent for mice. Soak cotton balls in essential oil and place them near suspected entry points or in areas prone to critter activity. Replace them regularly to maintain their potency.
Your home is your greatest investment. Keep up with winter home maintenance and protect your home with the right insurance for added peace of mind.
This article is furnished by California Casualty, providing auto and home insurance to educators, law enforcement officers, firefighters, and nurses. Get a quote at 1.866.704.8614 or www.calcas.com.
by California Casualty | Helpful Tips, Homeowners Insurance Info |
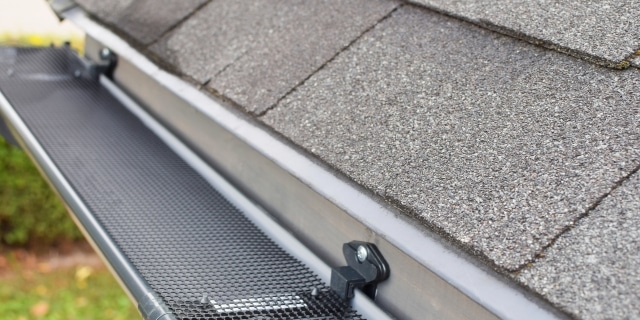
Those beautiful autumn leaves you’ve been admiring are not so pretty when they’re clogging your gutters. Acorns, leaves, branches, and other debris have a way of piling up, leading to blockages that can cause water damage and costly repairs. Enter gutter guards—a practical solution that keeps debris out while letting rainwater flow freely. Here’s a quick guide to gutter guards, including why autumn is the best time to check and clean your own gutters.
What exactly are gutters?
Gutters are channels along the edge of your roof that direct water away from your home. They include downspouts that bring water down to the ground, moving it at least 5-10 feet away from the foundation. When gutters get clogged, they no longer work the way they should. Water could stay pooled in the channels or move in ways that negatively affect your home. Clogged gutters can lead to expensive problems: soil erosion, basement flooding, structural damage, roof damage, siding damage, and foundation issues. A buildup of debris could also increase the risk of a fire. Luckily, there is an easy way to protect your gutters from getting clogged – gutter guards.
Types of Gutter Guards
There are many different types of gutter guards. Some can be self-installed, and others require a professional. Below is a brief description of the main kinds along with their pros and cons. (Check the warranty on your shingles before you install a gutter guard that requires attaching directly to shingles with screws or nails as that could potentially void it.)
Screen Guards
This is like a window screen for your gutters. The screen keeps out debris while the holes let the water pass through.
Pros: These guards are affordable and can be self-installed.
Cons: Dirt and small debris can still pass through the screen and get in your gutter. These guards need to be removed and cleaned at least once a year.
Micro-mesh Guards
Micro-mesh guards are like screen guards, but with holes that are much tinier. They are particularly good at keeping out pine needles and dirt, which can slip through larger openings. These guards are usually made of stainless steel and other durable materials.
Pros: Micro-mesh guards are low maintenance, and long lasting. They are easy to clean and should be cleaned every 3-12 months.
Cons: They require professional installation.
Reverse-Curve Guards (Surface Tension Guards)
These guards are attached beneath the shingles, and they go over the gutter and curve back a little. The curve creates a hood, so debris doesn’t get into the gutter, but the unique design lets the water seep through.
Pros: These are long-lasting and low maintenance guards.
Cons: Reverse-curve guards require professional installation. They also are highly visible and could affect your home’s aesthetic.
Brush Guards
These guards are made of stiff brushes that point up inside your gutters. The bristles catch debris as the water passes through.
Pros: They are easy to install and remove for cleaning.
Cons: These guards require frequent cleaning. Small debris can get caught in the brushes’ bristles, and these guards can be tough to clean as a result.
Foam Guards
This triangular-shaped foam fits inside your gutter to prevent leaves and other debris from lodging there. It’s usually made from polyurethane and has a spongy texture that allows water to flow through. Some foam guards restrict water flow more than others.
Pros: These are affordable and easy to install. They are good at blocking large debris.
Cons: Small debris can enter through gaps between the foam and gutter walls. The foam also can break and is susceptible to mold due to dampness. These need to be replaced every 1-2 years, depending on weather conditions in your area.
DIY vs. Professional
Should you install your own gutter guards or hire a professional? Here are some things to consider.
Choose DIY gutter guards and install them yourself if:
- You want or need to save money.
- You’re generally handy and comfortable on a ladder.
- Your roof is easy to access.
- You like the choices available for DIY. You can find most at your local home improvement store.
Hire a professional to install your gutter guards if:
- You have the budget for professional installation, and you prefer the convenience.
- You want a warranty to show the installation was done correctly and that will address potential future issues.
- You want a higher quality gutter guard than is available DIY.
- Your roof is unusually steep or is difficult to access.
- You have concerns about doing it yourself.
Before the Installation
The best time to install gutter guards is late summer and early fall. This helps prepare for the large volume of leaves that start coming down during the season. Before the installation, you will want to clean and check your gutters.
Cleaning your gutters is part of fall home maintenance. It helps to ensure that your home is ready for winter storm season and severe weather. Here’s a quick overview of how the process is done.
- Gather your supplies: a bucket for debris, trowel or gutter scoop, garden hose with spray nozzle, latex or waterproof gloves to protect your hands from wet debris, safety eyewear, and a sturdy ladder.
- Start at the downspout. Use your gloved hand or a trowel to remove leaves, twigs and packed material.
- Then go up to roof level on your ladder. Use your gloved hand to clear large debris like leaves or twigs. Use the trowel for compacted debris.
- Remove and clean the downspout strainer.
- Flush the downspout and the gutter with water from your hose.
- Look for leaks, making sure water flows freely through the downspout. You will want to repair any issues before you add gutter guards.
- Inspect your gutter for rust spots or peeling paint which could show signs of deterioration. Again you will want to address any issues and potentially replace those parts before adding the guards.
- Look for mold or mildew near the foundation which could mean water is getting in there. That could signal a larger problem.
Ready to start the project?
Once you have clean gutters without any issues, you are ready to protect them with gutter guards. Measure your gutters so that you will be able to purchase the right length of gutter guards. If you’re doing a DYI installation, make sure to fully read and understand the instructions. Watch tutorials and online customer reviews for a heads up on potential mistakes. Know that installing gutter guards can take anywhere from a couple of hours to a couple of days. If you’re choosing a professional installation, make sure to get several estimates and ask for references to avoid scams.
Your home is your greatest investment. Keep it fully protected for added peace of mind.
This article is furnished by California Casualty, providing auto and home insurance to educators, law enforcement officers, firefighters, and nurses. Get a quote at 1.866.704.8614 or www.calcas.com.
