
by California Casualty | Auto Insurance Info, Homeowners Insurance Info |
Do you want to save money on your insurance payments? Did you know there’s a way to do that without raising your deductible or lowering your coverage? The answer is bundling.
What is bundling? It’s a term to describe a multi-policy discount. If you have more than one policy with an insurance company, you may bundle those policies and, in the process, you can save on all.
Here’s why you might consider bundling:
-
- Bundling can save you money. Depending upon the amount of coverage for your policies, and your state, you can save from 5% to 25%.
- Bundling is convenient. It simplifies bill paying and record keeping since you interact with just one insurer.
- Bundling can help ensure you are fully covered. Having all policies with one company allows your insurance advisor to review any gaps in coverage.
There are many different ways to bundle your insurance.

Homeowner’s Insurance Bundles
Your home is one of your greatest investments; you need to make sure that it’s fully protected. There are plenty of decisions to make when buying your own policy- from coverage limits to extra protection for your belongings. One of those decisions might be to incorporate additional coverage to enhance your policy. When you bundle those with your home insurance, you can save money.
You can choose to bundle your home insurance with:
- Sump pump endorsement: A sump pump is a device that collects excess water and drains it outside your home. Sump pump coverage covers the costs of repair and replacement in the event of a sump pump failure. Just a couple inches of water backup can cause thousands of dollars in damage – ruining carpets, destroying appliances, and crumbling drywall.
- Flood insurance: Regular home insurance does not cover flood damage. That’s why many people in flood zones purchase this extra policy. There is a 30-day waiting period to buy flood insurance, so take that into consideration.
- Auto insurance: If you have a vehicle, you likely have liability, collision, and/or comprehensive insurance. Liability coverage is used to pay for damages that you cause. Collision coverage helps to pay to repair your vehicle or get one of equivalent cash value if yours is totaled. Comprehensive coverage is for damage to your vehicle other than collisions, such as natural disasters, fires, vandalism, theft, and animals that damage your vehicle.
- College students and renter’s insurance: If your college student* lives away at school, his or her belongings are covered by your homeowner’s policy at 10% of the limit of liability or $1,000, whichever is greater. You may want more coverage than 10%. Talk to your insurance advisor about expanding limits, such as an umbrella policy to cover expensive items your student is bringing to college. Alternatively, consider purchasing renter’s insurance for your college student for an off-campus apartment. Renter’s insurance not only protects your student’s possessions but offers them emergency housing if they are unable to reside in the rental unit. Renter’s insurance is surprisingly affordable, so when you bundle it with your homeowner’s, it could practically be free!
*Note that college students must meet certain requirements in order to qualify as an insured on your homeowner’s policy. This includes age limitations, family relationship, and full-time enrollment in school. In the event of theft coverage, they must have lived in the location 60 days immediately before the loss.
- Earthquake Insurance: If you live in an area that is prone to earthquakes, you may want to consider this additional coverage. Homeowner, condo, and rental insurance policies typically do not cover earthquakes.
- Umbrella policies: This type of policy provides additional personal liability insurance that starts to pay after your underlying limits of liability on your home insurance policy have been exhausted after a covered loss. While there’s no way to know for sure how much liability coverage you may need, understanding what you stand to lose is a good place to start. If you’re being sued, it’s possible that equity in your home, your personal savings, and your income may be at risk. If the value of two years of your annual income, the equity in your home, and your savings exceed the liability limits on your auto or home insurance policies, then you should consider an umbrella policy to protect your net worth.

Renter’s Insurance Bundles
Renter’s insurance is like homeowner’s insurance but for tenants. Starting at about $10 a month, it protects your personal belongings (that’s right, your landlord’s insurance policy will not cover your belongings) but that’s not all. It’s an important safeguard if you’re found at fault for property damage or injuries at your place (and even around the world). It also can help if you don’t have access to your apartment or home due to a covered loss.
You can choose to bundle your renter’s insurance with:
- Auto insurance: As described above, auto insurance helps protect you in the event of an accident or other damage to your car. When you bundle your renter’s policy with an auto policy that you already have, the savings can be substantial.
- Pet insurance: Our pets are like family and we want to keep them as healthy as possible. Pet insurance can help to offset those veterinary expenses. Depending on your policy, pet insurance may cover exams, prescriptions, lab tests and x-rays, surgeries, emergency visits, and even cancer. You make the initial payment and then are reimbursed depending upon the deductible and limits that you have selected. (Pet insurance also may be bundled with homeowner’s, too.)

Auto Insurance Bundles
Auto and homeowner’s insurance, and auto and renter’s policies, are among the most popular types of insurance bundles. However, you also may wish to bundle your car insurance with a boat policy.
- Boats and personal watercraft: If you have a boat, you will need a boat insurance policy. You also need a separate policy for personal watercraft such as jet skis. The policies protect you from vandalism, accidents, and liability for injuries to others.
*Note that motorcycle insurance is not eligible for a bundling discount. However, if you live in a cold climate state, and only ride your bike in warmer months, you can ask about seasonal coverage.
Each year, California Casualty policyholders save an average of $423* a year. That could be even more if you decide to bundle your coverages. See how much you can save and get started with a free quote today at mycalcas.com/quote.
This article is furnished by California Casualty, providing auto and home insurance to educators, law enforcement officers, firefighters, and nurses. Get a quote at 1.866.704.8614 or www.calcas.com.

by California Casualty | Auto Insurance Info, Travel |
With its beautiful beaches, rich culture, and delicious cuisine, Mexico is a popular travel destination. Plus, it’s one that can be reached by car for many Americans. If you’re planning a family road trip to Mexico or heading there for some much-needed rest and relaxation, you’ll want to do your research. Here are some tips to get you started.
Apply for Mexico Auto Insurance.
Mexico does not recognize U.S. auto insurance. If you’re driving to Mexico from the U.S. in your own car or a rental, you will need to purchase a tourist auto policy.
-
- A Mexico auto policy will allow you to cover damages if you’re involved in an accident.
- If you cannot show proof of Mexican insurance, you can be heavily fined and even arrested. This is true even if you are not at fault for the accident.
- You can get coverage for the duration of your trip: a few days, a few months, or longer.
- You can purchase this coverage from your U.S. insurer.
If driving your own car, apply for a vehicle permit.
Mexico requires temporary import permits, which essentially is registering your car in the country. The government agency that issues permits is called Banjercito. You will be asked to leave a monetary deposit that will be returned to you when you return home.
-
- You may purchase this temporary import permit at the border.
- You also may find it online. (Click the Ingles/English version to see the page in English.)
Avoid rental car scams.
It’s common for car rental places in Mexico to quote very low prices but to have hidden rental fees. When you show up to get your car, you discover that you have to pay crazy high fees.
-
- Be wary of low car rental fees and make sure to read the fine print.
- Make sure you set up rental car insurance.
- Discover Cars is a reputable website that helps you find the best rental prices.
Make sure you carry valid identification.
U.S. citizens must present a valid U.S. passport (book or card) and an entry permit which you will receive at immigration when you cross into Mexico. If you are driving a car, you also need a driver’s license.
-
- A U.S. driver’s license works in Mexico, but if you have time, you may apply for an international driver’s permit. It sometimes takes about 6 months to receive one, but it will translate your license into Spanish.
- When the immigration officer hands your stamped passport back to you at customs, it will include a tear-off FMM form. Hold onto this form and keep it with you. It is important documentation and you will need to show it when you leave the country. Otherwise, you will have to pay a fine.
Understand Mexican road markings and signage.
You’ll want to brush up on your Spanish for your Mexico road trip. That’s the language for the road signs. The signage also may look a little bit different than what you’re used to, so familiarize yourself with it before you go. Also, Mexico uses the metric system, so you may want to reacquaint yourself with it.
-
- Remember that both distance and speed limits are in kilometers. If you’re driving your U.S. car, it should have a reading for kilometers. If you’re driving a rental car from Mexico, kilometers should be displayed automatically.
- Keep a copy of Mexican road signs with English translations with you in the car.
- Stop lights are horizontal rather than vertical.
Know Mexico’s road system.
While you may expect traveling in Mexico to be a bit different than the U.S., you may be surprised at some basic differences. There are Facebook groups where you can talk to former U.S. citizens living in Mexico – ex-pats – and ask specific questions about your proposed route.
-
- There may not be gas stations in rural areas. You can ask around, as sometimes gas is sold in convenience stores.
- You have to pay to travel the highways and they can be surprisingly expensive. They only take cash, not credit cards.
- On the free roads, look out for speed bumps that may or may not be marked. These are known as topes and can cause damage to your car if you hit them too fast.
- If you’re traveling between states in Mexico, there are military-style checkpoints where you will have to stop and let them search your car.
Ride the bus.
Mexico has a bus system with different classes of service, and many U.S. visitors enjoy its higher classes—which are comparable to business class airline service.
-
- Executive and first-class bus travel come with comfortable seats, air conditioning, and onboard restrooms. These routes are efficient and operate on time with few stops.
- Some bus stations include lounges for executive travelers.
- Toilets at bus stations come with a charge of between $3-$5 for entry, so be prepared.
- Mexico also offers shared minibusses and vans known as colectivos (and other names). While you can save money using these, they may be cramped, without air conditioning and they have been known to break down—so use these with caution.
Know where you want to go.
Mexico has 758,00 square miles (or 2 million square kilometers) to explore. This includes beaches, mountains, cities, canyons, jungles, and more—plus plenty of distinctive food, culture, architecture, and activities. Plan out where you are going to go so that you can get the most out of your trip, and do it safely.
-
- In some parts of Mexico, there are caverns with underground water where you can swim. These swimming holes are called cenotes.
- Beaches in certain regions of Mexico have a seaweed problem known as sargassum. This starts in late spring and continues to the fall, so check to see whether this affects where you will be visiting.
- Most of Mexico’s museums are closed on Mondays so plan your trip accordingly.
Be an informed traveler.
Travel helps to broaden your horizons with exposure to different cultures and experiences. Do your research on your destination so that you will not only understand the local perspective but you can enjoy it.
-
- Know that time is relative in Mexico. Do not assume that everything is going to start on time. In most cases, it probably won’t. Plan for this when making your itinerary.
- There is no free Wi-Fi in Mexico’s cafes and restaurants.
- The Spanish word for women is “mujeres,” which means that bathrooms labeled with the letter “M” are for women. (This is especially confusing to American travelers!)
- Don’t drink the tap water in Mexico. It’s not safe. To avoid paying lots of money for bottled water, consider bringing a reusable water bottle with a disposable filter.
- Cash is king in Mexico, so where possible, pay with pesos. When paying with a credit card, many merchants will add a tip before running the card, so be aware. (You can actually tell them the tip you want to add before running the card.)
- When withdrawing money, look for ATMs that are located inside banks. If you have a problem with a street ATM, it may be hard to locate the owner.
Pay attention to State Department travel warnings.
Whenever you are traveling out of the country, it is good to check the U.S. State Department’s website for any travel warnings for your destination. These will include any security or health risk warnings, including updates on COVID-19.
-
- Sign up for the Smart Traveler Enrollment Program, a free service that gives you the latest updates when you’re traveling out of the country.
- The State Department will tell you if there are regions to avoid and precautions to take on your travels. Follow their recommendations.
- A vacation could turn into an expensive COVID-19 quarantine if you unexpectedly have to cover the costs of additional days in Mexico, so plan accordingly.
Safe travels.
This article is furnished by California Casualty, providing auto and home insurance to educators, law enforcement officers, firefighters, and nurses. Get a quote at 1.866.704.8614 or www.calcas.com.
by California Casualty | Educators |
Written by Casey Jeffers, Owner of Fair Winds Teaching & MSEA Second Grade Teacher
Packing up your classroom at the end of the year can be exciting and also challenging at the same time. However, I promise you… if you spend some time setting yourself up for success at the end of the school year, you will be so glad you did at back-to-school time.
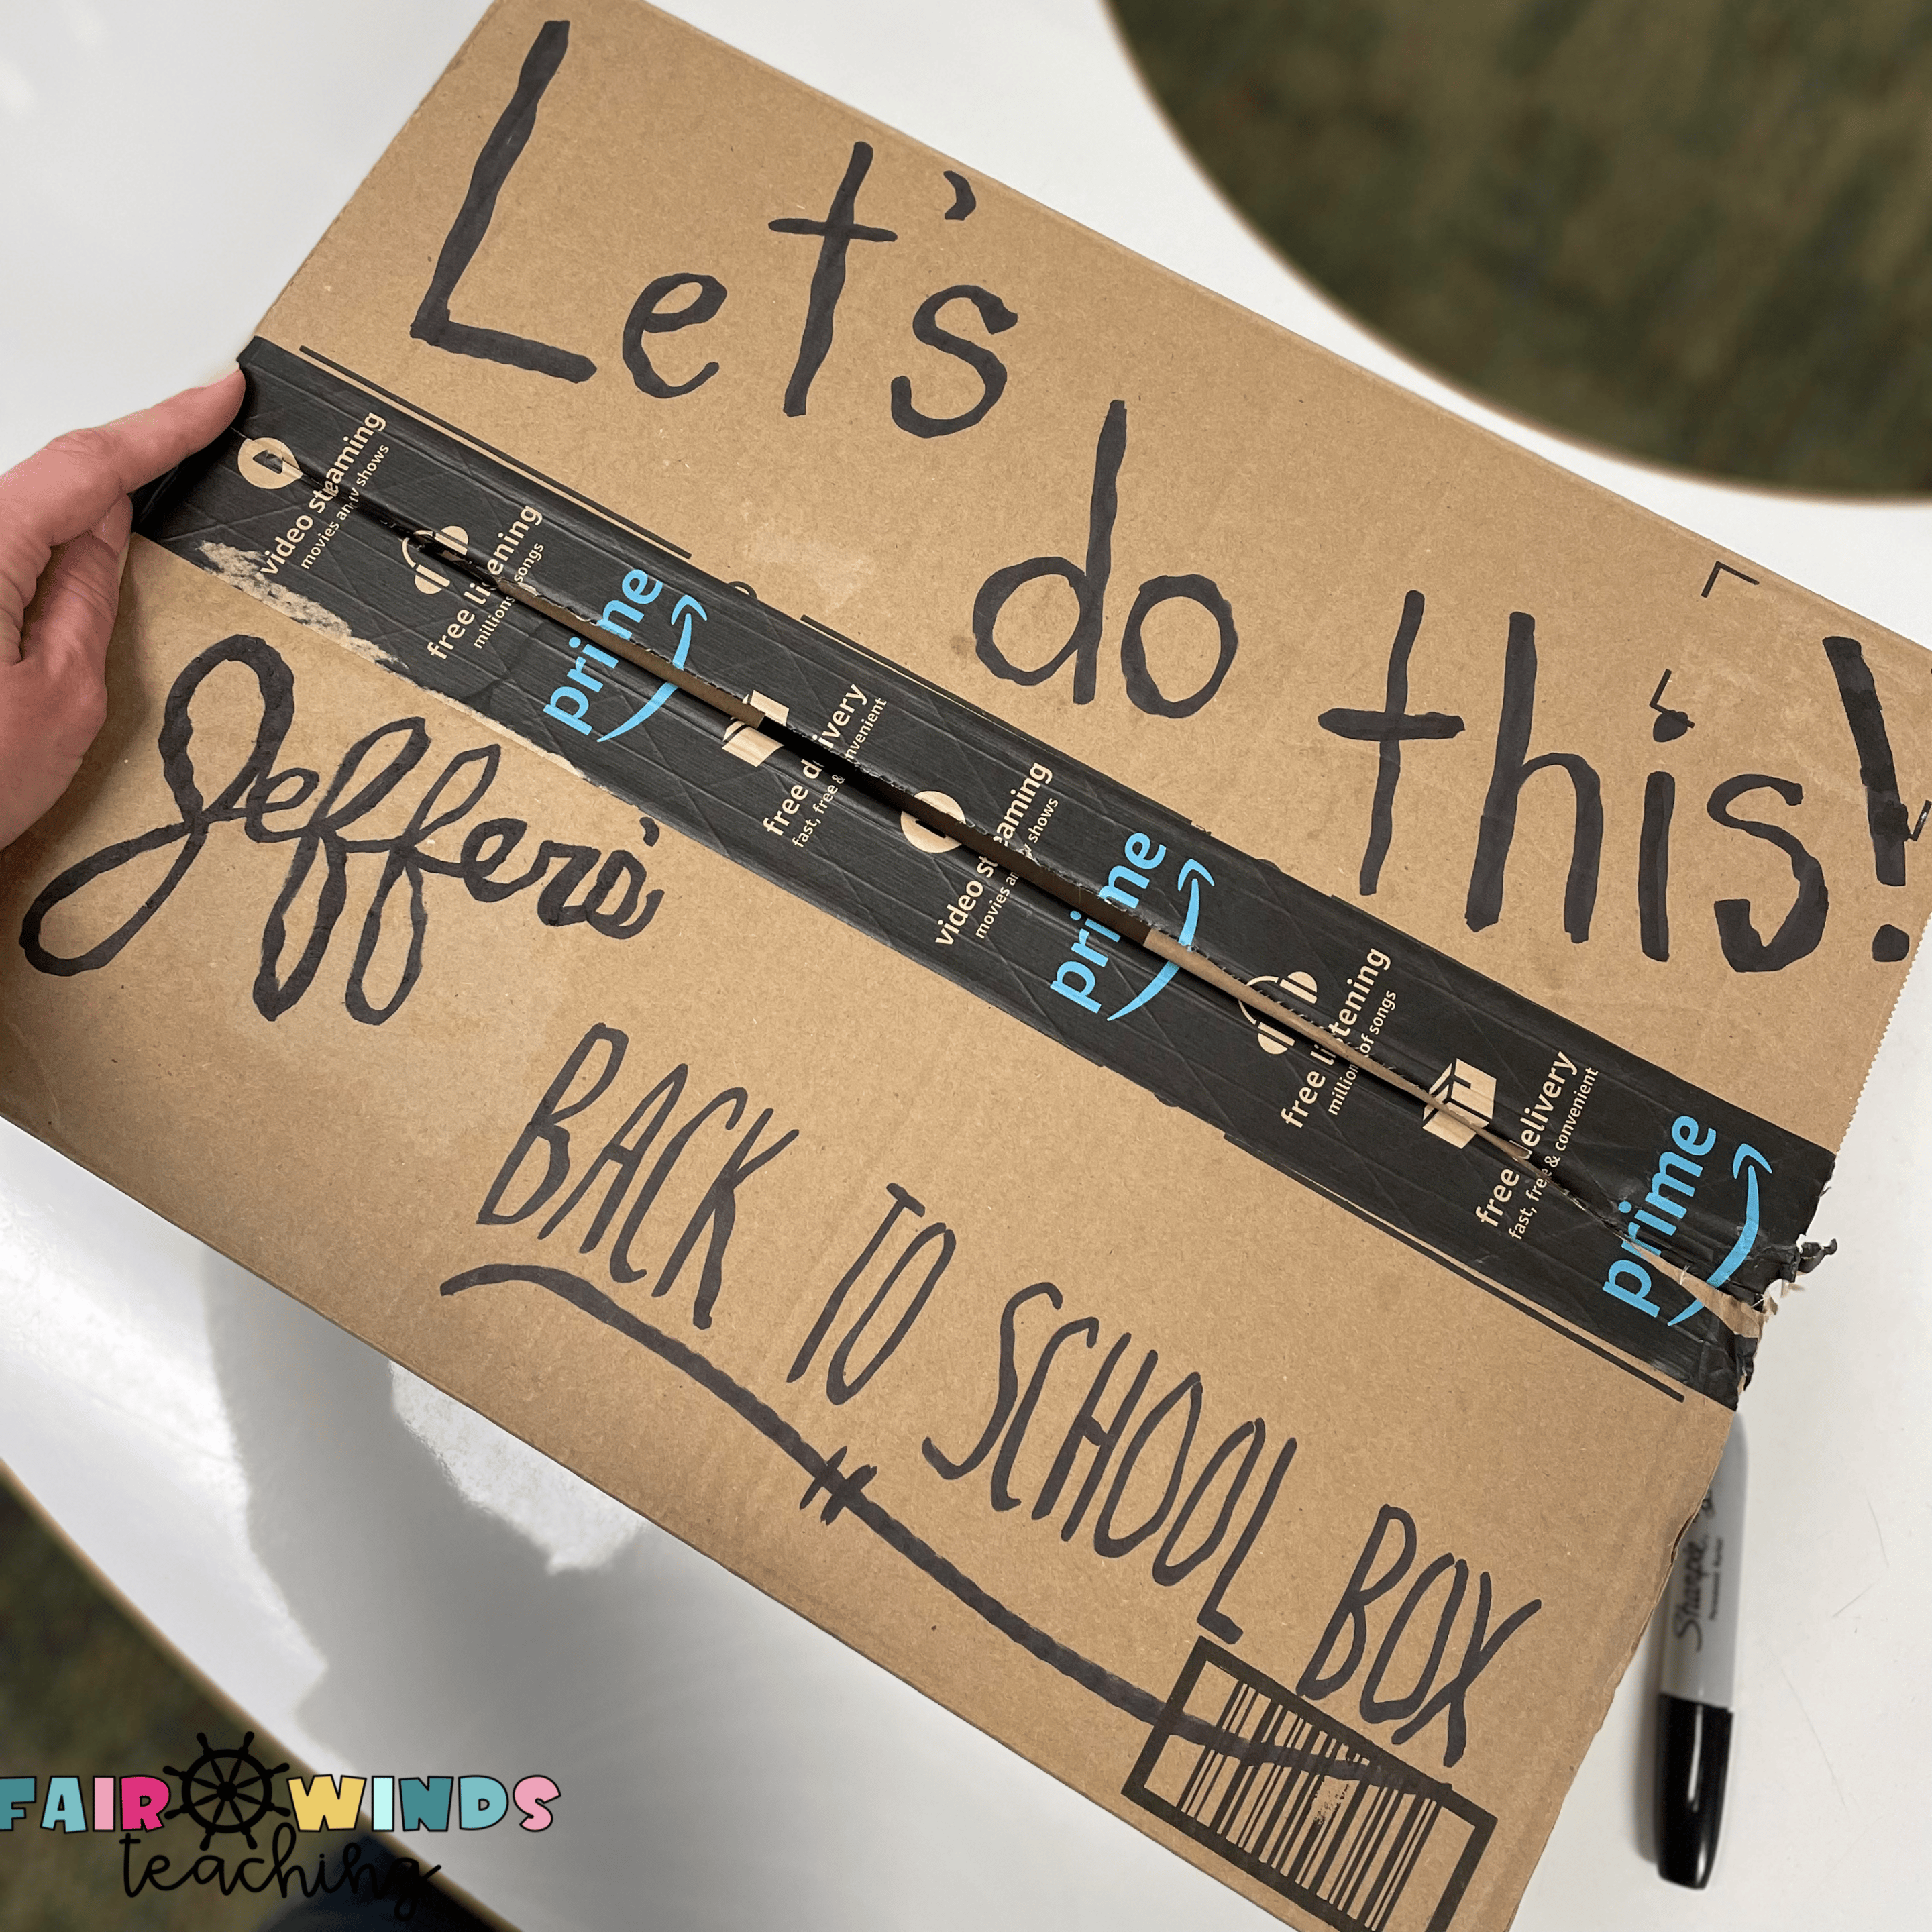
I have a box that I pack up and place on the top pile of all of the classroom supplies at the end of each year. These are all the items I will need first at the start of a new year, or in my case, my long-term substitute will open. I am expecting a baby over the summer and will not be starting my school year with my kiddos this school year. I want my substitute to be ready and not feel overwhelmed the day they start setting up my classroom in the Fall.
The box doesn’t have to be fancy, although you can use a nice plastic storage bin as well. I upgrade my Amazon box each year (because it gets bigger and bigger) and write myself a fun little note.
“Let’s Do This!” “You’ve Got This!” “You Go Girl!” “You Can Do Hard Things!” “Crushin’ it!”
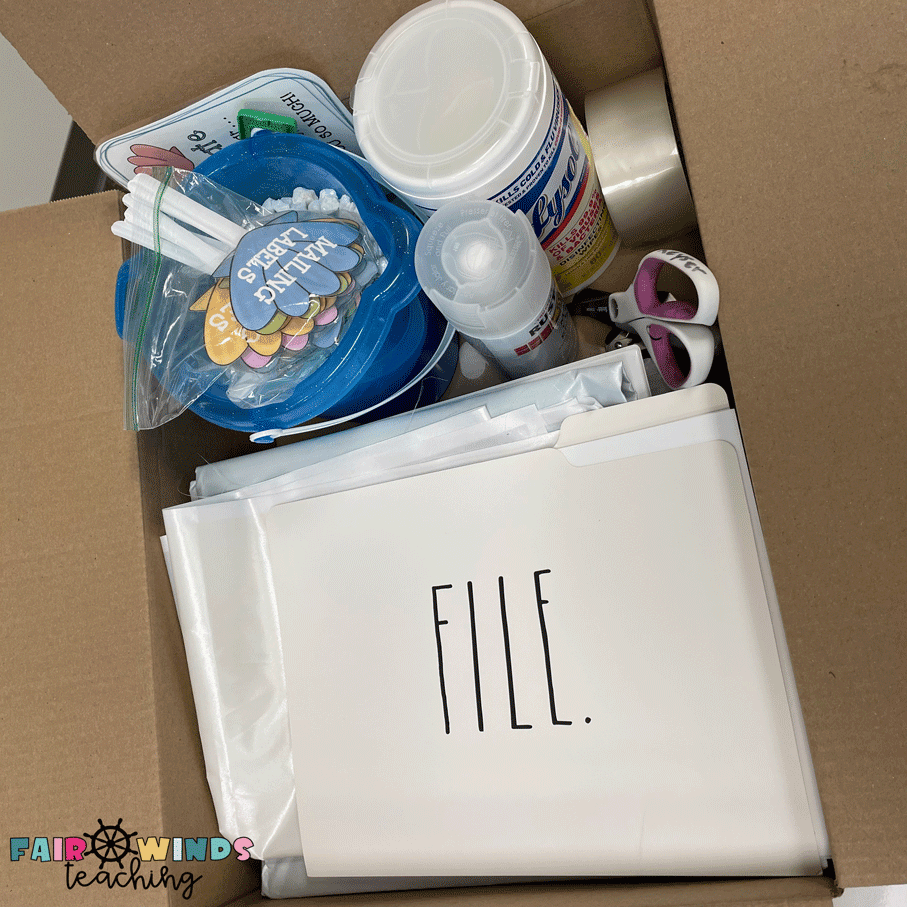
What’s inside my box?
-
- Back-to-School event items
- Simple Teacher supplies
- Birthday favors
- Bulletin Board items
- Cleaning supplies
- Master copies for the first week of school
- Motivational Note
- Water bottle and snack (that won’t go bad)
- $5 or gift card
Putting together your own box can be done this summer if you haven’t started one before… check it out now!
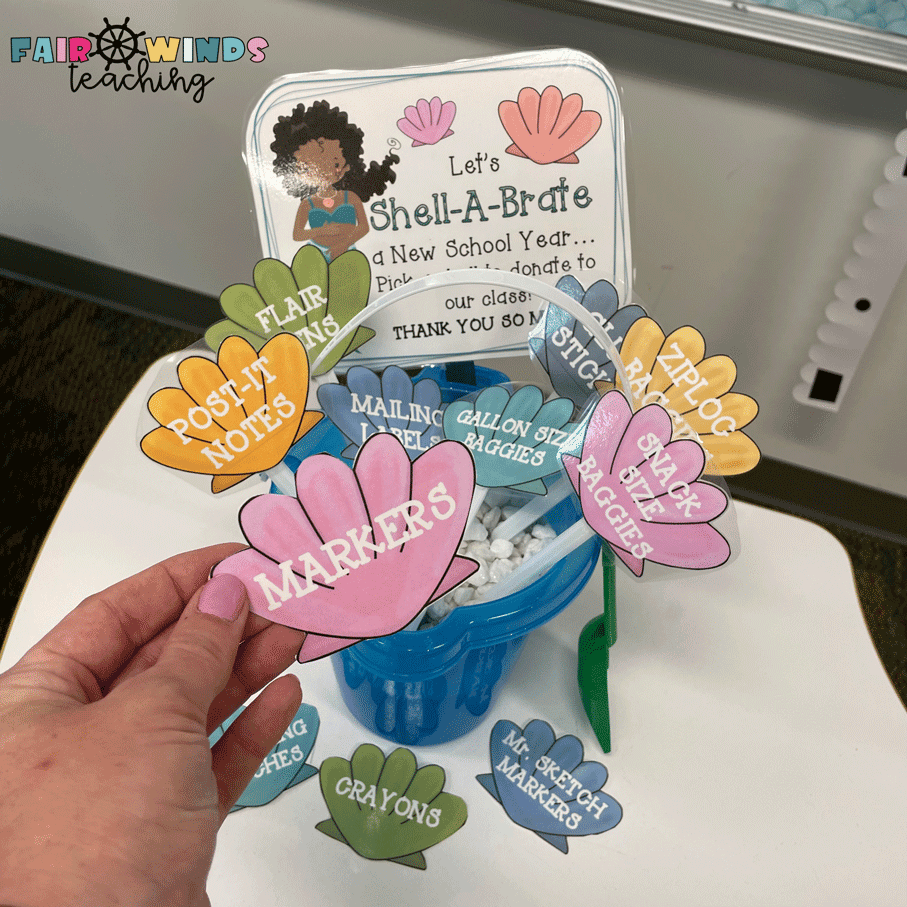
Back to School or Sneak Peek Event at School – At my school, we always have a sneak peek event (for new to the school families) during the school day. It usually occurs on the 2nd teacher work day back and our classrooms are NOWHERE READY for school. The families pop in and say hello and want to see their new classroom. Instead of stressing out about this, I have things ready in my box for a cute setup for a table outside in the hallway.
The box includes a dollar store plastic table cloth, a blow-up number 2 balloon (for 2nd grade), my mermaid sand bucket with donations needed for the school year, and a small gift for each student that comes by. Grab the mermaid bucket donations needed template here.
Some of my favorite sneak peek gifts are popcorn, mini pop-its or blow pops with these adorable tags (Thanks for Popping In), mini or full-size erasers with these Mistakes labels, or a slinky with these Spring into School tags. Check out my full list of where to buy these items!
Lastly, I place a sign on my classroom door that says, “Under Construction.” You can grab this freebie now, I have it available for your bulletin boards, library, and much more.
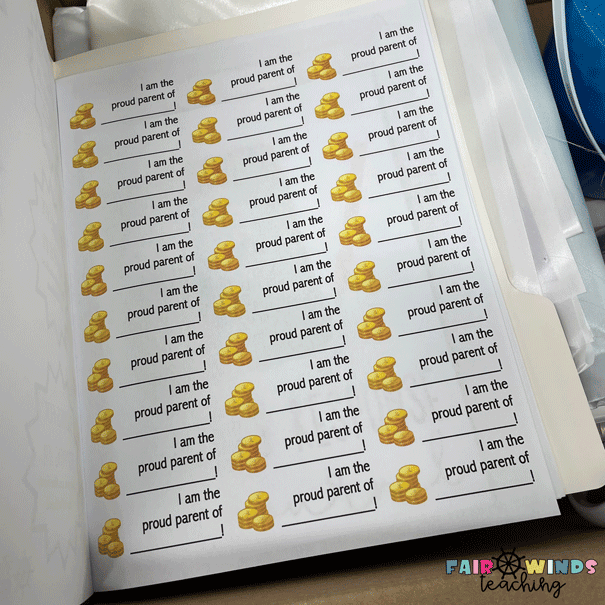
In the box, I also have stuff for my formal Back to School (BTS) evening event that is after my classroom is fully set up. I placed a couple of plastic bowls (for serving snacks and candy to my families), fun photo props, a BTS Welcome Bag full of goodies, and their All About Me Bag assignment to bring to school their first week of school. Each family also gets a sticker when they walk in that says, “ I am the Proud Parent/Grandparent/Family of _________!” You can grab those here.
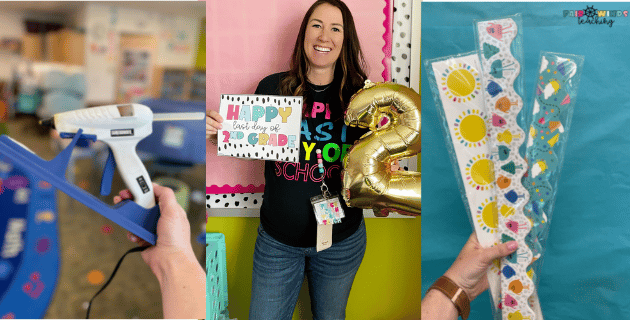
Simple Teacher supplies – Next up in the box is all the simple teacher supplies needed to start the school year. I make sure I have a couple of types of tapes (masking, painters, and scotch), a good pair of teacher sizes scissors, stapler and refill staples, a stapler remover, a black magic marker, a pack of sticky magnetic dots, post-it’s, a couple sharpened pencils, my FAVORITE wireless hot glue gun and refill glue and a tape measure. Not spending time ripping apart boxes to find all of these items will definitely save you time. Now, if I can just stop myself from talking to every teacher that walks past my classroom, we would really be able to get some back-to-school work done
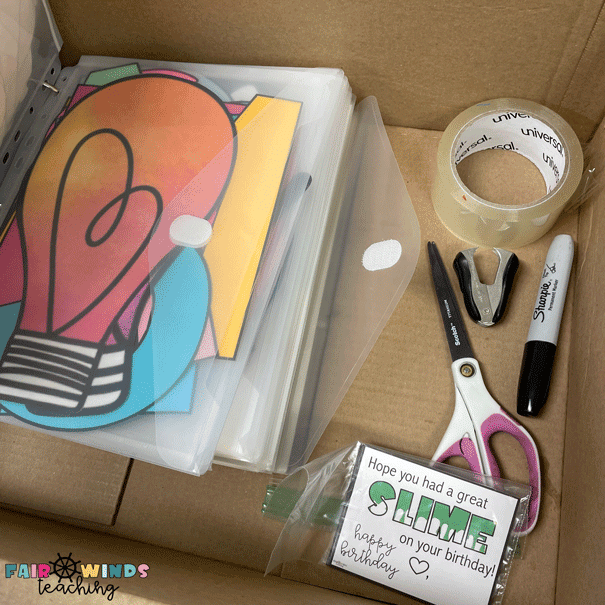
Birthday Favors – This is an overlooked item that I have added to my BTS box over the years. I never want to forget to celebrate the summer birthdays in my class (I am a July baby myself, and I never got to celebrate at school). My best tip is to go shopping at the end of every summer to grab class set deals that are basically free. Every year, the chalk, bubbles, sunglasses, slime packs, and summer beach balls are on sale at the end of the season. I buy up at least enough to cover a huge class size (30), then any I don’t end up using goes in my prizes box for the following year. You don’t necessarily need to add the items in the BTS box, but I always have the birthday gift tags printed and ready in my box to remind me to celebrate those kiddos that had July/August birthdays. The past few years I have found amazing slime deals and have used these gift tags, grab them here!
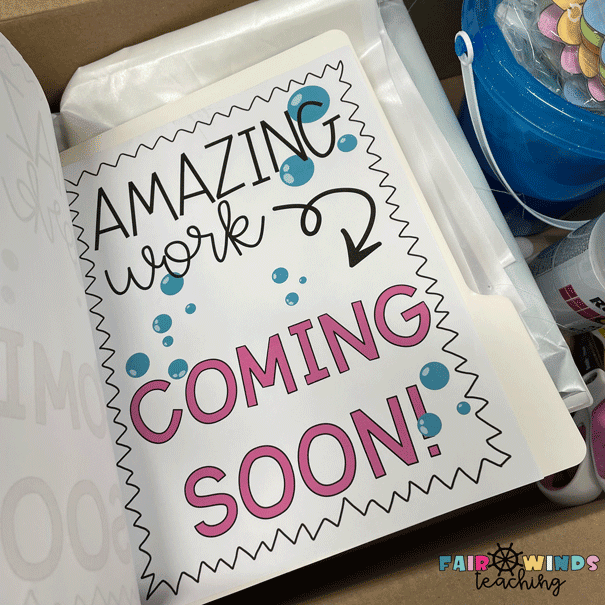
Bulletin Board Supplies – If you are anything like me, the base of the bulletin boards is the first thing I do when I get back. I want to make sure to grab the butcher paper color that I love before it’s all gone (a.k.a. teal and hot pink) and it is an instant way to make your room look pretty. I make sure I have my small bin of bulletin board supplies (see my bulletin board blog post here) and then my Amazing Work Coming Soon & Construction site signs printed and ready to go! Grab these freebies and then have your students help you design your classroom bulletin boards.
Cleaning Supplies – No explanation needed – Cloxex wipes, paper towels, Magic Eraser & Goo Gone. Want to see where I buy all my BTS Box supplies, check out this master list with links.
Master Copies – My in-service BTS week is when I work with specialists and teammates to start planning out the first quarter of ELA and Math content. This time is so valuable and I want to make sure all my “getting to know you” and “setting up routines” papers and lessons are ready to go. I make sure I have my master copies ready in a folder in my BTS box. I do not try to guess how many copies I need ahead of time, I make the copies on that first week. However, if you have leftover paper at the end of a school year and you are at a school that makes you wait for your first paper order when you get back, MAKE ALL THE COPIES BEFORE YOU LEAVE for summer.
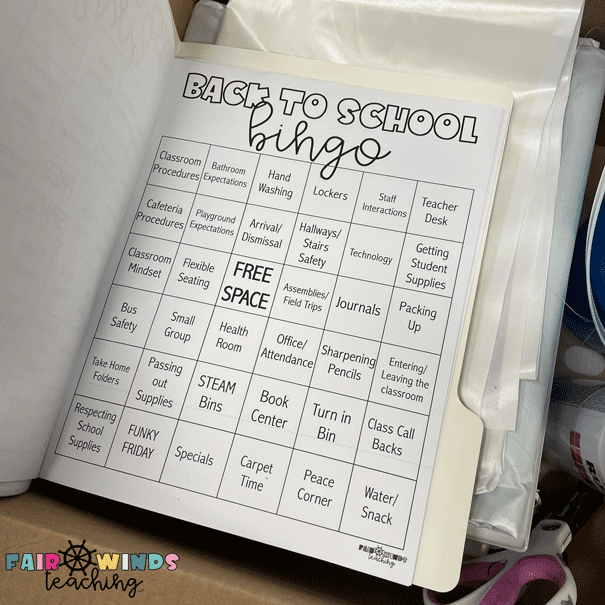
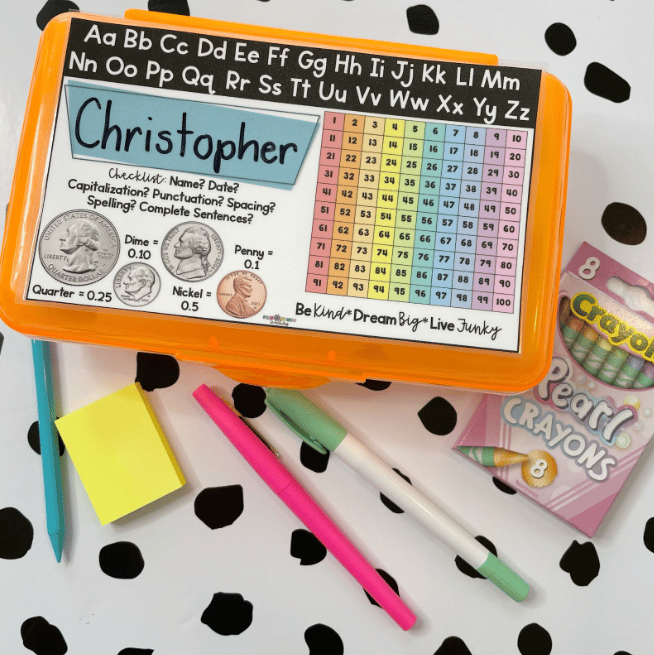
I make sure to have my Back to School Bingo, First Day of School Sign (blow-up numbers), Time Capsule, All About Me Bag, and Welcome Bag copies. I also have the first week of school writing papers, design your own name tag template, Do Unto Otters craft, and some Math About Me papers. Lastly, whether you do flexible seating or not, having your student’s name tags glued onto their hard case pencil boxes is a great way for them to actually use them as a resource and easy for you to make desk changes through the school year. I have them available for grades 1-2 and 3-4. It also saves your custodians from scraping off all that glue leftover at the end of the year. They will thank you!
Motivational Note – Before you close your box up and give it a good tape, grab a blank piece of paper or adorable stationery. Write yourself a BTS motivational note for your future self. Give yourself some advice or simply tell yourself, “You’ve Got This!” This note will seem silly while you are doing it, but will brighten your day (because you will forget about it). It’s a great touch to help start your new school year off with a bang!
Treat Yourself or Treat Someone Else! – Throw a $5 gift card to Starbucks or Dunkin’s or $5 cash to treat yourself to something on your way home from your first day back. If you don’t feel like using it, give it to a coworker that looks like they might need it that first day back. You can also grab a water bottle and a non-perishable snack and throw it in so it’s ready for the first day!
I hope you found this BTS box list helpful, it took me a while to know what I wanted in mine and it will evolve as you get to know your BTS habits.
HAPPY SUMMER & BACK TO SCHOOL PREP!

Casey Jeffers is a second-grade teacher at Butterfly Ridge Elementary in Frederick County, Maryland. She was recently recognized as the national winner of the NEA Foundation’s 2021 Teaching in Excellence Award. Casey is the proud owner of the Education Resource Blog, Fair Winds Teaching, and loves to connect with her education community through her TeacherPayTeacher’s business.

by California Casualty | Safety |
Summertime is a great time to be outside and enjoy the sunshine. But sometimes the summer heat can be too much. When it’s hot and humid, like most summer days, it’s easy for us to get overheated, which in turn can lead to serious heat-related illness.
High temperatures are especially dangerous for the elderly, pets, and young kids. So, if you’re sending the kids out to play, or if you’re planning to be outdoors enjoying summer fun for an extended period of time, watch for signs of overheating and follow these tips to cool down quickly.
1. Drink cool liquids.
The more water you drink, the better your body is able to regulate heat by sweating. Even better than water – especially if you’re starting to overheat – is coconut water. It has additional vitamins, minerals, and electrolytes. Also, try cold peppermint tea. Peppermint has a natural cooling effect. Put a peppermint tea bag into a glass filled with ice water, stir and drink.
Note: By the time you feel thirsty, you most likely are dehydrated. Try to drink water on a regular basis to stay hydrated.
2. Eat a frozen summer snack.
Who doesn’t love a popsicle on a hot summer day? These treats do double duty; they’re delicious and they help to cool you down. Frozen smoothies also are a yummy alternative, or try frozen fruit like watermelon wedges. You can even make your own ice cube popsicles with fruit and fruit juice.
3. Apply ice to parts of your body.
If you’re feeling hot or ill from the heat, ice can help. Take an ice pack, or an ice cube wrapped in a covering, and apply it to parts of your body. Look for places where your veins are closest to the surface; that will help cool you the quickest. Try the insides of your wrist, your neck, chest, and temples.
4. Find cool water.
Take a dip in the pool or lake. Run through the sprinklers. Get sprayed by the hose. Put your wrists under cold running water. Take a room-temperature bath. All of this will help to cool down your body. You can also soak two washcloths in cold water. Wring them out; put one around your neck and the other on top of the inside of your wrists.
5. Make your own cooling spray.
Fill a spray bottle with one part aloe vera gel and three parts cold water. Shake it up and you have a cooling body spray.
Pro tip: Keep the cooling spray in a chilled metal bottle to keep it cooler longer.
6. Create a cross breeze.
Place a fan across the room from a window. The breeze coming in will be caught up by the fan and circulated. Set up more fans around the room for an even greater cooling effect.
7. Eat spicy foods.
It may seem counterintuitive, but eating spicy foods can cool you down. That’s because spicy foods increase your blood circulation and help you sweat. Sweat in turn cools you down. So, enjoy that kick of spicy summer salsa!
8. Get out of the heat.
Get to a shady area, or better yet, inside to the air conditioning. Then, use one of the other techniques listed above to help cool down. Call for medical help if needed. See below for guidance.
9. Protect your pets.
Our pets get hot too, especially our fur babies. If your pet is going to be out in the sun with you,
follow our heat safety tips for pets.
Know the signs of overheating
There are 3 stages of overheating, each progressively more dangerous than the previous one. according to the CDC. Stages 1 and 2 are usually able to be managed at home. Stage 3 requires medical attention.
- Stage 1 (Heat Cramps): You may feel tired, dizzy, and dehydrated, and your muscles may cramp.
What to do: Rest and rehydrate. Drink water or something with electrolytes. Massage the affected muscles and wait for the cramps to go away.
- Stage 2 (Heat Exhaustion): Headaches, nausea, vomiting, and heavy sweating are symptoms of heat exhaustion.
What to do: Move to a cool place. Stop all activity and drink water or something with electrolytes. If the symptoms last for more than an hour, seek medical help.
- Stage 3 (Heat Stroke): You will stop sweating, even though you feel extremely hot. You may feel confused. You could breathe fast. You might have a seizure.
What to do: Heat stroke can cause permanent brain damage or even death.
Go to the hospital immediately.
Stay safe and have a fun summer!
This article is furnished by California Casualty, providing auto and home insurance to educators, law enforcement officers, firefighters, and nurses. Get a quote at 1.866.704.8614 or www.calcas.com.

by California Casualty | Educators |
School’s out. That means plenty of chances for summer fun. It also means endless opportunities for screen time. If you’re wondering how you’re possibly going to manage your child’s screen time this summer, read on!
We’ve compiled 15 of the most fun activities to do at home with your kids that don’t involve screens.
1. Get in the kitchen. Give your kids a chance to mix up a batter for their favorite cookies. Or have them make pizza bagels or another fun snack. You don’t have to use a stove or oven either. There are plenty of no-bake recipes. Just be sure to supervise your children whenever they are cooking in the kitchen.
2. Put on a play. Bring down that box of old costumes, your old bridesmaids dresses, and fun props. Equip your kids with everything they need to put on a play – or a fashion show. They can even bring a favorite story to life.
3. Make a time capsule. A special way to mark the summer is to make a time capsule. Make sure to date it and include some timely items. Trace around your child’s hand for a handprint. Include packaging from your child’s favorite snack. Add an art project, an all-about-me page, photos, newspaper or magazine clipping, certificates, or anything else your child wants to add.
4. Camp in the backyard. Your backyard makes a great campground, and best of all, it’s near everything you need at home! Set up a tent, sleeping bags, and games. Prepare a picnic lunch or dinner. If you have a fire pit, try this project for natural bug bombs to keep the mosquitos away.
5. Do a backyard bug or scavenger hunt. Take an up-close look at the tiny critters in your backyard. Use this free printable bug hunt to guide you or make your own with other common items found in your backyard, like flowers or rocks. Your child can even bring a notebook and draw the bugs or objects that they see.
6. Create an obstacle course. Empty boxes, hula hoops, and even sidewalk chalk or masking tape create fun obstacle courses. Create one inside or outside using materials right at home. Jump, crawl, skip and navigate these fun courses according to your child’s rules, of course!
7. Make a weather station. Have a future meteorologist? Interest them in this craft project with a purpose. Guide them in making their own weather vane, windsock, rain gauge, and more, with materials you have right around the house.
8. Make bubbles. Sure, you could buy bubbles but it’s way more fun to make them! Try these bubble recipes. Save them for a nice day. Their sugary residue probably won’t do well indoors.
9. Learn to sew. Sewing is a skill that will help your child for years to come. If you feel your child can hold a needle safely, start them by sewing two pieces of fabric together. There also are children’s sewing projects available at craft stores.
10. Try blow art. This is a fun way to paint by blowing through straws. Start with tempera paint that is thinned with water in a bowl. Use plastic spoons or droppers to place a small drop of paint on the paper. Then have your child blow through the straw on the paint to create abstract art.
Pro Tip: To ensure young children don’t accidentally suck up paint through the straw, cut a little hole in the middle.
11. Leave chalk notes for your neighbors. Break out your favorite sidewalk chalk and get to drawing! Draw an obstacle course for dog-walkers to test out on the sidewalk or leave kind messages for you neighbors to see when they come outside.
12. Make a DIY bird feeder. You only need 4 items- cookie cutters, gelatin, bird seed, and yarn. And then kids can hang their homemade feeders in the backyard and spend the day bird watching.
13. Run a lemonade stand. Not only is a lemonade stand a fun activity, it’s a great one to learn about business. Help your child determine the costs to make the lemonade and get the cups. Then help him/her to figure out what to charge. Your child can use art skills to make a poster with prices. Your child may opt to keep the proceeds or donate to an organization in need.
Pro Tip: Check if your local community requires a permit to sell lemonade. The exact rules vary by location.
14. Rescue a frozen toy. This takes a little more preparation, but it’s something your child can help with. Choose small toys that fit into an ice cube tray. Cover them with water and then freeze them. When you’re looking to occupy your child for a few minutes, give them the frozen toy, a cup of hot water, and an eye dropper. Challenge them to rescue the frozen toy. Time them to see if they could beat their best time.
15. Make a summer bucket list. Get your kids involved with what they’ll be doing this summer. Have them make lists of movies they want to watch, books they want to read, places they want to visit, and friends they want to see. Then use the list as a guide for summer fun that doesn’t involve screens.
And for those rainy indoor summer days, check out our list of 100+ Indoor Activities for Kids that Don’t Involve Screens.
Have a great summer!
This article is furnished by California Casualty, providing auto and home insurance to educators, law enforcement officers, firefighters, and nurses. Get a quote at 1.866.704.8614 or www.calcas.com.


