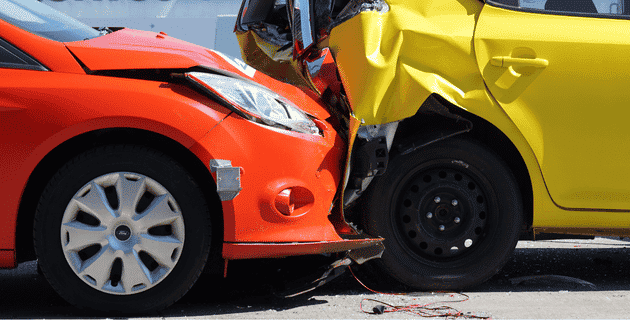
by California Casualty | Auto Insurance Info, Safety |
The open road, the sunshine, and vacation time—it seems that summer is meant for road trips. With so many of your fellow travelers on the road, though, there’s a chance for collisions. That’s especially true if you’re on a long drive, on unfamiliar roads or distracted by confusing signs, or even the passengers in your car.
So, how do you avoid a vacation-spoiling accident? Knowing the most common summer collisions – and their causes – can help you take action to avoid them. Here’s what you need to know.
Rear-end Collisions
These common types of collision can be caused by tailgating or distracted driving during stop-and-go traffic. Rear-end collisions also happen when motorists drive too fast or aggressively. To avoid a rear-end collision:
-
- Slow down and watch your speed.
- Increase your following distance between your vehicle and the car in front.
- Avoid stopping suddenly or swerving.
- Make sure your taillights and turn signals are working.
Pro Tip: If your car has one, an automatic braking system or forward collision warning system can help prevent these types of accidents.
Front-end Collisions
When the front end of your vehicle strikes another vehicle, tree, telephone pole, or other object, it’s a front-impact collision. These types of crashes are common during rainy weather. To avoid a front-end collision:
-
- Drive more slowly in the rain. Roads are slippery. Fog can impair your vision. Give yourself time to adjust.
- Increase your following distance in inclement weather. This will help give you more time to react.
- Avoid distractions; even playing with the radio or talking to passengers can divert your attention.
- Lane keeping systems can help. They alert you when you’re drifting out of lane, and can even steer your car back into the lane.
Side-impact Collisions
You know these as T-bone collisions or sideswipes. They often occur at intersections, as a result of confusion about which vehicle has the right of way. However, they also can occur if you run a red light or change lanes without warning. To avoid a side-impact collision:
-
- Look both ways as you approach a stoplight. Slow down when you see yellow; don’t speed up. You could risk running a red light.
- Come to a complete stop at every stop sign. Know where other traffic is before proceeding.
- Check your blind spot before changing lanes.
- When passing cars, be alert for other drivers changing lanes unexpectedly.
Highway Construction Collisions
Construction crews are out on the roadways, often sharing space with vehicles traveling at high speeds. That’s why it’s especially important to watch for signage and adjust your speed as you navigate past a construction site. To avoid a highway construction collision:
-
- Pay attention to construction site speed limits and follow them.
- Watch for signage and personnel directing you where to go.
- Slow down as you are passing workers and be alert.
- Increase your following distance for the car in front of you.
Interstate Collisions
High speeds coupled with distracted, aggressive, or drowsy drivers can cause accidents. When a crash happens on the highway, it can sometimes have a chain reaction effect. Make sure to use due diligence when you’re traveling at high speed around other vehicles. To avoid an interstate collision:
-
- Follow the speed limit and maintain a safe following distance from other drivers.
- Clearly indicate with your turn signal when you wish to change lanes. Check your blind spot before doing so, and make sure cars in other lanes aren’t heading to the same place you are.
- Maintain your distance from cars that are driving aggressively or dangerously.
- Limit distractions. Your priority is to drive safely.
Parking Lot Collisions
We may not think about it, but parking lots can be dangerous. When the lot gets busy, it’s easy to have multiple cars moving in different directions. Inattention or simply a bad decision can cause a collision. To avoid a parking lot collision:
-
- If possible, park in a spot away from other cars.
- Check your surroundings before getting into your car to pull out of your parking space.
- Don’t rely on technology alone (such as rearview cameras). The image can be distorted by sunlight or shadows. Use your mirrors.
- Move slowly and be aware of pedestrians and cars in the immediate area.
- Don’t drive when you’re drowsy. If you’re feeling tired or having a hard time staying awake, pull over in a safe place and take a power nap.
- Don’t use your cell phone when driving except for emergencies.
- Don’t eat or drink anything in spillable containers while you’re driving.
- Don’t drive when you’ve had a few drinks. Use a designated driver or call a ride-share service instead.
- Avoid driving during high traffic times.
- Take your car in for a maintenance checkup before you go on a road trip. This will help avoid equipment-related accidents.
Finally, make sure your car is insured so you are fully covered in case of an accident.
Safe travels!
This article is furnished by California Casualty, providing auto and home insurance to educators, law enforcement officers, firefighters, and nurses. Get a quote at 1.866.704.8614 or www.calcas.com.
by California Casualty | Auto Insurance Info |
Spring brings warmer weather, plenty of sunshine, and new blooms. But it also brings its share of storms, road glare, and other driving hazards. Here’s how you can stay safe when driving this spring.
Tip #1: Drive slowly and use caution in the rain.
Roads are most slippery when it starts to rain. This is due to rainwater mixing with the oil and grease on the road. But whether the rain has just begun or it’s been coming down for a while, it still makes roads slick.
-
-
- Keep your headlights on so that you are more easily seen.
- Slow down and increase your following distance from other cars. Remember that any amount of water could cause you to skid or hydroplane.
- Make sure your tires have enough tread and your wiper blades are in good condition.
- Avoid using cruise control in the rain.
- Avoid driving through water, which can damage your vehicle. If there’s too large a puddle, consider an alternate route.
Tip #2: Avoid potholes and puddles that could be covering potholes.
Freezing, thawing, and road salt in winter can help to create potholes. That’s why you may notice more of them in the spring. If you hit a pothole at too high a speed, or if it’s too deep, there could be problems. Potholes can lead to punctured tires, bent rims, suspension damage, poor alignment, or other expensive repairs.
-
-
- You may or may not see potholes coming. It’s even harder when they’re covered by puddles. Slow down and drive around both potholes and puddles.
- Keep a safe distance when following another vehicle.
- Keep both hands on the wheel to avoid losing control if you do strike a pothole.
- If you encounter a pothole that is especially large or deep, try to find another route.
Tip #3: Be prepared for sun glare.
Spring is known for its bright sunshine that can temporarily blind you when you’re driving. The hours following dawn and preceding sunset are typically the times when the sun is the brightest.
-
-
- Position the sun visor in your car to block the light.
- Sometimes moving the visors don’t do it. Sunglasses help reduce the sun’s intensity. Keep a pair handy in your car. Wearing a hat or sun visor can help too.
- Slow down. Give yourself plenty of distance behind the car in front.
- Keep your windshield clean. Dust, dirt, and pollen can make the glare worse.
- Pull over if you can’t see.
Tip #4: Share the road with construction, bikes, pedestrians, and kids playing.
Spring weather brings everyone out. That includes construction crews, bicyclists, pedestrians, and of course, children playing. Awareness is the first step.
-
-
- Drive slowly in residential areas. If a ball goes bouncing into the street, chances are there will be a child chasing it.
- Stop and give the right of way to pedestrians in crosswalks. Never pass vehicles that are stopped at crosswalks.
- Slow down and follow signs for new traffic patterns in construction zones. Solid lines in construction zones mean “stay in your lane.”
- Learn biking hand signals, and look for bicycles before you make turns. Allow plenty of space when passing bicyclists.
Tip #5: Be on the lookout for deer at dawn and dusk.
Deer migrate during the spring and sometimes venture too close to roads. A collision with a deer is not only fatal for them; it’s costly in terms of vehicle repairs.
-
-
- Be especially careful during dawn and dusk when deer activity is at its highest.
- Look out for deer crossing signs. These are posted at locations where deer sightings are common.
- Use high beams at night as long as facing traffic isn’t coming.
- If a collision seems inevitable, do not swerve into the other lane. You could hit a vehicle and cause an accident that’s worse.
- Brake firmly, and try to graze the deer rather than hit it. Ease up on the brake just before you connect with the deer. It will cause your vehicle to lift a bit, which might keep the animal from hitting your windshield.
Tip #6: Know how spring allergies can affect your driving.
Spring is a time for allergies. Driving with sneezing, runny eyes and nose, and congestion can be a big distraction. But allergy medications that cause drowsiness could do greater harm.
-
-
- Read the warning label on your allergy medication. If it warns against driving or operating heavy machinery, don’t do it.
- Replace your car’s air filters to ensure they are filtering pollen, mold, and other allergens.
- Consider washable car mats instead of cloth ones so you can clean them. Give your car a spring cleaning.
- Roll up your windows and turn your air conditioner to the recirculation setting. This minimizes the amount of fresh air coming in.
Tip 7: Make sure your vehicle is in good working order.
Keeping your vehicle in top condition will help you navigate the challenges of spring driving more easily. Follow a schedule for regular maintenance.
-
-
- Check your vehicle’s headlights, turn signals, and tail lights to make sure they are working. Make sure your headlights are aligned.
- Check your car’s wipers and replace the blades if they are showing signs of wear.
- Check your car’s air conditioning system to make sure it’s working.
- Make sure your tires have enough tread and are inflated. As temperatures rise and fall, your car tires may expand and contract. This causes loss of air pressure. You will want your tires to be inflated to manufacturer specifications. Check your owner’s manual.
- Finally, make sure you have the proper car insurance. Coverage will give you peace of mind should anything happen.
Now go enjoy the warmer weather. 😊
This article is furnished by California Casualty, providing auto and home insurance to educators, law enforcement officers, firefighters, and nurses. Get a quote at 1.866.704.8614 or www.calcas.com.

by California Casualty | Auto Insurance Info |
When it comes to sharing the road with others, let’s face it, we don’t always know what (or whatnot) to do. Ask anyone who has ever been behind a slow-moving vehicle or who has tried to pass an 18-wheeler…
Here’s a quick guide on the rules of the road as they pertain to sharing it with trucks, buses, motorcycles, bicycles, slow-moving vehicles, and pedestrians—plus a final word on the importance of moving over for emergency vehicles.
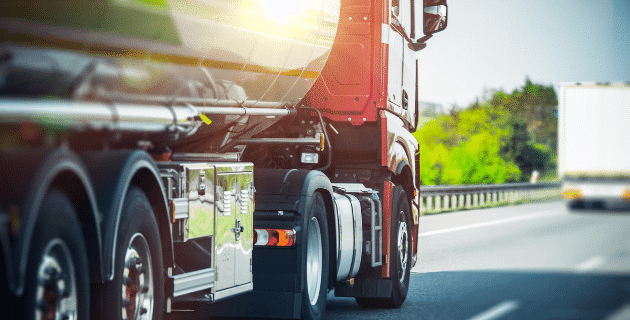
Trucks
A big rig weighs considerably more than the average car, and could be as much as 20-30 times heavier, according to the Federal Motor Carrier Safety Administration. Their significant size and weight affect how quickly they can stop, go, and maneuver with lane changes and turns. Despite mirrors and a bird’s eye view, trucks also have large blind spots. And if your car is in one, the trucker likely has no idea you’re there.
-
- Don’t cut off a truck by driving into the empty space just in front of them. While it takes a normal passenger car traveling at 65 mph about 300 feet to stop, it takes double that distance for a fully loaded commercial truck at the same speed. If you’re too close, the truck may not be able to slow down and avoid a collision.
- Do not try to get past a truck to reach an exit or turn. Slow down and stay behind.
- Know the locations of a truck’s blind spots and avoid them. These are typically directly in front, directly behind, and along the sides, but especially the right side. The general rule is that if you cannot see the truck driver’s reflection in his or her side mirror, most likely he can’t see you.
- The longer the vehicle, the greater the turning path will be. Big rig drivers often swing wide to make a turn. That means swinging left just before turning right. Watch the trucker’s turn signals and expect the driver to swing the other way. Importantly, do not pass a truck while turning or you might find yourself in its path.
- Always pass a truck on the left side. Once you pass, do not linger. Move out ahead so the truck knows you are there.
- Do not tailgate. You may not have enough time to stop if the truck in front of you stops quickly.
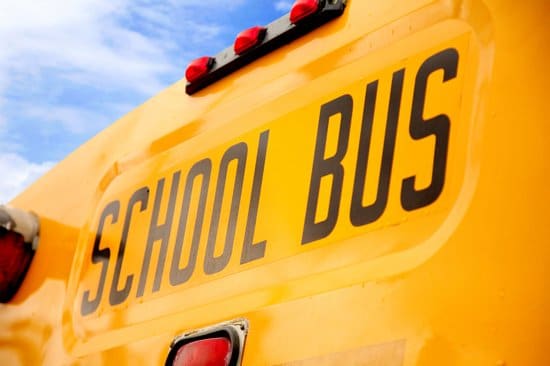
Buses
Buses face many of the same stopping and maneuverability issues that trucks do. The driver has the added pressure of being responsible for a busload of people—and sometimes children. With constant stops, and people getting on and off, there’s even more to consider when driving near a bus.
-
- School buses have warning lights. A flashing yellow means slow down; a flashing red means stop. Stop no matter where your vehicle is, including if it is alongside the bus.
- Remember that it is illegal to pass a school bus that has stopped to pick up or drop off children.
- Expect that public buses also will stop frequently. Maintain a safe distance behind them.
- Large vehicles like buses have a higher center of gravity and must travel more slowly around curves and on-ramps. If you’re behind them, adjust your speed. Do not cut them off.
- Remember that buses have large blind spots too, similar to trucks. They are usually immediately behind the side flat mirrors and behind the rear bumper. Try to stay visible and avoid those areas.
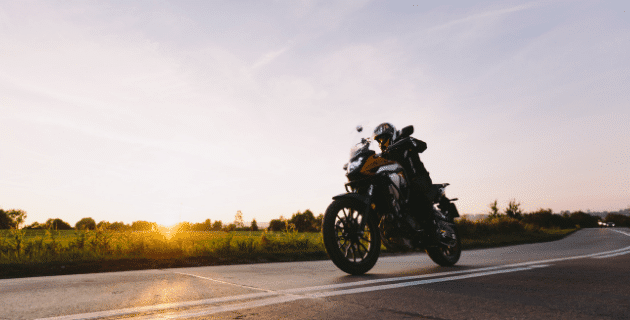
Motorcycles
Motorcycles are smaller than cars and significantly smaller than trucks and buses. So, it’s easy to see how they could almost “disappear” in your blind spots. Motorcycles can come up quickly without you realizing they’re there. That’s why it’s always good to be extra observant and know every vehicle sharing the road with you.
-
- Do a visual check and use your mirrors when you change lanes, enter a major road or make a turn.
- Allow motorcycles to have the width of the full lane width when possible.
- Never try to pass a motorcycle that is sharing the same lane as you. Move to one side to give them the room to pass.
- Road conditions can cause motorcycles to change speed or direction suddenly. These include wet slippery surfaces, gravel, and potholes. Anticipate this and be ready to adjust your speed and lane accordingly.
- When you park your car, look for motorcycles before opening your car door.
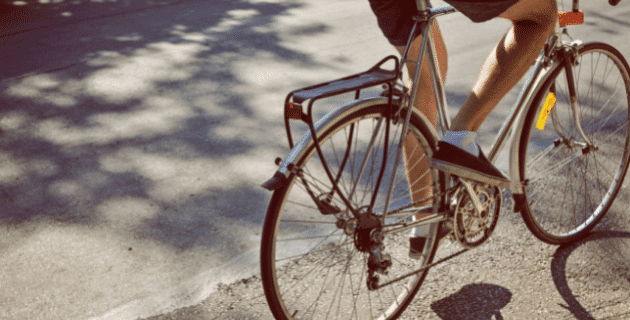
Bicycles
Bicycles have the right to be on the road with other vehicles, providing that they are following the rules. This includes proper lighting and reflectors at night, riding in the direction of traffic, signaling when changing lanes, and staying as near to the right curb as possible. In some cases, bicyclists may have a dedicated bike lane.
-
- Be aware that bicyclists may be permitted to ride on certain sections of highways where there is no alternate route and where bicycling is not prohibited by a sign.
- As with cars, bikes are required to signal turns. A left turn is the left arm extended to the side. A right turn is the left arm bent at a 90-degree angle with the hand at the top. The stop signal is the same with the hand at the bottom. Learn the hand signals so you know what the cyclist is communicating.
- Remember that your car weighs about 20 tons and a bike can weigh 20 lbs. or even less. Your car can do severe damage to a bicyclist and bike.
- Some states have laws about the amount of space you must give bicyclists. The general rule is to give them about 3 feet of clearance.
- After you park, look before you open your car door. There might be a bike coming.
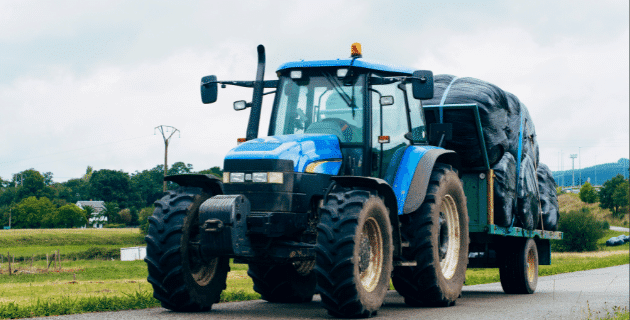
Slow-Moving Vehicles
It can be frustrating to be stuck behind farm tractors, animal-drawn carts, or road maintenance trucks. These slow-moving vehicles typically will display a reflective orange triangle so you are aware of their speed as you approach them.
-
- Slow down. Reduce your speed before you reach the slow-moving vehicle.
- Don’t sound your horn. You could scare a horse, and sounding a horn will not help a slow-moving vehicle move any faster.
- Be aware that animal-powered vehicles could make sudden movements.
- If there is enough room to pass them, do so carefully on the left.
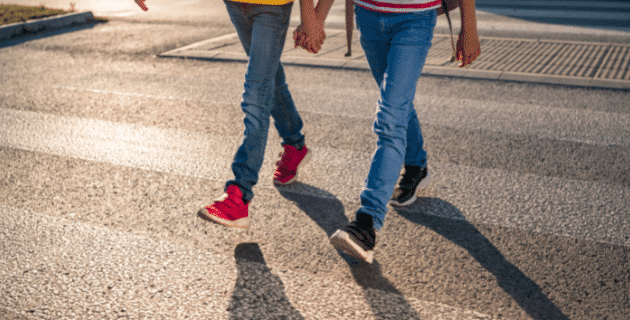
Pedestrians
Vehicles commonly share the road with pedestrians when they are crossing the street. Typically, this would be at a crosswalk. Check your local laws. In some cases, pedestrians do not always have the right of way. However, drivers do have a responsibility to be aware of people walking so they do not hit them.
-
- Stop at all crosswalks where pedestrians are waiting.
- Make sure your car is within 5 feet of the crosswalk. This helps blind pedestrians sense the presence of your vehicle.
- Do not turn before looking for pedestrians.
- Use extra caution in low visibility situations such as dusk, nighttime, or in bad weather. There may be a pedestrian whom you do not see.
- Never pass vehicles stopped at a crosswalk. They could be stopping for someone.
- Leave room. Consider a vehicle emergency braking with pedestrian and cyclist detection.
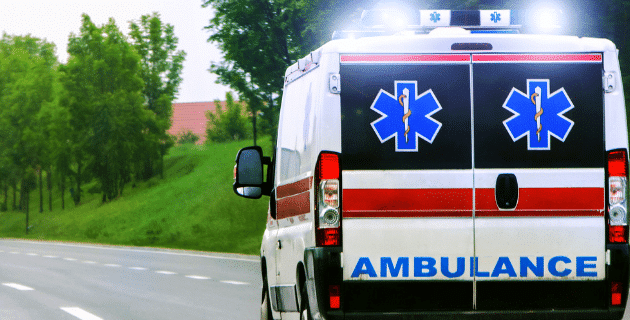
Emergency Vehicles
Police cars, fire engines, and ambulances need to get to the places where they can provide help to people in need. When you see flashing lights or hear sirens, that’s your cue to pull over to the side of the road. You can help emergency vehicles by giving them a clear path to their destination.
Following these rules for sharing the road will help keep you safe. Having the right auto insurance policy will provide peace of mind should you need that coverage. Safe travels.
This article is furnished by California Casualty, providing auto and home insurance to educators, law enforcement officers, firefighters, and nurses. Get a quote at 1.866.704.8614 or www.calcas.com
by California Casualty | Auto Insurance Info |
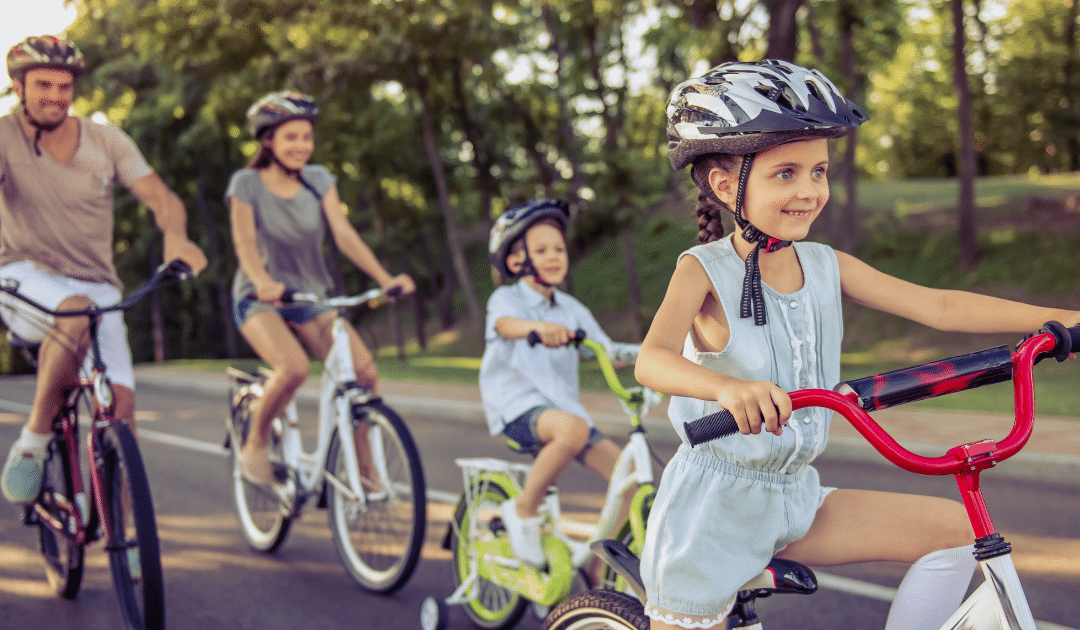
As more cyclists (of all ages) take to the road to enjoy the nice weather, now is a great time to brush up on the rules for safely sharing the streets.
Think of bikes as cars, but with fewer safety features. Road hazards such as potholes and debris may cause a cyclist to suddenly swerve, much like if they were driving a vehicle. And although riding on the right side of the lane is preferred for bike traffic, there may be the occasion when cyclists take to the center if road conditions require it.
Understanding cyclists and anticipating their next move will help you safely share the road. Here are some quick safety reminders on driving with cyclists this summer.
1. They have the right to “drive” in your lane, but they also need their space. Always give cyclists the right of way. Be sure to watch your speed compared to theirs. Pass only when there’s ample room (at least 3 feet between you and their bike) and while other vehicles are not approaching.
2. Look for bicyclists everywhere. Cyclists may not be riding where they should be or may be hard to see—especially in poorly lit conditions, including dusk/dawn/night and even in inclement weather.
3. Avoid turning in front of a bicyclist who is traveling on the road or sidewalk, often at an intersection or driveway. An oncoming cyclist may be traveling faster than you think. Drivers turning right on red should look to the right and behind to avoid hitting a bicyclist approaching from the right rear. Stop completely and look left-right-left and behind before turning right on red.
4. Completely stop at red lights or stop signs to let bikers pass or check for unseen bikers. Make eye contact with cyclists at intersections or crosswalks to acknowledge their presence and signal to let them know they are free to pass.
5. Don’t honk at someone on a bike. The noise could startle them, making them lose control of the bike they are riding. If it’s absolutely necessary, do so from a distance and make it a light tap.
6. Take extra precautions if you are sharing the road with children riding their bikes. They are smaller and harder to spot on the road, especially for drivers of bigger cars. Plus, these young bicyclists won’t have the same control over their bikes or know the rules of the road as mature riders.
7. Knowledge of common biking hand signals is a must. These include sticking the left arm straight out to indicate a left turn, holding the left arm up at a 90-degree angle to indicate a right turn, and pointing the left arm down at a 90-degree angle to indicate a stop or slowing down.
Taking extra precautions when you are behind the wheel and understanding a cyclist’s next move can help you avoid an accident. Use these tips this summer to help you both navigate the road ahead safely and seamlessly.
This article is furnished by California Casualty, providing auto and home insurance to educators, law enforcement officers, firefighters, and nurses. Get a quote at 1.866.704.8614 or www.calcas.com.
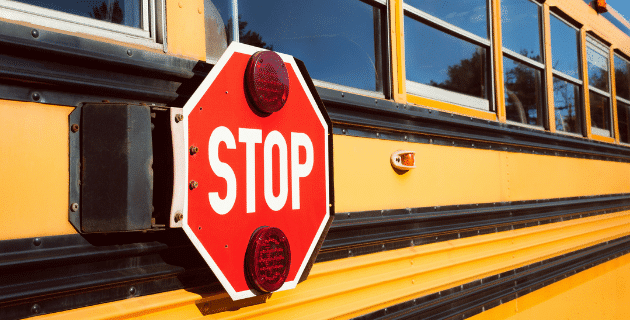
by California Casualty | Safety |
The hustle and bustle of the first days of the new school year can get a little crazy. Kids are racing to see their friends, buses are crisscrossing the area picking up and dropping off students and hurried parents are trying to drop their kids off before they have to head to work. Paying attention often goes by the wayside.
This is why it’s more important than ever to practice extreme caution around school zones and neighborhoods.
The National Safety Council warns that more children are hit by cars near schools than at any other location. That’s why they ask that drivers:
-
- Don’t double park because it blocks visibility
- Don’t load or unload children across the street from schools
- Carpool to reduce the number of vehicles at school
- Put down cell phones and other mobile devices
Other safety tips to prevent auto-pedestrian injuries around schools include:
-
- Not blocking crosswalks when stopped at a red light or making a turn forcing pedestrians to go around you; this could put them in the path of traffic
- Always stopping for school crossing guards
- Using extra caution to look out for children at bus stops, school zones, playgrounds and parks and in all residential areas
- Never passing a vehicle stopped for pedestrians
- Remembering that pedestrians have the right of way
And to prevent distracted walking and texting accidents, students are reminded to keep their head up and phone down and:
-
- Never walk while texting or talking on the phone
- Always move out of the way of others and stop on the sidewalk to text
- Never cross the street while using an electronic device
- Do not walk with headphones on
- Be aware of their surroundings
- Always walk on the sidewalk if one is available; if a child must walk on the street, he or she should face oncoming traffic
- Look left, right, then left again before crossing the street
- Cross only at crosswalks
Remember, the first days of school can be a dangerous time for excited students. Safety experts stress that we all need to slow down near school zones, wear seatbelts, leave early so we aren’t rushing and never drive distracted (texting, eating or drinking, horsing around with passengers or adjusting the radio or adjusting the navigation system).
This article is furnished by California Casualty, providing auto and home insurance to educators, law enforcement officers, firefighters, and nurses. Get a quote at 1.866.704.8614 or www.calcas.com.
