
by California Casualty | Homeowners Insurance Info |
Updated landscaping touches can make your address more appealing to you, your neighbors and/or your potential new buyers. In fact, real estate experts say that nice curb appeal can add 14% resell value and help your home sell six times faster.
As the saying goes, “You only have one chance to make a first impression.” So whether you’re selling your house or simply ready to add value to your current home, we suggest you get out the shovel and think outside the box.
Here are some slow but steady changes you can make to make a beautiful space outside your front door.
Start by Mapping Out Your Space
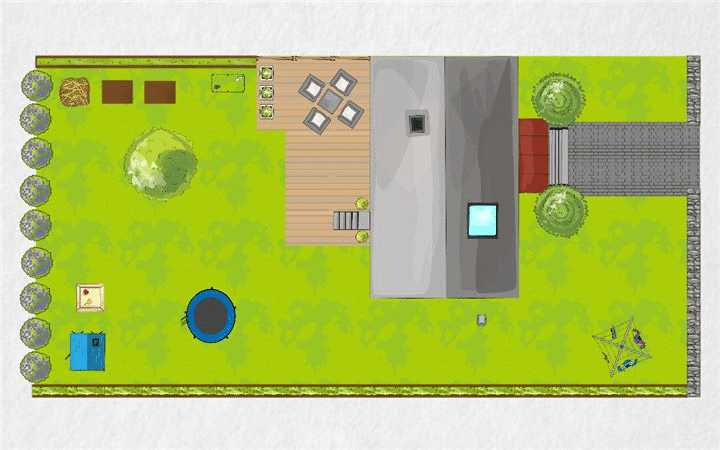
Careful planning will keep you on-task and on-budget throughout the landscaping process. First, sketch a rough design of your yard, drawing in what you think might work well, like paths, gardens, and trees. You could also use a tool like Gardena Garden Planner to visualize your space online.
This is a great time to gather ideas on how you get the most out of your outdoor areas. Can you capitalize on great views, sunrises/sunsets, or extend your current indoor space to the great outdoors? Bonus points for creative solutions that provide options for more outdoor living.
Deck, Concrete, or Pavers
A large outdoor space for extra seating, eating, or entertaining is on the wishlist of many homeowners. How you approach the construction of such a feature depends on the slope of your yard, the weather in your area, the size of your space, your preference for certain materials, and your budget. You will want to include the space on your plan and then heavily research your options to get the most bang for your buck.
Choosing the Right Path
Paths that help you, your family (including your fur babies), friends, and neighbors navigate your new outdoor oasis are also a must. Consider how people will enter the area (back door, side gate, etc.) and meander through the space as you decide where your paths should go. And as you choose the materials for your pathways, remember crushed gravel sticks to paws and little ones often trip or stub their toes on uneven pavers.
Time to Revisit Your Budget
Now that you have a plan in place, it’s time to cross-reference your wish list with your determined project budget. Hardscapes such as pavers, stones, and rocks are more expensive, so get a feel for how much you can allocate to these areas as indicated on your plan. Trees are another element that can quickly use up your earmarked funds. Here’s when you prioritize your needs, wants, and must-haves, and then refine your design to make your money go further.
Love Your Lawn, Don’t Just Live With It
You will want a lawn that takes less maintenance to thrive; giving you more time to enjoy the space you’re creating. Not every kind of grass will work in your climate. Do some research, and plan accordingly. If you live in a hot area, a drought-resistant variety like Bermuda grass would be better than Kentucky bluegrass, which does better in the cold.
How Will Your Garden Grow
Most importantly, know your planting zone. You will save a lot of money, time, and headache if you choose plants that are hardy for your area based on your planting zone. Then create six to eight-foot deeps garden beds that follow a general rule of 50% evergreens, 25% deciduous (or flowering) shrubs, and 25% perennials. Include a mix of plants that bloom at different times and there will always be something to admire! Sufficient spacing between each plant will also ensure that your garden continues to grow beautifully for years to come.
Be sure to plant your garden far enough away from the exterior your home to give room for upkeep, protect the façade and keep unwanted pests from using the garden as a highway into your home.
Laying down a two to four-inch layer of mulch can help combat weeds and keep your plants’ roots warm and well-fed. Avoid mulch around shrubbery or other plants with roots close to the surface, or they will be smothered rather than provided for.
Trees
Trees provide great shade, beauty, and curb appeal. Plan their placement carefully. Root systems, preference for particular soil conditions, and size at maturity must be top of mind when deciding on trees in your landscape. Study the impact your chosen specimens will have on the areas you intend to plant them before you buy. For instance, pine trees will shed needles, change the acidity of the soil around them (impacting any plants nearby) and not allow for grass to grow under their branches.
With your space mapped, your budget itemized and your plantings identified, doing a landscape update yourself can be really rewarding now and for years to come. If you’re not the DIY type or still unsure as to how to tackle your curb appeal, hiring landscape professionals is another viable option. Either way, an updated curb appeal could lift your spirits and your home’s value. So dig in!
This article is furnished by California Casualty, providing auto and home insurance to educators, law enforcement officers, firefighters, and nurses. Get a quote at 1.866.704.8614 or www.calcas.com.

by California Casualty | Homeowners Insurance Info |
For some areas of the U.S., spring showers mean rising water, and rising water means the potential for flooding. While many mortgage companies require flood insurance in certain flood-prone areas, Mother Nature’s fear tactics remind us of the benefits and peace of mind this special coverage provides.
Floods are one of the most common and dangerous natural disasters in the US. You know that your home is protected thanks to Flood Insurance, but if you live in a flood-prone zone, you also need to have a plan in place for the safety of you and your family.
Here’s a quick list of what you can do should your home floods:
Take a Moment
Seeing your home underwater and your belongings saturated is an overwhelming and stressful event. You have to breathe and grieve as you assess the situation. The road ahead will be hard, but you will make it through.
Think Safety First
If you’ve left and returned, before setting foot in your home, walk around the outside of your building and inspect for damage to the exterior to make sure you aren’t at risk of a collapse while you’re inside.
Immediately call you’re the utility company if they are not in the area and you suspect damage has occurred that needs their attention.
Water and electricity don’t mix. Turn your main breaker off and flip the individual fuse switches into the off position. You may need a qualified electrician to inspect, clean, and dry the box before power can be turned back on again.
Get the Right Gear
Stagnant water can carry bacteria along with more obvious chemical contaminants, sewage, garbage, and debris. Plus, water-logged areas can have mold already starting to form. Use rubber boots and waders with water-tight gloves to make sure you aren’t exposed to these potential dangers. And don’t touch your face once you’ve started to clean up.
Call Your Insurance Company
Call your flood insurance provider. They will begin the claims process and schedule an adjuster to visit your home. Depending on your situation, FEMA (1.800.621.3362) may also have free help available.
Document Everything
Collect video evidence of how your home was hit. Go into each room, capturing full images of any and all damage. Pay special attention to the walls, flooring, appliances, and other expensive items that may have been made unusable.
Collect any paperwork that you need to share with the adjuster/insurance agent. Use your phone to take pictures of any paperwork if you don’t have a way to make photocopies. Be sure to keep a file with the date, times, names, and details of any conversations.
Tackle Cleanup
- Ventilate the area by opening all doors, windows, cabinets, and drawers
- Don’t plug anything in unless it has been deemed safe by an electrician
- Check with your insurance provider if you can begin repairs.
- If you’ve got the all-clear, begin by removing any standing water.
- Use a dehumidifier and fans to remove as much moisture as possible.
- Move any furniture and rugs that weren’t too badly damaged to your yard and let them sit under the sun directly.
- Remove drywall and insulation, carpets and padding, upholstered furniture, window coverings, and any other household items that cannot be adequately cleaned/sanitized.
- Throw out any unsealed food and/or any food exposed to floodwater
Be Sure to Document All Items Before Discarding Them
You could also use a third-party cleanup crew, allowing a team of professionals to do the hardest work for you. Check and see if your insurance provider will cover the costs of this.
Mitigate the Mold
Mold can develop in a very short time, and exposure to it can be dangerous in the long term. If you come across any while inspecting your home, it needs to be treated immediately. This can be done by mixing a cup of bleach with a gallon of water and scrubbing any spores. While disinfecting, wipe down any countertops and appliances that were exposed to water.
Start the Rebuilding Process
Before you determine which contractor to choose, get multiple bids. You will want to work with a contractor you can trust. Check their online reviews. Research their experience and project history. Check if they are licensed and bonded.
Be Sure to Keep All of Your Receipts.
Flooding can be a terrible tragedy to experience. With these tools and knowledge, you can be prepared to keep your home and family safe when disaster strikes.
For more tips on what to do after a natural disaster, or how to prepare for a flood, click here.
This article is furnished by California Casualty, providing auto and home insurance to educators, law enforcement officers, firefighters, and nurses. Get a quote at 1.866.704.8614 or www.calcas.com.

by California Casualty | Auto Insurance Info |
A tire blowout is a rapid loss of air that causes your vehicle to lose control. It’s a dangerous surprise that can happen anytime your car is in motion. If you are driving down the road and suddenly hear a loud POP or THUD and feel your car begin to jerk or pull to the side, odds are you have just experienced a blowout.
Tire blowouts can be frightening, especially for young or inexperienced drivers, and can cause you to feel like you’re losing control of your vehicle. Blowouts cause 78,000 crashes a year, so keeping your cool and knowing how to proceed after a blowout is vital.
Here’s what to do if a blowout happens to you.
Step 1: Don’t panic. The most important thing you can do during a blowout is to stay calm. Don’t try to immediately overcorrect or press on your brakes- this could cause you to lose even more control.
Step 2: Grip the steering wheel firmly. Keep both hands on the steering wheel and keep the car moving forward in a straight line. You may feel the need to try and steer off to the side of the road or overcorrect if it starts to fishtail- don’t. To avoid an accident keep the car as straight as you can.
Step 3: Tap your gas pedal. If you are trying to regain control of your vehicle, accelerating lightly will help you because you are keeping your forward momentum. Braking immediately will only cause the car to become harder to control and could lead to an accident. Gently press the gas pedal and adjust to how the car moves. Once you’ve regained full control, slowly remove your foot from the accelerator and let the car slow.
Step 4: Brake Slowly. When your speedometer reads 30mph, it’s safe to slowly begin braking. After you have slowed enough to begin hitting your breaks it is safe to steer the vehicle into the rightmost lane or shoulder of the road (if possible). Continue braking steadily until your car stops completely.
Step 5: Put on your hazards. Put it in park and turn on hazard lights or put out reflective triangles and collect yourself. If you are still in the middle of the road, you should exit your vehicle and get to safety- out of the way of a collision.
Step 6: Change your tire or call roadside assistance. If you can safely change your tire and there is no damage done to your rim, now is the time to do so. If you cannot safely change your tire or don’t have a spare call for roadside assistance.
How to Avoid a Future Blowout.
A tire blowout may happen due to a number of circumstances: underinflation, too much weight in the vehicle, hitting a pothole or other debris, and even over-wear.
To avoid a future blowout, try to miss potholes & debris- when you can safely do so- and make sure to maintain your tires. You can do this by routinely checking your tire pressure, monitoring your tires for wear and tear (even small cuts and other minor defects can lead to a blowout), and most importantly keeping up with getting new tires.
New tires can generally last you anywhere from 25,000 to 50,000 miles. You will want to refer to your owner’s manual for recommendations on what tires you can put on your vehicle and their lifespan. A great way to keep your tires in check is to monitor their tread. You can do this by using the quarter test. If you are unfamiliar with the quarter test, here’s how it works- place a quarter in the center of the tread (thickest part of the tire), with the head facing you, in a new tire the quarter will easily fit and you should be unable to see the hair on the top of the head. If the hair is partially visible, you should think about replacing the tires. If you can see the very top of the head, the tires need to be replaced right away.
What About Insurance?
So, are you covered if you experience a tire blowout? Your auto insurance policy may cover sudden or accidental damage to your tires, like a blowout, depending on your policy.
Before an unexpected blowout happens to you make sure you’re covered. Check with your auto insurance provider or call in to review your policy.
This article is furnished by California Casualty, providing auto and home insurance to educators, law enforcement officers, firefighters, and nurses. Get a quote at 1.866.704.8614 or www.calcas.com.

by California Casualty | Homeowners Insurance Info |
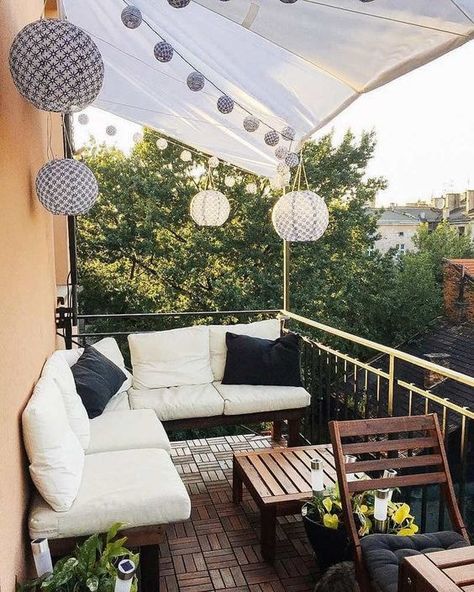
One of the best parts about renting? Almost all apartments these days have balconies! Don’t pass up the chance to jazz it up this spring, as the weather warms up, you’ll be glad you did. Even balconies that seem cramped or uninspiring can transform into sanctuaries of serenity with a few easy pieces.
Looking for the perfect balcony inspo? You’ve come to the right place. These 15 easy and cheap ideas are guaranteed to upgrade your space.
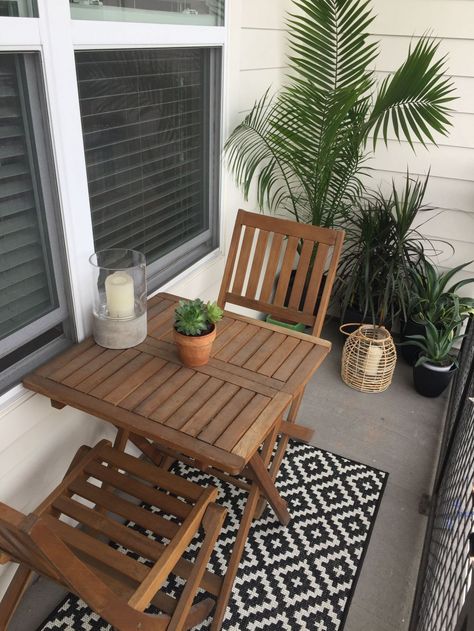
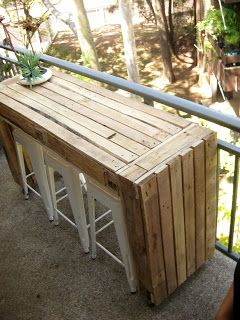
1. Start with the basics: a table and chairs. A small dining set is perfect for morning coffee, intimate dinners, cocktail hour, and quick lunchtime breaks. Go for something small and space-efficient or even furniture that can be folded up and easily leaned or stored.

2. Showcase your view. Situate your seating or furniture so as to make the most of your view.
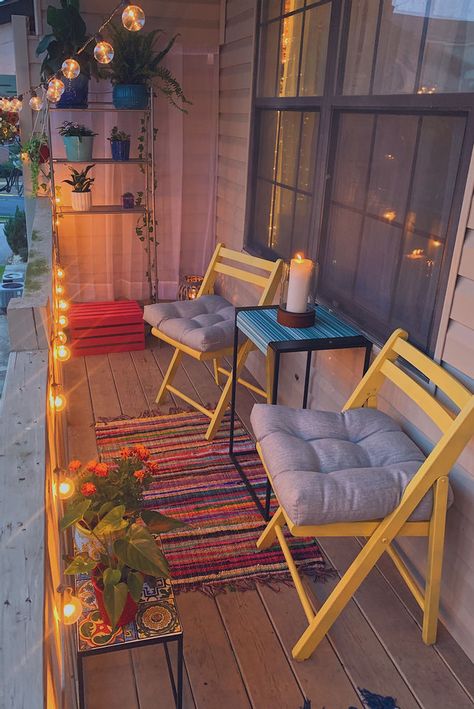
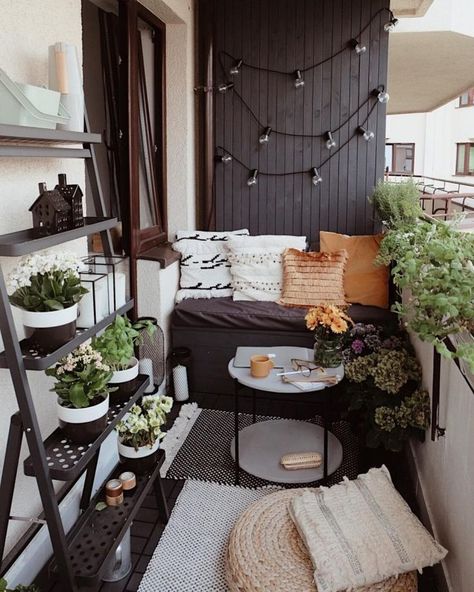
3. Use color. Color is a quick way to add personality and mood to your area. Do you want it to feel festive? Think oranges, reds, and other bright colors (look up “complementary colors” or check out Pinterest for palettes). Or would you rather make the mood quiet and relaxing? — then go with subtler, neutral, or more muted tones. You can always mix it up too, going for a muted palette but with bright accents. Get creative and make it your own!
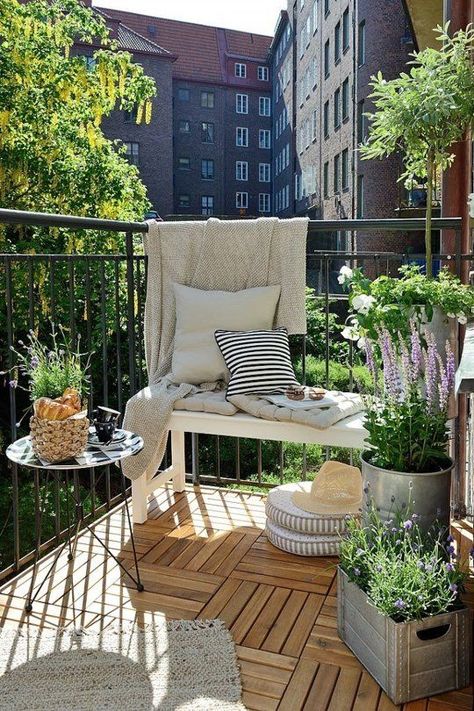
4. Create a garden. A balcony filled with planters, climbing vines and other foliage creates a lush garden scene. You’ve got a million choices to choose from. Want plants that are fragrant, such as flowering citrus? Or ones that attract hummingbirds and pollinators? Adding herbs (cooking or decorative) will also add some lovely scents. Make sure all pots have saucers to prevent water damage.

5. Add flowers for instant color appeal. Flowers and blooming plants add a sunny vibe to any balcony. Trailing blooms (think Tuscan verandas) add an extra touch of luxury.
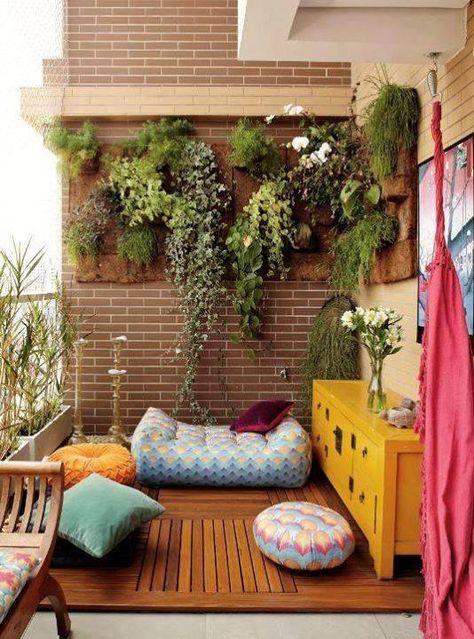
6. Check out floor pillows. If you’re on a tight budget or don’t intend to stay in your rental long, you can still dress up your outside digs. Instead of investing in furniture, look into floor pillows – usually inflatable and outdoor-friendly, these will let you enjoy your place for as long as you’re there.
7. A place to park your drink. Remember to add little side tables or even stools to hold your book, drink, sunglasses, phone, or anything else you’ll want to set down while relaxing outside.
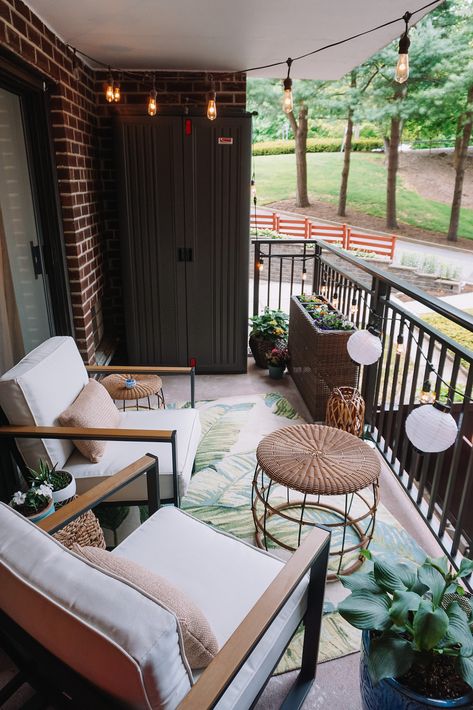
8. Throw down a rug. A patterned rug will open up the space visually and add a decorative dimension. Check out indoor/outdoor options.
9. Make an accent wall. Painting or hanging a decorative piece on the outdoor exterior walls will add a sophisticated design element. This could be an art-type piece, lights, or even a “living wall” add-on of ferns or other plants.
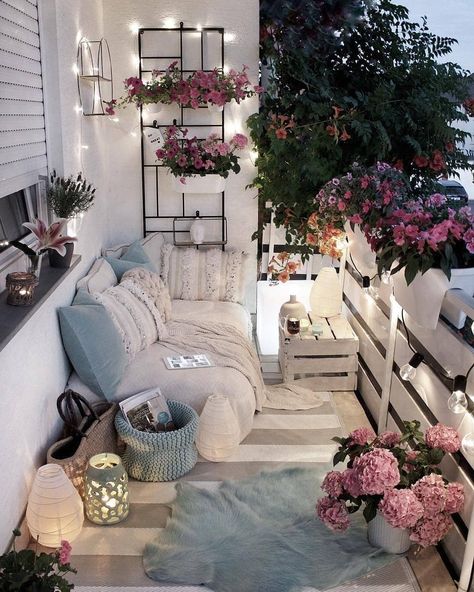
10. Add lighting. Outdoor lights will immediately up-level your balcony and give it evening ambiance. Options include strung lights (for that fairy light effect), LED candles in lanterns, and hanging or standing lights.

11. Consider bench seating. Bench seating is a bit more of a commitment than moveable chairs. It usually saves space and sometimes doubles as a storage element.
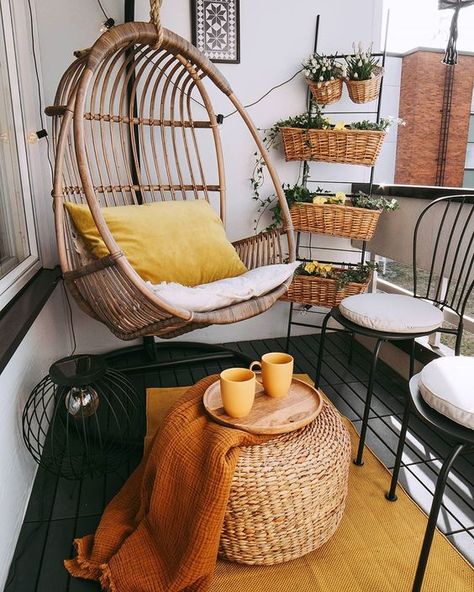
12. Hang a swing or hammock. Lazy swing-time isn’t just for vacation. If you have a lot of space, consider a hammock or swinging bench. This may even nudge you to do more of that self-care relaxing that we all know is so important!
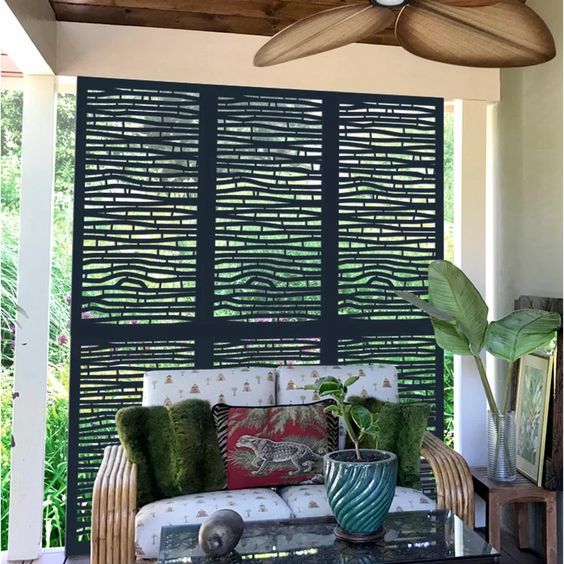
13. Create privacy. Using a room divider or a row of tall bamboo can create a nice illusion of privacy if your balcony directly abuts another.
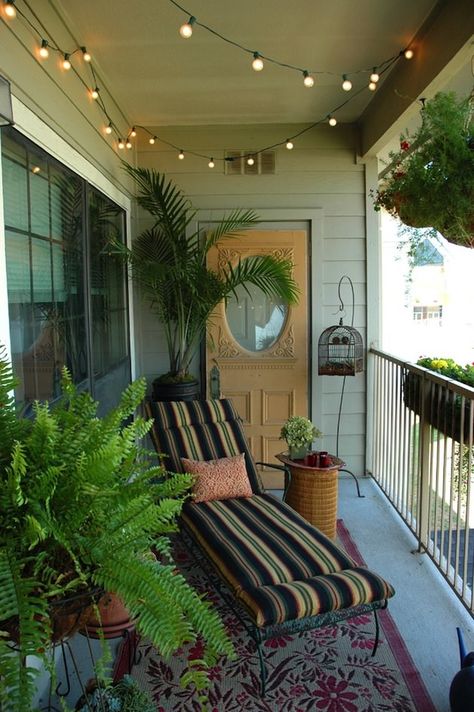
14. Go full recline mode. If space allows, think of getting a lounge chair. Perfect for curling up with a book, working on your laptop, or soaking up the sun, you can make it even comfier with outdoor pillows.
15. Throw shade. If your balcony gets a ton of light (maybe sometimes too much?), look at shading options. This could mean a standing umbrella, shade sail, or a more involved retractable awning.
Before you start on your balcony transformation project, be sure to check in with your roommate and your landlord about anything that might affect your plans. Then design around those and create your own little outdoor oasis – as spring rolls into summer and the warm weather beckons you outside, you’ll be so glad you did!
For more ideas to transform your balcony or outdoor space check out our Pinterest Board “Apartment Balcony Inspiration“
Don’t forget to give us a follow at California Casualty to stay up to date on every fun balcony inspiration we discover! Scan our Pincode with your Pinterest camera to follow:

This article is furnished by California Casualty, providing auto and home insurance to educators, law enforcement officers, firefighters, and nurses. California Casualty does not own any of the photos in this post, all are sources by to their original owners. Get a quote at 1.866.704.8614 or www.calcas.com.
by California Casualty | Calcas Connection, Good to Know, Homeowners Insurance Info |
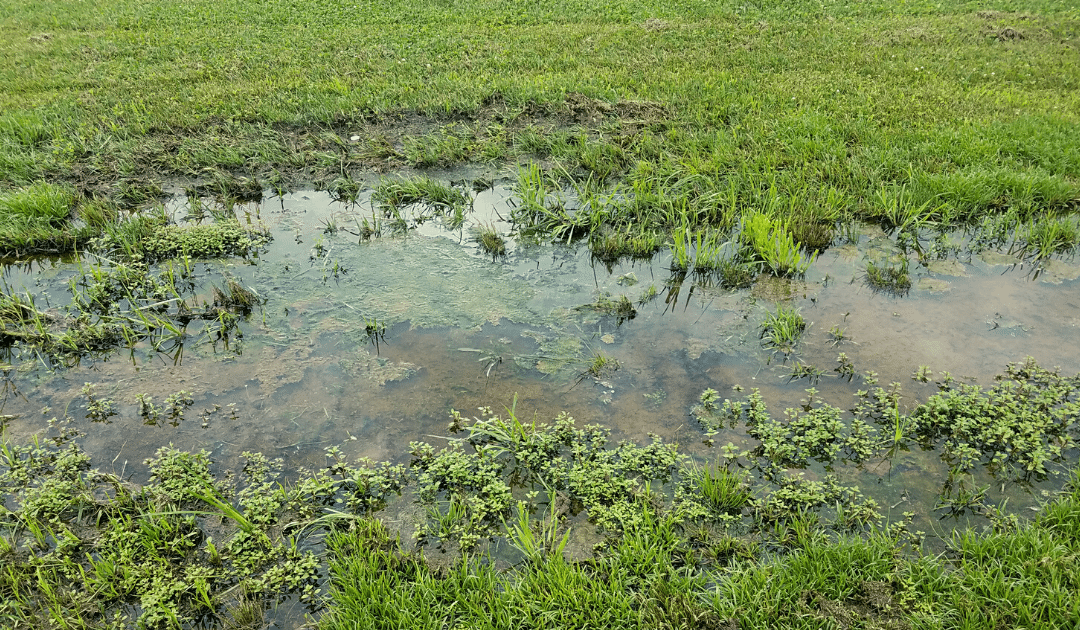
Spring is here! And so are spring storms, but spring showers don’t just bring flowers, they can also bring more water than what your yard can hold. And this standing water around your house can cause water damage to your home- costing you more than you think.
By definition, standing water is a body of water that does not move or sink into the ground. It can be caused by a number of factors: heavy rain, over-watering, poorly draining soil, improper grading, incorrect landscaping, low areas in your yard, and even water line leaks or bursts.
If you have standing water in your yard for multiple days, it can cause serious damage to your home. Not only will it be an eyesore that can ruin your grass and draw unwanted bugs, but stagnant water on the side of your home can also seep into small cracks or pores in your home’s foundation and get into your crawl space or basement, which can lead to water damage & more.
Here’s why you should address the standing water near your home now, and how you can prevent it from happening in the future.
Standing Water Can…
Ruin your basement. Water can cause cracks in your home’s foundation. This is how water enters your basement or your crawl space. Once inside it can create a musty odor and add dampness that will completely ruin flooring, drywall, furniture, electronics, etc.
Produce mold & mildew. High levels of condensation and humidity inside of your basement or crawl space create an environment for mold and mildew to thrive. This could not only affect your home, but it could also cause major health issues for you and your family.
Breakdown your home’s foundation. Over time, standing water that has made its way into your cement foundation will start to cause shifting and bowing of your structure. This is the beginning of the breakdown of your home’s foundation. If not taken care of- doors will no longer close, floorboards will start to squeak, steel beams may have to be inserted, and it could even lead to structural collapse.
Cost you thousands of dollars in repairs. A homeowner spends over $3,000 on average to repair damages to their home and property caused by water. Preventive maintenance and early detection are key to helping you save your home and your wallet.
But that’s not all, standing water can also draw unwanted pests: mosquitoes, roaches, termites, ants, silverfish, and other pests thrive in moist environments. They will seek damp areas and make your home their home if you don’t address the issue quickly.
Here’s how you can prevent standing water from getting into your home this spring.
How to Prevent Standing Water
1. Check for Proper Roof Drainage
Make sure every drop of rain will drain off of your roof correctly- starting at your gutters. Make sure they are free of leaves and sticks and that you have an attached downspout that is also clear of debris. It is also important to make sure your downspout has a downspout extension that will move water away from the foundation of your home.
2. Monitor Your Sprinkler Usage
If you see standing water, make sure to check that your sprinklers are not overwatering your lawn. First, check to make sure the sprinkler heads are functioning properly and not broken. If there is no issue, you will likely just need to reset your sprinklers to run at a less-frequent timespan. After resetting, if you are still seeing patches of barren or muddy lawn, you may have a leaky valve. Valves are responsible for distributing the water throughout the entire system, and if damaged they will need to be replaced right away.
3. Make Sure Your Yard is Correctly Graded
Grading, also referred to as lawn leveling, is the process of leveling your lawn to allow for the proper drainage of water. If you have water that is pooling around your foundation or your house is sitting on a low level, you may need to look into re-leveling your yard. Grading involves the moving of topsoil onto the yard. You will then even out the low spots with the soil and form a downward slope (around 2%) from your home’s foundation. Leveling is an intricate process, and if your yard needs re-leveled, you may need to hire a professional.
4. Aerate Your Lawn
Aerating your yard means to perforate the soil with holes (4 – 6 inches deep) to allow water, air, and other nutrients to better absorb into the soil. Not only will aeration lead to a greener, healthier lawn, but it will also alleviate soil compaction and allow water to better absorb during rainstorms. The best time to aerate your lawn is during spring and fall.
5. Mind Your Landscaping
Improper landscaping can cause water to sit at the base of your home’s foundation and ultimately make it into your home. When landscaping, avoid making any changes that will block drains or downspouts. Make sure that all of your landscaping slopes downward to create runoff and that all downspout extensions or drainage systems extend beyond your planting beds leading the water away and far from your foundation.
6. Install a Drainage System
If you are constantly struggling with standing water in an area of your yard, it may be best to look into installing a yard drain. Yard drains act like shower drains. They prevent flooding and move the water away from your yard through hidden pipes to a dry well. The dry well will then collect the water underground and slowly percolate to the soil around it
Standing water is a serious, yet largely overlooked, issue that can have serious consequences. If water has been in your yard for multiple days and won’t drain, don’t neglect it. Look for the cause of your problem or reach out to a professional. Acting today will save you time, money, and headache tomorrow.
This article is furnished by California Casualty, providing auto and home insurance to educators, law enforcement officers, firefighters, and nurses. Get a quote at 1.866.704.8614 or www.calcas.com.
