
by California Casualty | Homeowners Insurance Info |
For some areas of the U.S., spring showers mean rising water, and rising water means the potential for flooding. While many mortgage companies require flood insurance in certain flood-prone areas, Mother Nature’s fear tactics remind us of the benefits and peace of mind this special coverage provides.
Floods are one of the most common and dangerous natural disasters in the US. You know that your home is protected thanks to Flood Insurance, but if you live in a flood-prone zone, you also need to have a plan in place for the safety of you and your family.
Here’s a quick list of what you can do should your home floods:
Take a Moment
Seeing your home underwater and your belongings saturated is an overwhelming and stressful event. You have to breathe and grieve as you assess the situation. The road ahead will be hard, but you will make it through.
Think Safety First
If you’ve left and returned, before setting foot in your home, walk around the outside of your building and inspect for damage to the exterior to make sure you aren’t at risk of a collapse while you’re inside.
Immediately call you’re the utility company if they are not in the area and you suspect damage has occurred that needs their attention.
Water and electricity don’t mix. Turn your main breaker off and flip the individual fuse switches into the off position. You may need a qualified electrician to inspect, clean, and dry the box before power can be turned back on again.
Get the Right Gear
Stagnant water can carry bacteria along with more obvious chemical contaminants, sewage, garbage, and debris. Plus, water-logged areas can have mold already starting to form. Use rubber boots and waders with water-tight gloves to make sure you aren’t exposed to these potential dangers. And don’t touch your face once you’ve started to clean up.
Call Your Insurance Company
Call your flood insurance provider. They will begin the claims process and schedule an adjuster to visit your home. Depending on your situation, FEMA (1.800.621.3362) may also have free help available.
Document Everything
Collect video evidence of how your home was hit. Go into each room, capturing full images of any and all damage. Pay special attention to the walls, flooring, appliances, and other expensive items that may have been made unusable.
Collect any paperwork that you need to share with the adjuster/insurance agent. Use your phone to take pictures of any paperwork if you don’t have a way to make photocopies. Be sure to keep a file with the date, times, names, and details of any conversations.
Tackle Cleanup
- Ventilate the area by opening all doors, windows, cabinets, and drawers
- Don’t plug anything in unless it has been deemed safe by an electrician
- Check with your insurance provider if you can begin repairs.
- If you’ve got the all-clear, begin by removing any standing water.
- Use a dehumidifier and fans to remove as much moisture as possible.
- Move any furniture and rugs that weren’t too badly damaged to your yard and let them sit under the sun directly.
- Remove drywall and insulation, carpets and padding, upholstered furniture, window coverings, and any other household items that cannot be adequately cleaned/sanitized.
- Throw out any unsealed food and/or any food exposed to floodwater
Be Sure to Document All Items Before Discarding Them
You could also use a third-party cleanup crew, allowing a team of professionals to do the hardest work for you. Check and see if your insurance provider will cover the costs of this.
Mitigate the Mold
Mold can develop in a very short time, and exposure to it can be dangerous in the long term. If you come across any while inspecting your home, it needs to be treated immediately. This can be done by mixing a cup of bleach with a gallon of water and scrubbing any spores. While disinfecting, wipe down any countertops and appliances that were exposed to water.
Start the Rebuilding Process
Before you determine which contractor to choose, get multiple bids. You will want to work with a contractor you can trust. Check their online reviews. Research their experience and project history. Check if they are licensed and bonded.
Be Sure to Keep All of Your Receipts.
Flooding can be a terrible tragedy to experience. With these tools and knowledge, you can be prepared to keep your home and family safe when disaster strikes.
For more tips on what to do after a natural disaster, or how to prepare for a flood, click here.
This article is furnished by California Casualty, providing auto and home insurance to educators, law enforcement officers, firefighters, and nurses. Get a quote at 1.866.704.8614 or www.calcas.com.

by California Casualty | Firefighters, Homeowners Insurance Info, Peace Officers |
Your home and the personal property inside are your most valuable assets. If the unexpected were to happen, give yourself peace of mind by knowing your personal possessions have an extra layer of protection by placing them in a home safe.
Keeping a durable safe inside your home is one of the best ways to ensure your valuables, personal belongings, and other important documents inside remain secure in the event of a burglary, fire, or natural disaster. But buying a safe that is water, fire, and/or theft-resistant can be quite a monetary investment.
If you are questioning whether it’s “worth it” to purchase a home safe, here are some important factors to remember.
You’ll have quick access to important information
If you need cash or important documents like your Home Warranty, you won’t have to jump through any hoops or wait to get the information you need. All of your important information will be in one place that is quickly accessible to you and your family.
Your important items will remain safe
In the event of a disaster, there may not be time to grab all of the items you would like to bring with you. With a home safe, no matter the occurrence, your important possessions will remain secure.
You can also use it for firearm & weapon storage
If you keep weapons in your home, you can rest assured knowing that they will be locked away in your safe, out of sight and reach from your children and any guests (wanted or unwanted).
What Kind of Safe Should I Purchase?
Not all safes have the same functionality. Before you purchase a safe of your own, do your research on what will work best for you and your family. If you live in a flood or wildfire-prone area, be sure to invest in a safe that protects against water or fire. If you chose to use your safe for weapon storage, remember to find a safe that protects against humidity.
Home safes also come in many different sizes, with the average home save being 1.2 – 1.3 cubic feet. If you have an area of your home that you know you would like to place keep your safe (out of the eyes of an intruder) be sure to purchase a safe with the correct dimensions, so it will fit properly in your space.
The size of your safe should also take into account what you will keep inside of it. For example, if you are storing multiple family heirlooms, along with all of your emergency documents and a full emergency kit, you may want to invest in a larger safe.
Here are some examples of what you can keep in your home safe.
Items to Keep Inside Your Safe
Personal Documents – Birth certificate, passport, social security card, marriage license, vaccination & medical history, tax returns
Important Information – Passwords, health insurance information, legal documents, wills, death decrees, immigration paperwork, & external hard drives
Money & Bank Information –Cash, bank account numbers, checks, credit cards, bonds, stock certificates, & precious metals like gold or silver
Home& Auto Information – Insurance information, contracts, warranties, permits, deeds, & titles
Weapons – Firearms, knives, bows, & ammunition
Jewelry – Expensive necklaces, bracelets, earrings, watches, diamonds, gemstones, & engagement or wedding rings
Spare Keys – House keys, deposit box keys, car keys, garage door openers, & neighborhood facility keys
Heirlooms – Trinkets, photos, & items from childhood or passed down from generations
Emergency Information- List of family cell phone numbers & addresses, family disaster plan, emergency kit,& home inventory
Owning a safe is one of the easiest ways to make sure your personal property stays protected. Save yourself worry and stress by investing in a safe for your home today – your future self will thank you.
First responders- you help keep us safe all year long; let us help you keep your valuable possessions safe too. Click here to enter to win one of THREE Liberty Safes filled with 5.11 Gear courtesy of California Casualty!
DISCLAIMER: Contest terms and conditions apply, see page for details.
This article is furnished by California Casualty, providing auto and home insurance to educators, law enforcement officers, firefighters, and nurses. Get a quote at 1.866.704.8614 or www.calcas.com.

by California Casualty | Homeowners Insurance Info |
Personal Property, also referred to as “contents coverage,” is the term insurance companies use to collectively define the things you own inside your home. Imagine picking up your house, turning it over, and giving it a good shake. What would fall out? Furniture, electronics, clothing? The possessions that “make your house a home” are considered your personal property.
Should something insurance-related (like damage or theft from a covered peril) happen to your home, you’d likely have many personal property items to replace. Both homeowners and renters insurance policies typically include Personal Property Coverage, but in order to for your insurance coverage to help replace your items, you need to know how much personal property coverage you really need. That’s when a home inventory comes in handy.
Most people know a good ballpark for the dollar amount/coverage limit they need to cover the exterior of their home, known as Dwelling Coverage, but they rarely know the value of their personal items inside their home. Having the right amount of coverage to replace these personal items will make your life so much easier if/when you have a covered claim.
Plus, most insurers offer optional scheduled personal property coverage, or rider, for more special and/or expensive items such as jewelry, watches, and furs that have values above your personal property coverage limits.
Here are some things to consider when it comes to protecting your belongings.
-
- For homeowners policies, personal property coverage is usually a percentage (ranging from 20-50%) of your homeowners’ Coverage A (Dwelling Coverage) on your policy. However, you can purchase more coverage if needed.
- Renters are able to choose their personal property amount for their policies.
- There are two types of personal property coverage: replacement cost and actual cash value.
- An actual cash value policy factors in depreciation (use and age) to provide reimbursement based on the current value of an item, not what it would cost to replace it.
- A replacement cost value policy typically pays the dollar amount it takes to replace your item following a covered claim. Replacement cost value usually has a slightly higher premium cost than actual cash value, and some insurance companies will give you the option to choose replacement cost value if you’re willing to pay a little more premium.
- It’s also important to know that personal property coverage usually has certain limits on what it will pay to replace an item or category of items. Be sure that the coverage (or amount of anticipated compensation in the event of a covered claim) you actually need is within these limits or you may want to add coverage to better protect your cherished possessions.
- There are exclusions to personal property coverage! Items in your home like pets, property of roommates, boarders, or tenants (for homeowner’s policies), and vehicles are not covered.
- Sometimes if the event that caused the damage (peril) is not “named” on the policy, there is no coverage for that cause of loss.
It’s a good idea to take inventory of your personal property, complete with pictures and the purchase price of each item. As an easy reminder, and to stay on top of all of your new possessions, mark your calendar to do your home inventory every six months- once in the middle of the year and again at the end of the year. In the event of a loss, your up-to-date home inventory will help simplify the process of filing a claim.
A conversation with an insurance advisor will be helpful as you consider your coverage limits. Knowing what you own and understanding how your personal property coverage works can give you more confidence as you navigate through the quoting process and comfort in the event of a loss.
DISCLAIMER: These general industry descriptions are not representative of your individual insurance policy. Please be sure to review your policy at least once yearly with your insurance representative and mention any home improvements to ensure your coverage is complete.
This article is furnished by California Casualty, providing auto and home insurance to educators, law enforcement officers, firefighters, and nurses. Get a quote at 1.866.704.8614 or www.calcas.com.

by California Casualty | Homeowners Insurance Info |
One of the best parts about renting? Almost all apartments these days have balconies! Don’t pass up the chance to jazz it up this spring, as the weather warms up, you’ll be glad you did. Even balconies that seem cramped or uninspiring can transform into sanctuaries of serenity with a few easy pieces.
Looking for the perfect balcony inspo? You’ve come to the right place. These 15 easy and cheap ideas are guaranteed to upgrade your space.
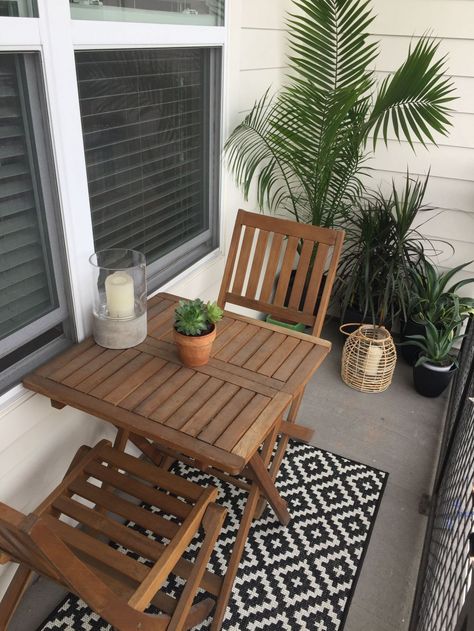
1. Start with the basics: a table and chairs. A small dining set is perfect for morning coffee, intimate dinners, cocktail hour, and quick lunchtime breaks. Go for something small and space-efficient or even furniture that can be folded up and easily leaned or stored.
2. Showcase your view. Situate your seating or furniture so as to make the most of your view.
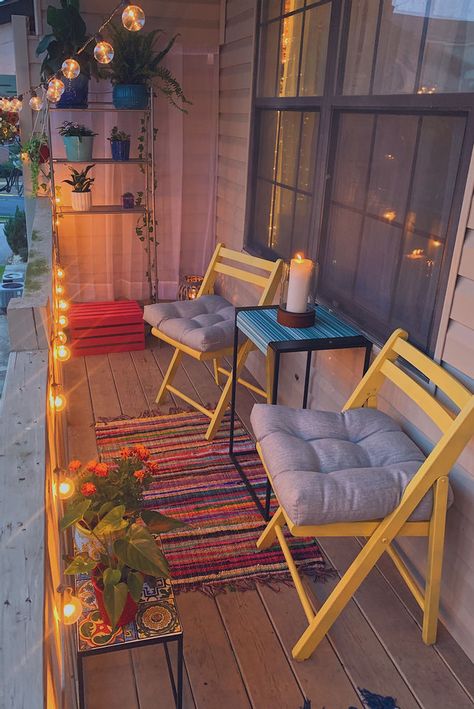
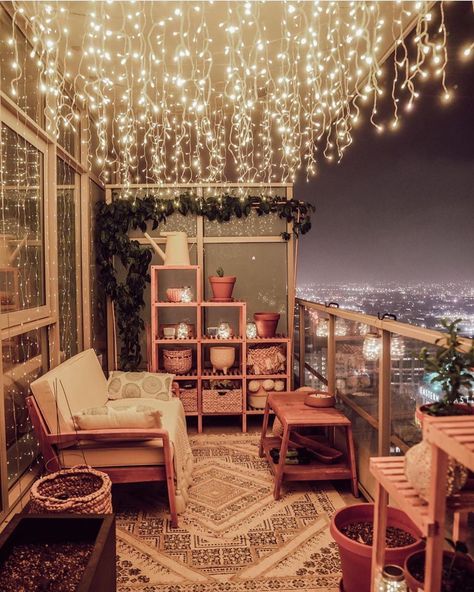
3. Use color. Color is a quick way to add personality and mood to your area. Do you want it to feel festive? Think oranges, reds, and other bright colors (look up “complementary colors” or check out Pinterest for palettes). Or would you rather make the mood quiet and relaxing? — then go with subtler, neutral, or more muted tones. You can always mix it up too, going for a muted palette but with bright accents. Get creative and make it your own!
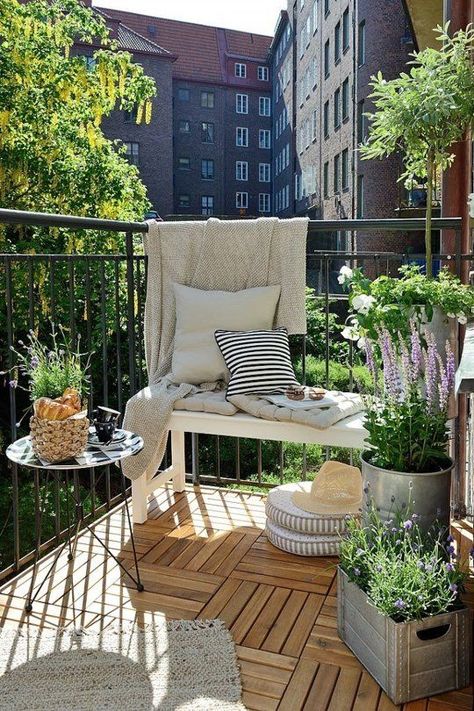
4. Create a garden. A balcony filled with planters, climbing vines and other foliage creates a lush garden scene. You’ve got a million choices to choose from. Want plants that are fragrant, such as flowering citrus? Or ones that attract hummingbirds and pollinators? Adding herbs (cooking or decorative) will also add some lovely scents. Make sure all pots have saucers to prevent water damage.

5. Add flowers for instant color appeal. Flowers and blooming plants add a sunny vibe to any balcony. Trailing blooms (think Tuscan verandas) add an extra touch of luxury.
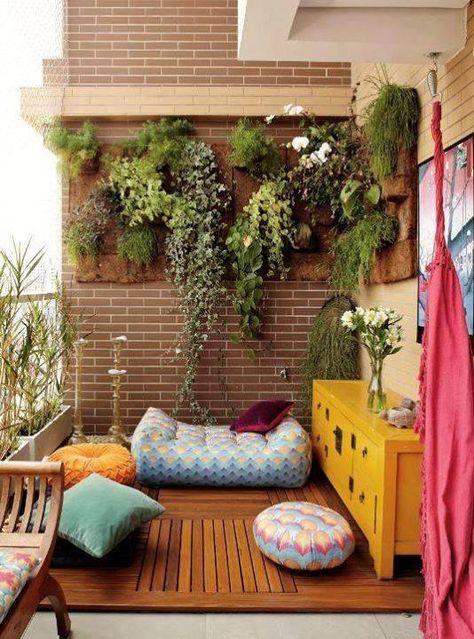
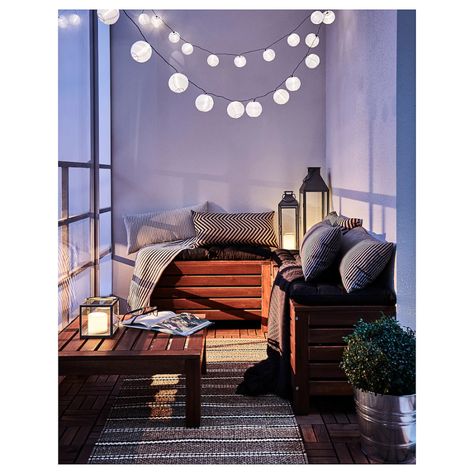
6. Check out floor pillows. If you’re on a tight budget or don’t intend to stay in your rental long, you can still dress up your outside digs. Instead of investing in furniture, look into floor pillows – usually inflatable and outdoor-friendly, these will let you enjoy your place for as long as you’re there.
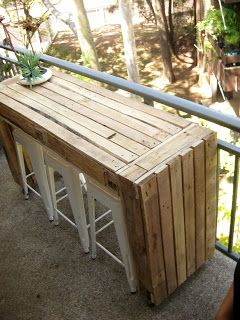
7. A place to park your drink. Remember to add little side tables or even stools to hold your book, drink, sunglasses, phone, or anything else you’ll want to set down while relaxing outside.
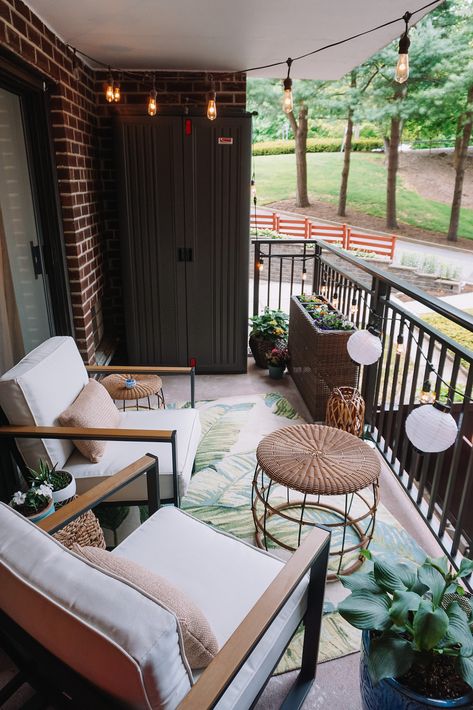
8. Throw down a rug. A patterned rug will open up the space visually and add a decorative dimension. Check out indoor/outdoor options.
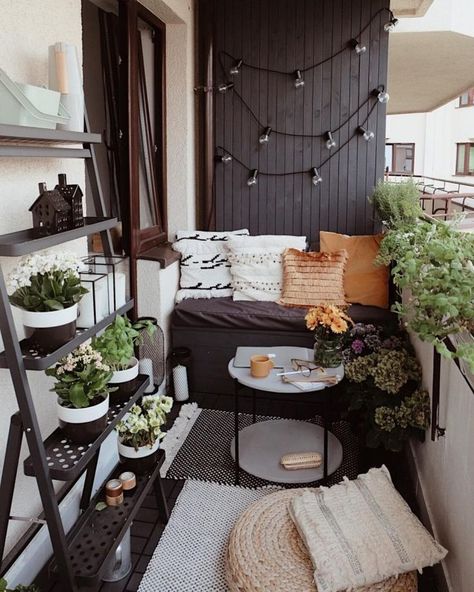
9. Make an accent wall. Painting or hanging a decorative piece on the outdoor exterior walls will add a sophisticated design element. This could be an art-type piece, lights, or even a “living wall” add-on of ferns or other plants.
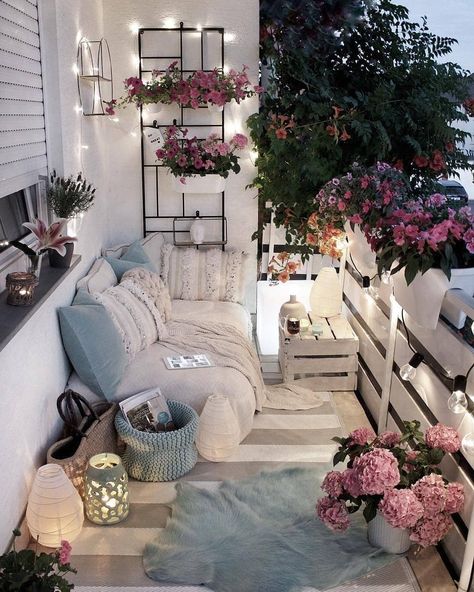
10. Add lighting. Outdoor lights will immediately up-level your balcony and give it evening ambiance. Options include strung lights (for that fairy light effect), LED candles in lanterns, and hanging or standing lights.
11. Consider bench seating. Bench seating is a bit more of a commitment than moveable chairs. It usually saves space and sometimes doubles as a storage element.
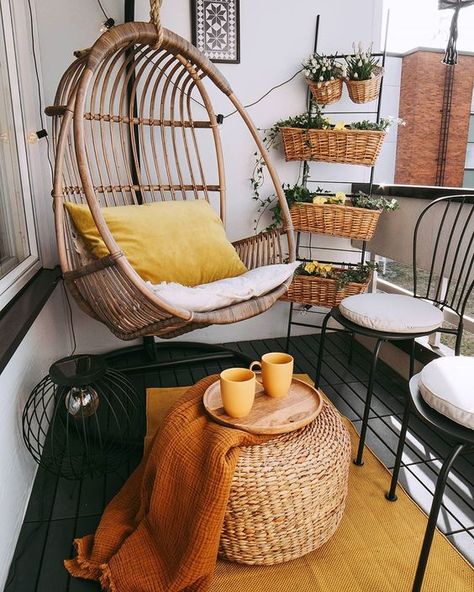
12. Hang a swing or hammock. Lazy swing-time isn’t just for vacation. If you have a lot of space, consider a hammock or swinging bench. This may even nudge you to do more of that self-care relaxing that we all know is so important!
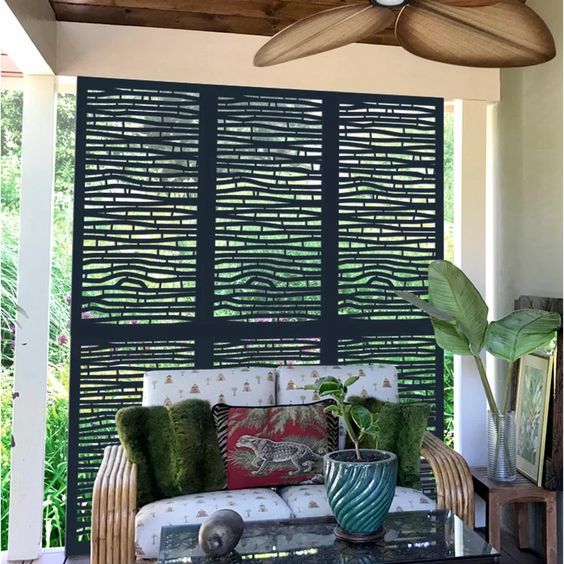
13. Create privacy. Using a room divider or a row of tall bamboo can create a nice illusion of privacy if your balcony directly abuts another.
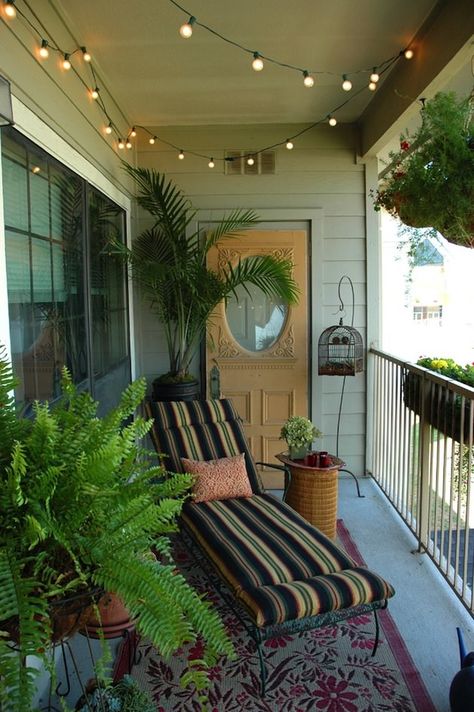
14. Go full recline mode. If space allows, think of getting a lounge chair. Perfect for curling up with a book, working on your laptop, or soaking up the sun, you can make it even comfier with outdoor pillows.
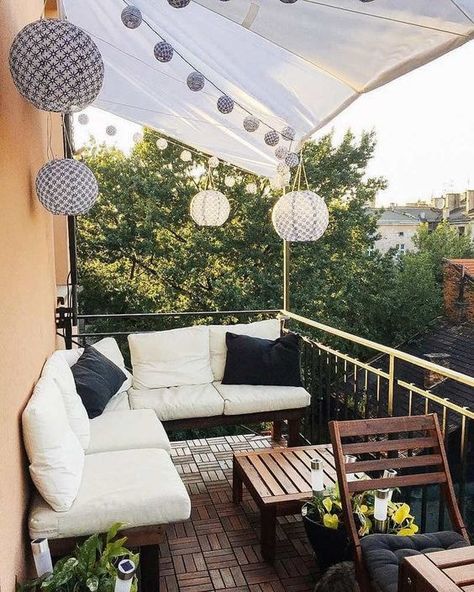
15. Throw shade. If your balcony gets a ton of light (maybe sometimes too much?), look at shading options. This could mean a standing umbrella, shade sail, or a more involved retractable awning.
Before you start on your balcony transformation project, be sure to check in with your roommate and your landlord about anything that might affect your plans. Then design around those and create your own little outdoor oasis – as spring rolls into summer and the warm weather beckons you outside, you’ll be so glad you did!
For more ideas to transform your balcony or outdoor space check out our Pinterest Board “Apartment Balcony Inspiration“
Don’t forget to give us a follow at California Casualty to stay up to date on every fun balcony inspiration we discover! Scan our Pincode with your Pinterest camera to follow:

This article is furnished by California Casualty, providing auto and home insurance to educators, law enforcement officers, firefighters, and nurses. California Casualty does not own any of the photos in this post, all are sources by to their original owners. Get a quote at 1.866.704.8614 or www.calcas.com.
by California Casualty | Calcas Connection, Good to Know, Homeowners Insurance Info |
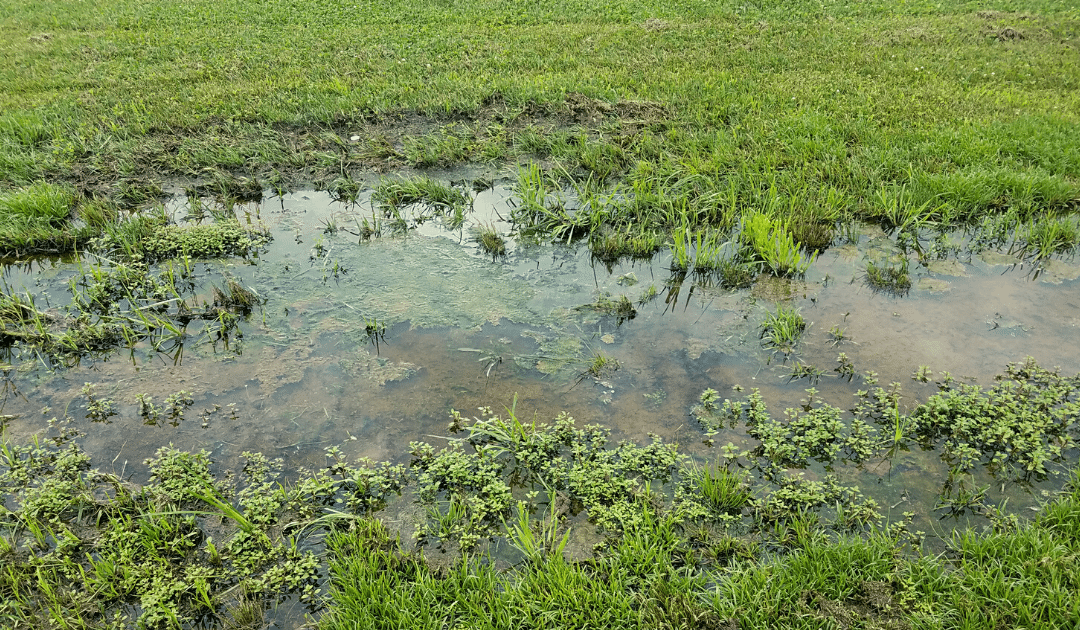
Spring is here! And so are spring storms, but spring showers don’t just bring flowers, they can also bring more water than what your yard can hold. And this standing water around your house can cause water damage to your home- costing you more than you think.
By definition, standing water is a body of water that does not move or sink into the ground. It can be caused by a number of factors: heavy rain, over-watering, poorly draining soil, improper grading, incorrect landscaping, low areas in your yard, and even water line leaks or bursts.
If you have standing water in your yard for multiple days, it can cause serious damage to your home. Not only will it be an eyesore that can ruin your grass and draw unwanted bugs, but stagnant water on the side of your home can also seep into small cracks or pores in your home’s foundation and get into your crawl space or basement, which can lead to water damage & more.
Here’s why you should address the standing water near your home now, and how you can prevent it from happening in the future.
Standing Water Can…
Ruin your basement. Water can cause cracks in your home’s foundation. This is how water enters your basement or your crawl space. Once inside it can create a musty odor and add dampness that will completely ruin flooring, drywall, furniture, electronics, etc.
Produce mold & mildew. High levels of condensation and humidity inside of your basement or crawl space create an environment for mold and mildew to thrive. This could not only affect your home, but it could also cause major health issues for you and your family.
Breakdown your home’s foundation. Over time, standing water that has made its way into your cement foundation will start to cause shifting and bowing of your structure. This is the beginning of the breakdown of your home’s foundation. If not taken care of- doors will no longer close, floorboards will start to squeak, steel beams may have to be inserted, and it could even lead to structural collapse.
Cost you thousands of dollars in repairs. A homeowner spends over $3,000 on average to repair damages to their home and property caused by water. Preventive maintenance and early detection are key to helping you save your home and your wallet.
But that’s not all, standing water can also draw unwanted pests: mosquitoes, roaches, termites, ants, silverfish, and other pests thrive in moist environments. They will seek damp areas and make your home their home if you don’t address the issue quickly.
Here’s how you can prevent standing water from getting into your home this spring.
How to Prevent Standing Water
1. Check for Proper Roof Drainage
Make sure every drop of rain will drain off of your roof correctly- starting at your gutters. Make sure they are free of leaves and sticks and that you have an attached downspout that is also clear of debris. It is also important to make sure your downspout has a downspout extension that will move water away from the foundation of your home.
2. Monitor Your Sprinkler Usage
If you see standing water, make sure to check that your sprinklers are not overwatering your lawn. First, check to make sure the sprinkler heads are functioning properly and not broken. If there is no issue, you will likely just need to reset your sprinklers to run at a less-frequent timespan. After resetting, if you are still seeing patches of barren or muddy lawn, you may have a leaky valve. Valves are responsible for distributing the water throughout the entire system, and if damaged they will need to be replaced right away.
3. Make Sure Your Yard is Correctly Graded
Grading, also referred to as lawn leveling, is the process of leveling your lawn to allow for the proper drainage of water. If you have water that is pooling around your foundation or your house is sitting on a low level, you may need to look into re-leveling your yard. Grading involves the moving of topsoil onto the yard. You will then even out the low spots with the soil and form a downward slope (around 2%) from your home’s foundation. Leveling is an intricate process, and if your yard needs re-leveled, you may need to hire a professional.
4. Aerate Your Lawn
Aerating your yard means to perforate the soil with holes (4 – 6 inches deep) to allow water, air, and other nutrients to better absorb into the soil. Not only will aeration lead to a greener, healthier lawn, but it will also alleviate soil compaction and allow water to better absorb during rainstorms. The best time to aerate your lawn is during spring and fall.
5. Mind Your Landscaping
Improper landscaping can cause water to sit at the base of your home’s foundation and ultimately make it into your home. When landscaping, avoid making any changes that will block drains or downspouts. Make sure that all of your landscaping slopes downward to create runoff and that all downspout extensions or drainage systems extend beyond your planting beds leading the water away and far from your foundation.
6. Install a Drainage System
If you are constantly struggling with standing water in an area of your yard, it may be best to look into installing a yard drain. Yard drains act like shower drains. They prevent flooding and move the water away from your yard through hidden pipes to a dry well. The dry well will then collect the water underground and slowly percolate to the soil around it
Standing water is a serious, yet largely overlooked, issue that can have serious consequences. If water has been in your yard for multiple days and won’t drain, don’t neglect it. Look for the cause of your problem or reach out to a professional. Acting today will save you time, money, and headache tomorrow.
This article is furnished by California Casualty, providing auto and home insurance to educators, law enforcement officers, firefighters, and nurses. Get a quote at 1.866.704.8614 or www.calcas.com.

by California Casualty | Homeowners Insurance Info |
As the weather warms up, seasonal allergies can collide with everyday household allergens to create the perfect storm of misery for allergy sufferers. If you or your family members are allergy-prone, there are steps you can take to minimize allergens throughout your home and throughout pollen season.
These 11 tips can help vastly improve your home’s indoor air quality, helping prevent asthma flare-ups, new cases of mold allergies, and the need for bulk purchases of tissues and antihistamines!
- Clean well, clean often. A clean house is a healthier house. Regular, thorough cleaning of all surfaces and furnishings will keep allergen counts down, prevent mold and decrease pet dander. Besides the regular surfaces, keep in mind too that clearing out clutter is a big factor in controlling dust. One more reason to get rid of extra stuff!
- Vacuum regularly. Consistent vacuuming is a powerful weapon in removing allergens, toxins, mold spores, mites, and other offenders. Depending on your household’s activity levels and allergy sensitivity, you may need to vacuum as often as every other day or so. Use a HEPA filter in your vacuum and change it often.
- Control dust mites. These critters thrive in bedding and linens that aren’t cleaned often enough. Keep them in check by washing bedding, uncovered pillows, and kids’ stuffed toys in hot water each week, and dry with high heat. Zippered allergen-resistant covers for mattresses, pillows, and box springs are especially effective against allergy attacks. Avoiding heavy drapes, wall-to-wall carpet and overstuffed fabric furniture also control mites, as does humidity-regulating air-conditioning.
- Limit indoor greenery. House plants add beauty, but many times they can harbor mold. Try to cull out all but your favorites, and for the plants you do keep, lay down aquarium gravel on top of the soil to discourage mold growth.
- Get an air filter or purifier. Air cleaning devices can significantly improve indoor air quality (if you’re on the west coast, these are a lifesaver during wildfire season). Go for high-quality air filters such as HEPA or certified asthma/allergy ones. Choose from stand-alone filters or those designed to be installed in your central air system – or better yet, both!
- Stay ahead of pet dander. Keeping up with a vacuuming and cleaning schedule will help limit dander. You can also cover vents with material such as cheesecloth to catch circulating dander. Regularly wash and dry pet beds and toys. Bathe pets weekly and wear a mask when grooming them. And finally, if you’re able to resist the puppy-dog eyes, try not to let pets sleep in bedrooms.
- Keep pollen out. Keep doors and windows closed and use the air conditioning to keep pollen, dust, and other toxins outside. Change air filters frequently, especially during pollen season.
- Prevent mold. Damp areas breed mold spores, which then travel throughout your home. Reduce moisture in the bathroom by running a fan during and after showers, minimizing shower time, and making sure wet clothes, towels, and bathing suits are hung or dried. To further limit the spread of mold, use dehumidifiers and/or air conditioning, use humidity monitors if needed, limit the number of houseplants and fix all leaks.
- Control pests. Prevent cockroaches and mice with traps or hire a professional exterminator. Repel them in the first place by always putting garbage, food waste, and recycling into containers with an insect-proof lid and emptying bins daily. Keep the kitchen free of crumbs and food scraps. Store pet food in sealed containers. Seal cracks and other possible pest entryways.
- Dehumidify. Use a dehumidifier in especially damp areas such as the basement.
- Adopt a no-smoking policy. Do not allow smoking inside your home. Besides a range of serious health effects, tobacco smoke can also cause asthma – not just for the smoker but for anyone exposed to secondhand smoke.
The bad news about allergies? They will always be around us. The good news? We can do something about them! A thorough spring cleaning can get you on the right track (not sure where to start? – check out our tips here!). After that, consistently following the 11 steps above will help reduce allergens and improve your indoor air quality all year round – which will in turn keep you and your family healthier and safer for years to come.
This article is furnished by California Casualty, providing auto and home insurance to educators, law enforcement officers, firefighters, and nurses. Get a quote at 1.866.704.8614 or www.calcas.com.
