
by California Casualty | Homeowners Insurance Info |
Like our real children, there isn’t much we wouldn’t do for our fur babies. They give us so much love, and they trust us to keep them fed, sheltered, and safe. But did you know, you might be putting them in danger without even knowing it?
Some common household items can be toxic to pets. Here’s what you need to know to pet-proof your home.
In the Kitchen
Many of the foods we enjoy are not good for our pets. In fact, these foods can make them very ill. The things we throw into our trash are potential hazards, too.
Foods to avoid include coffee grounds, tea, chocolate, avocado, unbaked dough, grapes/raisins, salt, macadamia nuts, onions, garlic, and anything with the artificial sweetener xylitol. Also, avoid alcohol. For a more detailed list, click here.
Watch out for choking hazards. Fruit pits are common hazards. Plastic bags can choke or suffocate your fur baby. Rubber bands and string can also be problematic.
Never give your dog cooked bones, such as from your family dinner. Cooked bones are brittle and can splinter in a pet’s mouth. Raw bones generally are safer. Avoid any bone that your dog could easily swallow whole. Also, stay away from pork bones which easily crack, and rib bones that can get stuck in your fur baby’s throat.
Steps to take:
-
- Keep a list of harmful foods in your kitchen for easy reference.
- Check ingredients before you give human food to your pet.
- Supervise your pet whenever he/she is eating.
- Secure your kitchen garbage so that pets cannot access it. Put it behind a closed cabinet door or buy locks for your trash cans.
In the Bathroom
From the medicine cabinet to the shower, bathrooms are filled with hazards for our furry friends. Remember that cats can jump up to high places, so store your hazardous items accordingly.
Medicines that are especially dangerous to our fur babies include non-steroidal anti-inflammatory drugs such as aspirin, ibuprofen, and naproxen. Acetaminophen is also poisonous. So are cold medicines, antihistamines, antidepressants, and prescription drugs.
Soaps and toothpaste can cause stomach upset if ingested. Commercial cleaning products, if stored in your bathroom, are a danger. Pets also like to drink from the toilet. If you’ve added a toilet cleaner to the water, that could make them sick.
Steps to take:
-
- Store any hazardous materials behind closed cabinets and out of reach.
- Use soap pumps rather than bars of soap.
- Keep the toilet lid closed.
- You can make your own natural cleaning solution of baking soda and vinegar. Mix one-part baking soda to two-parts vinegar (e.g. ¼ cup baking soda and ½ cup vinegar). Pour the mixture into a spray bottle.
In the Living Room or Den
We spend a lot of time relaxing in our living rooms and dens, and don’t give a second thought to the items around us that could be dangerous. From plants to electric cords, there are plenty of hazards.
Plants are a top hazard, as many can be poisonous to pets if eaten. These include lilies, foxgloves, azaleas, rhododendrons, tulips, chrysanthemums, rhubarb leaves, shamrocks, fungi, autumn crocuses, aloe vera, and poinsettias. For a more detailed list, click here.
Scented potpourri and tobacco products also are toxic to pets. Surprisingly, pennies minted after 1982 are as well, as they contain zinc.
Keep your fur babies away from small items like buttons and jewelry which may be swallowed. Be extra careful around objects with open flames like candles and fireplaces. Teething puppies and curious kittens may go for electric cords, too.
Steps to take:
-
- Remove any toxic plants.
- Do a quick check daily for small items and other hazards.
- Choose flameless candles to prevent pet burns. Secure your fireplace with a mesh screen to keep pets away.
- Use furniture to block access to electric cords, or purchase pet-friendly cord protectors. You can also try an anti-chew spray available at most pet stores, or make your own from two parts apple cider vinegar to one-part white vinegar.
In the Bedroom
Bedrooms contain some of the same hazards mentioned earlier, but in addition, often have windows and sometimes balconies. Even though your cat may climb to the highest spot in your home, and jump down seemingly without effort, it is dangerous to let your cat near an open window or on the balcony. Falls from that height can severely injure and even kill them.
People also sometimes store their winter wool clothes in mothballs. They contain a high concentration of insect repellant and can be toxic if ingested. Even the fumes can affect your pets.
Steps to take:
-
- Keep your windows closed when possible and definitely if you are not around to supervise your pet.
- If you open a window, see if you can do so from the top only. Make sure the window screen is secure, and cannot be pushed out easily.
- Do not allow cats on balconies or to sun themselves on the window sill of an open window. If startled, the cat could lose his/her balance.
- Do not store your clothes in mothballs, or if you do, keep them up in an attic or a place that is inaccessible to pets.
In the Laundry Room
Those fabric softener sheets that you toss into the dryer to reduce static cling are a danger to your fur baby. They are infused with chemicals that can make them sick. Commercial laundry soap is also toxic. Those pods that attract kids also interest pets. Finally, washers and dryers are favorite hiding places for kitties.
Steps to take:
-
- Choose brands of detergent and fabric softener sheets that use plant-based ingredients and are safe for pets. Avoid pods.
- Store all supplies behind a cabinet and/or out of reach of curious pets.
- Always check your washer and dryer before you use it.
- If you have a door to the laundry room, close it so that pets don’t get in while you’re not there.
In the Garage
We store a lot in our garage, and many of the items are not good for pets. These include antifreeze, alkaline batteries, herbicides, insecticides, wood glue and adhesives, and paint. In addition, warm cars are favorite places for cats to nap on a cold winter’s night.
Steps to take:
-
- Store any chemicals and hazardous materials out of reach of your pet.
- When possible, purchase pet-safe alternatives such as de-icing salt that won’t harm their paws.
- Check for animals in and around your car before you drive it. Give the hood of your car a couple of hard knocks or honk your horn before you start your engine.
- Never keep your pet in the garage, even safely in a crate. Garages have dangerous temperatures (low and high) as well as fumes and other hazards that could affect their health.
Finally, hazards also appear during the holidays. Check out these articles for Christmas and winter holiday safety, Halloween safety, and fireworks safety for your fur babies.
If you suspect your pet came in contact with a household danger, call your vet immediately. You may also reach the ASPCA Animal Poison Control Center at 1-888-426-4435.
And for more tips on how to be a responsible pet owner, click here.
This article is furnished by California Casualty, providing auto and home insurance to educators, law enforcement officers, firefighters, and nurses. Get a quote at 1.866.704.8614 or www.calcas.com.
by California Casualty | Auto Insurance Info, Homeowners Insurance Info |
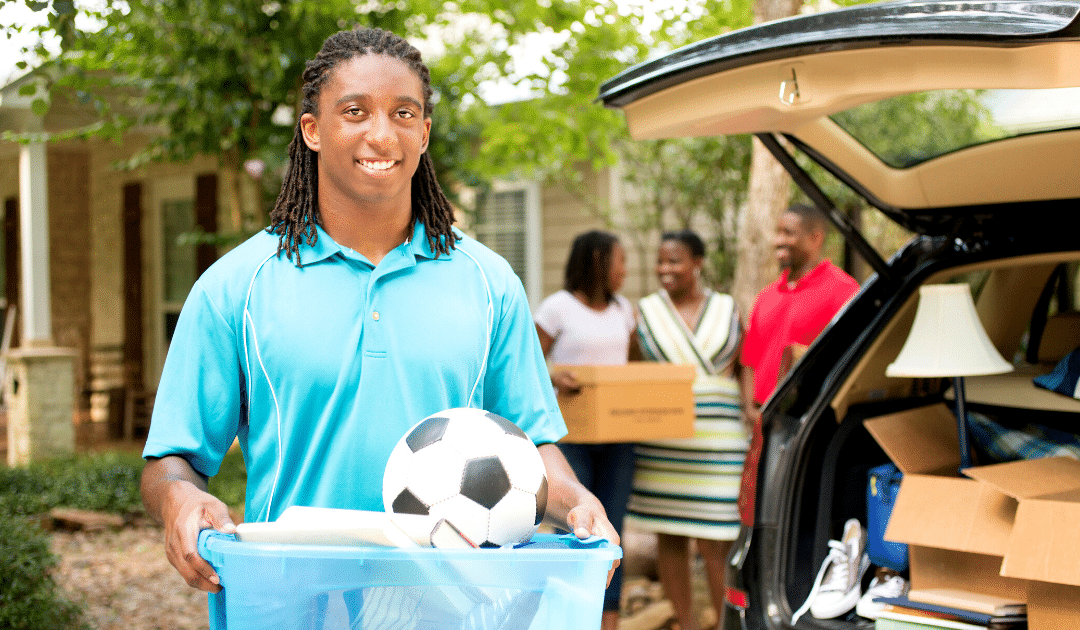
Your student is headed to college out-of-state – or across the state. It’s a milestone, and you’re helping them set up all of the necessary items associated with that big move, furniture, textbooks, food, cleaning supplies, etc.
In the midst of all of your preparation, don’t forget one of the most important items – insurance. Whether they stay on your policy or decide to get one of their own, you want to make sure your son or daughter is fully covered in terms of car and home/renters insurance.
Auto Insurance
Here are some common auto insurance questions for parents of college students.
My student won’t have a car away at school; do I still need to keep them insured?
Some students drive thousands of miles away so they can have their car with them, but others would rather keep their cars at home, and opt for flying in and using public transportation when they arrive. To avoid overcrowding, some schools even set limits on who can have cars on campus.
If your son or daughter will not have a car at college, you should still keep your student on your auto policy. This will avoid a lapse in coverage, and he/she may need to drive in an emergency and also will be coming home for breaks. (If your child has a car that will be kept at home and not driven while he/she is at school, ask your insurance company whether you qualify for a discounted rate.)
Do I need to change my insurance coverage to the state where the college is located?
Since college is not considered a permanent address, your student can keep his state driver’s license and the car may be registered and insured in your home state. However, you will want to check the insurance requirements where your student is attending college—and make sure that your state’s policy meets their minimum standards in the event of an accident. Either way, make sure that you notify the insurance company that the car will be kept in a different state so that they may update their records.
Should my student get his/her own auto policy?
As long as your son or daughter is still living with you, and you own the car he/she is driving, there is no need to get them their own car insurance, unless you would like to. There also is no specific age where you have to make that transition. A common time to switch to their own policy is when young adults move from the family home to their own first apartment.
If your student is living off-campus, and maintaining that address year-round, you may consider a separate auto policy.
Are there any discounts that we qualify for?
Your student may qualify for a good student driver discount, available from many insurance companies with proof of grades. Ask your insurance agent for other discounts that may be available.
Don’t forget! If your student is enrolled in school full time, was a resident of your household before moving out to attend school, and is a relative 24 years or younger or 21 or younger and in your care, your California Casualty homeowner’s policy offers the personal property protection they need as well.
Whether your child stays in a dorm on campus or resides in a leased residence off-campus, 10% of your homeowner’s personal property coverage (coverage c) extends to their possessions while they are away. If you believe they need more than that 10% coverage – for expensive musical instruments or computer equipment – then consider adding a scheduled personal property endorsement to your policy. With computers, tablets, smartphones, gaming systems, furniture and clothes, you would be spending thousands of dollars to replace your student’s possessions without this layer of protection.
You can’t be with them at college, but you can still protect them—with the right insurance.
This article is furnished by California Casualty, providing auto and home insurance to educators, law enforcement officers, firefighters, and nurses. Get a quote at 1.866.704.8614 or www.calcas.com.
by California Casualty | Homeowners Insurance Info |
Summer is the perfect time for outdoor adventures. Whether you like hiking, biking, swimming or camping, there are plenty of activities to enjoy and places to explore.
While we have fun, it’s also important to remember that sometimes our outdoor excursions come with unexpected risks. From weather to wildlife encounters, make sure you and your family take the right precautions to stay safe. Follow these tips as you enjoy the great outdoors this summer.
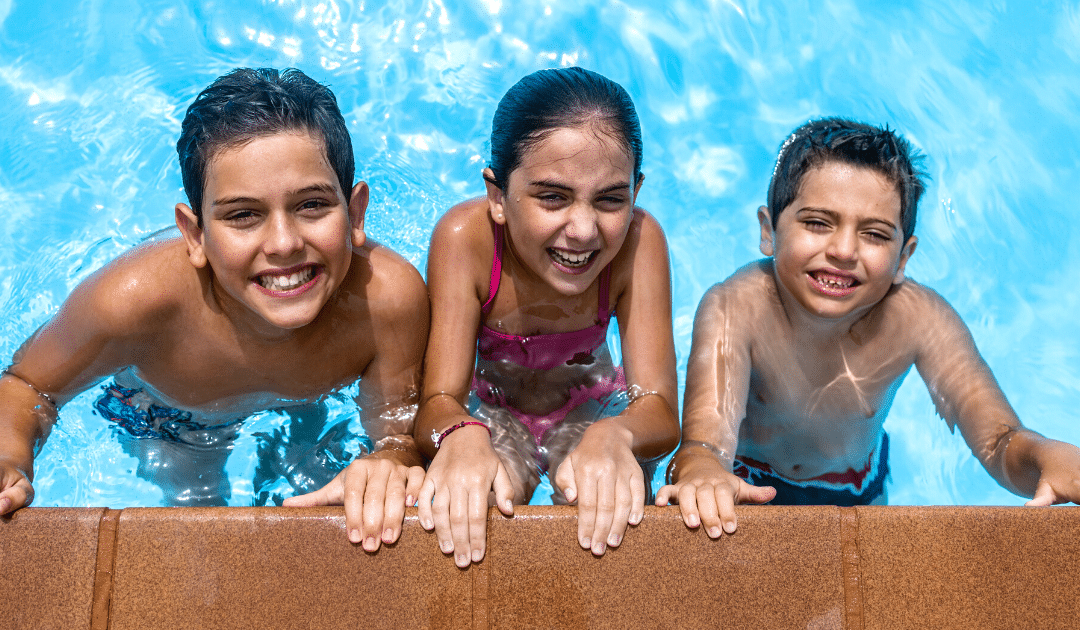
Tips for Water Safety
In the U.S., 11 people die from drowning each day, according to the CDC. Children ages 1-4 are at the greatest risk, but drowning is also the second leading cause of accidental death among children ages 1-14.
These tragedies can be easily prevented with simple pool safety and water safety measures.
-
- Never swim alone. If possible, swim in the presence of a lifeguard.
- Teach children to swim. Even toddlers can learn water survival skills, according to the American Academy of Pediatrics. But remember that swim lessons do not guarantee your child can protect himself/herself from drowning.
- Designate a water watcher whenever your child is in the water. Avoid distractions, such as from phones. Drowning can happen in an instant.
- Don’t let children play around pool drains or suction fittings.
- Learn CPR in case you need it.
- Wear lifejackets if on a boat.
- Remember that swimming in a pool is different from swimming in a lake or in the ocean. There are currents and undertows.
- Don’t drink alcohol while swimming.
- Pool Safely is a national public education campaign. Take the Pool Safely Pledge and get a free downloadable safety kit.
Tips for Hiking Safety
Whether it’s a national park or a local trail, hiking is a popular way to connect with nature. Making the right preparations will help ensure that you can enjoy the scenery without worrying about injury.
-
- Know exactly where you are going. Consult with experts who have been there on what you need.
- Check the weather forecast and then recheck it. Bring any additional supplies you will need in case the weather turns.
- Do not hike alone. Travel with someone else, and if you’re going to a remote area, try to travel with a small group
- Know the nearest ranger station and the number in case you need help.
- Do not go into an area marked closed.
- Leave a copy of your itinerary with a trusted friend or family member. Include details such as your destination, the timeframe of arrival and departure, phone numbers of people you are with, specific trails and campgrounds, and even the car you will be driving. This will help in case you are lost.
- Pack the essentials. These include a first aid kit, compass, flashlight, matches, knife, food, water, toilet paper, duct tape, trash bag, whistle, bug spray, sunscreen, and a solar charging power source.
- Stay hydrated and know the signs of heat exhaustion. Infants and young children, as well as people over age 65, are at the greatest risk.
- If taking your dog on a hike, make sure he/she is protected against fleas and ticks. Bring water for your dog and take care that he/she does not get overheated.
Tips for Camping Safety
Being close to nature means that many of the hiking safety tips, above, will apply. In addition, you’ll want to take these added precautions.
-
- Arrive early so you can make camp before dark. Give yourself two hours of daylight to set up camp. Learn your campsite in the daylight so you have an idea of where things are before dark.
- Don’t pitch your tent near the tallest trees in case of a lightning storm.
- Build campfires in a safe area, away from trees, bushes, and other flammable objects. Beware of post-fire embers.
- Do not leave food or garbage in the open.
- Never approach or feed wildlife.
- Know that If animals feel cornered, they could bite, scratch or attack. Wild animals may transmit rabies.
- Practice good hygiene. Wash hands before handling food.
Tips for Bicycle Safety
Biking is great exercise and another fun family activity. Hit the road safely with these tips.
-
- Many states require bicycle helmets for children under 18. But helmets are good protection for everyone.
- Dress in bright colors so you will be seen.
- Wear sunglasses to protect your eyes and sunscreen to protect your body.
- Never ride with headphones or earpieces. You want to be able to hear what’s going on around you.
- Choose routes that have wide roads or bike lanes. Observe all traffic laws and be aware of drivers.
- Bring a patch kit in case you need to repair a tire or tube.
- Stay hydrated. Bring water with you.
- Carry some emergency cash in case you need it.
Whether you are traveling by car, plane, or RV always remember to travel safe and plan ahead of your adventure.
This article is furnished by California Casualty, providing auto and home insurance to educators, law enforcement officers, firefighters, and nurses. Get a quote at 1.866.704.8614 or www.calcas.com.
by California Casualty | Homeowners Insurance Info |
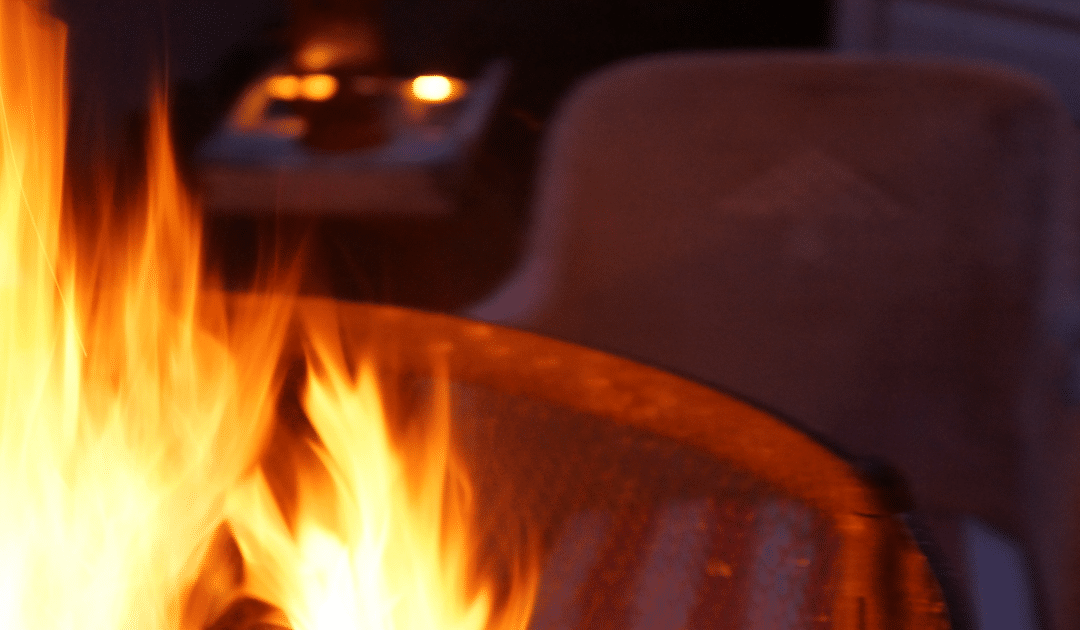
Planning to fire up the grill or gather around the fire pit this summer? While these fun activities are great ways to spend the season with your family and friends, they also come with a risk of fire-related injuries.
If you’re hosting an outdoor gathering or handling potentially hazardous materials like fireworks, it’s important that you take the proper fire safety precautions. Here’s what you need to know to stay safe and prevent an injury or accident this summer.
1. Fire Pits
There’s nothing better than taking advantage of your fire pit on a cooler summer evening. But if you haven’t set up for safety, there could be dangerous consequences.
-
- Position your fire pit so it is at least 10 feet away from your house and anything that can catch fire. This includes trees and bushes.
- Avoid burning treated wood, wet wood, or anything that gives off a gas or dense smoke.
- Don’t use flammable fluids to start or relight a fire. They can cause an explosion or turn a controlled fire into an uncontrollable one.
- Consider a fire screen to catch stray sparks.
- Have a fire extinguisher on hand and/or a bucket of water.
2. Barbecue Grills
Barbecues are the centerpiece of our summer celebrations. But cooking outdoors comes with its own share of hazards. Propane is used to power some grills. It is a highly flammable substance that can burn if it comes in contact with your skin. Charcoal briquettes also can cause burns and fires if not properly attended. Follow these tips for grilling safely.
For propane grills:
-
- Be careful not to overfill a propane tank.
- Check the connection between the propane tank and the fuel line to make sure there are no leaks. You can do this by making a solution of 50% liquid dish soap and 50% water, and brushing it on the hose connections. If there are leaks, you will see air bubbles when you turn on the propane.
- Store your tank in a safe location, upright and away from a heat source. Do not store a propane tank inside your house.
For charcoal grills:
-
- Use plenty of water to douse hot coals after you’re done cooking. Give them a stir to make sure there are no lit embers.
- Do not put the coal and embers in plastic, paper, or wooden containers after use. They could still be hot enough to start a fire.
3. Campfires
Sitting around the campfire and roasting marshmallows is a highlight of camping. But did you know that campfires can get as hot as 932 degrees Fahrenheit in just 3 hours? Their embers stay hot long after the fire is done—hot enough to burn someone who comes in contact with them eight hours later!
-
- Choose a location for your campfire that is away from dry grass and trees and from your tent.
- Add rocks around the perimeter of your campfire to help contain it.
- Enforce a 3-foot perimeter around fires that is the kid-free zone and pet-free zone.
- Never use gasoline to start a campfire or add it to an open flame.
- Put out your campfire before going to bed. Drench it with water and bury it with sand. That will help prevent the fire from starting again from the embers.
4. Fireworks
Fireworks are fun, festive, and a much-loved part of our patriotic celebrations. Yet fireworks send thousands of Americans to the ER every July. While you can enjoy the public fireworks without too much worry, doing them on your own requires a few additional safety precautions.
-
- Buy fireworks from a reputable seller.
- Store them safely away from children and pets in a locked box in a cool, dry place.
- Carefully read and understand all instructions.
- Avoid alcohol while using fireworks. Not only could it impair you, alcohol is highly flammable.
- Keep onlookers 60 feet away from the place where you’re setting off fireworks.
- Light one at a time. Light the fuse at the tip, not the bottom.
- A barbecue lighter works well to help keep fireworks at arm’s length.
- If a firework does not light, do not attempt to relight it. Wait at least 30 minutes to retrieve any fireworks that did not ignite.
- Never allow children to handle fireworks. Children ages 8 and older may hold sparklers with proper supervision. Sparklers could easily catch a child’s clothing on fire or cause blindness if in contact with a child’s eyes.
5. Lawnmowers
You may not think it, but your lawnmower is a fire risk. Any lawnmower, electric or gas, can catch fire and ignite items around them including your home. Fires may be caused by leaking fuel or fumes from a gas mower. Electric mowers may short circuit, causing a fire. In addition, a hot mower can ignite dry grass that is packed into it.
-
- Start mowing at your house and head away from it. This will reduce the chance that a hot mower is near your home.
- Never add fuel to a hot motor. Wait until it cools down.
- Avoid moving in hot, dry, windy weather, or if you do, wet down the grass first.
- Use a hose to clean out grass from mower blades.
- Make sure the area you’re mowing is clear of rocks. Even tiny rocks can cause a spark when it strikes the mower’s blades at high speed.
- Follow your mower’s recommended maintenance plan to ensure everything is in good working order.
6. Recreational Vehicles
Traveling in an RV is a dream. Having a fire in an RV is a nightmare. Powered by propane, a hazardous substance, and electric generators, which produce exhaust gases, RVs can be a fire risk.
-
- Make sure you have installed a smoke detector, carbon monoxide detector, and a propane leak alarm.
- Check the RV’s mechanical and electrical systems to ensure they’re in good working order.
- Look for frayed electric cords on any appliances in the RV.
- When cooking, never leave the stove unattended.
- Store clothes and flammable objects away from the cooking area.
- Store the propane tank outside, but not in the back or you could be at risk in the event of a rear-end collision.
- Let the generator cool down before refueling.
- Add RV coverage to your insurance policy.
7. HVAC (Heating, Ventilation, and Air Conditioning) Systems
During the summer, we run our air conditioning for long periods of time. Hot temperatures can strain air conditioning units. If your system is dirty, it could short circuit, causing a fire to start.
-
- Have your HVAC system cleaned at least once a year.
- Replace vents and exhaust fans as needed.
- Check your smoke detectors to make sure that they are in working order so they may warn you of a fire.
This article is furnished by California Casualty, providing auto and home insurance to educators, law enforcement officers, firefighters, and nurses. Get a quote at 1.866.704.8614 or www.calcas.com.
by California Casualty | Homeowners Insurance Info |
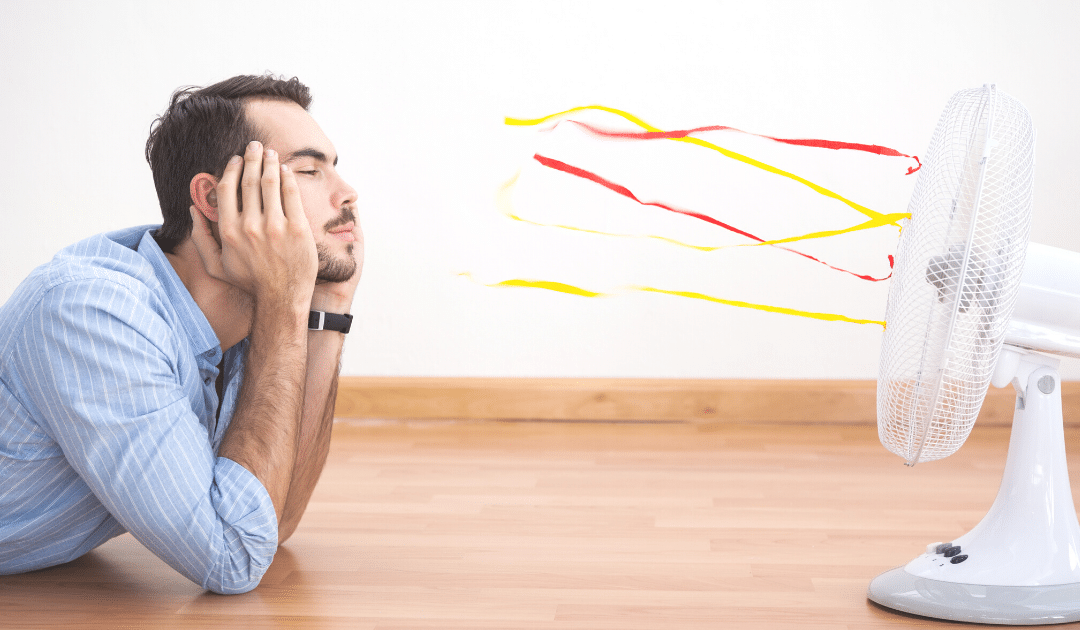
Summer is here and (unfortunately for most) so is the heat and humidity. But humidity in your home isn’t just uncomfortable. Did you know it can also do some serious damage to your house and your health?
Humidity describes the amount of moisture in the air. When the humidity is high, a hot day feels that much hotter. When there’s too much humidity inside your house or apartment, mold and mildew begin to take hold, rotting the wood and creating the ideal environment for dust mites and other allergens. If you’ve ever noticed a musty odor in your home, chances are you are smelling mold and mildew. And if you have asthma or allergies, this can make your symptoms that much worse.
What causes humidity?
Cooking, bathing, washing dishes, and line drying clothes inside can all add moisture to the air inside your home. Leaks in your pipes or cracks around your doors and windows can let in humid air, as can dampness from your home’s crawl space. Even houseplants can create humidity.
How can you tell if your home is too humid?
Look for condensation on windows or wet spots on ceilings or walls. You may notice mildew and mold. You also can measure humidity with a hygrometer, available inexpensively online. The ideal humidity indoors is between 30-50%.
Tips to reduce humidity
The good news is that you can take steps to decrease the humidity in your home—and improve your air quality while reducing your cooling costs. Here’s how.
Tip #1: Running your air conditioner will help with humidity.
-
- Set your air conditioner to “auto” rather than “on.” During the “on” setting, your air conditioner blows air over a wet coil which can create more humidity.
- Make sure your air conditioner is well maintained. Change the filters. Keep drip pans and drain lines clear and clean.
- If your air conditioner is too big for your home, it will have shorter cooling cycles. That won’t be enough to reduce your home’s humidity.
Tip #2: Buy a dehumidifier or consider these DIY alternatives.
-
- Since lower humidity feels cooler, a dehumidifier will allow you to reduce the use of your air conditioner, thus reducing your cooling costs.
- Though not as effective as a dehumidifier, you can try DIY versions:
- A basket or can of charcoal briquettes can absorb humidity in a room. Replace it every 2-3 months.
- Rock salt or kitty litter also absorbs moisture in the air. Take two similarly size buckets. Drill holes in the bottom of one. Stack the drilled bucket inside the other bucket – making sure to leave a gap. You may wish to put an object in between the buckets to create that space. Fill the top-drilled bucket with salt or kitty litter. Then, check it every few days. Water will collect in the bottom bucket. Empty as needed.
Tip #3: Fix leaks and gaps.
-
-
- Fix leaky faucets and pipes so there’s no excess water in your home.
- Put caulk and weatherstripping around doors and windows to keep cool air in and hot, humid air out.
Tip #4: Create airflow.
-
-
- Install vent fans in the kitchen and bathrooms. Keep them on a little longer after showering or cooking. Fans move air around and help with evaporation.
- Make sure there is ventilation in your attic. A lack of airflow can cause condensation, creating mold growth in your home’s structure.
- If you have a sealed, unused fireplace, that can cause condensation. Make sure there is airflow or it could affect your walls.
Tip #5: Limit humidity from under your home.
-
-
- Cover dirt floors in your crawl space with a vapor barrier. This piece of plastic will help contain the humidity below your house.
- Slope the soil away from your foundation so water doesn’t pool underneath your home.
- Keep gutters and downspouts clear so you don’t have standing water. Extend your downspouts so they flow away from your home.
Tip #6: Be conscious of daily living choices.
-
-
- Instead of hanging clothes inside to line dry, hang them outside (if allowed in your community).
- Lower the temperature of your showers by a few degrees, and take shorter showers. This will help reduce humidity.
- Crack the window open during a shower to help release the extra humidity.
Tip #7: Position your house plants to help with humidity.
-
-
- Some house plants produce moisture and others absorb it. A Boston fern will absorb humidity while a spider plant will make it more humid.
- Move your moisture-producing plants to one room with good airflow or outdoors if possible.
Follow these steps and you’ll soon be enjoying a cooler, more comfortable home.
This article is furnished by California Casualty, providing auto and home insurance to educators, law enforcement officers, firefighters, and nurses. Get a quote at 1.866.704.8614 or www.calcas.com.

by California Casualty | Homeowners Insurance Info |
Looking for projects to do this summer to enhance your home? Try these 6 fun, easy and creative ways to spruce up your living space. We’ve even added some helpful tips so that you can get the most out of each DIY (do-it-yourself) project. Happy decorating!
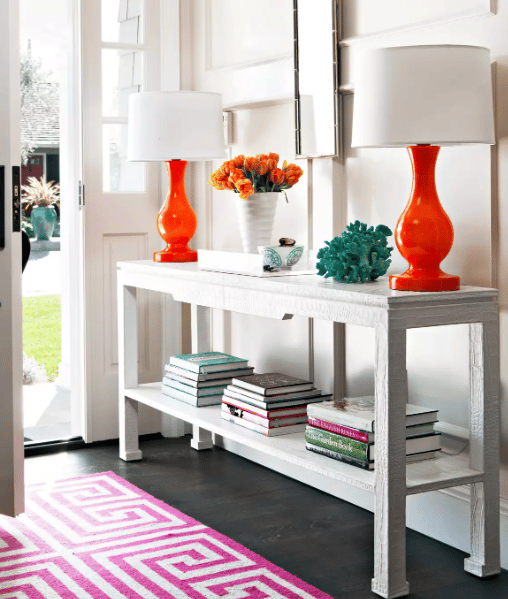
Project 1: Add Storage to Your Entryway
Get ready to transform your entryway into the perfect spot for storage. Not only will this give you a place to put your keys (and find them later), but it will offer a beautiful focal point for guests as they enter and exit your home. Choose a small table or bench that fits in the space. Look for one with a second shelf or drawer for additional storage. Decide on the perfect spot, out of the way of the front door and the closet door. Once it’s placed where you’d like it, hang a wall-mounted shelf or hooks above the table for easy storage of keys and other items.
Project Tips:
-
- Look on Facebook marketplace for cheap benches, tables, or cabinets that you can refinish.
- Make sure you leave enough room to still walk through your entryway.
- Don’t forget the décor! Add pillows and lamps for a fun pop of color.
- Use baskets to group items, such as stacks of incoming mail, in a decorative way.
- Store items here that you need as you enter or exit your home, such as keys or sunglasses, for added convenience.

Let’s face it. It’s fun to write on your walls, and with a chalkboard wall calendar, you can do exactly that! This type of calendar is so much fun that it encourages everyone to stay organized. Plus, it’s easy to create. All you need is some chalkboard paint, painter’s tape, and measuring tools. Sketch out your plan on a piece of paper. You can plan one large rectangle or a series of rectangles that come together as a whole: monthly or calendar, daily reminder lists, etc. Once the design is set, it’s time to measure and paint, and voila—you’ll have a masterpiece before you know it.
Project Tips:
-
- Start in the middle and work outward when you paint. Use a roller for large areas and a brush for small areas. Make sure to use two coats of paint.
- It takes three days for the paint to fully dry. You may be tempted to test it out, but don’t. You’ll be happy you waited.
- Personalize your calendar by adding your family’s name at the top. You can use beautiful stencils to create the perfect lettering.
- Add “to do” lists for each family member at the bottom of the wall calendar, within easy reach.
- Color code your activities by person with different color chalk.
- Your chalkboard wall doesn’t have to be black. Chalkboard paint comes in many colors!
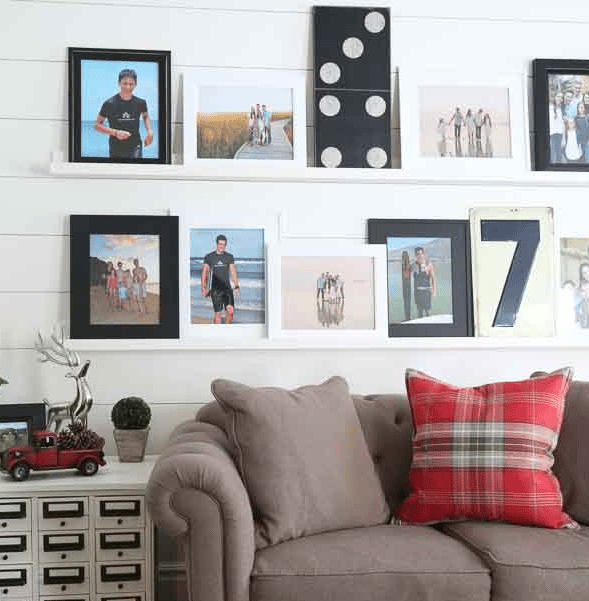
Who said you had to hang your pictures on the wall? A picture ledge is a great alternative. Picture ledges are a cross between bookshelves and fireplace mantles. They’re decorative and they give the room a little extra depth and interest. Picture ledges are great ways to display family photos and smaller artwork pieces. Choose a wall for your picture ledge, such as your living room or den. Then follow these steps to make your own picture ledge. It’s not hard to make your own but you also can buy premade picture ledges or use a fireplace mantle or decorative crown molding.
Project Tips:
-
- You can find beautiful premade pieces that could be used as picture ledges on Etsy
- For a more finished look, choose pictures with frames and mattes that have a similar color scheme.
- If you have furniture beneath the picture ledge, you can use it as a guide for how long the ledge should be.
- For an instant room makeover, change the pictures that you’re displaying!
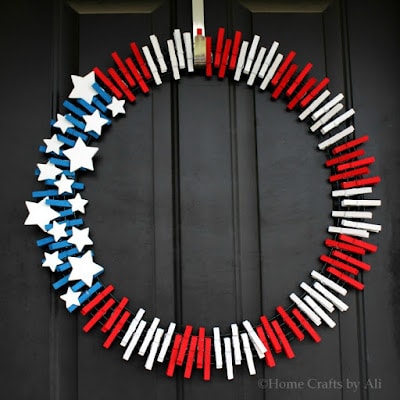
If you’re looking to add some red, white, and blue to your summer celebration, this patriotic wreath is easy and fun to create. It looks great displayed indoors or out. You can get a wire wreath frame at any craft supply or fabric store and the clothespins at a grocery or discount store. Then it’s just a matter of painting and assembling for a beautiful, artistic result!
Project Tips:
-
- Paint the clothespins and the stars on top of a craft mat so you don’t get paint all over your table.
- For a shortcut, squirt some paint into a gallon plastic bag, add your clothespins and shake them up. Then touch up any missed spots.
- Change the colors of the clothespins to shades of blue and add some shells or starfish for a fun beach theme.
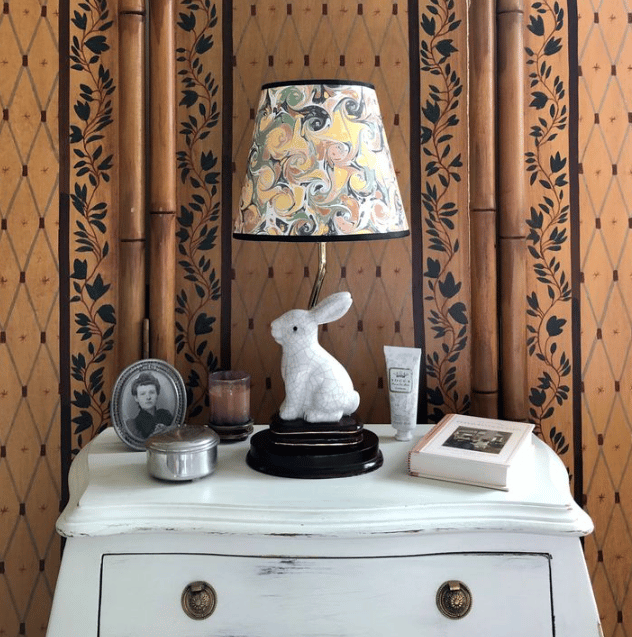
Light up your room with elegant lamp shades that you made yourself! It’s as simple as cutting and pasting to transform a ho-hum beige shade into a stunning showpiece. Choose the decorative paper that you like. Create a pattern by rolling the lamp shade along kraft paper as you trace the outline. Cut out the pattern and check that it fits around the shade. Then cut the fancy paper into the pattern shape. Glue it to lamp shade and add decorative trim for a finished look.
Project Tips:
-
- Hold the patterned paper up to a light. This will give you an idea of how your pattern will look on a lamp.
- Use clothespins to hold the trim in place as it dries.
- If you use spray adhesive for the paper, make sure to spray both the lamp shade and the paper. Then, work quickly as it dries fast.
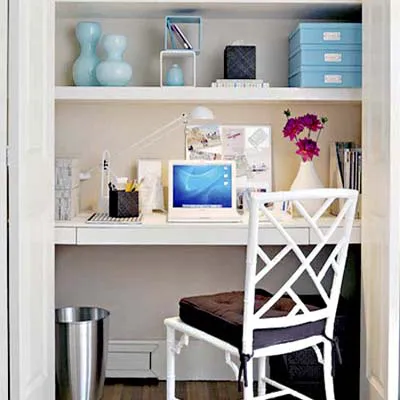
With so many people working from home, it’s nice to have your own space. You can transform a closet into an office or homework space with just a few adjustments. Take off the door and remove the clothing rods. Add a large shelf at desk height and two narrower shelves above it for storage. Then add the supplies that you need when you work such as a desk lamp, pens, pencils, etc.
Project Tips:
-
- Add a pop of color to your desk décor with a vase or planter.
- Add a corkboard to the back wall to post notes or display photos.
- Keep the closet door in the attic or garage in case you’d like to replace it someday. Or you can choose to keep the door on and close it when not in use.
This article is furnished by California Casualty, providing auto and home insurance to educators, law enforcement officers, firefighters, and nurses. Get a quote at 1.866.704.8614 or www.calcas.com.
