by California Casualty | Helpful Tips, Homeowners Insurance Info |
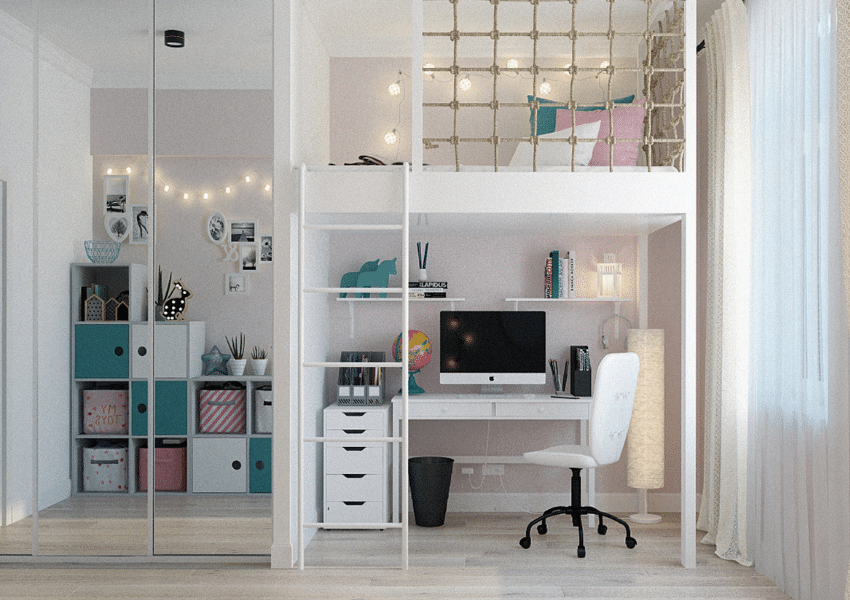
When your apartment is short on square footage but long on stuff, every inch suddenly feels like prime real estate. Closets overflow, kitchen cabinets turn into a never-ending game of Tetris, and don’t even get started on where to stash that extra set of sheets. The good news? You don’t need a bigger place — or a landlord’s permission — to get organized. With a little creativity and a few clever storage hacks, even the smallest apartment can feel spacious, stylish, and totally livable.
Start at the Door: Tame the Entryway Chaos
Your entryway sets the tone for your entire apartment, and it’s often the first place that clutter piles up. Even a tiny corner by the door can function as a drop zone with the right setup.
- Create a DIY entryway organizer using adhesive hooks, narrow shelving, or a pegboard so everything has a dedicated spot.
- Add a slim coat rack or a small storage bench for jackets, bags, and shoes.
- Baskets or bins under a bench help keep footwear out of sight.
Think Vertically (Your Walls Are Working Overtime)
When floor space is limited, the solution is simple: look up. The higher you go, the less clutter you see at eye level, which makes the whole apartment feel more open.
- Tall bookcases or floating shelves above the couch, bed, or desk keep clutter off surfaces and draw the eye upward.
- Wall hooks aren’t just for coats; use them for hats, bags, headphones, or even kitchen tools.
- Over-the-toilet shelving instantly adds storage in bathrooms without taking up valuable floor space.
- Over-the-door organizers are the unsung heroes of small apartments. Use hanging pocket organizers not just for shoes, but for:
- Pantry items or produce
- Cleaning supplies
- Hair tools and beauty products
- Hats, scarves, and gloves
Choose Furniture That Pulls Double Duty
In a small apartment, every piece of furniture should earn its keep. If it doesn’t multitask, it might not deserve a spot.
- Storage ottomans hold blankets, books, or extra pillows while doubling as seating.
- Beds with built-in drawers or hidden storage headboards eliminate the need for extra dressers.
- Use a dresser as a TV stand to sneak in additional storage.
- Fold-down dining tables or wall-mounted desks give you flexibility without sacrificing space.
Maximize What You Already Have
You don’t need new furniture to create more storage — you just need better organization.
- Cabinet door caddies are perfect for spices, cleaning supplies, or hair products.
- Double closet rods instantly double hanging space for clothes.
- Wall hooks inside closets keep belts, bags, and accessories from getting tangled.
- Under-bed storage bins are ideal for off-season clothes, shoes, or extra linens.
- Pegboards can organize everything from kitchen tools to office supplies.
- Stackable bins or storage cubes — especially clear or wire — let you see everything at a glance.
- Pull-out shelves for deep cabinets prevent items from getting lost in the back. (Ask your landlord’s permission if you’re installing them.)
Don’t Ignore the Corners
Corners are often wasted space, but they don’t have to be. Every awkward angle is an opportunity in disguise.
- Corner shelving units provide storage without dominating the room.
- Corner desks are perfect for work-from-home setups.
- Add a small chair or stool for flexible seating that tucks neatly away.
Get Creative with Sleeping Arrangements
Your bed takes up a lot of space. Make it work harder.
- Loft beds or Murphy beds free up floor space for a desk, sofa, or storage underneath.
- Ottoman beds offer hidden storage for bulky items.
- Sofa beds or daybeds are perfect for hosting overnight guests without sacrificing everyday space.
Storage That Doubles as Style
Storage doesn’t have to be boring; it can be part of your décor.
- Hang hats, scarves, or bags on the wall for a functional display.
- Use a cork wall or pegboard to showcase jewelry alongside photos or artwork.
- Hang a curtain or add a room divider to define spaces, then place storage cubes behind it.
- Think outside the box:
- A garden hose holder becomes a storage caddy
- A wine rack stores rolled towels
- A toilet paper holder organizes hair tools
- Storage ladders are both decorative and practical. Drape blankets, hang towels, or clip baskets to the rungs.
- Hang pots and pans to free up cabinet space and add a chef-inspired vibe.
- Use a rolling kitchen island or cart with drawers and a work surface, then roll it out of sight when not in use.
- Magnetic shelves on the fridge hold spices or everyday items, clearing precious counter space.
- Vacuum storage bags shrink seasonal clothing, bedding, and bulky items until you need them again.
Small Space, Big Potential
Living small doesn’t mean living cluttered. With smart storage solutions, multifunctional furniture, and a little creativity, your apartment can feel organized, stylish, and surprisingly spacious. The key is to make every inch count.
Finally, don’t forget the renter’s insurance. It’s an easy way to protect your valuables and other possessions for added peace of mind.
This article is furnished by California Casualty, providing auto and home insurance to educators, law enforcement officers, firefighters, and nurses. Get a quote at 1.866.704.8614 or www.calcas.com.
by California Casualty | Auto Insurance Info, Helpful Tips, Safety, Travel |
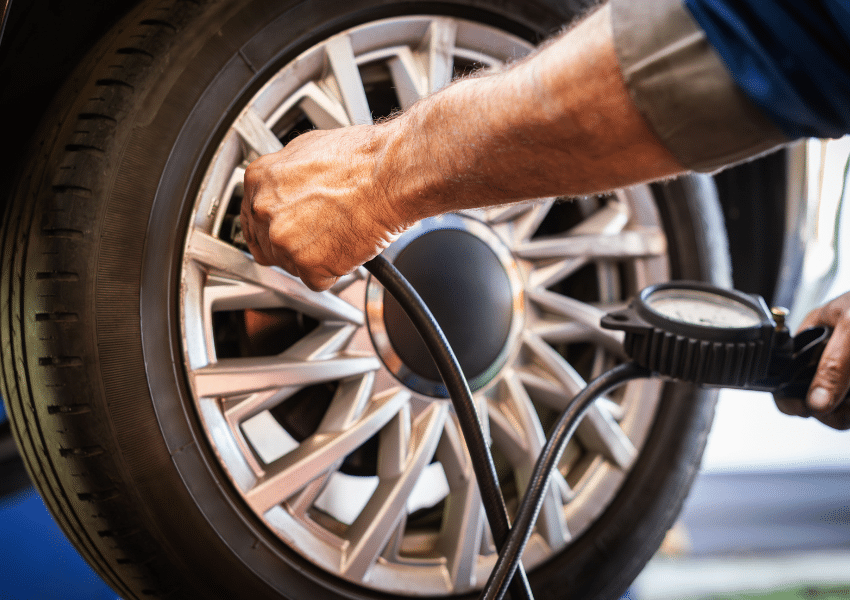
Your tires do a lot more than roll you from point A to point B. They keep you safe, improve fuel efficiency, and make every drive smoother and quieter. Yet terms like rotation, alignment, and balancing often sound like auto shop jargon best left to the pros. In this Tires 101 guide, we break down what these services really mean, why they matter, and how a little tire care can go a long way toward protecting your vehicle — and your wallet.
Tire Rotation
What is tire rotation?
Tire rotation is the practice of moving your tires to different positions on your vehicle — front to back, side to side, or diagonally — so they wear more evenly over time. Because each tire position experiences different forces, rotation helps distribute that wear instead of allowing one tire to do all the hard work.
Why tire rotation matters
Even tread wear means longer-lasting tires, better traction, and a smoother ride. Rotating your tires also helps maintain predictable handling and braking, especially in wet or slippery conditions. As a bonus, evenly worn tires roll more efficiently, which can help improve fuel economy.
What happens when you skip rotation
When tires are not rotated, they wear unevenly and wear out faster — sometimes thousands of miles sooner than expected. Front tires, in particular, tend to wear more quickly on most vehicles because they handle the bulk of steering, braking, and acceleration. Over time, uneven wear can lead to noise, vibration, and reduced grip on the road.
How often rotation is needed
Most vehicles benefit from tire rotation every 5,000 to 8,000 miles, or as recommended by your vehicle’s manufacturer. Many drivers pair tire rotation with routine oil changes, making it easy to remember and stay consistent.
How rotation is done
The rotation pattern depends on several factors: your vehicle’s drive system (front-, rear-, or all-wheel drive), whether your tires are directional, and whether the front and rear tires are the same size.
- Front-Wheel Drive (FWD): Front tires move straight back; rear tires move to the front and switch sides.
- Rear-Wheel or All-Wheel Drive (RWD/AWD): Rear tires move straight forward; front tires move to the back and switch sides.
- Directional Tires: Designed to roll in one direction only, these tires can move front to back but must stay on the same side.
- Staggered or high-performance setups: If front and rear tires are different sizes, they are typically rotated side to side only.
Pro Tip: If you have a full-size spare that matches your other tires, ask whether it can be included in the rotation to keep it in good condition and ready for use.
Tire Alignment
What is tire alignment?
Tire alignment — also called wheel alignment — ensures your wheels are perpendicular to the ground and parallel to each other. Alignment involves adjusting the angles of the wheels, so they point straight ahead and make optimal contact with the road.
Why tire alignment matters
Proper alignment helps your vehicle drive straight, handle predictably, and wear tires evenly. When your wheels are aligned correctly, your steering feels more responsive, your ride is smoother, and your tires last longer.
What happens when alignment is off
Misaligned wheels can cause tires to wear unevenly or prematurely. You may notice your vehicle pulling to one side, your steering wheel sitting off-center, or increased rolling resistance that forces your engine to work harder. Over time, poor alignment can reduce fuel efficiency, increase stopping distances in emergencies, and even cause steering wheel vibration.
How often alignment is needed
A good rule of thumb is to have your alignment checked once a year or every 10,000 to 15,000 miles. You may also need an alignment after hitting potholes, curbs, or other road hazards — or anytime your vehicle doesn’t feel quite right.
How alignment is done
Alignment adjustments are made to your vehicle’s suspension system, not the tires themselves. Technicians fine-tune three key angles:
- Toe: The degree to which tires point inward or outward when viewed from above.
- Camber: The inward or outward tilt of the tire when viewed from the front of the vehicle.
- Caster: The forward or backward tilt of the steering axis when viewed from the side.
Together, these adjustments ensure your wheels work in harmony rather than fighting against one another.
Tire Balancing
What is tire balancing?
Tire balancing ensures that the weight of each tire and wheel assembly is evenly distributed around the entire circumference. Proper balance allows your wheels to spin smoothly without vibration.
Why tire balancing matters
Balanced tires improve ride comfort, reduce vibration, and help your tires wear evenly. They also minimize stress on your suspension and steering components, contributing to better overall vehicle performance.
What happens when tires are unbalanced
When a tire has a heavy spot, it can wobble as it spins, causing noticeable vibrations, especially at highway speeds. Unbalanced tires may lose consistent contact with the road, leading to uneven tread wear and shortened tire life. Over time, this imbalance can also strain suspension and steering parts.
How often balancing is needed
Tires should be balanced every 6,000 to 8,000 miles, typically at the same time they are rotated. Balancing is also recommended whenever you install new tires or notice unusual vibrations.
How balancing is done
A technician mounts the tire and wheel assembly on a computerized balancing machine that detects weight imbalances. Based on the machine’s readings, small lead, zinc, or steel weights — either clip-on or adhesive — are placed on the wheel rim. The tire is then re-spun to confirm that the weight is evenly distributed.
General Tire Care
Keeping your tires in good shape goes beyond rotation, alignment, and balancing. Regular inspections and proper inflation play a critical role in tire safety and longevity.
Check tire pressure regularly using a gauge, ideally when tires are cold — meaning they haven’t been driven for at least three hours. The correct pressure can be found in your owner’s manual or on the sticker inside the driver’s side door.
- Underinflated tires generate excess heat and stress, leading to irregular wear and increased risk of failure.
- Overinflated tires are more susceptible to punctures and road damage.
It’s also wise to visually inspect your tires for cuts, cracks, bulges, or embedded objects so small issues can be addressed before they become major problems.
Finally, make sure your vehicle is fully insured for added peace of mind.
Safe travels from all of us at California Casualty.
This article is furnished by California Casualty, providing auto and home insurance to educators, law enforcement officers, firefighters, and nurses. Get a quote at 1.866.704.8614 or www.calcas.com.

by California Casualty | Helpful Tips |
Holiday parties are all about good company, great memories — and that one dish everyone can’t stop talking about. If you’re searching for the perfect potluck recipe to wow a crowd, you’re in the right place. We’ve scoured the internet for festive favorites that travel well, taste amazing, and disappear fast.
Appetizers
Hot Crab Pinwheels
These warm, melty bites deliver a burst of creamy crab flavor that disappears from the platter in minutes.
Ingredients:
- 1 package (8 ounces) reduced-fat cream cheese
- 1 can (6 ounces) crabmeat, drained, flaked and cartilage removed
- ¾ cup diced sweet red pepper
- ½ cup shredded reduced-fat cheddar cheese
- 2 green onions, thinly sliced
- 3 tablespoons minced fresh parsley
- ¼ to ½ teaspoon cayenne pepper
- 6 flour tortillas (6 inches)
Directions:
- Beat cream cheese until smooth. Then stir in crab, red pepper, cheese, green onions, parsley and cayenne.
- Spread 1/3 cup filling over each tortilla and roll up tightly.
- Wrap in plastic, twisting ends to seal. Refrigerate for at least 2 hours.
- When ready to bake, preheat the oven to 350 degrees.
- Unwrap rolls, trim ends and cut each into 6 slices.
- Coat cookie sheet with cooking spray. Place rolls on cookie sheet and bake until bubbly, about 10 minutes. Serve warm.
Pro tip: Bring the refrigerated rolls to the party and finish them in the host’s oven.
Muffin Tin Latkes
Crispy on the edges and tender inside, these muffin-pan latkes bring a fun twist to a beloved classic.
Ingredients:
- ¼ cup vegetable oil
- 12 ounces russet potatoes (2-3 potatoes)
- 1 large onion
- ¼ cup all-purpose flour
- 1 ½ teaspoons kosher salt
- 1 ½ teaspoons freshly ground black pepper
- 1 large egg, lightly beaten
- Sour cream, cooked apples, caramelized onions and/or chopped chives for serving
Directions:
- Place oven rack in the top position and preheat oven to 425 degrees. Generously spray a 12-cup muffin pan with nonstick cooking spray. Add 1 tsp. oil to each muffin cup. Put the muffin tin on a rimmed baking sheet and set aside.
- Peel the potatoes. Use a grater or a food processor to shred them. Then shred the onions and add them to the potatoes in a medium bowl.
- Add the flour, salt, pepper and egg and mix.
- Scoop a ¼ cup of the potato mixture into each muffin cup, pressing it into the bottom and against the sides.
- Bake until the latkes are a deep golden brown and the oil is sizzling, about 40-50 minutes.
- To ensure the latkes don’t stick, run a knife around and under each after you take them out of the oven, and move them to a cooling rack. Add your favorite toppings when serving.
Pro Tip: Make these up to 2 days ahead and store them tightly wrapped in the refrigerator. Just reheat on a baking sheet at 350 degrees, about 20 minutes.
Main Dishes
Skillet Cheeseburger Hot Dish
All the flavors of your favorite backyard burger come together in one bubbling, crowd-pleasing skillet.
Ingredients:
- 1 28-oz. bag frozen potato tots
- 1 medium red onion, chopped and divided
- 3 pickle brine, divided, plus 6 pickle chips, chopped
- 1 olive oil
- 1 ½ lb. 90% lean ground beef
- 2 steak seasoning
- 3 tomato paste
- 2 all-purpose flour
- 1 ½ tsp. beef bouillon base mixed with 1 ½ cup warm water
- 6 Cheddar cheese, coarsely grated (1 ½ cup) and divided
- ¼ cup mayonnaise
- 3 ketchup
- 1 yellow mustard
- 4 Campari tomatoes, chopped
Directions:
- Heat oven to 425 degrees.
- Put tater tots on a rimmed baking sheet and bake until crispy, about 25-30 minutes.
- In a small bowl, combine half of the onion with 2 tablespoons of pickle brine. Set aside.
- Heat oil in cast iron skillet. Add remaining onion and cook until tender and golden, 6-7 minutes. Add beef and steak seasoning and cook until the meat is no longer pink.
- Add tomato paste until caramelized and darkened in color. Sprinkle with flour. Gradually add bouillon mixture and simmer. Stir until slightly thickened.
- Sprinkle with 1 cup cheese and top with tots, then the remaining ½ cup cheese. Bake until cheese is melted and mixture is bubbling.
- In a small bowl, whisk together the mayonnaise, ketchup, mustard, and remaining tablespoon pickle brine. Drain pickled onions, then scatter over tots along with tomatoes and pickles. Serve with the special sauce on the side.
Turkey and Stuffing Casserole
This cozy casserole layers all the comfort of a holiday dinner into one hearty, shareable dish.
Ingredients:
Casserole:
- 2 tablespoons EVOO
- 2 tablespoons butter
- 2 pounds ground turkey at room temp and patted dry
- 2 teaspoons Worcestershire sauce
- Salt and freshly ground black pepper
- 2 ribs celery, chopped
- 1 carrot chopped
- 1 onion chopped
- 1 small potato, peeled and chopped
- 2 tablespoons finely chopped fresh thyme
- 2 tablespoons flour
- 2 to 2 ½ cups turkey or chicken stock
- ½ cup frozen peas
Stuffing:
- 6 tablespoons butter cut into pieces
- 3-4 ribs celery with leafy tops, chopped
- 2 small apples, such as Macintosh or Honeycrisp, chopped
- 1 large fresh bay leaf
- 1 onion chopped
- About 1 tablespoon poultry seasoning
- Salt and freshly ground pepper
- 1 bag traditional seasoned stuffing mix or 5 cups cubed stale bread
- About 3 cups of turkey or chicken stock
- Butter for dotting casserole
Directions:
- Preheat the oven to 375 degrees.
- Heat the EVOO in a large, deep skillet over medium high heat. Melt in the butter.
- Add the turkey and cook until browned. Season with the Worcestershire, salt and pepper.
- Add the celery, carrots, onions, potatoes and thyme. Cook 8-10 minutes until vegetables are softened.
- Stir in the flour and cook for a minute, then add the stock and cook to thicken.
- Stir in the peas until warmed through and transfer the mixture to a casserole dish.
- For the stuffing, heat a large skillet and melt the butter on medium heat. Add the celery, apples, bay leaf and onions.
- Add the poultry seasoning and salt and pepper. Cook until tender, 12-15 minutes. Then add the stuffing mix or bread to moisten in the stock.
- Arrange the stuffing on top of the casserole and dot with butter.
- Bake until brown, bubbly and crisp on top, about 15 to 20 minutes.
Pro Tip: If baking later, refrigerate the casserole. On party day, plan to bring the casserole to room temperature and follow baking instructions above at your home or the host’s.
Side Dishes
Sweet Onion Creamed Corn
Sweet, smoky, and irresistibly creamy, this upgraded corn dish steals the show on any potluck table.
Ingredients:
- 5 bacon strips, chopped
- 1 large, sweet onion, chopped
- 1 medium sweet red pepper, chopped
- 5 cups frozen corn (about 24 ounces), thawed
- 2 cups cubed fully cooked ham
- ½ cup half-and-half cream
- 1 tablespoon brown sugar
- 1 tablespoon dried parsley flakes
- 1 teaspoon smoked paprika
- ½ teaspoon salt
- ½ teaspoon pepper
- 1 package (8 ounces) cream cheese, cubed and softened
Directions:
- Cook bacon over medium heat until crisp. Remove with slotted spoon, leaving drippings in the pan.
- Cook and stir onion and sweet red pepper in bacon drippings over medium high heat until tender, about 5-6 minutes.
- Grease a 4-quart slow cooker. Combine corn, ham, cream, brown sugar, parsley, paprika, salt, pepper, bacon and onion mixture. Cook covered on low for 3-4 hours.
- Stir in cream cheese and cook 10 minutes longer. Stir before serving.
Broccoli Rice Casserole
Packed with cheesy goodness and wholesome veggies, this casserole is the kind of side everyone goes back for
Ingredients:
- 4 Tbsp. (½ stick) salted butter
- 1 medium yellow onion, finely diced
- 1 garlic clove, grated
- 4 Tbsp. all-purpose flour
- ½ tsp. dry mustard
- ¼ tsp. cayenne pepper
- 3 cups whole milk
- 4 oz. cream cheese, at room temperature
- ½ cup grated parmesan cheese
- 1 tsp. black pepper
- ½ tsp. kosher salt
- ½ tsp. paprika
- 8 oz. processed cheese (Velveeta), cubed
- 3 cups grated sharp cheddar cheese (about 12 ounces)
- 8 cups small broccoli florets
- 6 oz. diced pimentos, drained
- 2 ½ cups cooked long-grain rice
Directions:
- Preheat oven to 350 degrees.
- Melt the butter in a large skillet over medium heat. Add the onion and garlic and cook until softened, about 3-4 minutes.
- Add the milk, stirring constantly. Cook until thickened, about 2 minutes.
- Add the cream cheese and parmesan. Stir in the pepper, salt and paprika.
- Add the processed cheese, stirring until melted. Then add 1 ½ cups cheddar and stir until melted.
- Fold in the broccoli and pimentos.
- In a large baking dish, create a base with half the cooked rice. Top with half of the broccoli cheese sauce. Repeat.
- Sprinkle the remaining 1 ½ cups cheddar over the top. Bake until bubbly, about 30 minutes.
Desserts
Candy Cane Pie
This make-ahead, no-bake pie is the perfect festive touch for any holiday gathering.
Ingredients:
- 25 chocolate sandwich cookies (such as Oreos; about 9.5 ounces)
- 5 unsalted butter, melted
- 2 ½ cups heavy cream
- 1 cup powdered sugar
- 3/4 cup white chocolate chips
- 12 cream cheese, at room temperature
- 1 peppermint extract
- ½ cup coarsely crushed candy canes (from 8 candy canes), plus more for garnish
- Red gel food coloring, for the filling
- 2 mini candy canes, for garnish (optional)
Directions:
- Pulse the cookies in a food processor until fine crumbs form. Pour in melted butter and pulse until combined. Press the mixture firmly in a 9-inch-deep dish pie plate. Cover the crust and place it in the freezer for at least 15 minutes and up to a day.
- Whip the heavy cream and ½ cup of the powdered sugar on medium-high until stiff peaks form, about 3 minutes. Set aside.
- Microwave the white chocolate chips in 15-second intervals, stirring between each, until fully melted. Let cool for 2-3 minutes.
- Combine the cream cheese, peppermint extract, and remaining ½ cup powdered sugar. Beat on medium high speed until light, fluffy and smooth, about 2 minutes. Add the melted white chocolate and mix on medium speed.
- Carefully fold in 3 cups of the whipped cream. Cover and refrigerate the remaining whipped cream.
- Transfer half of the peppermint filling to a medium bowl. Fold in crushed candy canes and spread the mixture in the chilled pie shell. Freeze for 10 minutes.
- Add red food coloring to the remaining filling, mixing gently to avoid deflating. Spoon the pink filling over the chilled pie. Cover and refrigerate for 8 hours.
- Whisk the reserved whipped cream mixture back to stiff peaks. Dollop on the pie and decorate with crushed candy canes.
Layered Chocolate Marshmallow Peanut Butter Brownies
Swirls of chocolate, peanut butter, and marshmallow make these brownies an indulgent, show-stopping treat.
Ingredients:
- 1 ½ cups butter, divided
- 3/4 cup baking cocoa, divided
- 4 large eggs, room temperature
- 2 cups sugar
- 1 teaspoon vanilla extract
- 1 ½ cups all-purpose flour
- ½ teaspoon salt
- 1 jar (16.3 ounces) chunky peanut butter
- 1/3 cup 2% milk
- 10 large marshmallows
- 2 cups confectioners’ sugar
Directions:
- Preheat oven to 350 degrees.
- In a small saucepan, melt 1 cup of butter. Stir in ½ cup of cocoa until smooth. Remove from heat.
- In a large bowl, beat eggs, sugar and vanilla until blended.
- Combine flour and salt and gradually add it to the egg mixture.
- Beat in cocoa/butter mixture.
- Transfer to a greased 15x10x1 pan. Bake until the center comes out clean, about 18-22 minutes.
- Cool brownies on a wire rack. Microwave peanut butter until softened, about 30 seconds and spread on warm brownies. Refrigerate until peanut butter is set, about 45 minutes.
- In a saucepan, combine milk, marshmallows, remaining ¼ cocoa and remaining ½ cup butter. Stir over medium low heat until the mixture is smooth. Remove from heat and gradually stir in confectioner’s sugar. Spread over peanut butter layer.
- Refrigerate at least 30 minutes. Cut in squares and serve.
Have a go-to dish that always earns compliments? We’d love to hear it. Share your favorite holiday recipe in the comments.
Happy holidays from all of us at California Casualty!
This article is furnished by California Casualty, providing auto and home insurance to educators, law enforcement officers, firefighters, and nurses. Get a quote at 1.866.704.8614 or www.calcas.com.

by California Casualty | Helpful Tips, Pets |
If you’ve noticed your dog looking a little rounder than usual, you’re not alone. It happens gradually, almost sneakily — even to the most loving and attentive owners. The good news? Helping your dog get back to a healthy weight doesn’t have to be overwhelming. In fact, it can be a rewarding, bonding journey filled with new routines, more play, and a happier, more energetic pup.
Why Those Extra Pounds Matter
A chubby dog may look adorable, but the health risks are anything but cute. Obesity is linked to serious conditions in pets, including:
- Arthritis
- Diabetes
- Heart, liver, and kidney disease
- Certain cancers
- A shortened lifespan
Even a few extra pounds can place stress on your dog’s joints and organs. Think of weight-loss efforts not as a diet, but as an investment — one that pays off in more comfortable movement, better sleep, extra years of life, and that unmistakable sparkle in your dog’s eyes when they feel good.
Is Your Dog Overweight?
Every dog breed has its own natural shape, so it’s important to look at your pet’s individual build. Here are three simple checks you can do at home. These quick visual cues give you a starting point, but your veterinarian remains the best source for an accurate assessment.
- Rib Check
Run your hands along your dog’s ribcage. You should be able to feel the ribs easily beneath a thin layer of fat — not pressing hard, just lightly gliding your fingers.
- Waist Check
Look down at your dog from above. Do you see an obvious waistline behind the ribs? If not, or if the body looks oval instead of hourglass, that may indicate extra weight.
- Tummy Tuck Check
Now look from the side. Your dog’s abdomen should slope upward slightly from the ribcage toward the hind legs. A sagging or straight line usually means excess fat around the belly.
Start with a Vet Visit
Before making any changes, schedule a checkup. Think of your vet as your dog’s personal trainer and nutritionist rolled into one. Your veterinarian can:
- Rule out underlying health issues like arthritis or thyroid disease
- Identify an ideal weight goal
- Recommend a safe daily calorie target
- Suggest food options tailored to your dog’s needs
Think Slow and Steady
Crash diets are unsafe for dogs and ineffective long-term. A healthy pace for canine weight loss is typically 1–5% of current body weight per month. Gradual progress prevents metabolism slowdowns, reduces hunger-driven begging, and helps your dog lose fat while maintaining muscle. Small improvements, made consistently, lead to big results.
Choosing the Right Food
You may want to stay with your dog’s current food or switch to a healthier diet. That doesn’t necessarily mean buying the most expensive bag on the shelf. What matters is choosing a formula that aligns with your dog’s goals. Options to consider include:
- Prescription weight-loss diets: Great for dogs with significant weight to lose or underlying health issues.
- Low-calorie kibble: Many brands offer lighter formulas.
- Senior formulas: Often lower in calories to match lower activity levels in older dogs.
- Wet food: Higher water content keeps pups fuller while reducing overall calories.
Count the Calories (Yes, It Matters!)
Just like with people, portion size is often the real culprit.
- Measure every meal — don’t eyeball it.
- Use a kitchen scale or a measuring scoop for accuracy.
- Track calories from treats. (They count!)
When it comes to treats, think outside the (biscuit) box. Many dogs enjoy baby carrots, blueberries, plain green beans, or ice cubes. These crunchy snacks satisfy without blowing the daily calorie budget.
Smaller, More Frequent Meals
If your schedule allows, breaking meals into two or three smaller feedings throughout the day can help curb hunger and begging. This simple shift can make a big difference in your dog’s comfort—and your sanity.
Movement: Make It Fun — and Make It Daily
You don’t have to train for a marathon. You just need to get moving together. Aim for 30 minutes of daily activity, adjusted for your dog’s fitness and health. Options your dog may enjoy include:
- Walks
- Swimming
- Hiking
- Fetch
- Tug play
- Games
- Doggie playdates
- Agility or fitness classes
If your dog is significantly overweight, start slow. Watch for heavy panting, lagging behind, or signs of discomfort. Keep water available and increase activity gradually. Most importantly, make it enjoyable. Your dog will feed off your energy — so smile, laugh, chat with your pup, and celebrate the moments you’re spending together.
Keep Track of Progress
Some animal hospitals offer free weight checks, and many pet stores have scales as well. Progress can be subtle at first, but seeing those numbers shift (even a little!) is incredibly motivating.
Celebrating non-scale victories keeps the journey positive. You can also track:
- Energy level
- Mobility
- Ease of getting up
- Endurance on walks
- Coat condition
Get the Whole Family on Board
Helping your dog reach a healthy weight is an act of love, and consistency is key. If one person sneaks table scraps, adds extra kibble, or gives too many treats, progress stalls. Agree as a household on the plan — portions, treats, activity, and rules. That way, your dog gets a clear, consistent message and a greater chance at success.
A Final Note About Protection
Health journeys sometimes come with unplanned vet expenses. Having pet insurance can help offset larger costs and keep your dog’s wellness on track. You can easily add Pet’s Best pet insurance to your California Casualty auto or home policy. Talk with a California Casualty customer service representative to learn more about what pet insurance can cover.
This article is furnished by California Casualty, providing auto and home insurance to educators, law enforcement officers, firefighters, and nurses. Get a quote at 1.866.704.8614 or www.calcas.com.
by California Casualty | Helpful Tips, Homeowners Insurance Info |
Think you’ve found the perfect hiding spot for your cash or jewelry? Think again. From the freezer to the sock drawer, burglars know all the “secret” places homeowners use to stash their valuables. Before you tuck away your treasures in plain sight, learn which hiding places offer false security — and where your valuables will truly be safe.
Front Door
We’ve all heard the advice about keeping a spare key “just in case,” but hiding one near your front door is practically an open invitation. The doormat, flowerpot, mailbox, or fake rock –these are the first places a burglar will check. If you need to keep an extra key, leave it with a trusted neighbor instead.
Entryway
Your entry table may be the perfect place for dropping your car keys, wallet, or spare cash when you walk in, but it’s also the first stop for an intruder. Those items are quick to grab and easy to carry. A thief could be in and out of your home in under a minute with your keys, ID, and bank cards in hand.
Bedrooms
Burglars make a beeline for the master bedroom because they know that’s where people store their most valuable items — cash, jewelry, and small electronics. They’ll check dresser drawers, armoires, sock drawers, and even the space under your mattress. Suitcases and storage boxes? Those are fair game, too. The very spots that are most convenient for you are the ones they will check.
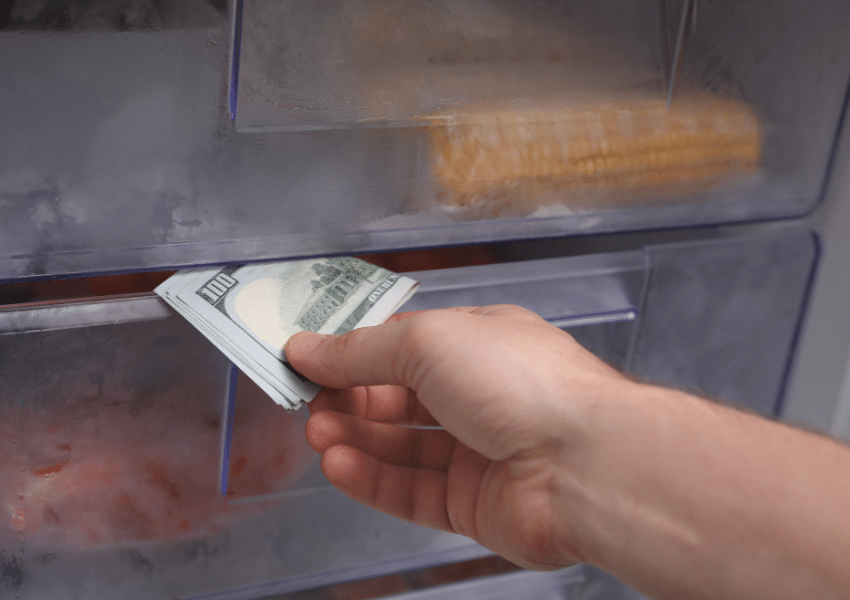
Freezer
Think your freezer is foolproof? Think again. Many homeowners wrap cash or jewelry in plastic and tuck it behind the frozen vegetables. But this “clever” hiding place is common knowledge among burglars. If it’s easy for you to access, it’s easy for them to find.
Bathrooms
Your bathroom medicine cabinet may seem like a private place, but it’s often one of the first areas a thief will check — especially if they’re looking for prescription drugs to sell. Don’t keep cash or jewelry there either; it’s too easy to reach.
Cookie Jar
It might seem like a sweet spot to stash your grocery money, but thieves know this classic trick. The same goes for flour tins and coffee canisters. If it’s in plain sight in the kitchen, assume it’s on a burglar’s radar.
Home Office
Your office is a goldmine for identity thieves. Computers, passports, checkbooks, and tax forms can all be used to steal your identity or drain your accounts. Keep sensitive documents locked away and back up important files to a secure cloud account.
Portable Safes
A small safe can keep kids or guests out of your valuables, but it won’t stop a thief from carrying the whole thing out the door. Unless your safe is bolted to the floor or wall, it’s just another box waiting to be picked up and opened later.
Other Bad Spots
Anywhere damp, dirty, or difficult to monitor is also a poor choice. Inside toilet tanks, for example, may seem clever, but the moisture can ruin documents and cash.
Where to Hide Your Valuables Instead
The best hiding places are the ones that require effort to access or don’t make sense for a thief to bother with. Think inconvenient, hidden, or disguised. Here are some ideas.
Trash Can with a False Bottom
A cleverly designed trash can with a hidden compartment can be a surprisingly effective deterrent. Thieves are unlikely to rummage through garbage. Just make sure your valuables are sealed against moisture — and don’t accidentally toss them out on trash day!
Fake Wall Outlets
You can purchase wall outlets that look completely real but pull out to reveal a small hidden compartment. They’re perfect for storing cash, jewelry, or small documents. Just be sure the outlet isn’t connected to any wiring.
Hidden Household Items
Fake food cans or containers designed to mimic ordinary products — like shaving cream or soup — are a discreet way to hide valuables. You can even make your own by hollowing out real cans. Just be careful to make them look authentic, and don’t place them in high-traffic areas where someone might mistake them for the real thing.
Structural Hiding Spots
If you’re handy, consider creating built-in hiding spaces behind removable panels or trim. Hollowed-out wainscoting, door jambs, or floorboards can be excellent concealment spots. Pre-made versions are also available for purchase and can be installed without major renovations.
Books and VHS Cases
A hollowed-out book on a crowded bookshelf — or an old VHS tape in a dusty box — won’t draw a second glance. Just don’t use a book or a tape case you might mistakenly donate.
Storage Bins
Large, unlabeled bins can attract attention, so disguise your valuables among ordinary items. Label bins with dull titles like “Old School Projects,” “Holiday Décor,” or “Winter Clothes.” Even if burglars do open a few, they’re unlikely to dig deep through boxes of tinsel or kids’ art supplies.
Kids’ Bedrooms
While the master bedroom is a prime target, thieves usually skip children’s bedrooms. Consider stashing your valuables in a box on a high shelf in the closet. Further protect it with a misleading label.
Add an Extra Layer of Security
Even the best hiding spots can’t protect your valuables completely. Strengthen your security by:
- Installing a home security system with cameras and alarms to deter burglars.
- Using motion-sensor lighting around entry points to discourage nighttime intrusions.
- Keeping your valuables insured through your homeowner’s or renter’s policy so you’re financially protected even if the worst happens.
By avoiding the most obvious hiding places and thinking creatively about security, you can protect your valuables and your peace of mind.
This article is furnished by California Casualty, providing auto and home insurance to educators, law enforcement officers, firefighters, and nurses. Get a quote at 1.866.704.8614 or www.calcas.com.
