by California Casualty | Educators |
Teachers and students alike have been working hard all year long and they’ve finally reached 100 days together in the classroom. It’s time to celebrate this milestone!
Here are some fun activities you can do in your classroom when you reach 100 days of school.

1. Make 100 Days of School Shirts
Celebrate 100 days of school by having your whole class sport 100 day shirts! Here’s how it’s done- have each student bring in a plain t-shirt (or an old shirt that they don’t wear anymore), purchase or have kids bring in easy supplies like bandaids, googly eyes, puffballs, beads, yarn, stickers, etc., and let kids go to work on creating their shirt. The only rule is that whatever they are using- they need to use 100 of them for their shirt to be complete!
For virtual students: Have each child make their own shirt during class one day together, and then show them off on-screen by wearing them together on the 100th day.
Pro Tip: If you don’t want to purchase extra supplies, just use markers or paint and have each child draw their design!

2. Dress Up as 100-Year-Olds
Want to do something a little more silly that your class (and fellow teachers) are sure to enjoy? Host a 100-Year-Old dress-up contest! Students can come to school dressed in their best 100-year-old costume. To make it even more exciting, host a contest with a prize for the “oldest” looking student. Who wouldn’t want a few miniature Golden Girls running around their elementary school all day?
For virtual students: Have each student dress up and show off their look on camera and host a virtual contest on who looked the oldest.
3. Play a Game!
There are hundreds of game options that you can play with your students to celebrate 100 days! If you want to keep it educational you can try playing one of these:
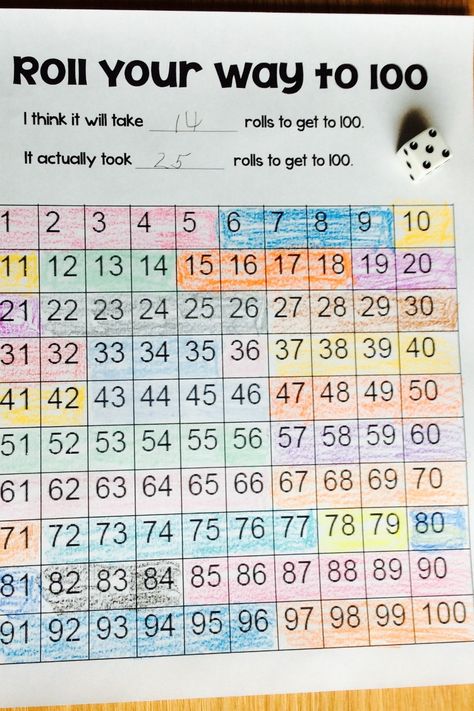
Roll to 100 Dice Game
Number Scavenger Hunt
100 day M&M Sort & Graph
Guess the Jar – What 100 Items Looks Like
For virtual students: Send worksheets via email and have them color in digitally or print out at home. Click here for a free online dice roller.
4. Make the Day a Little Sweeter
If your school lets you have snacks in the classroom, try some of these fun activities to help make the 100th day a little tastier! If your COVID protocols forbid eating snacks in the classroom you could always try these activities with individually wrapped candy like Tootsie Rolls, Hershey’s Kisses, mini candy bars, suckers, Laffy Taffy, etc and have kids wait until they get home to eat them. OR use other objects in their place like beads.
Make 100th Day Trail Mix
Create a 100 Days of School Edible Necklace
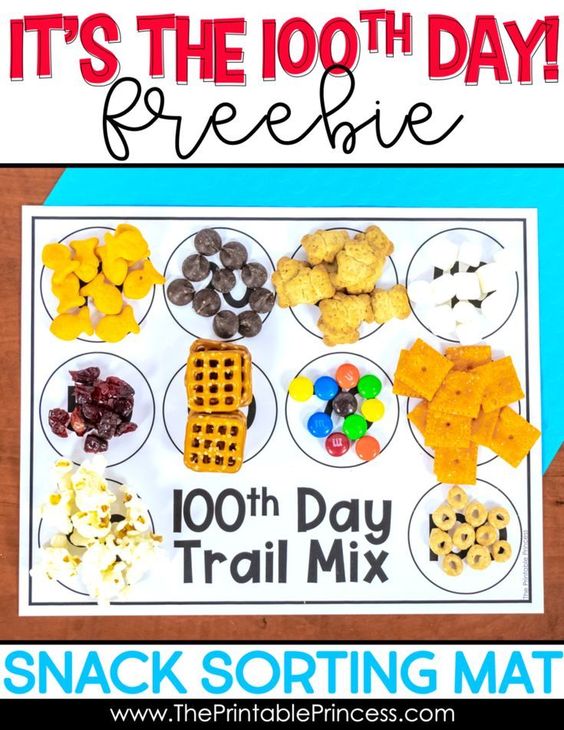
100 Day Snack Sort
If you can have snacks, you should definitely try having your kids do this Tootsie Pop experiment!
For virtual students: You can let parents know ahead of time what projects that you plan to do and the supplies your students will need, or you can have students count out food objects (or any object) they already have at home to sort.

5. Decorate Your Classroom
A fun activity and a bright addition to your classroom, having your students help create 100-day decor for doorways and bulletin boards will not only help you out when it comes to thinking of new ideas, but it will also help show off your student’s love for your school! Or if you want to surprise your students when they walk into the room on the 100th day with special decorations click here for ideas.
For virtual students: Have each student make a virtual background celebrating 100 days of school. They can create a photo of their favorite lesson so far or write what they have loved the most about their school year. The best part is, is that you can have them create whatever you would like to celebrate!
6. Get Up and Get Moving with STEAM!
Get your students out of their seats and having fun with these fun activities that require them to build using their STEAM skills. You could even set them up in stations where students have to go and complete each activity:
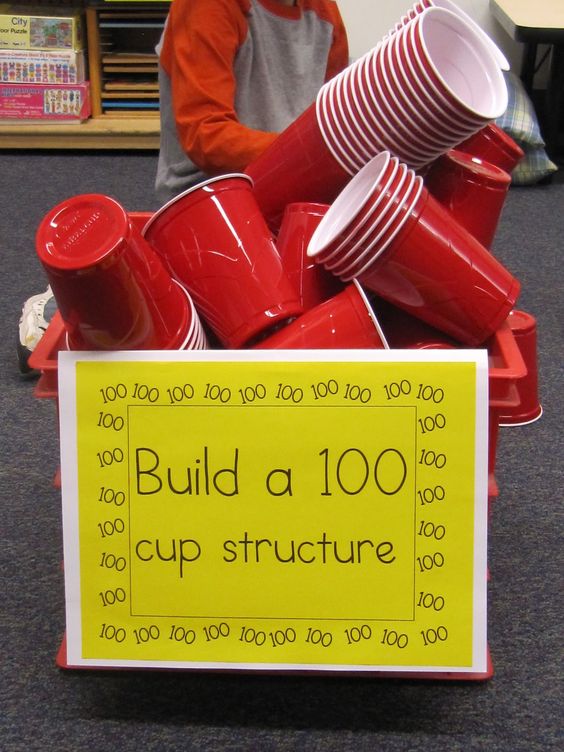
Build a 100 Cup Structure
Create a City with 100 Legos
Make a Self Portrait with 100 Paper Clips
For virtual students: Have your students take pieces of paper and cut them to where they have 100 pieces, and then have them create a self-portrait using the blocks. Each student can then take a photo of their creation and show them off to their classmates.
7. 100 Items
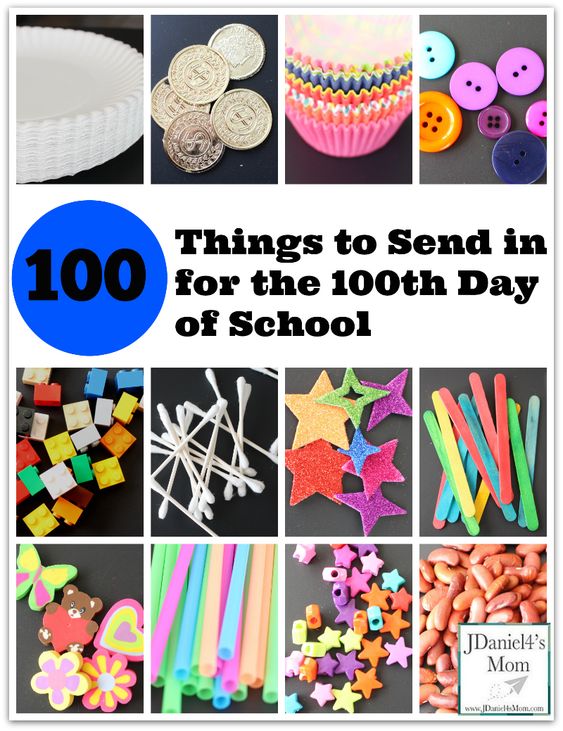
Have each student bring 100 items from home that they can show off to their peers! This is the perfect chance for students who collect objects like action figures or sports cards to show off their hobbies. Students can even vote for their favorite item and the best one can win a prize. Just be sure to send home a note to parents beforehand letting them know your plan and size limitations. No one wants 100 goldfish bowls brought into their classroom…
For virtual students: The rules can stay the same, just do your show and tell virtually.

8. Take it Easy with a Good Book
Finish off your 100-day celebrations by reading a book (or books) together as a class that features the number ‘100’. Check out our favorites here.
For virtual students: Hold your reading virtually.
Happy 100 Days! Keeping pushing, you are almost done 🙂
And for more 100 Days of School classroom celebration ideas check out our Pinterest Board “Teachers Celebrate 100 Days of School”.
This article is furnished by California Casualty, providing auto and home insurance to educators, law enforcement officers, firefighters, and nurses. Get a quote at 1.866.704.8614 or www.calcas.com.

by California Casualty | Educators |
It’s hard to learn when you’re cold. It’s also hard to teach. Unfortunately, many of our nation’s schools are older and that means they are likely full of drafty windows and outdated heating systems. And when the temperatures drop, your classroom is colder than anyone wants.
Fortunately, there’s something you can do about it. Take steps to keep your classroom and your students a bit warmer this winter.
How warm should your classroom be?
If a classroom is too warm, it can raise your body temperature. This can make you feel sick, dizzy, and disoriented. If the classroom is too cold, it can cause you to lose focus as your mind constantly interrupts you with thoughts about the discomfort. The effects on learning are real, too.
Temperatures that are too high or low contribute to lower test scores, decrease in memory, and lack of energy. The ideal temperature for learning is between 68-75 degrees, according to the Regional Educational Laboratory Program of the Institute of Education Sciences.
If your classroom temperature falls below 68 degrees, it’s time to take action. Here’s what you can do.
Dress in layers.
Both you and your students can suit up for the cold. Follow these guidelines for the best way to layer your clothing.
-
- The inner layer is meant to keep moisture away from your skin so that your body doesn’t cool down due to sweat. Choose wool, synthetic, or silk but not cotton as it won’t do the job.
- The middle layer should be a light insulating layer. Wool or synthetics work here.
- The outer layer is the insulating layer designed to trap heat. Wool and nylon/polyester work well.
- Avoid tight-fitting clothing, including socks. Any clothing that reduces normal blood circulation to your arms and legs will actually make you feel colder.
Wear hats, scarves, gloves, and socks.
Teaching in a coat is bulky and uncomfortable. However, adding some of your winter accessories can bring warmth without the bulk.
-
- Since 7-10% of heat is lost via our head, wearing a hat can help. Just make sure that your school doesn’t have a rule against hats, and that the ones chosen aren’t distracting from learning.
- Scarves immediately make you feel warmer. Winter scarves and fashion scarves both work; just make sure that they fully cover your exposed neck.
- Gloves can be worn while teaching and learning. Students can keep their fingers warm when reading or doing activities that don’t involve writing.
- Keep your feet warm. Wool socks are great choices for extra warmth. Most of the time, wearing double socks just makes your shoes feel tight. Take a tip from the Tour de France cyclists and fold a paper towel or napkin over the top of your foot, toes, and under your toes. Then put on your shoe. It will give you extra warmth.
Use hand warmers, foot warmers, and blankets
Get creative with ways you and your students can keep warm!
-
- Keep disposable hand and foot warmers on hand. They are air-activated and last for hours.
- You can also use reusable and rechargeable hand or foot warmers. There are some great options for kids, too.
- Buy cheap blankets at the dollar store or Walmart or have students bring their own to keep in your classroom in case they get cold. Get enough so each student can have his/her own. And keep them year after year (just don’t forget to wash them). These can also come in handy during storytimes!
Get moving.
Moving circulates your blood which makes you feel warmer. It has the added benefit of engaging students.
-
- Incorporate movement into your lesson plans and your routines. Have students respond to multiple-choice questions by standing on one leg, rubbing their hands together, or stretching toward the ceiling. Give a quiz where questions are posted around the room.
- Take a learning break and do jumping jacks, GoNoodle Movement videos, etc.
-
- Bundle up and take your class outside for a few minutes. Not only will running around help them warm-up, but when you come back in, the classroom will feel warmer.
- Remember to close your classroom door to keep in the heat.
Choose foods and beverages that help you stay warm.
Healthy fatty foods provide the energy that keeps you warm. Similarly, hot beverages add that much-needed comfort.
-
- Nuts and dark chocolate are great choices for healthy fatty foods that are easily portable to the classroom.
- Sipping on a thermos filled with soup also can help you concentrate in a cold classroom.
- Drink hot beverages, such as tea or coffee. Ginger tea is known for producing heat in our bodies. The caffeine in coffee increases your metabolism which can raise body temperature. Plus holding tea or coffee in your hands feels wonderfully warm.
- Drink water. When you’re dehydrated, your core temperature can drop. Staying hydrated helps you regulate your temperature.
Finally, remember that we all need a little motivation after winter break. Concentrate on the moment, think warm thoughts, and take in the enjoyment of teaching. Those happy feelings will help you and your students forget the cold… at least momentarily.
Coats for Kids – the Gift of Warmth
California Casualty supports Coats for Kids, a program that donates new winter coats to children in need. Coats for Kids was established by the Professional Fire Fighters of Utah to combat one of the most fundamental hardships of childhood poverty, the absence of a warm winter coat. We applaud all of you who make the extra effort to keep our most vulnerable children safe, warm, and healthy.
This article is furnished by California Casualty, providing auto and home insurance to educators, law enforcement officers, firefighters, and nurses. Get a quote at 1.866.704.8614 or www.calcas.com.

by California Casualty | Educators |
It’s nearly the holidays, and in classrooms everywhere, students are “bouncing off the walls” with excitement. It’s one of the most challenging times to keep young minds on task. But it’s not the only time. After the holiday break, the long winter months loom ahead. When students are cooped up, and darkness descends early, this is another difficult time to teach.
Here are some tips and tricks that have been used successfully by veteran teachers. Try these creative ways to keep students engaged before the holiday break and during the winter months.
Tip #1: Choose seasonal content and themes.
You don’t have to ignore the holidays in order to teach quality content. In fact, acknowledging them lets you in on the fun. Choose holiday-themed books for literature circles, and writing prompts that spark imagination like this primary grade example, Trapped in a Snow Globe. In social studies, introduce diverse winter holiday traditions from Christmas to Hanukkah, Diwali, Kwanzaa, and more. Focus on common themes of family, sharing, and light. In math class, challenge students to budget and “buy” items for the holidays. Extend seasonal themes into the winter months by inviting your students to study the geometry of a snowflake, write a poem about snow, or research its insulating power. Don’t forget, decorate your classroom for your winter-themed lessons!
Tip #2: Add a seasonally-themed reward system.
You have your year-long reward or incentive system, but during the holidays, consider including an added incentive to keep students focused. Reward good behavior with snowballs (cotton balls). Students place them in a jar, and when it’s filled, the class earns a hot cocoa break or extra recess time. You also could hold a holiday raffle using items from the dollar store. Reward good behavior with raffle tickets and a chance to win. Importantly, don’t ditch your primary reward system. Think of this as additional positive motivation.
Tip #3: Introduce new experiences and activities.
Grab students’ attention with an experience or new activity. Scavenger hunts and escape rooms are engaging games that can be used to review curriculum content. Plays and skits developed by the students are great vehicles for learning. Google’s 3D animals can bring the zoo to the classroom. Presentations created with shared Google slides reinforce digital literacy as well as core content. Invite a guest speaker to talk to students about a topic they are studying. These new and exciting activities will help focus students during the busy holiday season and the long winter months.
Tip #4: Get students moving and out in the sunshine.
Part of the challenge of teaching during the winter months is that everyone is cooped up inside. It’s tempting to fall asleep or lose focus in a warm, comfortable classroom. Lessons that get students up and moving will keep them energized. Set up stations around the room and have students circulate. Post student work on the wall and do a gallery walk, where everyone can review it. This works especially well for group projects and posters. Schedule time outside so students can soak up some sun, which helps to combat Seasonal Affective Disorder (SAD). Bundle up, and make an outdoor excursion a regular part of your week.
Tip #5: Create engaging lessons.
This is the time of year to pull out the most popular lessons—or create new ones. Think about hands-on lessons that extend beyond the textbook, such as STEAM activities that stretch young minds and are truly engaging. Build a snowman out of toothpicks and marshmallows. Build a snowball catapult to launch marshmallows. Ask students to design their own toys. Incorporate sensory elements such as writing in shaving cream on their desk. Analyze the phases of the moon through Oreo cookies. Being able to eat the project afterward is a definite bonus!
Tip #6: Incorporate service learning.
The holidays and winter months are ideal for community service projects. Consider a class project that incorporates the curriculum but also gives back to those in need. Partner with a nonprofit in your community. Chances are they would welcome the help with fundraising, awareness, and more. Fundraising projects involve literacy, math, and art. Awareness campaigns can help students build research and presentation skills. Service-learning promotes teamwork and provides students an opportunity to create meaningful change.
Tip #7: Keep it consistent.
The holiday season can be especially disruptive for teaching. Holiday concerts, special activities, classroom celebrations, and school breaks make classroom time feel disjointed. That’s why it’s important to stick to the routine as much as possible. Do what you can in the classroom time allotted. Importantly, don’t try to cram things in before the holiday break. Give children the time to learn and the space to learn it consistently. There will be plenty of time during those long winter months. Thankfully, we add a couple of minutes of light each day following the winter solstice, December 21. That means spring can’t be far ahead.
Do you have a tip that isn’t on this list? We’d love to hear it. Share it with us and other Educators in the comments.
This article is furnished by California Casualty, providing auto and home insurance to educators, law enforcement officers, firefighters, and nurses. Get a quote at 1.866.704.8614 or www.calcas.com.

by California Casualty | Educators |
If you’re a teacher, chances are you’ve gotten your share of apple-themed gifts—and probably more than a few shiny red apples. In honor of National Eat a Red Apple Day, December 1, let’s explore the history of how the red apple became the iconic symbol for teachers everywhere.
Education for Apples
Early on in the U.S., teachers were housed, fed, and paid by the community in which they taught. Poor families who could not afford the teacher’s low wages would pay with produce. The early apples were bitter, sour, and smaller than the ones we’re used to. But apples were popular because of their bartering value. They could be made into hard cider, considered safer to drink than water. Apples also could be eaten fresh, fried, stewed, and baked. They could be made into vinegar, brandy, preserves, and apple butter. They could be dried for the winter and eaten year-round.
Years later, after Prohibition, apples started to become marketed as an essential part of a healthy diet- hence the term, “an apple a day keeps the doctor away”. Apples were still being given to teachers, but this time from their students.
The first day of school occurs near the beginning of September, coincidentally apple harvest time. Apples grow in every state in the continental U.S. They’re cheap and pretty, especially when they are buffed until they shine. That made apples the ideal first-day teacher gift. It was a way for students to show appreciation and get the year started on the right foot with a sweet, and healthy treat for their teacher.
Today, there are foundations and awards for educators, like the Golden Apple Foundation. Apples continue to decorate classrooms and hallways. Apple mugs, earrings, shirts, ties, notebooks, etc. line the aisles at grocery stores for teachers. The apple is and will continue to be a powerful symbol of knowledge and education because just like apples, teachers are an essential part of helping our children grow.
Celebrate Red Apple Day with your students!
Here are 5 apple-themed activities for Eat a Red Apple Day, or any day that you’d like to celebrate apples and sweeten the learning experience.
-
- Conduct an apple taste test. Put out samples of three varieties of apples. Then have students describe them and rank them.
- Read an apple-themed book.
- Teach fractions, counting/sorting or measurement using apple-inspired math.
- Make an apple-inspired art project.
- Visit an apple orchard, learn how to plant an apple tree, and more in these engaging videos.
Do you have a favorite apple-themed activity? Please share in the comments.
This article is furnished by California Casualty, providing auto and home insurance to educators, law enforcement officers, firefighters, and nurses. Get a quote at 1.866.704.8614 or www.calcas.com.

by California Casualty | Educators |
Is it time for break yet? We’re counting down the seconds.
While some may already be enjoying their time at home with friends and family others are in the classroom right up until Thanksgiving day. Your main goal is to keep students busy and on-task, but even that’s becoming more and more of a challenge…
You don’t want to lose the momentum you have had all semester with your class, but truthfully you are equally as eager for the Holiday and time away from the classroom. It may feel like there’s no end in sight right now, so here are a few tips along with a few memes (of course) on how to keep your student’s behavior in check and enjoy these last few days.
1. Don’t talk too much about break… at least not to your students
It’s easy for students to get lost in the anticipation and lose sight of how much time is left to learn before you actually leave for Thanksgiving break if you keep mentioning it. That’s why it’s best to wait until at least a few days before to start talking about break. That’s not to say you can’t mention it to your co-workers 😉

2. Stick to your normal routine
The mid-semester blues have set in; the point where teachers start to let up and loosen classroom rules. More chairs are being tipped back, GoNoodle is becoming the go-to, and all other classroom rules are starting to fall by the wayside. But, its crucial that you stick to your normal rules and routines. Your students will be able to see you letting up and chances are they will take advantage of that by starting to act up and distract your class. Hold firm in your routine as long as possible. This doesn’t mean you can’t work in some fun Thanksgiving games and activities, just don’t let the whole day (or week) become a free-for-all. Because we all know, once you lose a child’s focus before break it’s hard to get it back.

3. Don’t overwhelm yourself
Get prepared before you leave, but don’t overwhelm yourself with all of your grading and lesson planning at once. Remember, after Thanksgiving break you still have a few weeks left before the semester ends. Instead of trying to do it all, take care of everything that needs your immediate attention before you leave and make a solid plan on how your next few weeks will be when you return. This way you will be able to prioritize your work and keep on track before Christmas break.
4. Try to over-plan your break before it gets here
There is nothing worse than having a break that is so jam-packed you don’t have any time to relax and enjoy yourself. These days leading up to break when friends and family are texting and calling wanting to make plans, make time for them, but be careful not to make your schedule so full that you don’t have time for yourself. Remember, it’s okay to say ‘no’.
5. Think positive
This school year has been stressful for so many teachers, with the lack of subs, COVID protocols, the switch between in-person and remote teaching, etc. You work hard every single day and you’re exhausted, but you’ve got this! You have earned this much-needed break. Don’t feel guilty for looking forward to it or Christmas break as much as you are.
Have a happy and safe Thanksgiving break!
This article is furnished by California Casualty, providing auto and home insurance to educators, law enforcement officers, firefighters, and nurses. Get a quote at 1.866.704.8614 or www.calcas.com.

by California Casualty | Educators |
Reading can transport children to far-off lands, introduce them to beloved characters, and entertain them for hours. It also can boost their vocabulary, increase their attention span, and set them up for academic success.
Yet many children today spend more time on a device than with a book. Here are some strategies that parents can use to cultivate a love for reading with their children.
Teachers, this is a great article to share with your class parents.
Make reading a daily habit.
Set a regular time in your child’s schedule to read, even if it’s just 5-10 minutes. It could be part of their bedtime routine during weekdays or quiet time on weekends. Read aloud to your children if they can’t yet read, or even if they can. Importantly, let your children see you read, too.
Create a special space for reading in your home.
Reading is pleasurable. Your special spot for reading should be, too. Find a place in your home that is quiet and away from TV or computers. Add a comfortable chair and a light. Include a table so that you can enjoy some tea or hot cocoa as you read. Lay a blanket on the back of the chair so you can wrap yourself in warmth. For young children, create child-sized spaces with books on low shelves or in floor bins so kids can easily reach them.
Make reading a family affair.
Schedule a family reading day. Make special book-themed snacks, read the book, and watch the movie. Incorporate books into your holiday traditions. Play reading bingo. Help your children find books on topics that interest them, or with characters to whom they can relate. Choose a fun family project that you need to research using books. Involve your children in finding the information and completing the project with you. Read the same book your child is reading so you can talk about it. You can even take turns reading aloud.
Tip for a reluctant reader: Read aloud but stop at an exciting cliffhanger. Then put the book down and walk away. Your child might just pick it up to find out what happened!
Keep track of books to read.
Make a list of the books your child wants to read. Ask friends for suggestions. Look up other books of authors your child likes. Keep a log of what your child has read with notes if you’d like. It’s fun to look at that list after a few months. You can set up a Pinterest board with the books they’ve read, too. Ask your child to set a goal for how many books he/she wants to read. When your child reaches the goal, celebrate!
Visit the library and bookstores.
Take regular trips to get more reading material. The library is a wonderful place to start, plus it’s free. Try the used bookstore, too, where you can get great bargains. Choose books that are fun and engaging and books that help children develop important skills. The most popular authors are often great storytellers.
Carry a book or ebook reader.
Reading is a great way to pass the time. Keep one (or more) books or an e-reader in your car or bag so your child can read while traveling, waiting in line at the bank, or anytime there is downtime. Keep your child’s latest read in his/her backpack so he can take advantage of downtime at school.
Start a book club.
A parent-child book club can be great fun. Make the book choice one that fosters lively discussion. Relate it to your personal lives. Ask for honest reviews of the book. Bring star stickers for the kids to use as ratings. Incorporate a fun snack that is related to the book.
Tip: Find free & low-cost books here.
Attend storytimes, author visits, and book events.
Join other book lovers to celebrate reading at fun events hosted at your local library, bookstore, or in your community. Look for local events held during National Read Across America Day on March 2.
Join an online community.
One popular site for finding book recommendations is Goodreads, but you have to be 13 or older to join. (Adults can join and search for children’s books, however.) For younger readers, try Biblionasium, a free and safe community for readers in grades K-8. The site is searchable by reading level and students may build their own virtual bookshelf. DogoBooks is a paid site that hosts the National Geographic Kids Book Club and features contests and giveaways.
This article is furnished by California Casualty, providing auto and home insurance to educators, law enforcement officers, firefighters, and nurses. Get a quote at 1.866.704.8614 or www.calcas.com.


