
by California Casualty | Firefighters, Health |
Firefighters don’t get a snow day. While most of us are bundling up and staying indoors, fire crews are battling blizzards, icy roads, and sub-zero temperatures — even while fires burn hot and fast inside buildings. Snow, sleet, hail, and bitter cold don’t just make the job uncomfortable; they complicate every step of a fire response, from frozen hydrants and sluggish water supply to hazardous footing and equipment that doesn’t perform the same in extreme cold.
Firefighting in winter demands more than bravery — it requires planning, adaptability, and a proactive approach before the first flake falls.
Prepare Your Equipment
Cold weather exposes weaknesses in gear quickly. Make sure you have extra hose lengths, hydrant tools, and water supplies readily available. Keep a stock of shovels to manage snow buildup on scene, along with sand or salt to improve footing.
Every crew member should be familiar with the truck’s window defrosters, cab heat, and brake retarders, which are especially important on slick roads. Pump operations require special attention as well. Cold temperatures change how pumps behave, so firefighters need to understand when it’s appropriate to run a pump wet versus dry to avoid freezing damage.
Maintain That Equipment
Winter calls don’t end when the fire is out. After using pumps, ladder pipes, deck pipes, or manifolds, make sure all equipment is thoroughly drained. If possible, this should be done at every shift change to prevent residual water from freezing and causing costly damage. Coating the threads of fittings or port caps with antifreeze can also help prevent freezing and keep equipment operational when it’s needed most.
Coordinate With Other Agencies
Strong communication becomes even more critical in winter weather. Establish clear coordination with Public Works for snow removal on fire station streets and primary response routes. Law enforcement may also need to assist with traffic control, street closures, or removing abandoned vehicles that block access. These partnerships can save valuable minutes during an emergency.
Plan and Use Snow-Removal Routes
Knowing which roads are plowed can make the difference between a quick response and a delayed one. Identify snow-removal routes in advance and use them whenever possible to ensure the safest and fastest access to the scene.
Use Cold-Specific Tactics
Before committing to a water supply, test hydrants to confirm they’re not frozen. Small handheld propane torches can help free frozen hydrant caps or hose couplings when needed.
If a hose line is being used intermittently, keep a slight flow of water moving through the nozzle to prevent freezing. Spread salt on icy surfaces to reduce slip hazards, and secure or brace ladders carefully so they don’t slide during operations.
Be aware that extreme cold affects smoke behavior as well. Smoke tends to stay lower rather than rising, which can significantly reduce visibility — even outside the structure.
Watch for Structural Hazards
Water behaves differently in freezing temperatures. Instead of running off, it may freeze on contact, adding weight and stress to roofs, floors, and other structural components. This increases the risk of collapse and should be factored into tactical decisions.
Ice can also accumulate on ladders, increasing their weight and potentially causing twisting or failure. Monitor ladder conditions closely and adjust operations as needed.
Hydration Still Matters
When it is cold out, dehydration isn’t usually top of mind, but it should be. Cold air, heavy gear, and hard work take a toll on the body, even if you’re not sweating buckets. Firefighters should arrive on scene already well hydrated and keep sipping fluids throughout the operation. A good rule of thumb: aim for about a quart of water an hour during active work, even when the temperatures are low.
Protect Firefighters from Cold Stress and Frostbite
In extreme cold, firefighters can only work outside for short periods before the weather takes a toll. Keep work periods brief and make sure crews take regular breaks to warm up. Gear holds in heat/sweat, so when activity slows, that moisture can quickly make the body cold. This can cause shivering and a dangerous drop in body temperature.
Cold stress affects more than just the body — it affects the mind. As body temperature drops, your ability to think clearly declines, which increases the risk of mistakes and injuries.
Frostbite can happen fast when skin is exposed to severe cold. The skin can freeze, damaging blood vessels and tissue. Because the area may feel numb, firefighters may not realize it’s happening right away. The best protection is prevention: wear loose layers under turnout gear that let moisture escape and always wear two pairs of socks. Limit work periods outside and have access to a warming station.
Support Mental Wellness
The darker, colder months also can take a toll on mental health as well as physical endurance. Fatigue, isolation, and seasonal mood changes are real challenges in the fire service. Make sure your crew knows mental health resources are available and encourage open conversations about stress and well-being.
As winter tests every call and every crew, thank you for answering the call no matter the conditions — and for doing the job that keeps our communities safe. It’s cold out there. Take care of one another and come home safe.
This article is furnished by California Casualty, providing auto and home insurance to educators, law enforcement officers, firefighters, and nurses. Get a quote at 1.866.704.8614 or www.calcas.com.
by California Casualty | Helpful Tips, Safety |
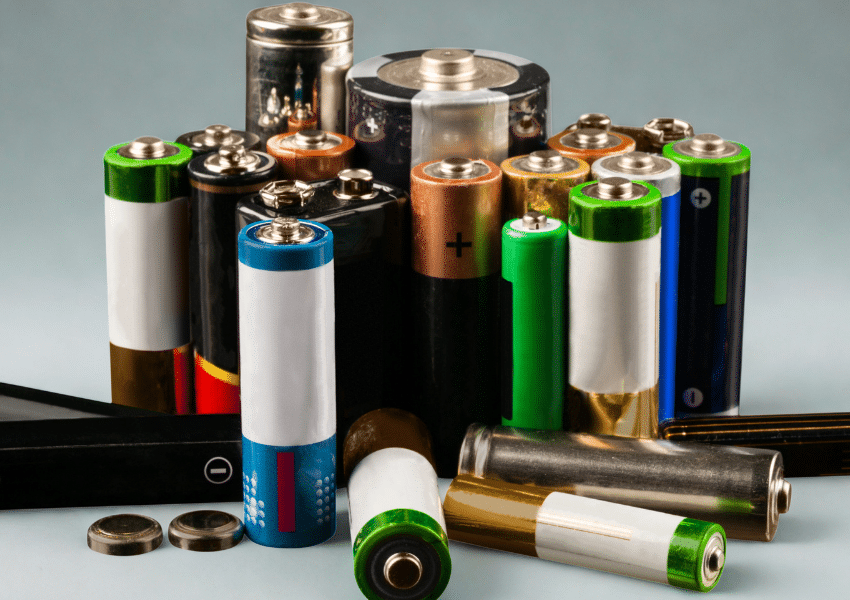
Batteries power so much of our daily lives — phones, flashlights, toys, tools — and yet when they die, most of us don’t give them a second thought. Trash can? Recycling bin? Junk drawer, forever? The truth is that improper battery disposal can be dangerous for the environment and even a fire risk. Let’s break down the right way to dispose of batteries to keep everyone safe.
Why Battery Disposal Matters
Not all batteries are created equal. They are made from different metals and chemicals. Some contain hazardous materials like mercury, lead, nickel, and cadmium — substances that can leak into soil and water if sent to a landfill. Other batteries contain valuable materials, such as lithium and cobalt, that are costly and difficult to replace. Proper recycling keeps these materials in circulation.
Types of Batteries
Non-Mercury Alkaline and Zinc Carbon Batteries
These are the most common household batteries — A, AA, AAA, C, D, and 9-volt — used in items like toys, flashlights, and remote controls. Earlier versions of these batteries – made before 1996 – contained mercury and therefore required hazardous disposal precautions. But now these general-purpose batteries may be placed in the regular trash if your local municipality allows it.
Disposal:
- General trash if your town/state allow it*
- Recycling options at stores like Home Depot, Lowe’s and Staples
- Do not toss multiple batteries together, as any remaining charge can cause them to spark and potentially start a fire.
*Note: In states like California, it is illegal to throw any type of battery in the trash.
Mercury Batteries
Mercury and silver-oxide batteries often are found in small electronics, such as single-use button cells in watches, cameras, and hearing aids. Older general use batteries manufactured before 1996 also fall into this category. These batteries contain heavy metals and must be handled by professionals.
Disposal:
- Tape terminals before recycling to limit danger of an errant charge. Use clear packing tape, electrical tape or duct tape so it won’t easily peel off. If tape isn’t clear, make sure the type of battery and brand is visible.
- Household hazardous waste disposal per your local municipality
- Recycling options at retailers like Home Depot, Lowe’s and Staples
- Mail-in kits are available at companies like the Battery Network (formerly Call2Recycle).
Rechargeable Batteries
Rechargeable batteries come in many shapes and sizes. While they sometimes look like regular alkaline batteries, they require special hazardous disposal. These batteries contain heavy metals and must always be recycled, never thrown in the trash.
Types:
- Lithium-ion (Li-ion): Found in phones, laptops, and many electronics; can spark or catch fire if damaged
- Nickel-cadmium (NiCd): Often used in cordless power tools, phones, digital cameras, and medical equipment; cadmium is highly toxic
- Nickel-metal hydride (Ni-MH): Commonly found in power tools, digital cameras, and gaming controllers
- Small-sealed lead acid (SSLA/Pb): Used in mobility scooters, children’s ride-on toys, emergency lighting, and hospital equipment
Disposal:
- Individually bag batteries before bringing them to a hazardous recycling site.
- Alternatively, tape terminals before recycling to limit danger of an errant charge. Use clear packing tape, electrical tape or duct tape so it won’t easily peel off. If tape isn’t clear, make sure the type of battery and brand is visible.
- Household hazardous waste disposal per your local municipality
- Recycling options at retailers like Home Depot, Lowe’s and Staples
- Mail-in kits are available at companies like the Battery Network (formerly Call2Recycle).
Lead Acid Batteries
Lead acid batteries are commonly found in cars, boats, motorcycles, golf carts, and lawn mowers. These batteries contain sulfuric acid and lead and should be handled with care. They should always be professionally recycled. The good news is that almost all the materials (lead, plastic, and acid) can be reclaimed and recycled to make new batteries.
Disposal:
- Many auto repair shops and retailers, like AutoZone, accept used car batteries for recycling.
- You can also check with your town for information on safe household hazardous waste disposal.
- You may be able to find other resources at the Battery Network (formerly Call2Recycle).
EV Batteries
EV batteries are high-capacity lithium-ion batteries. As a consumer, you will likely not have to worry about handling them. They will be recycled by your auto repair shop, dealership or battery manufacturer when it is time to change them out.
Of note is that EV batteries can cause fires in electric and hybrid vehicles. This can happen if the battery is overcharged, damaged, or has a faulty design.
Disposal:
- These batteries must be recycled at a hazardous waste facility.
- Recycling fees can be part of the overall battery cost.
Battery Safety Tips
No matter the battery type, keep these safety tips in mind:
- Keep batteries away from moisture. Store them in cool, dry places.
- Use only the charger designed for your rechargeable battery. Switching to other chargers can create a fire risk.
- Never burn batteries. They can explode when exposed to fire.
- Watch for damage. Swollen or leaking batteries should be handled with caution. Place the damaged battery in a nonflammable material such as sand or kitty litter. Contact your local hazardous waste facility for disposal instructions.
Taking a few extra minutes to recycle or dispose of batteries correctly helps prevent fires, protects natural resources, and keeps hazardous materials out of landfills.
This article is furnished by California Casualty, providing auto and home insurance to educators, law enforcement officers, firefighters, and nurses. Get a quote at 1.866.704.8614 or www.calcas.com.

by California Casualty | Health, Helpful Tips |
If winter has you craving sunshine, energy, and a little spark of joy, you’re not alone. The good news? Beating the winter blues doesn’t require a plane ticket or a tropical forecast — just a few creative, mood-boosting ideas that bring warmth, fun, and fresh energy back into your days.
For many people, the winter blues are more than a passing slump. Reduced daylight can disrupt the body’s natural internal clock, affecting mood, energy, and motivation. Some experience this as Seasonal Affective Disorder (SAD), with symptoms ranging from mild to more serious. If you’re feeling a little off this season, the good news is that small, intentional changes can make a big difference.
Think Like a Norwegian
In countries where winters are long and dark, people don’t fight the season; they embrace it. Try shifting your mindset from “getting through winter” to enjoying what makes it special. Cozy up with a warm drink, light a fire in the fireplace, or lean into winter activities like skating, skiing, sledding, or building snowmen. Make a simple list of the things you genuinely enjoy about winter and keep it handy for days when your mood dips.
Let the Light In
Light plays a powerful role in how we feel. Open your curtains as soon as you wake up and let natural light flood your space. Morning light is especially important for regulating mood and energy. If natural sunlight is limited, light therapy may help. A light therapy box mimics sunlight and is typically used for about 30 minutes in the morning. Before starting, check with your healthcare provider to be sure it’s right for you.
Create a Cozy, Mood-Boosting Environment
Your surroundings can have a surprising impact on how you feel. Brighten your space with warm lighting, flameless candles, or string lights to counteract dark winter days. Add soft textures like cozy throws or plush pillows and bring in cheerful colors or seasonal scents such as citrus, vanilla, or pine. Even small changes can make your home feel more inviting and energizing.
Move Your Body — Even a Little
Exercise is a natural mood booster. You don’t need an intense workout to feel the benefits. A short walk outside, especially during daylight hours, can lift your spirits and provide valuable light exposure. Indoors? Turn on your favorite music and dance it out. Movement plus music is a powerful combination.
Turn Winter into a Productivity Boost
When the cold makes staying under the covers tempting, remember that winter is also the perfect time to tackle projects at home. With fewer distractions pulling you outside, it’s often easier to focus and be productive. Knocking items off your to-do list — whether it’s organizing a closet, catching up on paperwork, or starting a long-postponed project — can be surprisingly energizing. That sense of accomplishment boosts your mood and helps turn a quiet winter day into a satisfying win.
Cook Up Some Comfort
Winter is the perfect time for nourishing comfort foods. Enjoy your favorites in moderation while keeping your meals balanced with fruits and vegetables. Homemade soups are a winter win — warm, satisfying, and packed with nutrients that support overall health.
Stay Hydrated
Cold weather can be dehydrating, even if you don’t feel thirsty. Drinking plenty of water helps support healthy skin and aids your body in flushing out toxins. Add slices of lemon or cucumber for a refreshing twist and a little extra motivation to sip throughout the day.
Be Mindful of Alcohol
While it may feel comforting in the moment, alcohol is a depressant and can worsen low moods. Limiting intake can help keep your energy and spirits more stable during the winter months.
Connect With Others
Social connection is one of the best antidotes to the winter blues. Get together with friends to play games, watch movies, or simply laugh and catch up. Even planning something to look forward to — a weekend getaway, dinner party, spa day, or favorite activity — can lift your mood before it even happens.
Try Something New
Winter can feel repetitive, which can contribute to low energy and motivation. Shake things up by learning something new. Try a new recipe, start a creative hobby, take an online class, or explore a winter-friendly activity you’ve never done before. Novelty stimulates the brain and can bring a welcome sense of excitement and accomplishment.
Prioritize Sleep
Quality sleep is essential for emotional well-being. Aim for 7–9 hours per night and try to maintain a consistent bedtime. Oversleeping can actually make fatigue and low mood worse. Practice good sleep hygiene by limiting caffeine in the afternoon and avoiding screens for at least an hour before bed.
Practice Mindfulness and Gratitude
Simple mindfulness practices — like meditation, journaling, or breathing exercises — can help ground you and ease stress. Take time to reflect on what you’re grateful for: people you love, meaningful experiences, or small daily pleasures that bring comfort and joy.
Know When to Ask for Help
If your winter mood feels overwhelming or persistent, you’re not alone — and help is available. Don’t hesitate to reach out to your doctor or a local mental health professional for support.
This article is furnished by California Casualty, providing auto and home insurance to educators, law enforcement officers, firefighters, and nurses. Get a quote at 1.866.704.8614 or www.calcas.com.
by California Casualty | Auto Insurance Info, Helpful Tips, Safety |
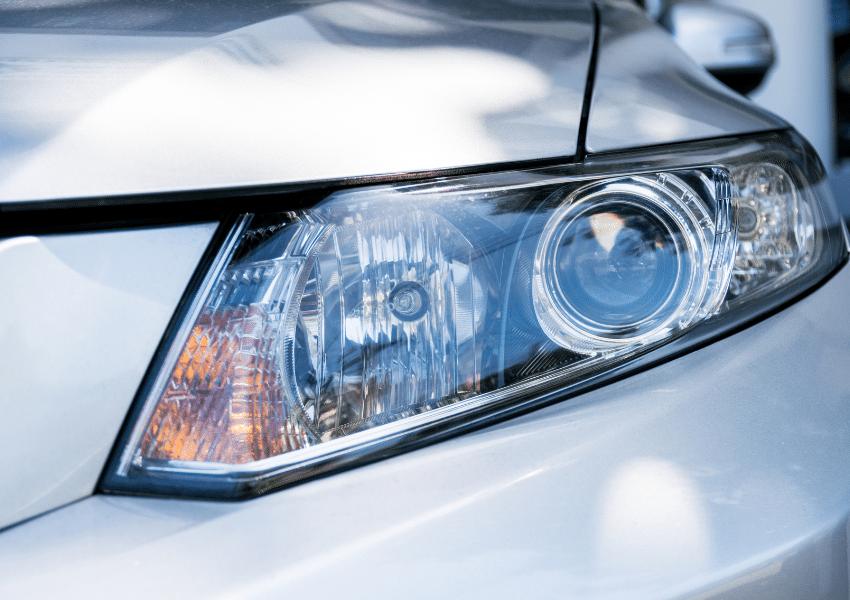
Whether you’re driving down a dark back road, navigating a rain-soaked highway, or flashing your brights to warn another driver, your headlights are doing far more than simply lighting the way. They’re keeping you safe, visible and aware of everything ahead. From classic halogen bulbs to cutting-edge LED, today’s vehicle headlights come in a variety of types — each designed to improve your driving experience in different conditions.
Before we get into the specifics, let’s break down the components that create that important illumination. Headlights are generally defined by three core factors:
- Halogen, HID, LED, or laser: the source of the light
- Reflector or projector housings: the architecture that shapes and directs the beam
- Adaptive systems: the intelligence that moves the light as you drive
Each layer plays a different role, and together they determine how confidently you can read the road ahead — and how clearly other drivers can see you coming.
The Light Source
Halogen Headlights (about 700 lumens)
How they work: When electricity flows through a tiny metal wire inside the bulb, the wire gets extremely hot. Because the bulb is filled with halogen gas, the heat makes the wire glow brightly, creating the light you see from a halogen headlight.
Halogen headlights are the most traditional type and are still common in older vehicles and budget-friendly cars. In setups that use separate bulbs for low and high beams, halogens are often the choice for high beams. Their main advantage is cost — they’re inexpensive to produce and replace. However, they use more energy and don’t last as long as newer lighting technologies.
High-Intensity Discharge (HID) Headlights (about 3,000 lumens)
How they work: HID headlights don’t use a wire to make light. Instead, they create a tiny electrical spark between two metal points inside a bulb filled with special gas. That spark glows extremely bright, producing a strong, efficient beam of light.
HID headlights — often referred to as Xenon headlights if they use Xenon gas — deliver a bright, intense light that makes nighttime driving noticeably clearer. Their distinctive bluish-white glow has made them a popular aftermarket upgrade.
LED Headlights (about 2,000-4,000 lumens)
How they work: LED headlights use tiny electronic components called diodes. When electricity flows through them, the movement of electrons creates light instead of heat. By grouping many of these small LEDs together, manufacturers can produce a bright, efficient, and tightly focused beam for the road.
LED headlights have become the go‑to choice for many modern vehicles—and for good reason. They’re extremely energy‑efficient, long‑lasting, and adaptable. Although they can be more expensive to replace, LEDs typically outlast halogen and HID bulbs by several years, which helps offset the cost.
One of their biggest strengths is flexibility. LEDs can be arranged in complex matrix patterns, allowing both low and high beams to be built into the same housing. Individual sections can brighten or dim independently, working seamlessly with automatic high‑beam assist systems that rely on forward‑facing cameras.
Laser Headlights (Advanced/Limited-Use Technology)
How they work: Laser headlights don’t shine lasers onto the road. Instead, tiny laser diodes fire into a phosphor material, which then produces a very bright white light.
Laser headlights represent the cutting edge of automotive lighting, but their high cost and limited availability mean they’re mostly found in luxury and performance vehicles. Because they generate such an intense beam, they’re usually paired with LED systems and often activate only at higher speeds to extend high‑beam range.
The Shape and Direction
While the bulb creates the light, the housing determines how that light is shaped and aimed.
- Reflector Headlights: Reflector headlights are the old-school standard. Early designs featured a bulb placed inside a reflective steel bowl, covered by a glass or plastic lens. The bowl spread the light, while the lens helped direct it forward. Over time, mirrored surfaces improved beam control and made it possible to replace just the bulb instead of the entire unit.
- Projector Headlights: Projector headlights take things a step further. In addition to the bowl, mirrors, and bulb, they include a magnifying lens that increases brightness and precision. A built-in shield directs the light downward, reducing glare for oncoming drivers. Projector housings can accommodate halogen, HID and LED bulbs, making them a common choice in modern vehicles.
The Intelligence
Adaptive Headlights
Adaptive headlights represent the most advanced lighting systems on the road today. These headlights can adjust brightness, direction, and beam pattern based on steering angle, speed, road conditions, and surrounding traffic. As you turn the steering wheel, the headlights swivel to illuminate curves and corners more effectively — improving visibility while helping to reduce glare for oncoming drivers.
A Word About Headlight Alignment
Even the best headlights won’t perform well if they’re not aimed correctly. Over time, bumps, vibrations, and normal wear can knock them out of alignment, reducing how far and how evenly they illuminate the road.
How to check alignment:
- Park within 5 feet of a wall or garage door.
- Mark the center of each beam with painter’s tape in a cross shape.
- Back up 20–25 feet.
- If the beam no longer lines up with the tape marks, the headlights need adjustment.
For the most accurate results, have a professional handle the alignment.
When to Replace Your Headlights
Halogen bulbs typically last around five years, though this varies with use. Consider replacing or testing your headlights if you notice:
- Dimming or reduced visibility
- Flickering or inconsistent brightness (may point to electrical issues, not just worn bulbs)
- One bulb burning out (the other is usually close behind)
Note that cloudy or yellowed headlight lenses can sometimes be restored with cleaning or polishing kits.
And while proper maintenance goes a long way, having the right insurance adds an extra layer of confidence every time you drive. Safe travels from all of us at California Casualty.
This article is furnished by California Casualty, providing auto and home insurance to educators, law enforcement officers, firefighters, and nurses. Get a quote at 1.866.704.8614 or www.calcas.com.
by California Casualty | Helpful Tips, Homeowners Insurance Info, Safety |
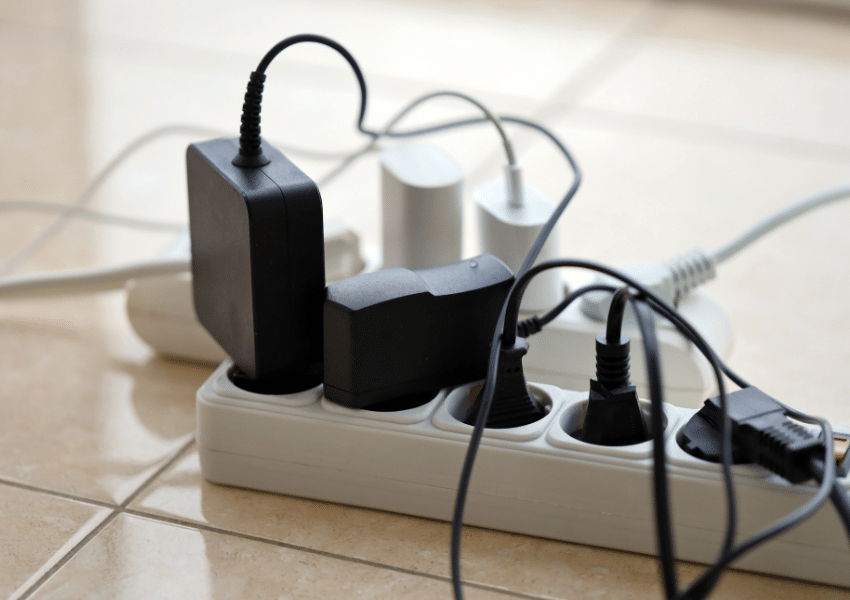
From curling irons to coffee makers, it’s tempting to plug just about everything into your power strip. But not all devices are meant to share that space. In fact, plugging the wrong items into a power strip can quietly overload your system and increase the risk of damage or even fire. Before you add one more cord, here’s what you need to know.
Power Strips vs. Surge Protectors: What’s the Difference?
Power strips are simply electrical outlets attached to a cord. They plug into a wall outlet to give you more places to plug things in.
Surge protectors, on the other hand, are power strips with a built-in safety feature. If there’s a sudden spike in electricity — such as during a lightning storm or a brief power fluctuation — they redirect excess voltage away from your devices to help prevent damage.
While surge protectors add a layer of protection, neither power strips nor surge protectors are designed to handle high-wattage appliances.
What Happens When You Overload a Power Strip?
Every device pulls a certain amount of electricity. When the combined demand of everything plugged into a power strip exceeds what it’s rated for, a power strip can overload. That overload can cause:
- Overheating
- Melted wiring or outlets
- Sparks
- Electrical fires
- Permanent damage to appliances
Most household power strips are rated for 15 amps at 120 volts, which equals 1,800 watts total. You can usually find this information printed on the strip’s label. Before plugging in any device, make sure its wattage keeps the total below this limit. As you add more devices, keep a running total to avoid exceeding the strip’s capacity.
Avoid Plugging in These Items
Just because a plug fits in a power strip doesn’t mean it belongs there. The items below use a lot of electricity — often in sudden bursts — which can overload a power strip and create serious safety risks.
1. Air Conditioners: Air conditioners cycle on and off, creating power spikes. Their continuous high electrical draw can overheat a power strip and melt internal wiring.
2. Air Fryers: Air fryers use short bursts of extremely high wattage. These surges can overwhelm a power strip and damage both the strip and your appliance.
3. Blenders: Blenders have powerful motors that draw a high amount of wattage, especially at startup—far more than a power strip can safely handle.
4. Curling Irons & Flat Irons: Hair styling tools heat quickly and often draw over 1,500 watts, pushing most power strips to their limit.
5. Coffee Makers: Coffee makers rely on heating elements that require intense bursts of power, increasing the risk of overheating or electrical damage.
6. Dehumidifiers: Like air conditioners, dehumidifiers use compressors that cycle on and off, causing power surges and sustained electrical loads.
7. Electric Blankets: These blankets contain heating elements that draw significant wattage for long periods, making them unsafe for power strips.
8. Extension Cords: Never plug an extension cord into a power strip. This practice, known as daisy chaining, is a well-known fire hazard.
9. Hair Dryers: Hair dryers frequently pull 1,500 watts or more, making them one of the most common causes of overloaded strips.
10. Microwaves: Microwaves draw between 1,000 and 1,500 watts and use powerful motors, which far exceeds what a standard power strip can handle.
11. Power Tools: Table saws, circular saws, chop saws, and air compressors all have high startup amperage surges that can overload a strip instantly.
12. Refrigerators: Refrigerators use compressors that cycle repeatedly, pulling a high current each time they start — something power strips aren’t built for.
13. Space Heaters: Drawing around 1,500 watts, space heaters push power strips to their absolute limit. Their constant cycling makes them especially dangerous.
14. Toaster Ovens: With powerful heating elements and rapid bursts of high wattage, toaster ovens should always be plugged directly into a wall outlet.
15. Washing Machines & Dryers: These appliances require high-current loads and, in many cases, 240-volt outlets. Power strips are never appropriate for them.
Warning Signs Your Power Strip Is Overloaded
Power strips don’t always fail dramatically. Often, they give subtle warning signs first. Knowing what to look for can help you catch a problem early and prevent damage or fire risk.
- The strip feels warm or hot to the touch
- The circuit breaker trips frequently
- Devices shut off unexpectedly
If you notice any of these signs, unplug devices immediately and move high-powered items to a wall outlet.
The Safer Rule of Thumb
If an appliance:
- Produces heat
- Has a motor
- Uses a compressor
- Or draws a lot of power
…it belongs directly in a wall outlet, not a power strip.
Finally, make sure to fully protect your home with the right insurance. If despite your best efforts to follow all the safety rules, a fire was to happen, your policy can provide added peace of mind.
This article is furnished by California Casualty, providing auto and home insurance to educators, law enforcement officers, firefighters, and nurses. Get a quote at 1.866.704.8614 or www.calcas.com.
