
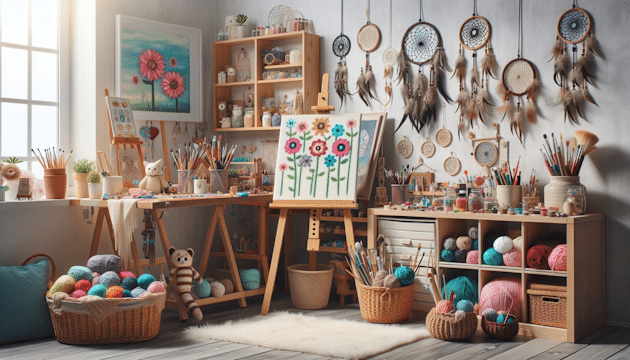
Embrace your inner artist and let your imagination run wild. Whether you prefer glue and glitter or pottery and paint, it’s fun to get creative. In honor of March, National Craft Month, we compiled some of our favorite crafts for home and the classroom. So, whether you’re looking to unwind after a long day or searching for a fun activity to share with your students, join us in celebrating National Craft Month.
Benefits of Crafting
Crafting is good for our brains and our spirits. Working with our hands and exercising our creative skills helps with hand-eye coordination, concentration, critical thinking, and problem solving. Crafting teaches us patience and resilience, and how to fix things when they don’t exactly go our way. The process of creation can also reduce stress and anxiety, improve our mood and self-confidence. When we create with others, we also build community and a sense of shared accomplishment.
Here are some ideas to get you started. Feel free to improvise; after all, creativity is what it’s all about!
Colored Mason Jars
https://modpodgerocksblog.com/colored-mason-jars/
These decorative mason jars make great gifts. Personalize them with your favorite stencils.
Supplies: Clear mason jars, Mod Podge, food coloring or acrylic paint, foam brush, adhesive stencils, glitter, scissors, wax paper (Use food coloring if you want the final result to be clearer, and acrylic paint if you want more color.)
Process: Wash and dry the mason jars to ensure the best result. Add some Mod Podge to a bowl with a few drops of food coloring or paint. Put about two tablespoons into the mason jar and roll it around to coat it. Add more as needed, one tablespoon at a time. Shake it over the garbage can to get rid of excess Mod Podge. Place the jars face down on wax paper and allow to dry for 24 hours. Affix your stencil on the outside of the jar. Cover the stencil area with Mod Podge. Peel off the stencil and apply glitter right away. You can tie the jar with baker’s twine for a festive touch.
DIY Sharpie Mug
https://feelingnifty.com/sharpie-mugs-diy-tutorial/
This personalized mug makes a great gift and it’s so easy to create.
Supplies: a plain and inexpensive ceramic mug, oil-based Sharpie marker (regular Sharpies will wash away)
Process: You can draw any design on the mug or write a meaningful quote. Try affixing a large alphabet sticker and using your Sharpie to make colorful dots around it. Then peel off the sticker and you’ll have a monogrammed mug. Once the marker paint is dry, put the mug in a cold oven. Turn it to 250 degrees and bake your Sharpie mug for 2 hours. Turn the oven off and let it cool completely. Note that color changes can happen while baking. If you are concerned, you can skip the baking and simply coat the mug with Mod Podge.
Flower Pens
https://parents.highlights.com/how-to-make-flowers-out-pens
Create a beautiful bouquet of pens with just a few supplies. Make it extra special by choosing favorite flowers or colors.
Supplies: Pens, silk or plastic flowers with stems, floral tape
Process: Place the flower stem against the bottom of the pen. Wrap floral tape around the stem and pen to attach it. Continue wrapping the tape all the way to the top, then bring it back down again. Cut off the excess once the pen is fully wrapped. The floral tape will self-adhere with some pressure.
Glitter Sensory Bottles
https://onelittleproject.com/sensory-bottles/
These bottles are easy to make, and kids love them. Use them as a sensory tool in class or as a free time reward once work is done.
Supplies: Clear, empty water bottles, baby oil, glitter, pony beads, buttons
Process: Fill the bottles three-quarters of the way with baby oil. Add glitter; start with a small amount. The glitter will sink to the bottom. Add other items such as beads or buttons. Put the cap on. Turn the bottle upside down and right side up a few times. Watch the glitter fall. Add more as necessary. When it’s finished, fill the bottle to the top with baby oil.
Paper Plate Dream Catchers
https://onelittleproject.com/how-to-make-a-dreamcatcher/
These dream catchers are easily customizable. Tie them into a social studies curriculum on Native American crafts.
Supplies: Paper plates, yarn, feathers, pony beads, hole puncher, markers, glue
Process: Cut out the inner circle of the paper plate. Punch 8 evenly space holes around the inside cutout circle. Decorate the plate with markers. Cut a 55-inch length of yard. Tie it to one of the inner holes and knot it in place. Thread the yarn through the other inner holes in any pattern that you like. Punch one hole at the top and tie a piece of yard to hang the dream catcher. Punch three holes at the bottom where you will hand yarn with beads and feathers. Cut three pieces of yarn, 12 inches long. Tie the feathers to the end of the yarn. Add some glue to keep them in place. Slide beads down over the yarn above the feathers. Tie the feathered and beaded yarn on the bottom. You are now ready to hang your dreamcatcher!
Salt Painting
https://www.thebestideasforkids.com/salt-painting/
Experiment with color and texture as you create a beautiful piece of art.
Supplies: Glue, table salt, watercolors or food coloring, paintbrush, pencil, cardstock
Process: Draw the image on the cardstock. Trace the lines using glue. Keep glue lines thin. Sprinkle salt over the glue. Use a lot so it coats every part. Shake off the excess salt. Dip your paintbrush in the watercolor and gently tap the salt. Watch the color spread. Let your painting dry. Spray with a sealer.
Tissue Paper Painting
https://thelittleredhen.typepad.com/my_weblog/2011/05/painting-with-tissue-paper.html
Create a masterpiece of color with this easy technique. Make sure to buy tissue paper that is not shiny. The cheaper tissue paper found at Dollar Stores will not “bleed” easily.
Supplies: Watercolor paper or cardstock, tissue paper, a spray bottle, water
Process: Tear up the tissue paper into small pieces. Arrange it on your paper in a design. Make sure to overlap some colors. Spray the tissue with water until it is wet. Then, let it dry. Once the project is completely dry, remove the tissue paper and see the colorful results. It is very important that everything is completely dry. Removing the tissue too soon will damage the paper underneath.
Yarn Pumpkins
https://onelittleproject.com/yarn-pumpkins/
These yarn pumpkins can also be yarn apples or decorative balls. They make beautiful centerpieces and are so easy to make.
Supplies: Balloon, yard, white glue (one full 2-ounce bottle per pumpkin – Tacky glue works best), pipe cleaners, tape measure, scissors, plastic fork
Process: Blow up the balloon about half full. Pour glue into a bowl. Tie one piece of yarn to the end of the balloon and use it to hang the balloon from a kitchen cabinet or other location so that it’s easier to manage. Dip a piece of yard in the bowl of glue and swirl it around with the fork. Then holding the end of the yarn with your fingers, run it through the fork tines to remove extra glue. Press it against the balloon, winding it around. Repeat until much of the balloon is covered. Allow it to dry for 24 hours. When you’re ready to pop the balloon, press your fingers down under the yarn all around to detach the balloon. Make a very small hole near the balloon knot to let the air leak out slowly. Pull the deflated balloon out. Add pipe cleaner stems and vines. Create spirals by wrapping the pipe cleaners around your finger.
Do you have a favorite craft that’s not listed here? Share it with us in the comments.
This article is furnished by California Casualty, providing auto and home insurance to educators, law enforcement officers, firefighters, and nurses. Get a quote at 1.866.704.8614 or www.calcas.com.

- Surprising Careers for EMTs - February 27, 2026
- How to Properly Pack Your Fridge - February 24, 2026
- Staying in Control with Driver Assist - February 13, 2026